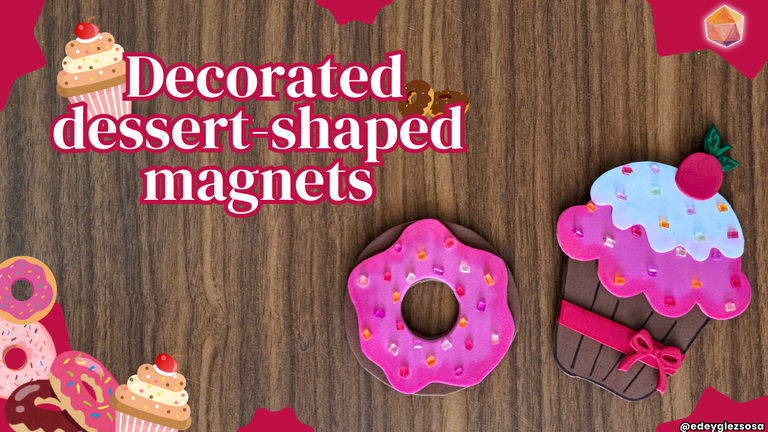
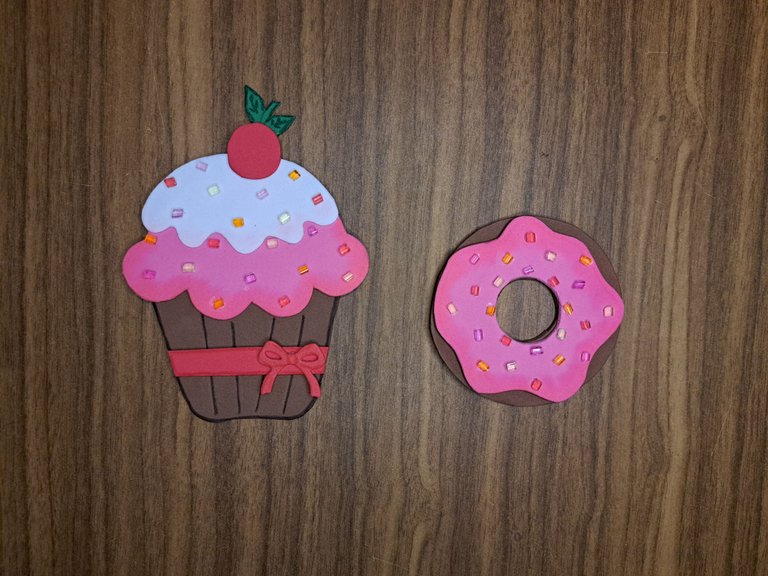
Greetings friends of the community. I hope you are all well at the moment of reading this. Today I want to share with you the process of creating some decorated magnets in the shape of desserts. To be more precise, I made the magnet ornaments in the shape of a cupcake and a donut, both covered with strawberry icing.
These ornaments have a fairly simple creation process, which makes them perfect for those people who need to make a beautiful gift, but don't have a lot of time to do so. And while these ornaments are meant for metal surfaces, we can replace the magnets with some kind of double-sided tape to make them perfect for any surface. So let's not waste any more time and let's start with the tutorial after knowing the materials.
Saludos amigos de la comunidad. Espero que al momento de leer esto se encuentren todos bien. El día de hoy quiero compartir con ustedes el proceso de creación de unos imanes decorados con forma de postres. Para ser más exactos, los adornos imantados los hice con forma de pastelillo y dona, ambos cubiertos con un glaseado de fresa.
Estos adornos cuentan con un proceso de creación bastante sencillo, lo cual los hace perfectos para esas personas que necesitan confeccionar un regalo hermoso, pero no cuentan con mucho tiempo para ello. Y si bien estos adornos están pensados para superficies metálicas, podemos reemplazar los imanes con algún tipo de cinta de doble contacto y así hacerlos perfectos para cualquier superficie. Así que no perdamos más el tiempo y comencemos con el tutorial luego de conocer los materiales.
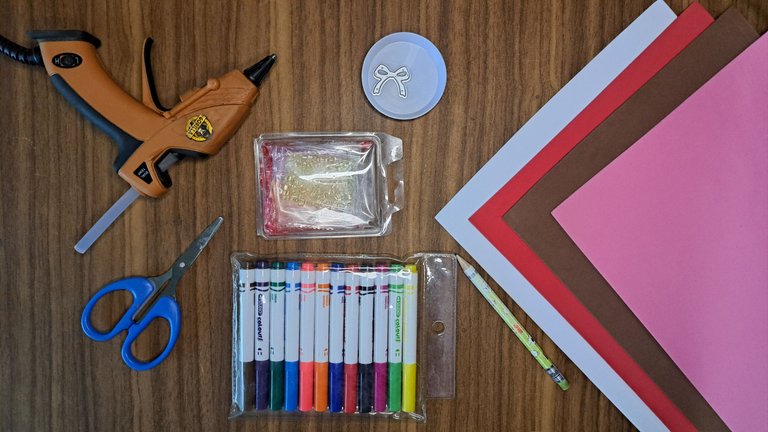
Materials // Materiales
| ✔️ White, red, carmelite and pink smooth fomi | ✔️ Fomi liso blanco, rojo, carmelita y rosado |
| ✔️ Cylindrical beads of different colors | ✔️ Perlas cilíndricas de diferentes colores |
| ✔️ Markers | ✔️ Marcadores |
| ✔️ Metal cutting die with loop shape | ✔️ Troquel de corte metálico con forma de lazo |
| ✔️ Scissors and pencil | ✔️ Tijeras y lápiz |
| ✔️ Hot silicone | ✔️ Silicona caliente |
Step by step // Paso a paso
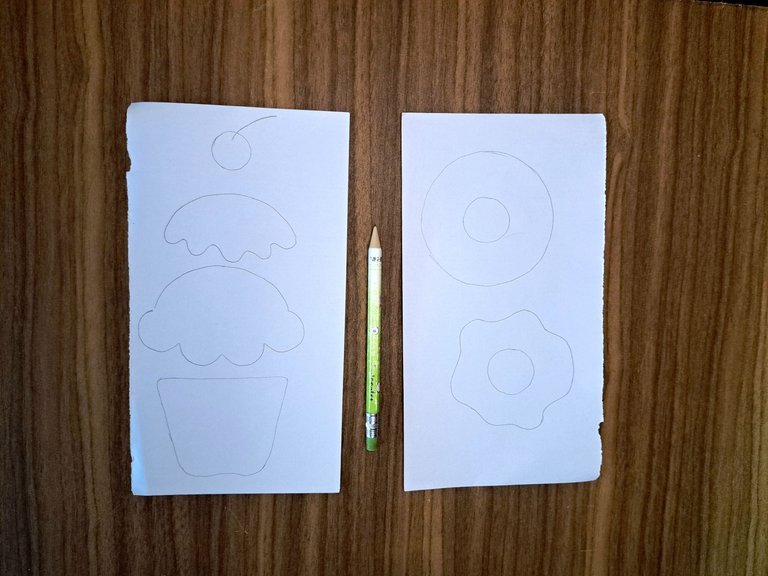
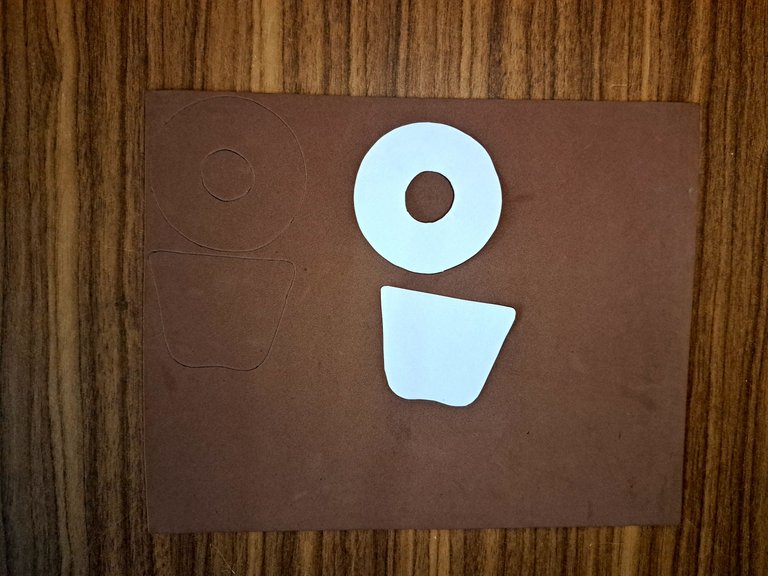
1️⃣ The first step is to mark the silhouette of the two ornaments and then cut out each of the pieces with scissors. You can use the first image as a mold, since it is the standard A4 sheet size.
El primer paso consiste en marcar la silueta de los dos adornos y luego recortar cada una de las piezas con unas tijeras. Pueden emplear la primera imagen como molde, ya que está al tamaño estándar de hoja A4.
 |
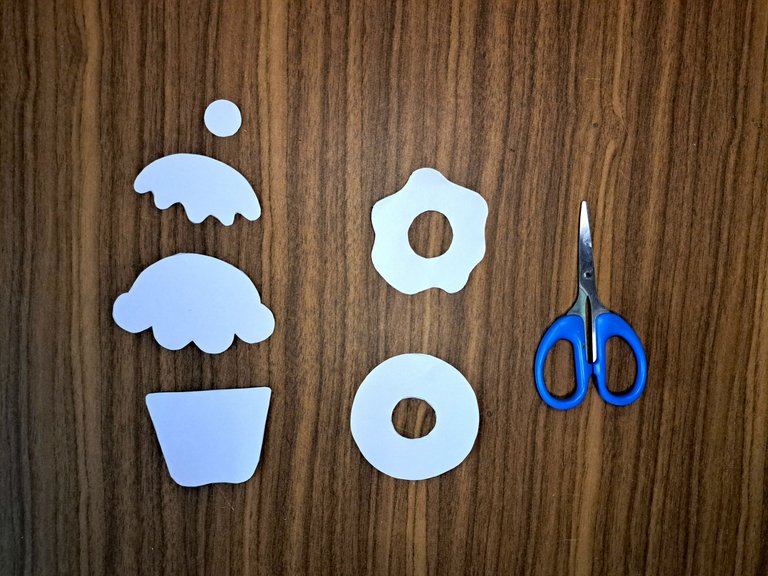 |
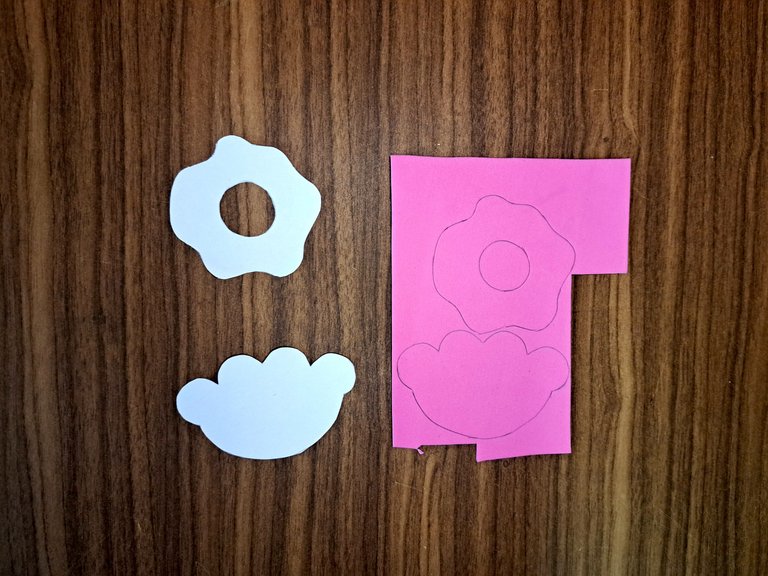
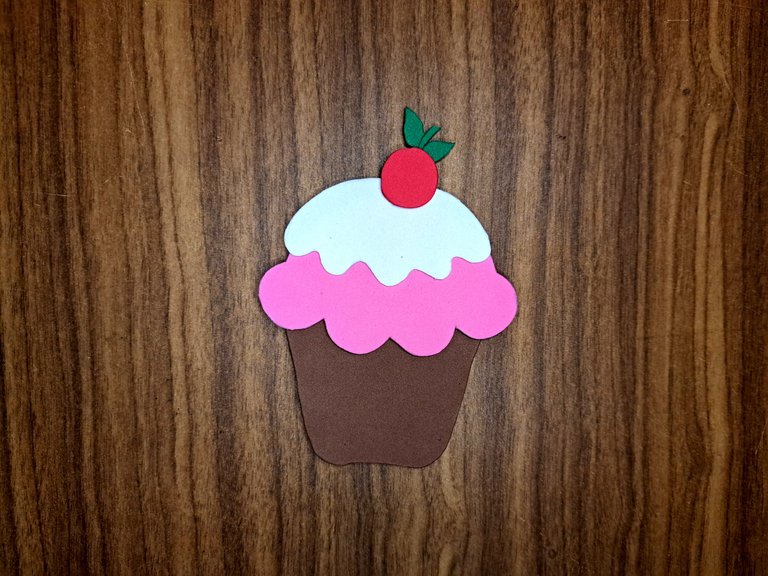
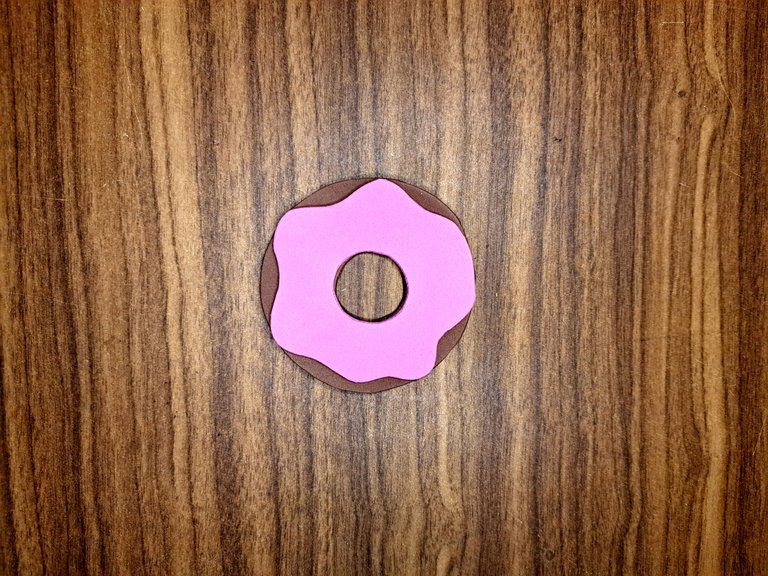
2️⃣ Next, we will mark the silhouette of each of the cut out molds on the plain fomi. The donut and the bottom of the cupcake will be carmelite. The cupcake toppers and donut icing will be strawberry pink. Additionally, the cupcake has a white topper and a red cherry.
A continuación, marcaremos la silueta de cada uno de los moldes recortados sobre el fomi liso. La dona y la parte baja del pastelito serán carmelitas. Las cubiertas del pastelito y el glaseado de la dona serán rosados fresa. Adicionalmente, el pastelito lleva una cubierta blanca y una cereza roja.
 |
 |
 |
 |
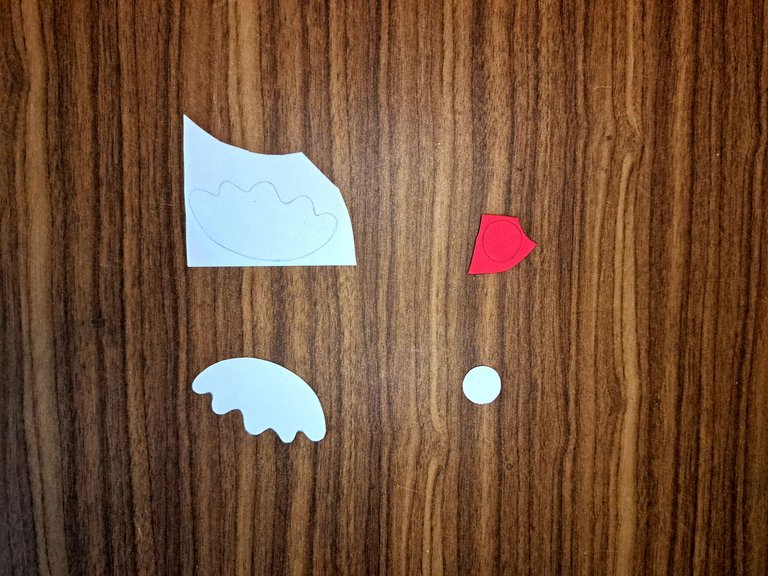
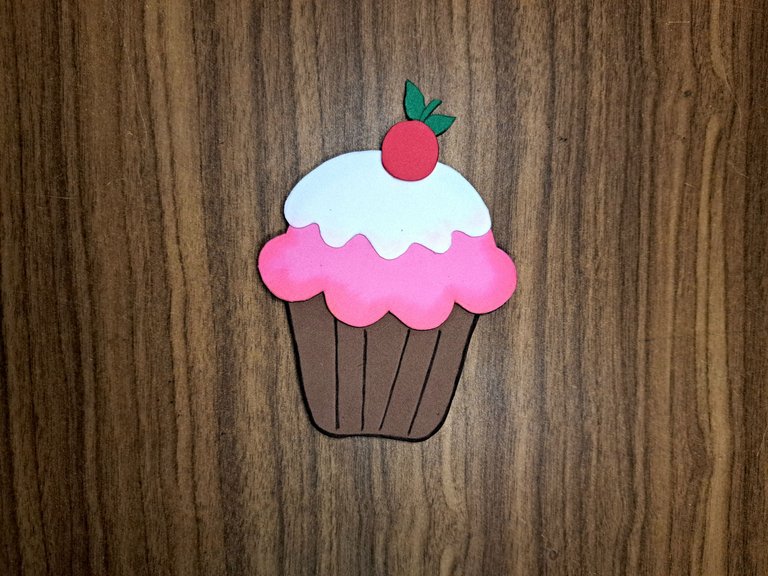
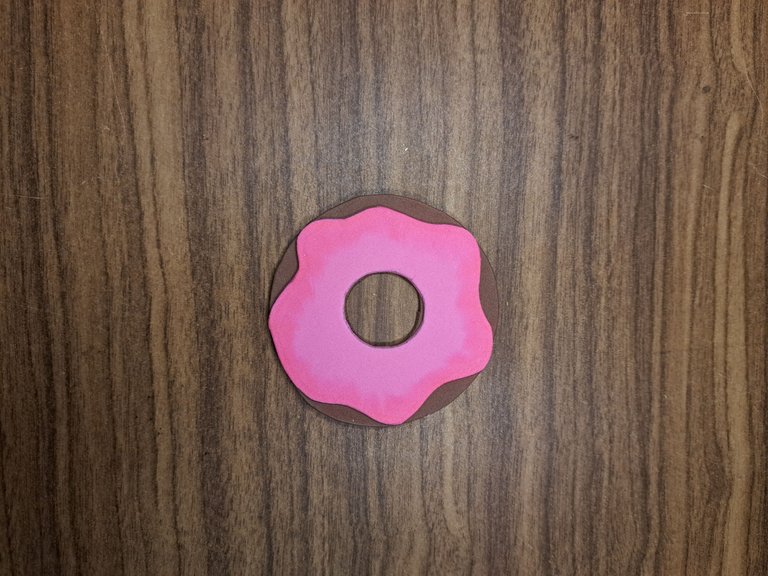
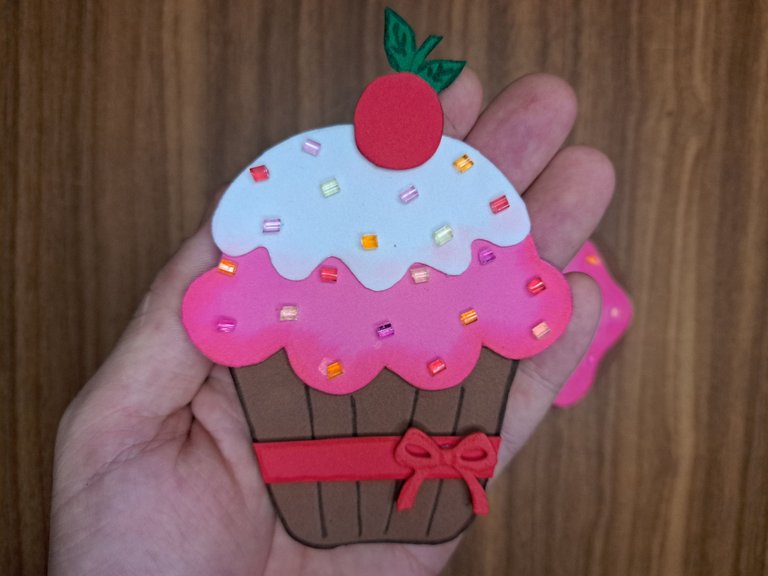
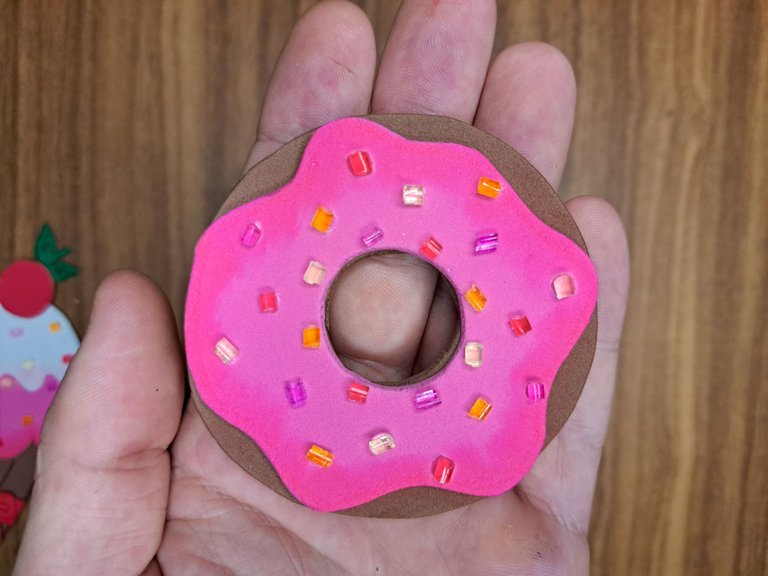
3️⃣ With the fomi pieces cut out, we will begin to assemble each one of the decorations. We will start with the cupcake, placing the strawberry icing on top of the carmel base and the white icing with the cherry on top of it all. In the case of the donut, we only need to place the strawberry icing on top of the carmel donut.
On the pink cover of both decorations we will apply a blurring using a pink marker and a napkin. For the base of the cupcake we will use a black ink pen and we will draw some stripes in the center and we will mark all the border.
Con las piezas de fomi recortadas, comenzaremos a montar cada uno de los adornos. Empezaremos por el pastelito, colocando la cubierta fresa encima de la base carmelita y encima la cubierta blanca con la cereza encima de todo. En el caso de la dona, solo debemos colocar el glaseado fresa sobre la dona carmelita.
Sobre la cubierta rosada de ambas decoraciones aplicaremos un difuminado utilizando un marcador rosado y una servilleta. Para la base del pastelillo emplearemos un bolígrafo de tinta negra y dibujaremos unas rayas en el centro y marcaremos todo el borde.
 |
 |
 |
 |
 |
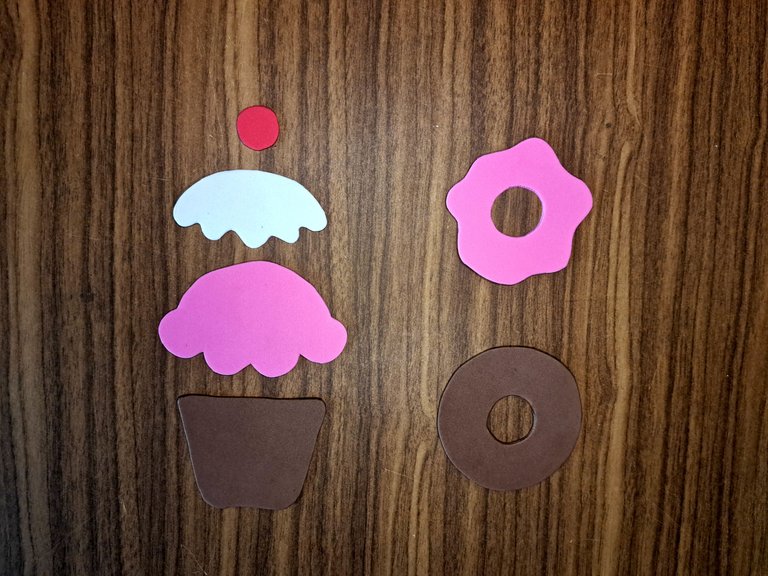
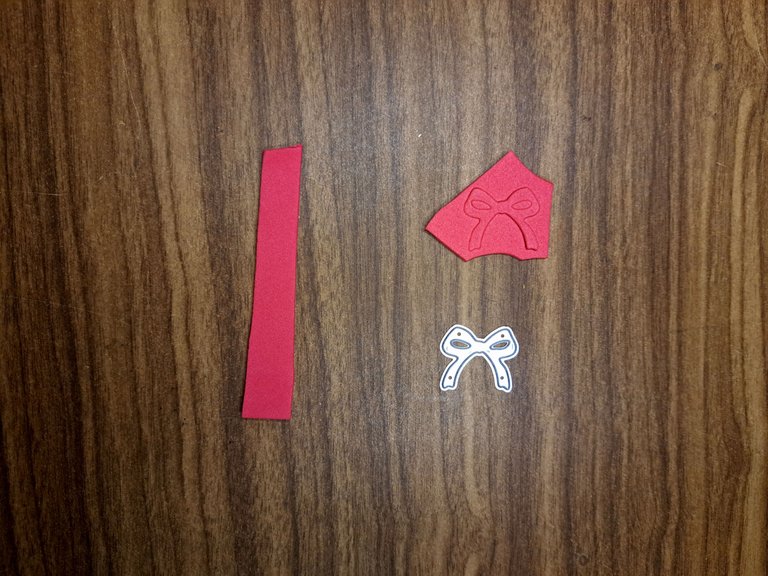
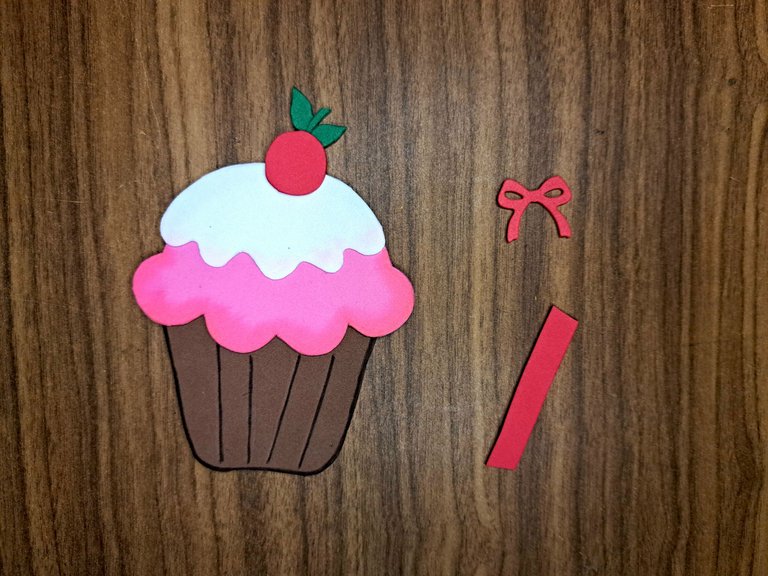
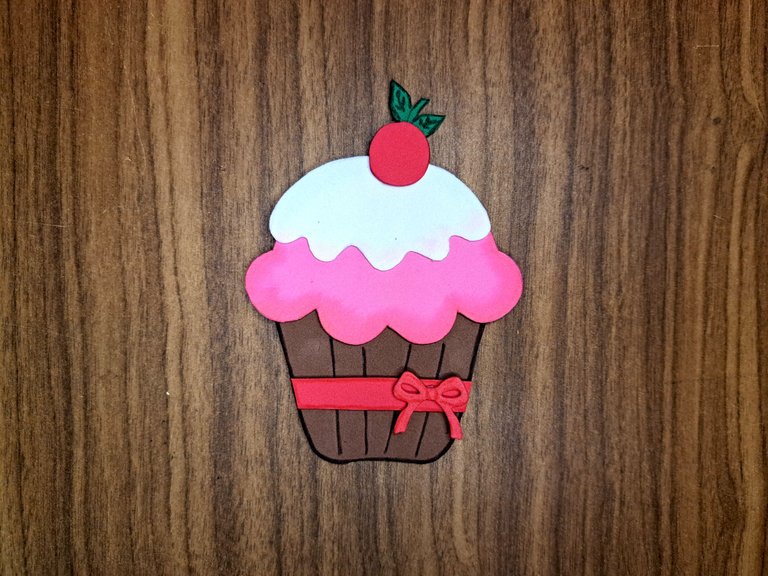
4️⃣ With a piece of red fomi we will cut out a bow and a strip. Glue the strip diagonally to the stripes on the base of the cupcake and on top of the ribbon. With a red marker we will border both the ribbon and the ribbon, but without blurring. To cut the ribbon I used a metal cutting die, but you can perfectly do it by hand.
Con un pedazo de fomi rojo recortaremos un lazo y una tira. Pegaremos la tira diagonalmente a las rayas de la base del pastelillo y encima el lazo. Con un marcador rojo bordearemos tanto el lazo como la cinta, pero sin difuminar. Para recortar el lazo utilicé un troquel de corte metálico, pero perfectamente pueden hacerlo a mano.
 |
 |
 |
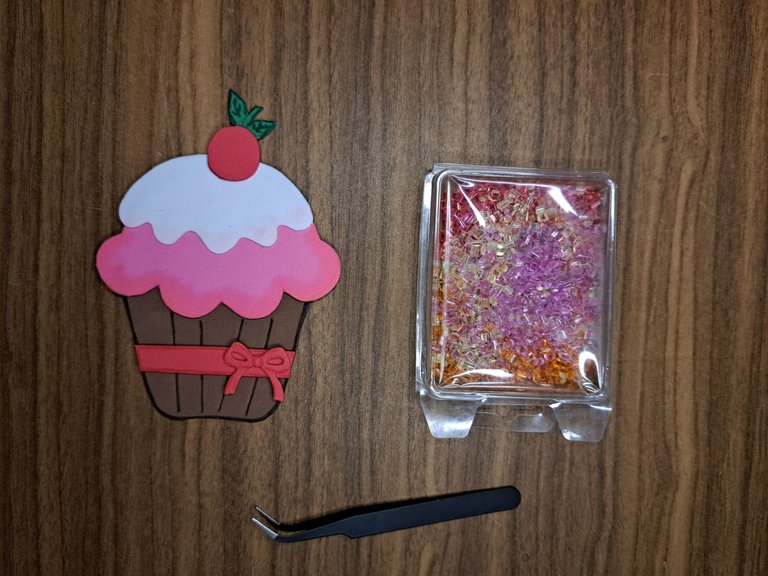
5️⃣ Next, we will use tweezers and quick-drying glue to place various types of plastic cylinders of different colors on top of the ornaments. The idea is to place them separately from each other, but without putting the same colors together to make it look like there is more variety.
Seguidamente, emplearemos unas pinzas y pegamento de secado rápido para colocar encima de los adornos varios tipos de cilindros plásticos de distintos colores. La idea es colocarlos separados entre sí, pero sin juntar colores iguales para que parezca que hay más variedad.
 |
 |
 |
 |
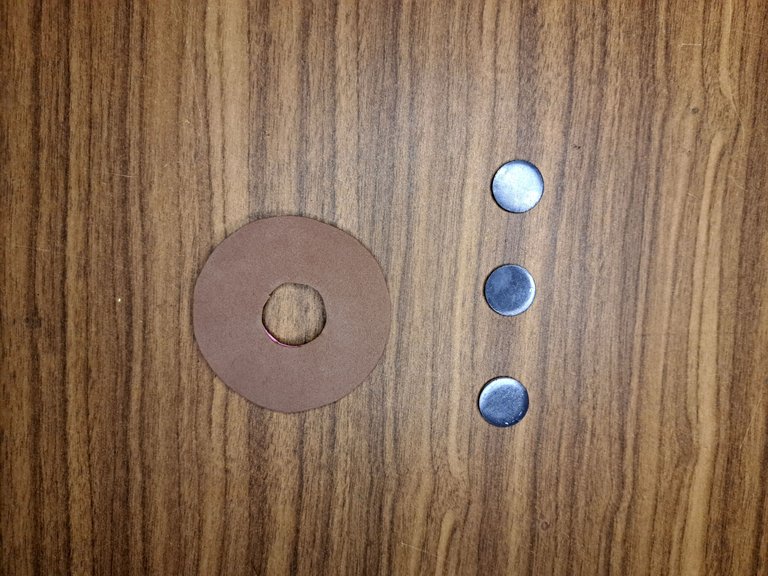
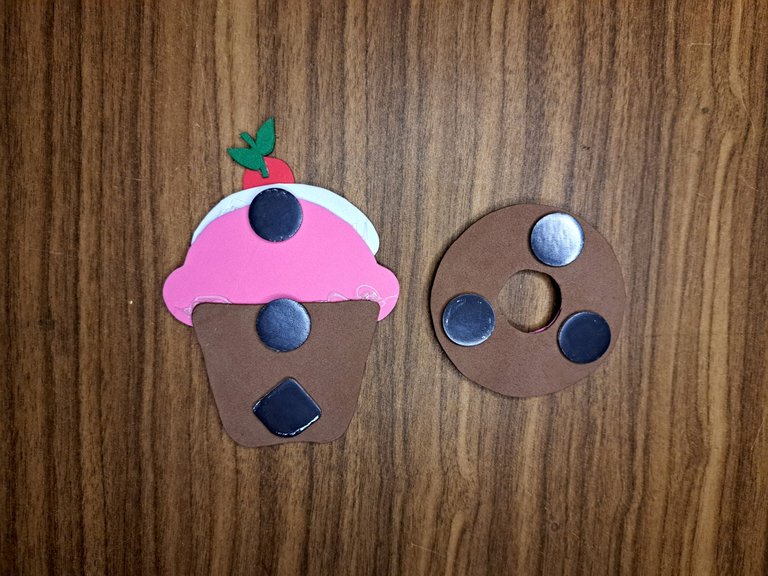
6️⃣ Finally, glue some magnets on the back of the ornaments. In my case, I glued three on each ornament, since they were not very strong and one alone would not hold. If you don't have magnets available, you can use double-sided tape.
Para finalizar, se deben pegar algunos imanes en la parte trasera de los adornos. En mi caso, pegué tres en cada adorno, ya que no eran muy potentes y uno solo no iba a aguantar. En caso de no tener imanes a disposición, se puede emplear una cinta de doble cara.
 |
 |
 |
Finished Work // Trabajo Terminado
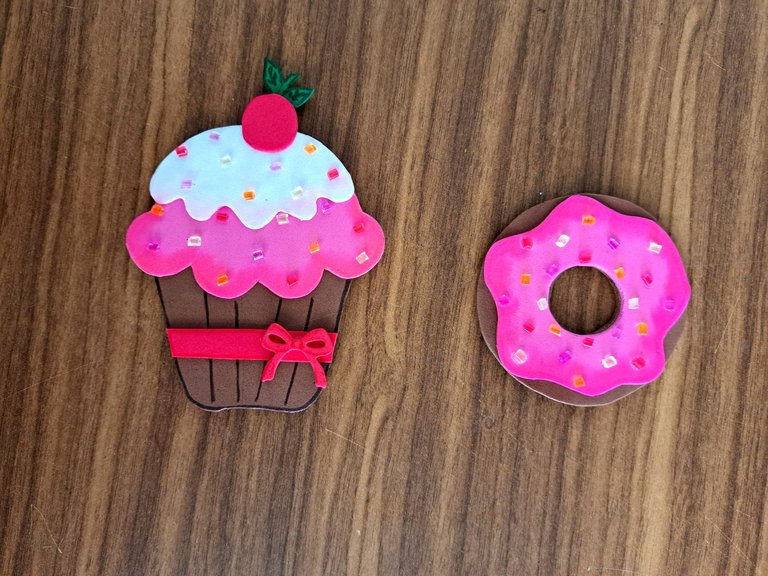
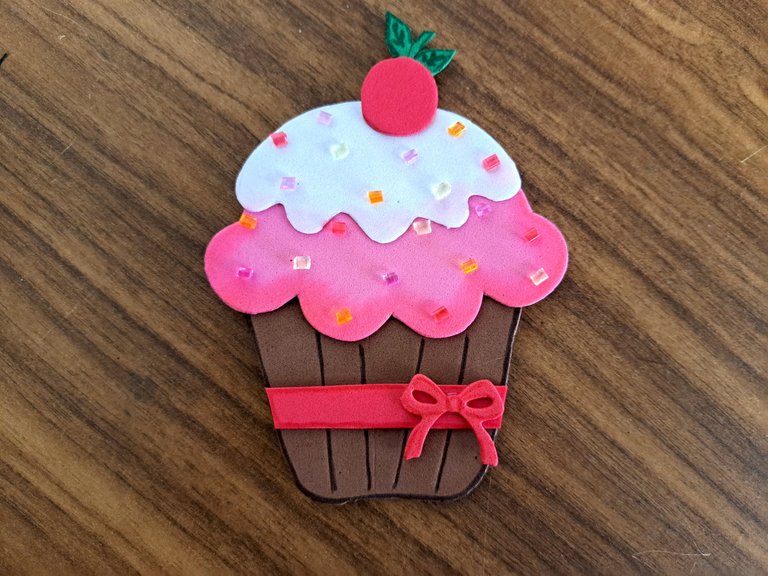
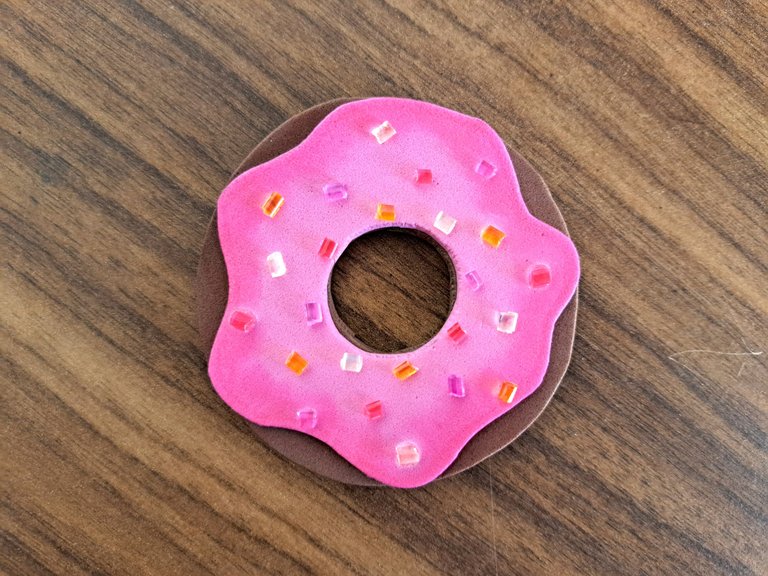
This way, these beautiful decorated magnets in the shape of desserts will be ready. I hope you liked the result as much as the elaboration process. Without further ado, I bid you farewell until next time.
De esta forma, quedarían listos estos hermosos imanes decorados con forma de postres. Espero que les haya gustado el resultado tanto como el proceso de elaboración. Sin más que agregar, me despido hasta una próxima ocasión.
 |
 |
 |

Credits and Resources // Créditos y Recursos
Cover page created in Canva
Translated by DeepL
Images captured with my Samsung Galaxy A53

