Hello, Hive World! 😊 There have been a few days of no blog from me. Life can sometimes have a way of sneaking up on someone when one is least expected, you will agree.
I had to pause some bead projects I was working on to bead this guitar. The past week has been tough for my family. My son fell sick, and it took a toll on me and the father.
The chances of these little beings catching one disease or another are just too high no matter how much we try as parents; one minute, they might be jumping over you, and the next minute, they might be running a high temperature as a sign of something underneath. When this happens, the best thing we can do is be there for them, comfort them, and take care of them as much as we can.
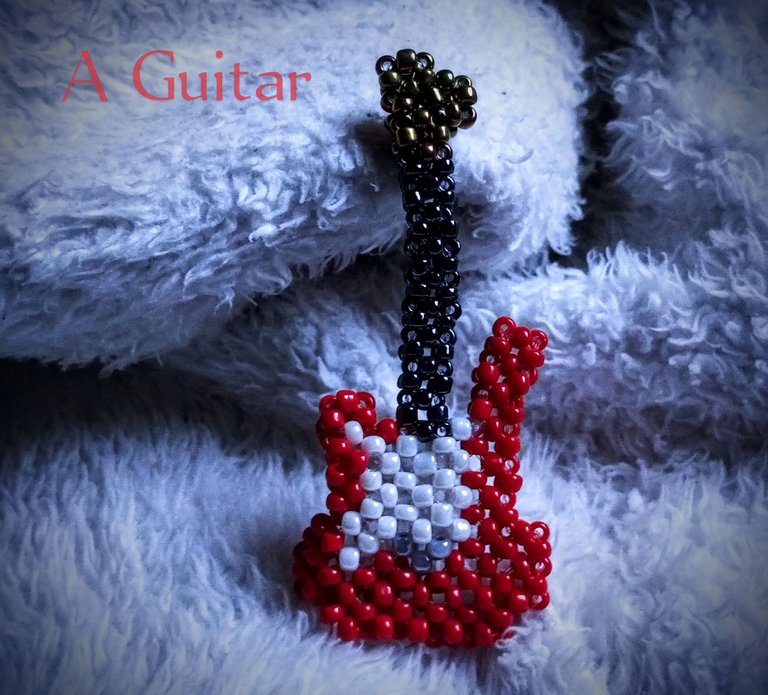
Thankfully, he is recovering pretty well now, so I decided to bead for him a guitar as a get-well-soon present. It turned out to not just be a get-well-soon for my son, as the whole process of beading the guitar is so soul-soothing for me, and the result is very satisfying and pleasing to the eyes. Somehow, it's helped me recover from all the stress of the past few days. I guess that is what you get for doing something you are passionate about.
 I hereby invite you to join me and see the beading of the guitar 🎸, and I hope that you enjoy and love it as much as I do making it.
Materials used:
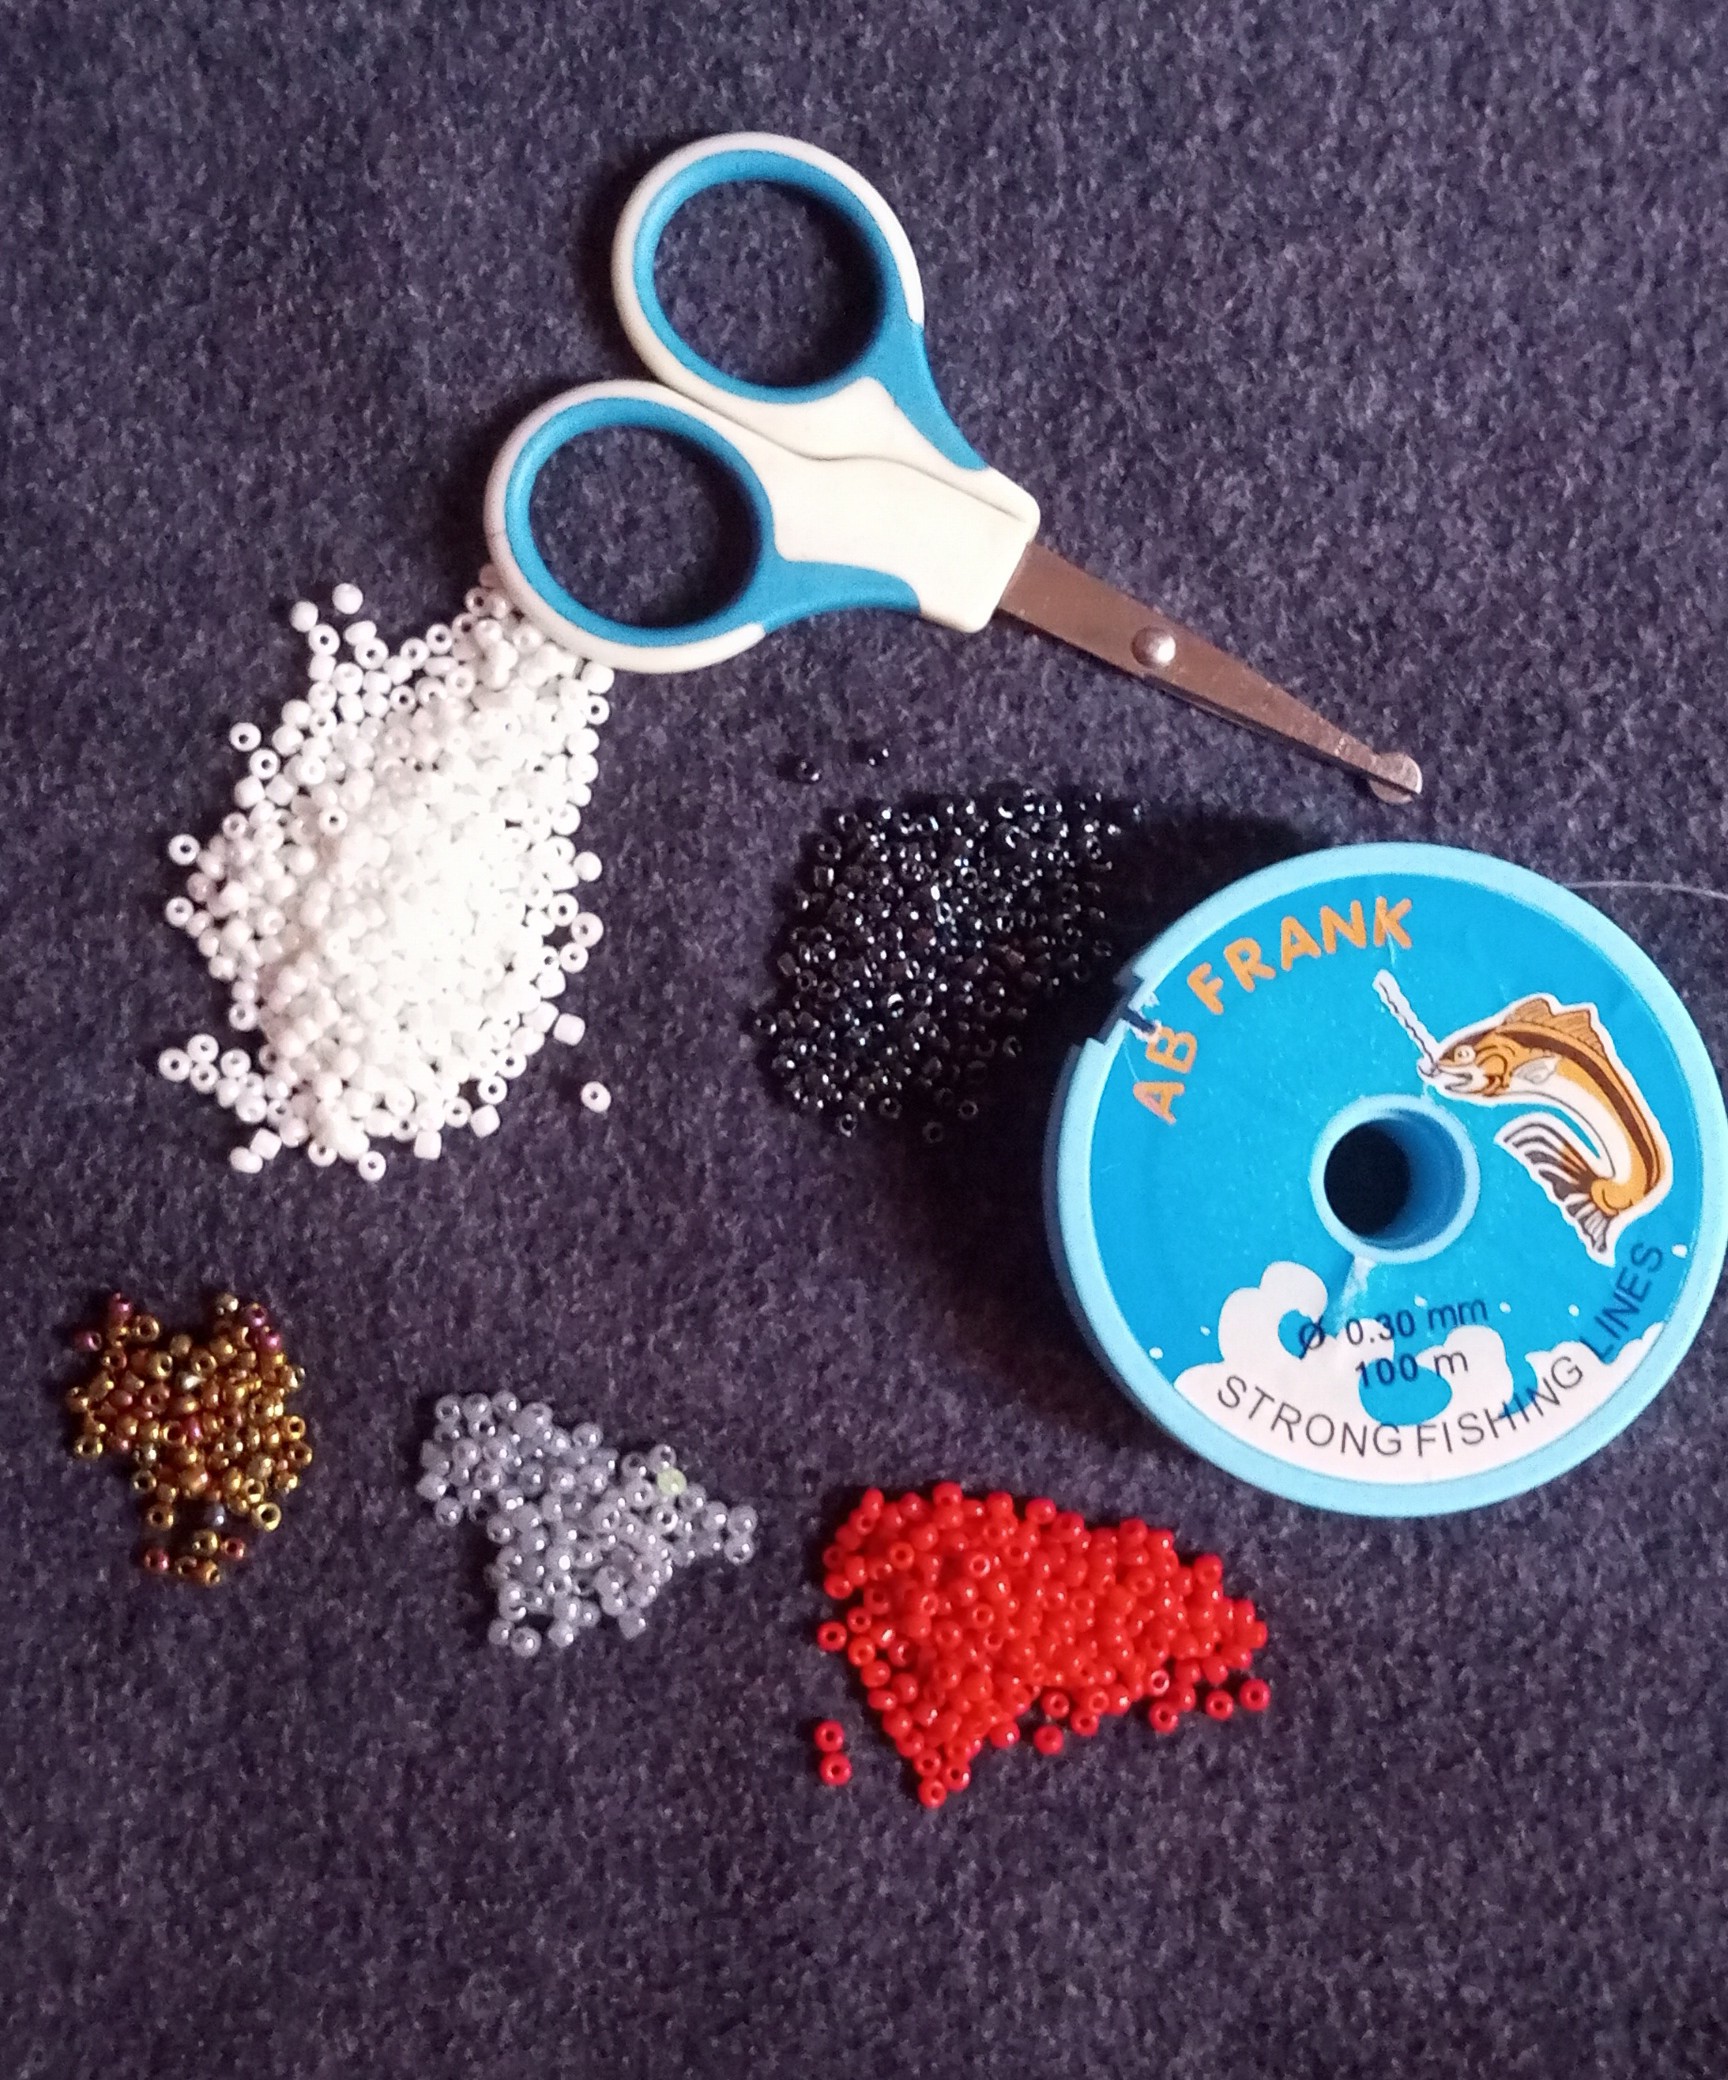
✓ Metal color, black, white, red, and ash color seed beads.
✓ Scissors
✓0.3 fishline
Step-by-step process:
The steps are a bit long, but I try to simplify them as much as possible for your easy understanding; enjoy!
Step 1: I started to make the tip of the guitar by cutting a 90 cm fishline, putting four metal color beads on it, and crossing both fishlines with the fourth bead. 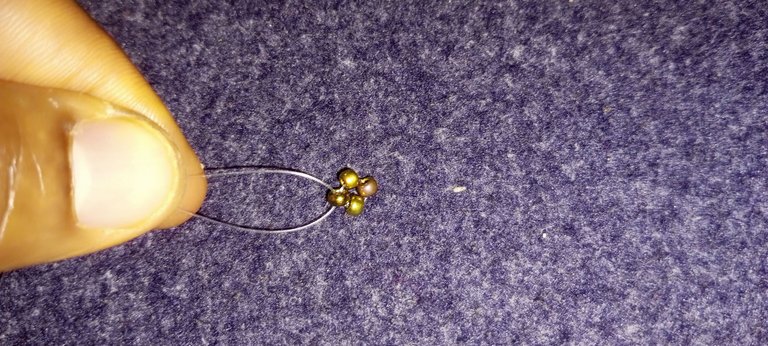 Step 2: I put four beads on the right fishline and then passed the same fishline back through the first bead.
 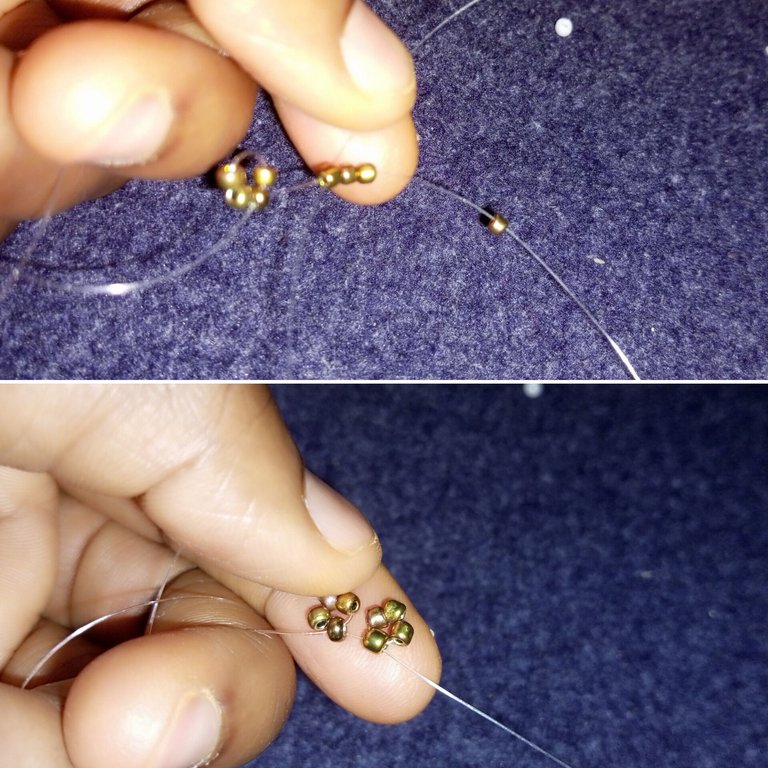 Step 3: I put one bead on the right fishline and then crossed both lines with one bead.
  Step 4: I put one bead on the left fishline and one bead on the right fishline and then crossed both lines with one bead.
 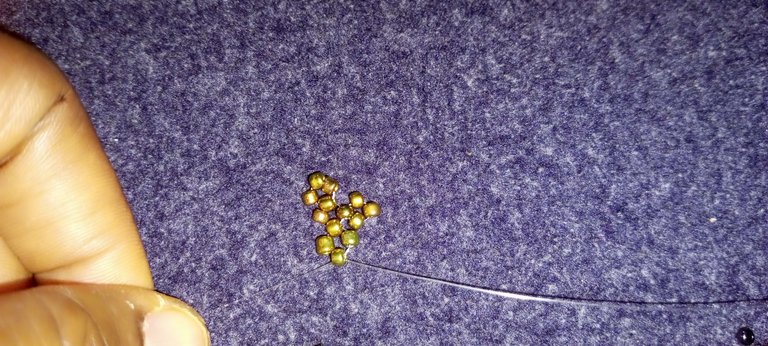 Step 5: Here I introduce the black beads to form the middle of the guitar. I put one bead on the left fishline and one bead on the right fishline and then crossed both lines with one bead.
 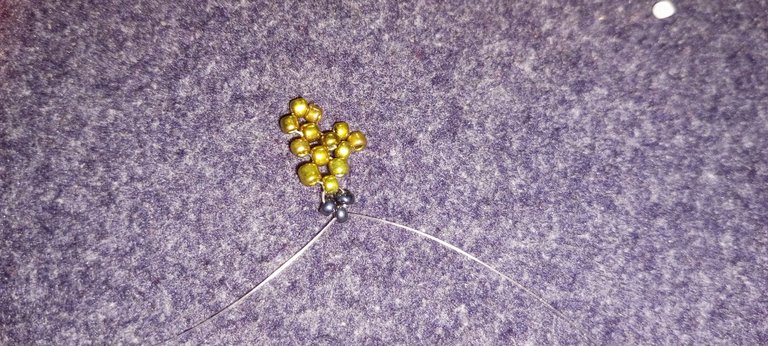 Step 6: I continued to add black beads until I made nine rings of black beads.
 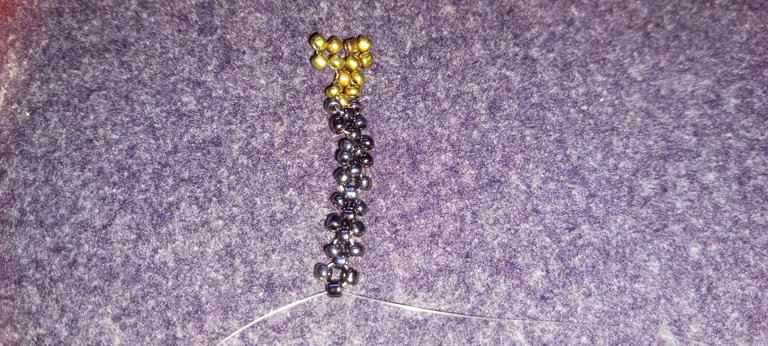 Step 7: Here I started to make the bottom of the guitar by introducing the white beads. I put two beads on the left fishline and then crossed both lines with one bead.
 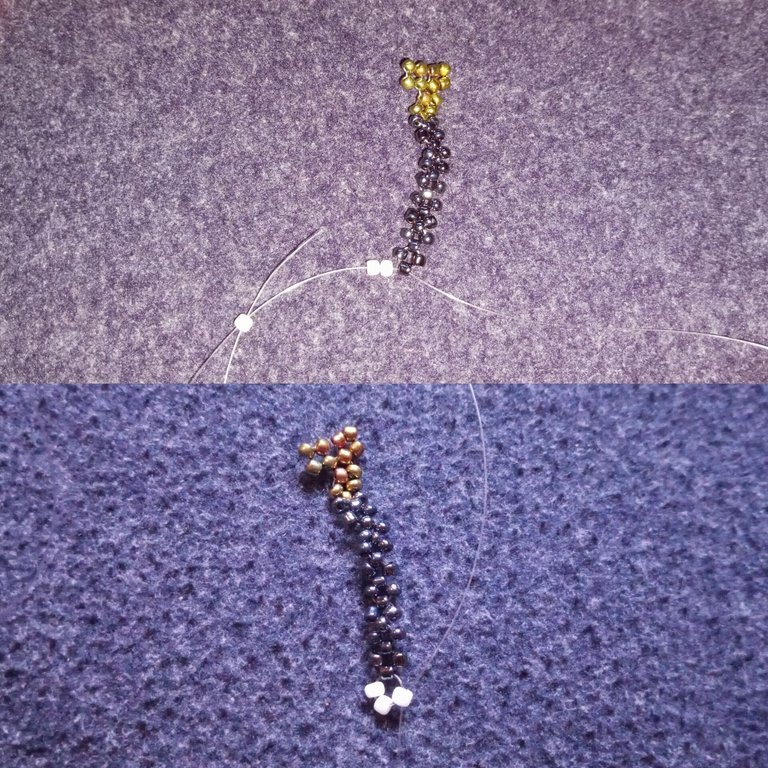 Step 8: Two things were done in step 8. First, I put two white beads on the left fishline and then crossed both lines with one red bead. Second, I put one white bead and three red beads on the right fishline and then passed the same right fishline back through the first white bead.
 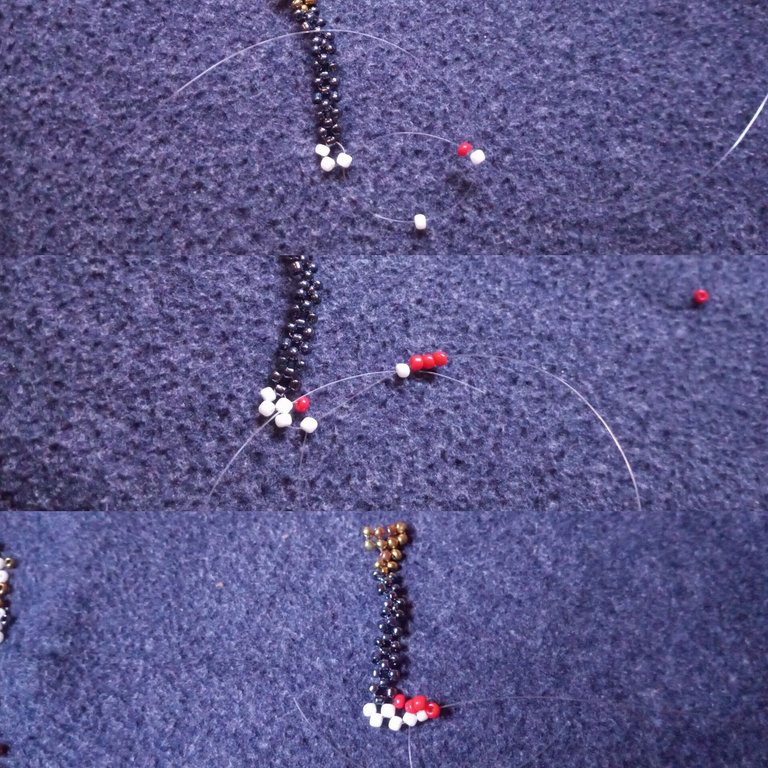 Step 9: In this step, I simply crossed both fishlines with one red bead.
 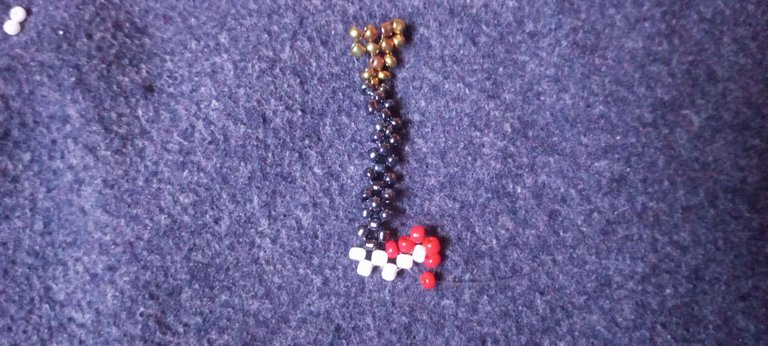 Step 10: I put two red beads on the right fishline and then crossed both lines with one white bead.
 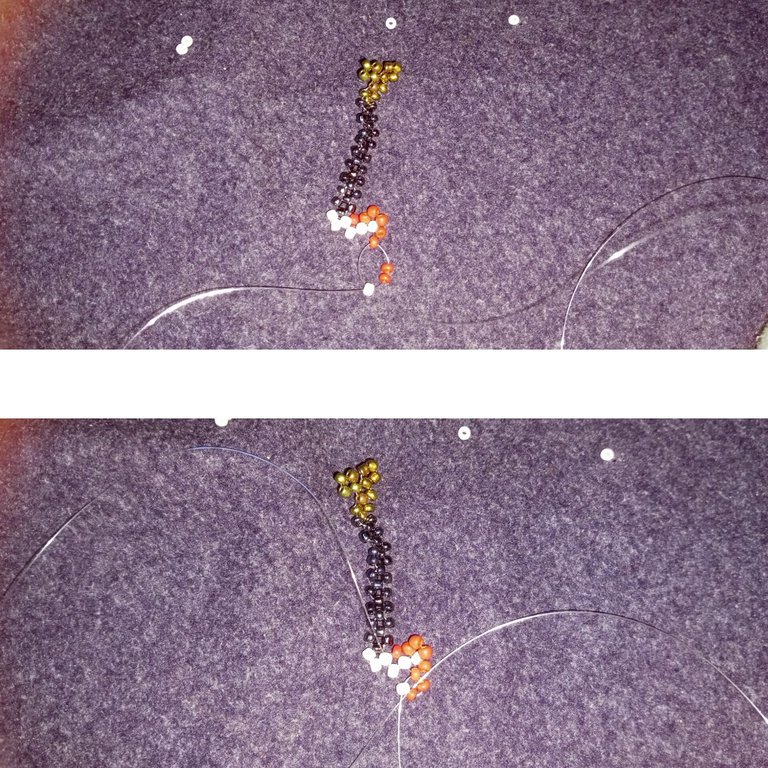 Step 11: I passed the left fishline through the next white bead; I put one white bead on the right fishline and then crossed both lines with one white bead.
 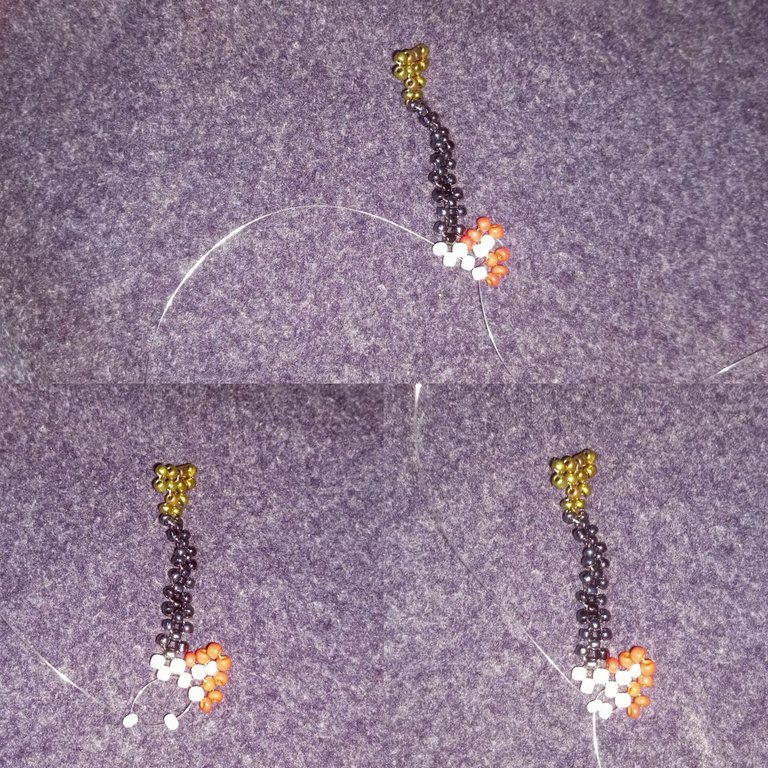 Step 12: I passed the left fishline through the next white bead; I put one white bead on the left fishline and then crossed both lines with one white bead.
  Step 13: I put two white beads on the left fishline and then crossed both lines with one white bead.
 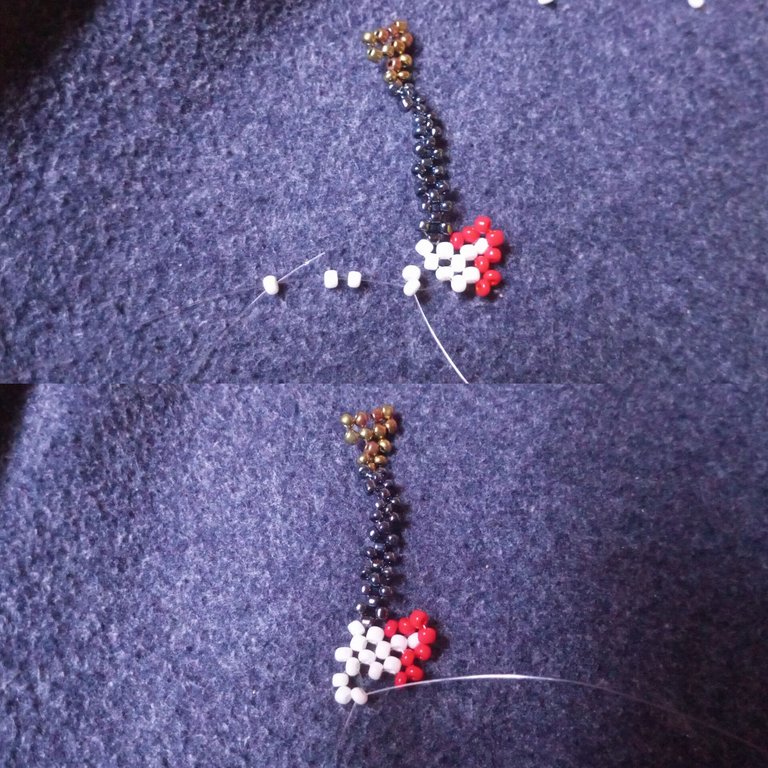 Step 14: Here, I passed my right fishline through the next white bead, put one white bead on the left fishline, and then crossed both lines with one white bead.
 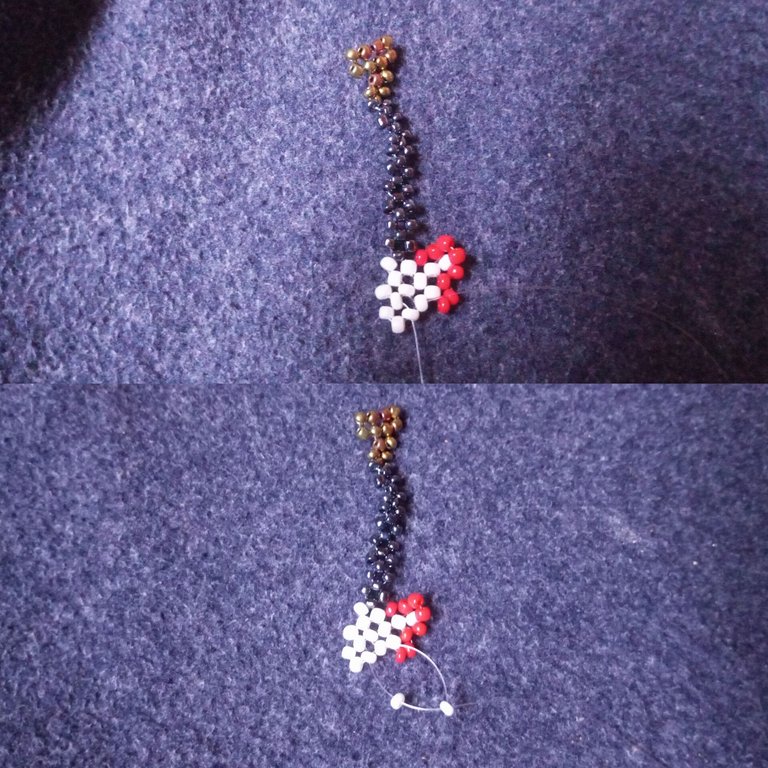 Step 15: I passed my right fishline through the next red beads, put one white bead on the left fishline, and then crossed both lines with one red bead.
  Step 16: Here I put four red beads on my right fishline and then passed the same fishline back through the first red bead.
 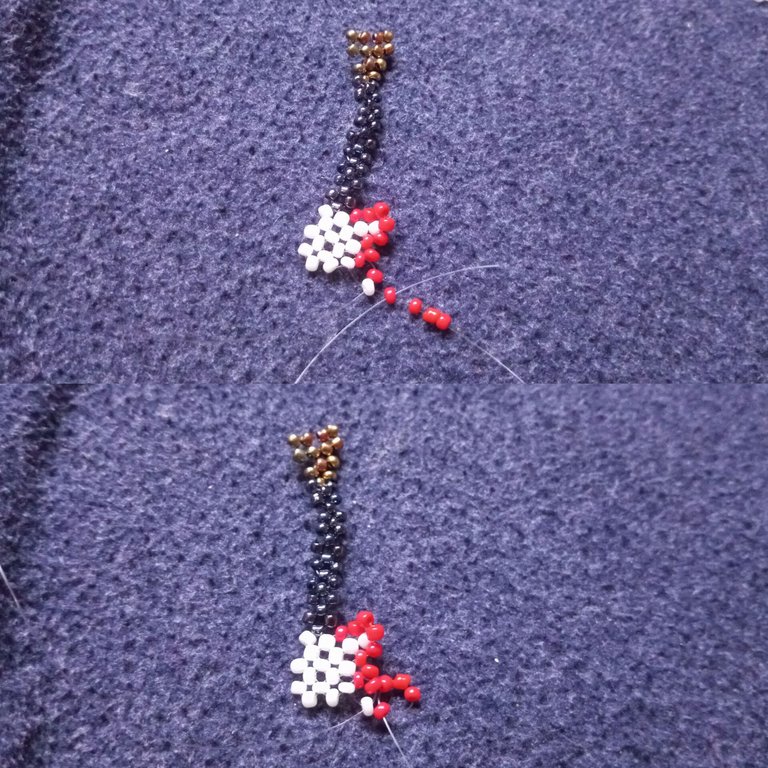 Step 17: I put one white bead on the right fishline, crossed both lines with one white bead, and then passed my left fishline through the next white bead.
 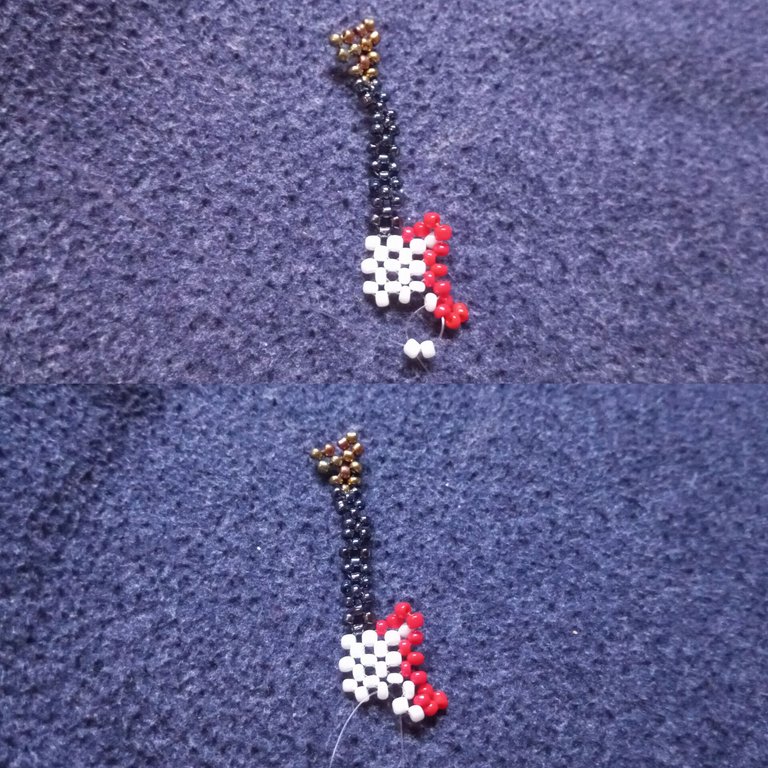 Step 18: I put one red bead on the right fishline and then crossed both lines with one ash color bead.
 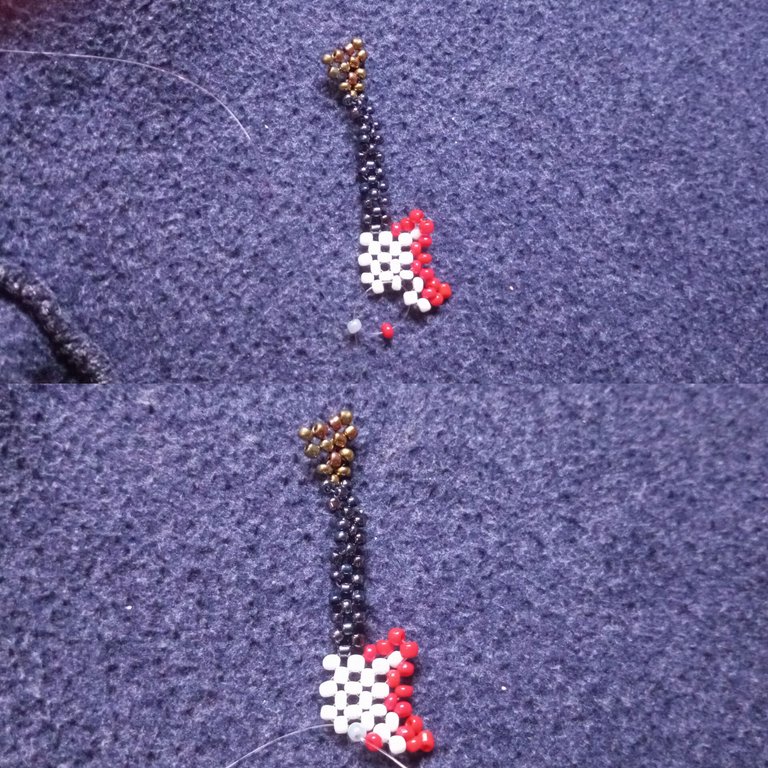 Step 19: I put one ash color bead on the left fishline and crossed both lines with one ash color bead.
 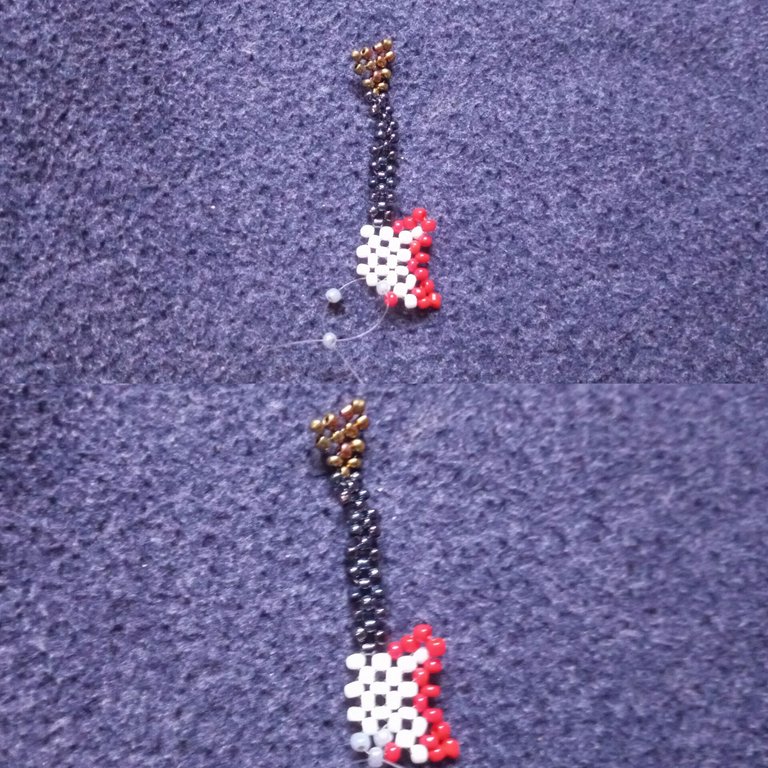 Step 20: I put two red beads on the left fishline and crossed both lines with one red bead.
 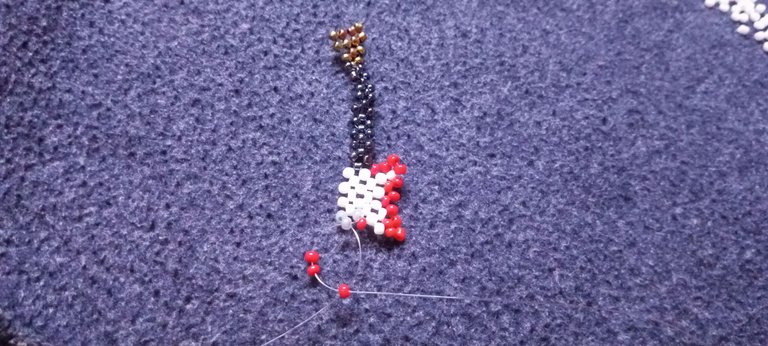 Step 21: I passed the left fishline through the next red bead, put one red bead on my left fishline, and crossed both lines with one red bead.
 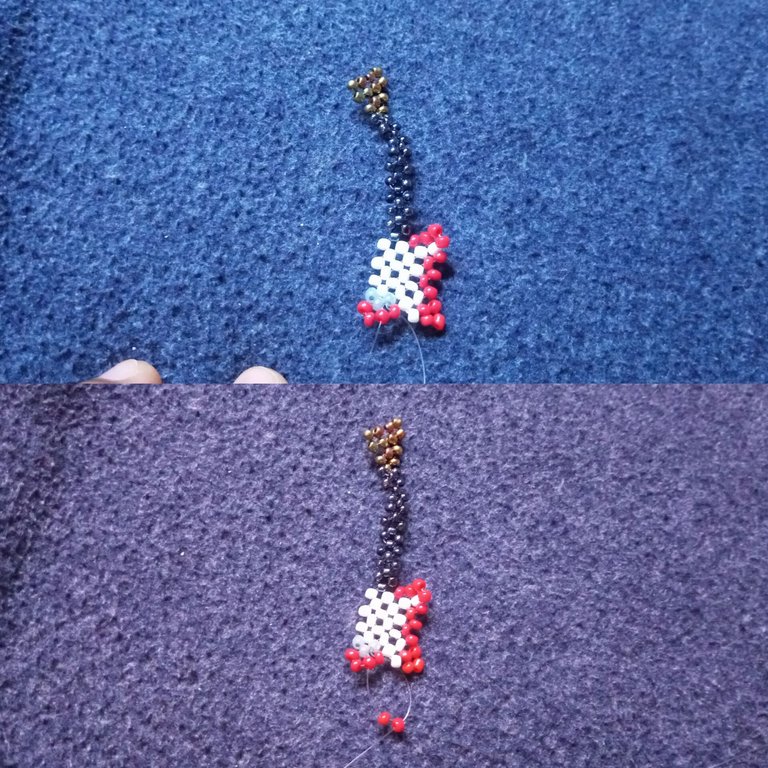 Step 22: I put three red beads on the right fishline and passed the same fishline back through the last red bead, then passed the same fishline through the first red bead; this brought the two fishlines close to each other. I just crossed both fishlines with one red bead.
  Step 23: I put the left fishline through the next red bead, put one red bead on the right fishline, and crossed both fishlines with one red bead.
 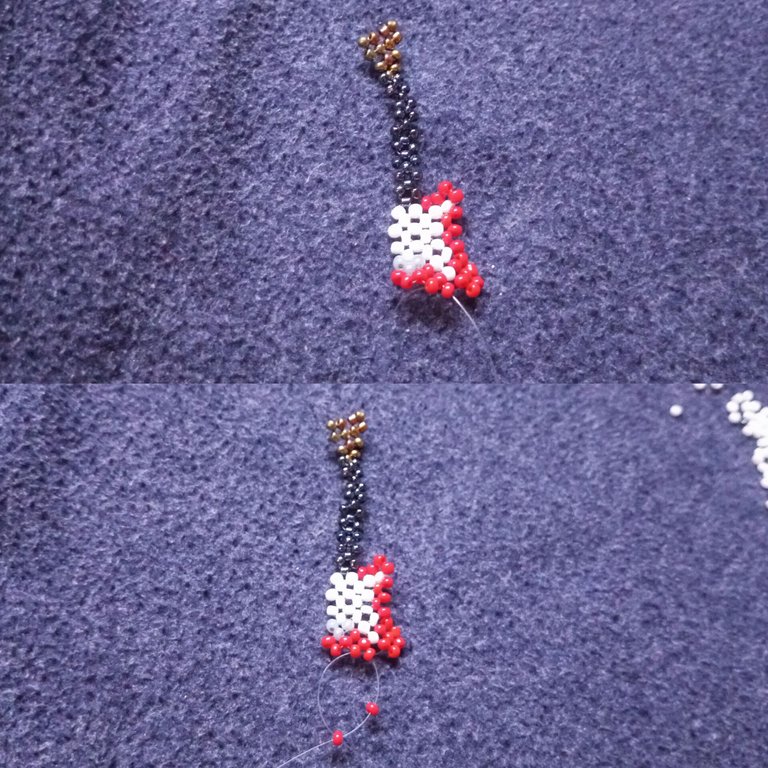 Step 24: I put one red bead on the right fishline and crossed both fishlines with one red bead.
 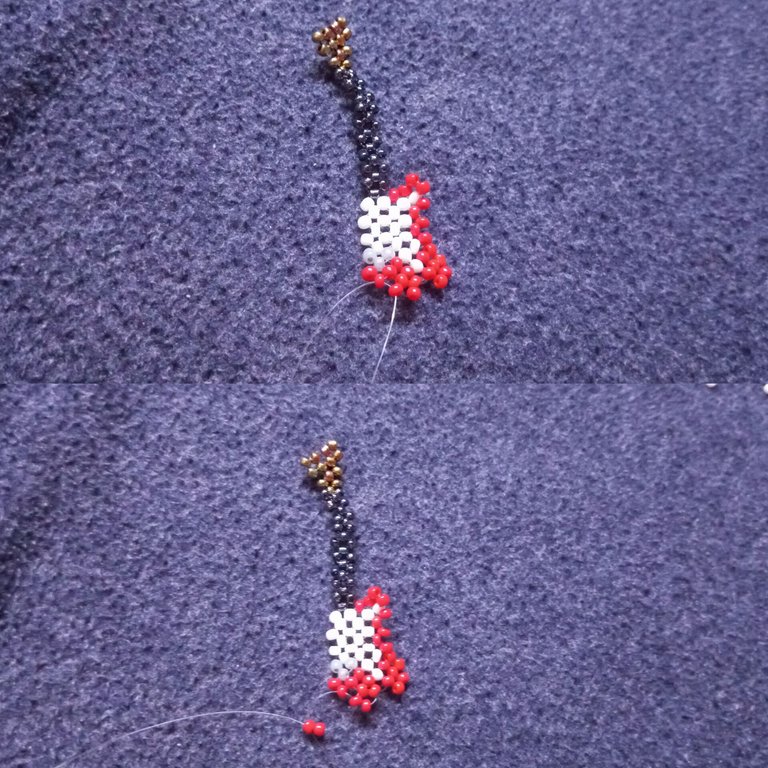 Step 25: I put two red beads on the right fishline and crossed both fishlines with one red bead.
 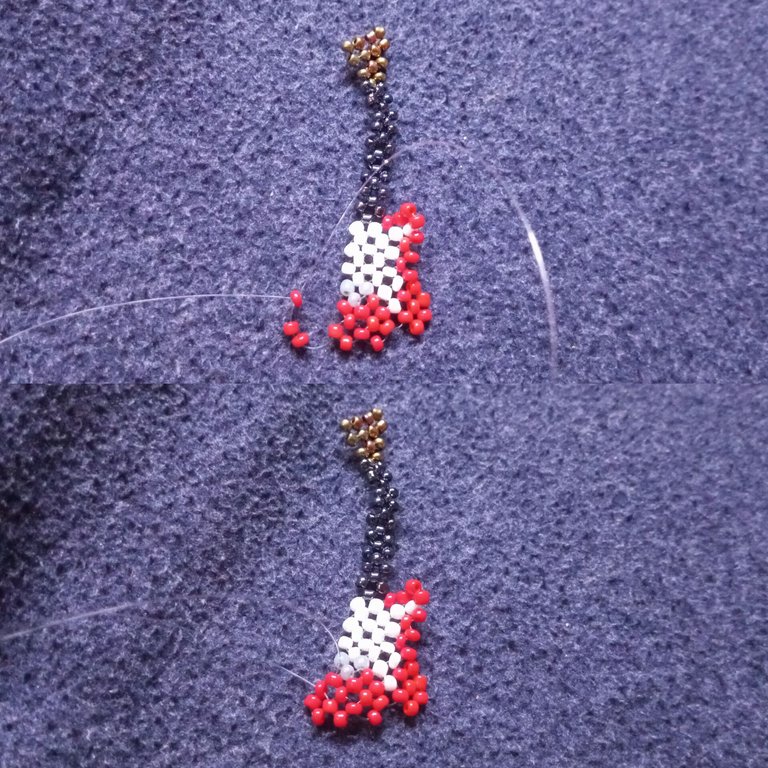 Step 26: I put the right fishline through the next red bead, put one red bead on the right fishline, and crossed both fishlines with one red bead.
 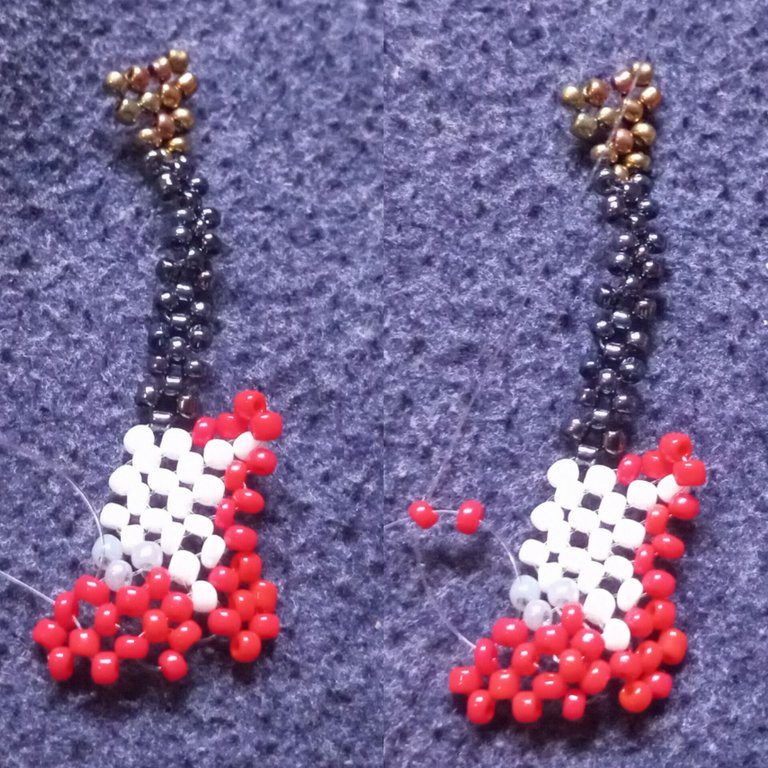 Step 27: I put three red beads on the left fishline and crossed both fishlines with the third red bead. From there, I put three red beads on the left fishline and then passed the same fishline through the first red bead.
 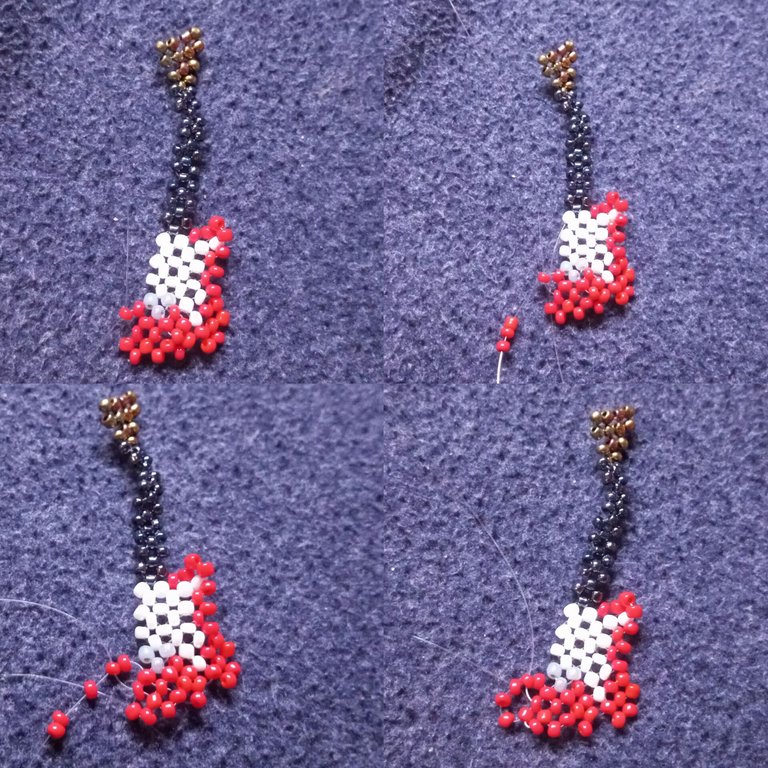 Step 28: I put one red bead on the right fishline and crossed both fishlines with one red bead.
 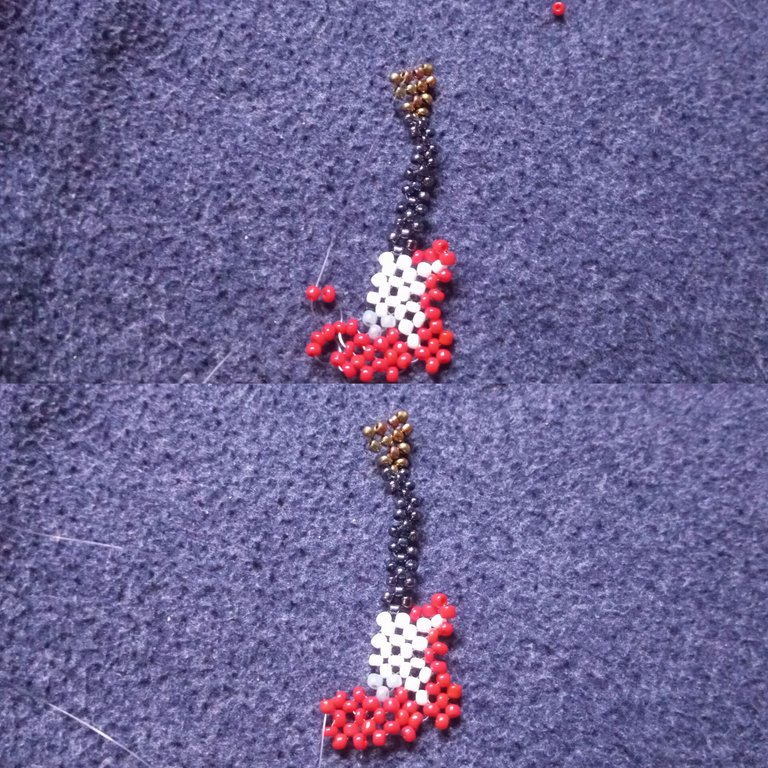 Step 29: I put two red beads on the left fishline and crossed both fishlines with one red bead.
 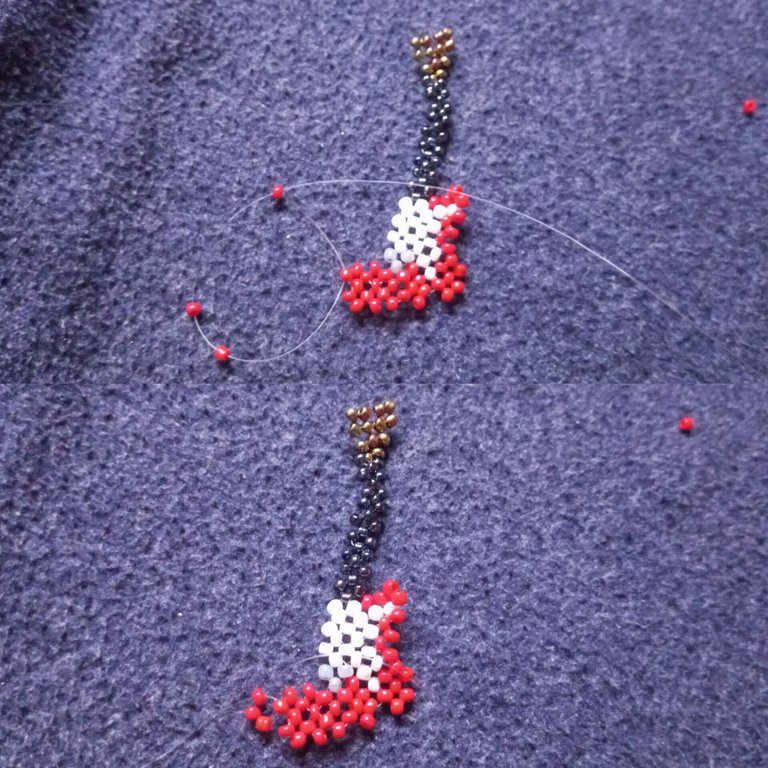 Step 30: I put two red beads on the left fishline and crossed both fishlines with one red bead. From there I passed the right fishline through the next red bead and crossed both fishlines with one red bead.
 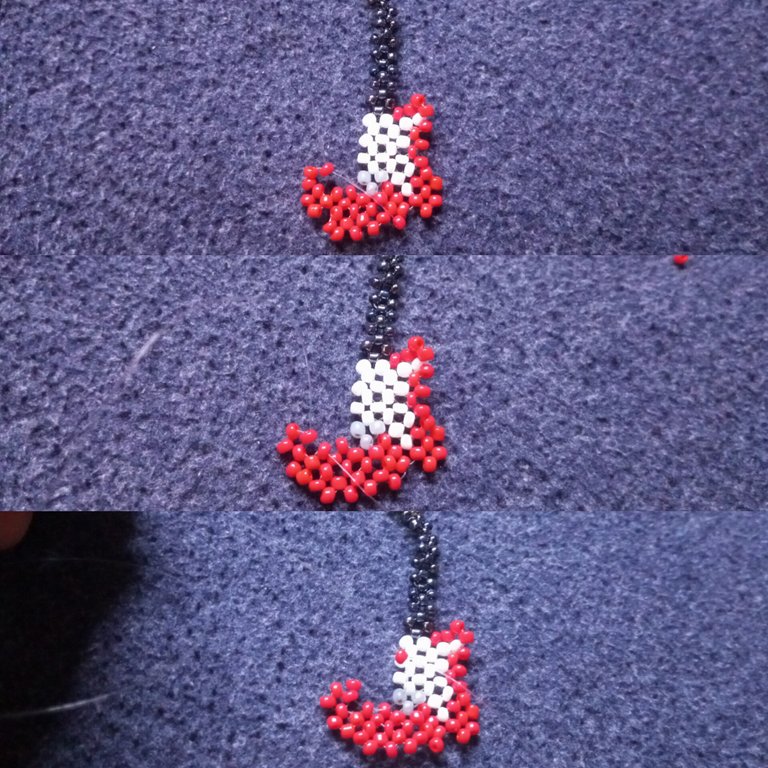 Step 31: I passed the right fishline through the next white bead, put a white bead on the right fishline, and crossed both fishlines with one red bead.
 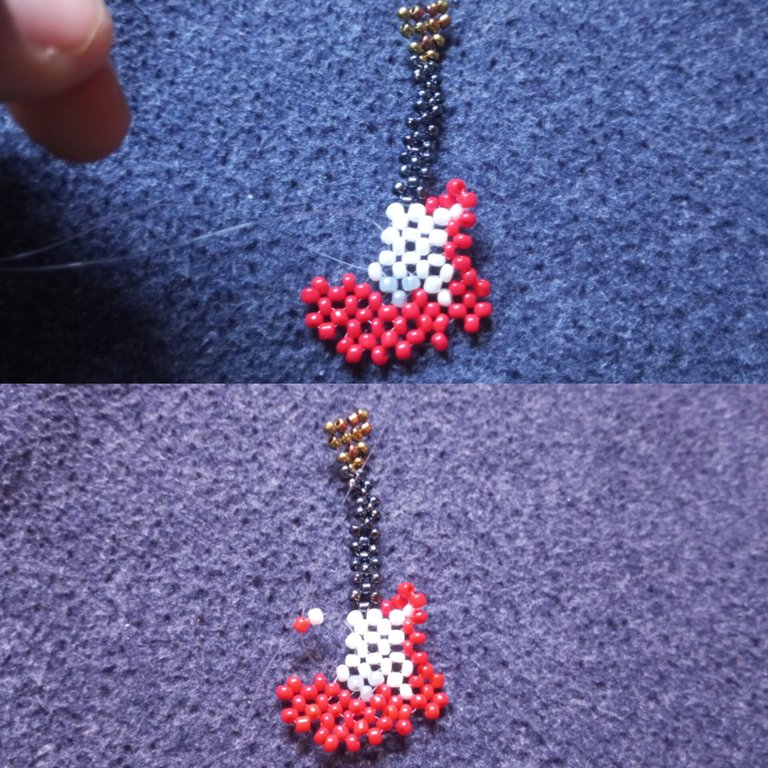 Step 32: I put one red bead on the left fishline and crossed both fishlines with one red bead.
 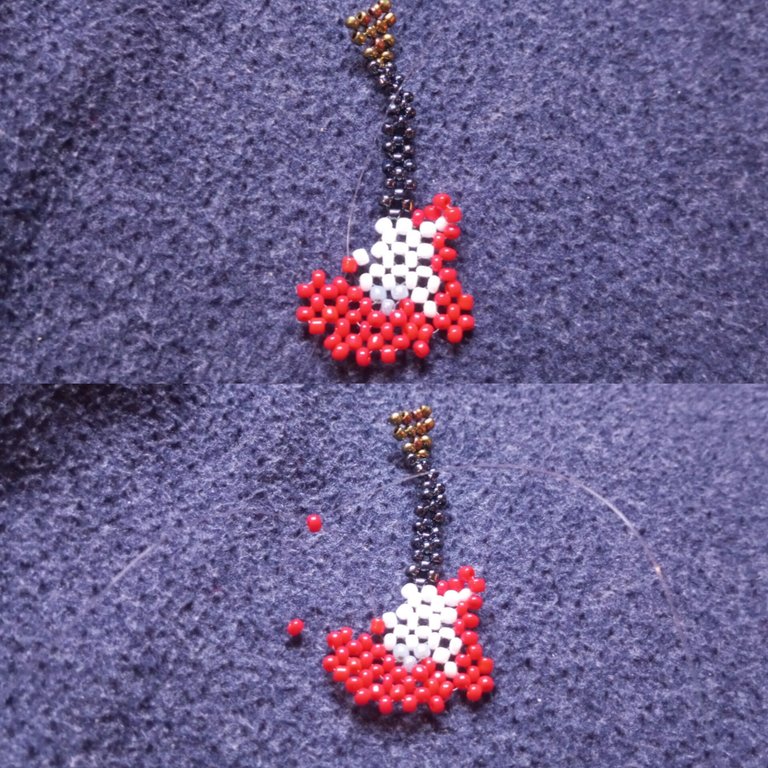 Step 33: I put two red beads on the left fishline and crossed both fishlines with one red bead.
 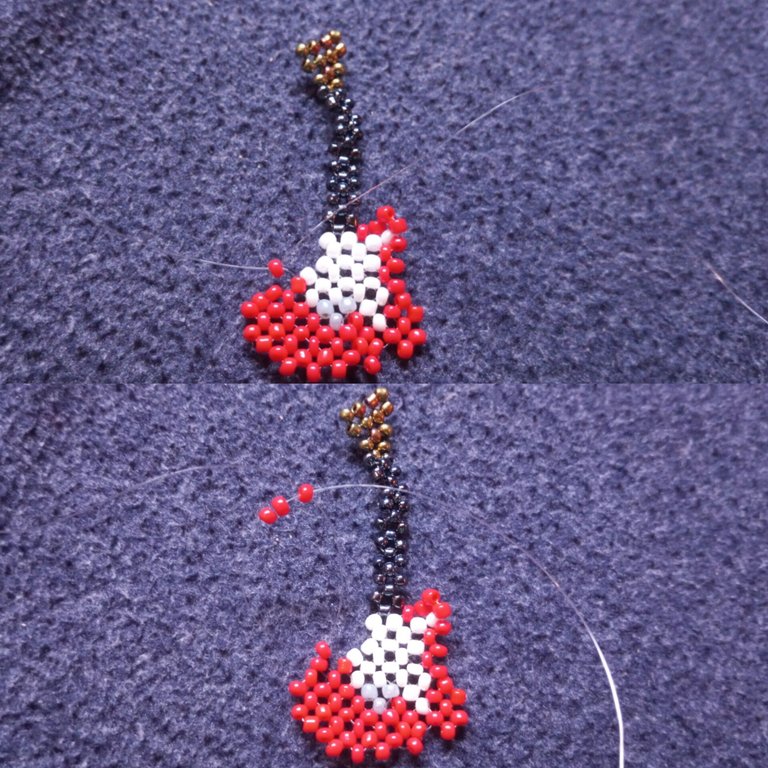 Step 34: I passed the right fishline through the next white bead and crossed both fishlines with one white bead.
 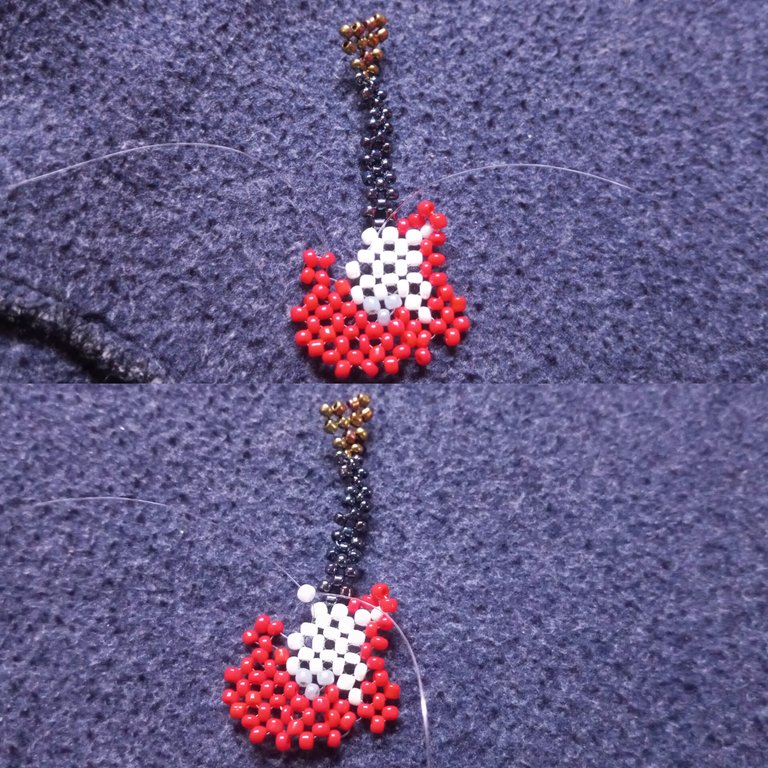 Step 35: I passed the right fishline through the next white bead, put one red bed on the left fishline, and crossed both fishlines with one white bead.
  Step 36: I passed the left fishline through the next red bead, put one red bead on the left fishline, and crossed both fishlines with one red bead.
 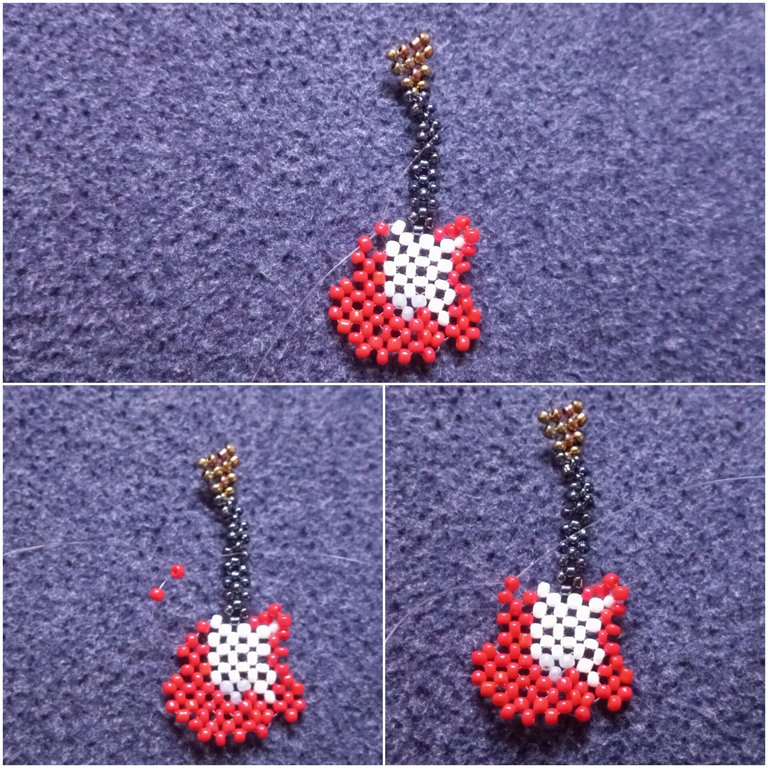 Step 37: I put one red bead on the left fishline and one bead on the right fishline and crossed both fishlines with one red bead. I repeated this three more times to complete the arm of the guitar. This gives me half of the guitar.
 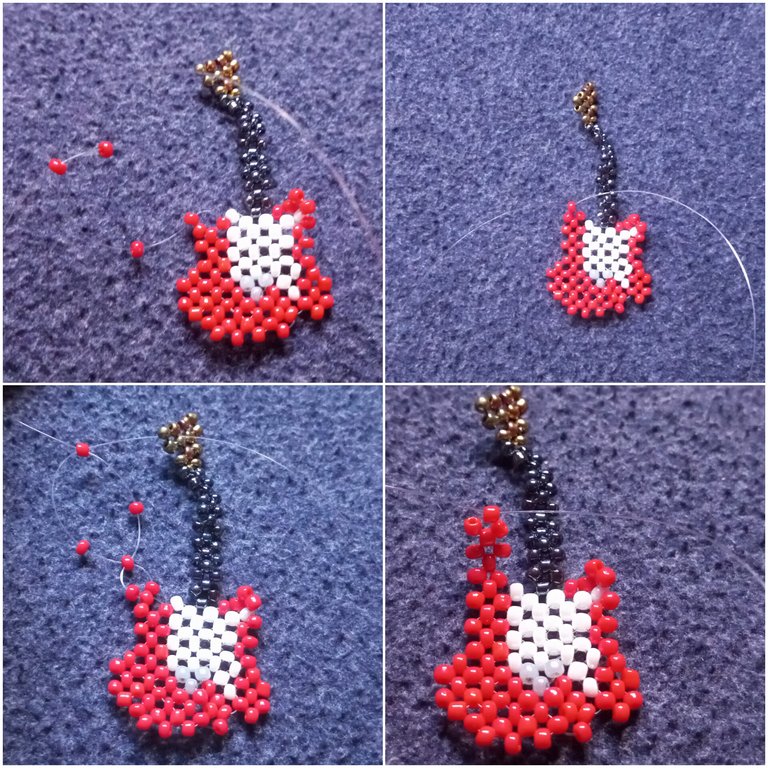 Step 38: I simply repeated all the steps above to make the other half of the guitar and went ahead to join the two with a single bead round.
 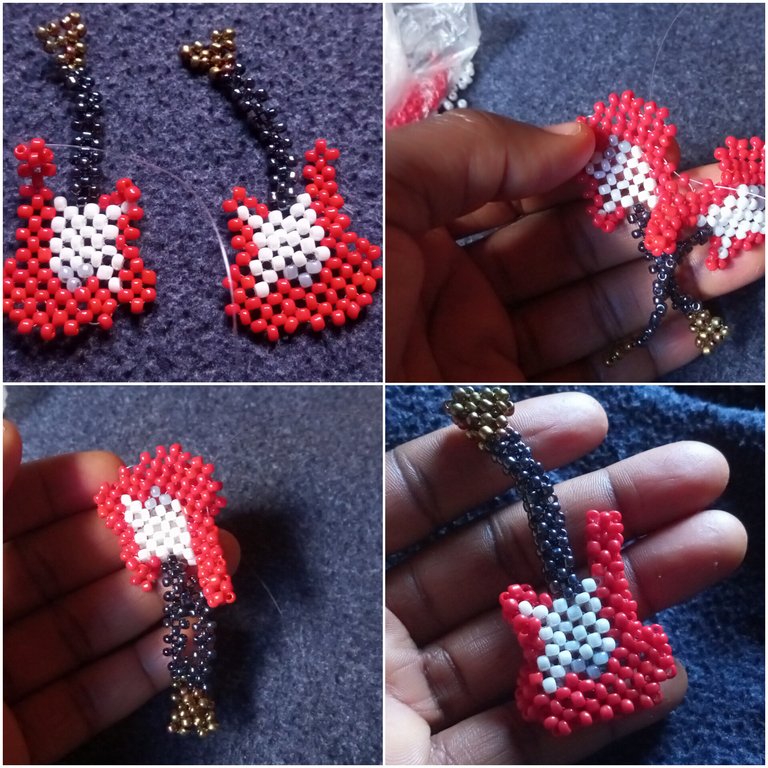 Here is the final look, what do you think? I am curious to read your thoughts in the comments section.
 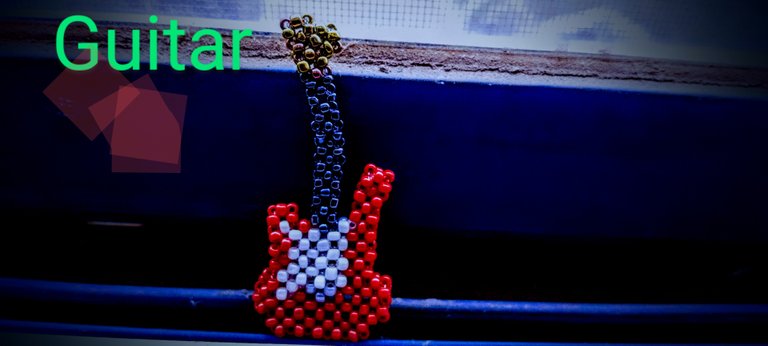 Made with Love
 Thank you so much for your attention and support. I wish you a great day ahead. All images are mine @funshee🙏❣️


