Versión En Español.

 )
)
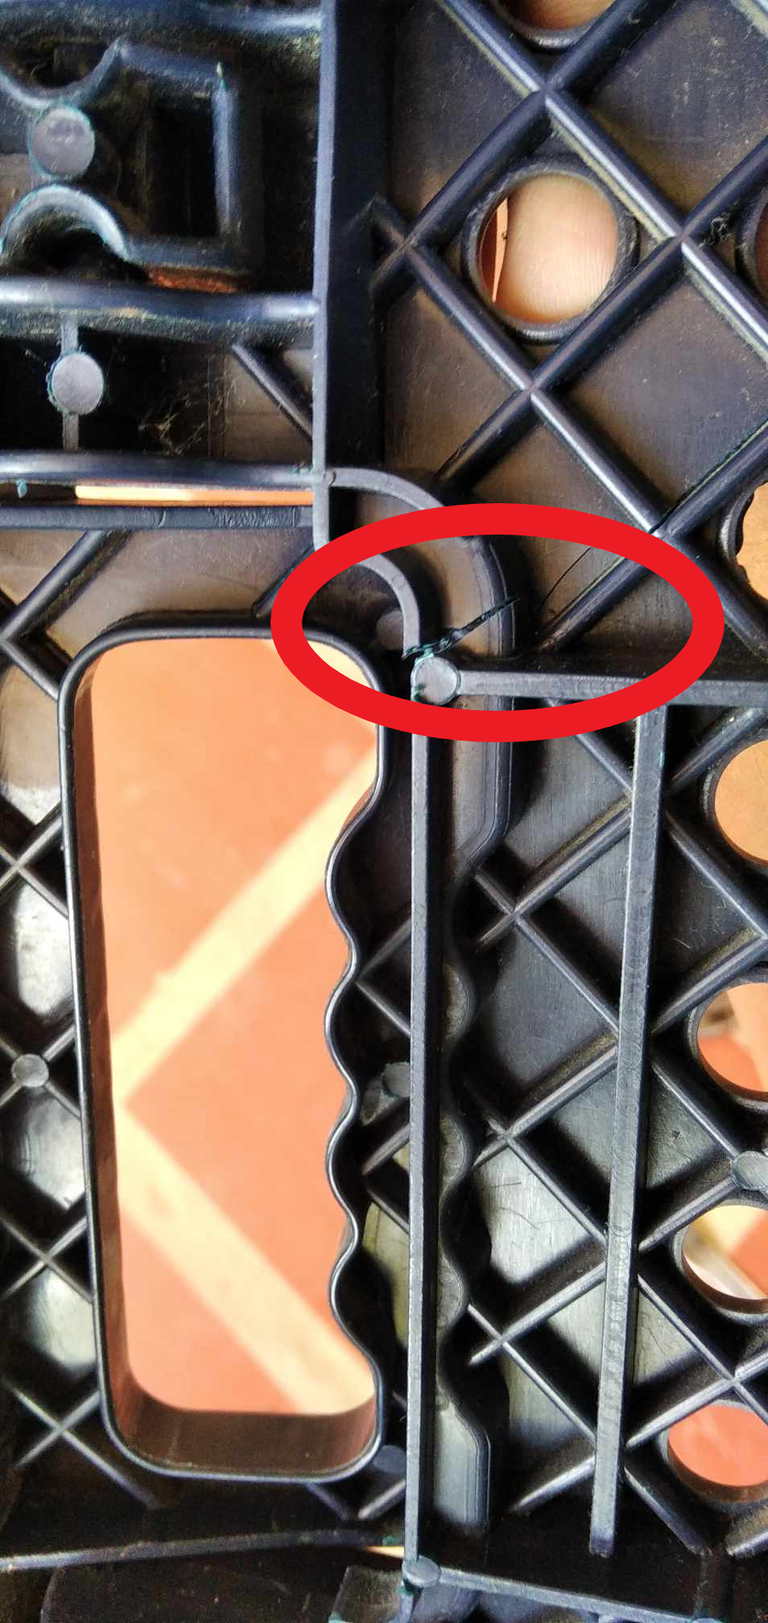
Como se puede apreciar en la imagen, la grieta se ha corrido a tal punto que puede agravarse inhabilitándola en su totalidad. Para evitar esto se necesita los siguientes implementos.
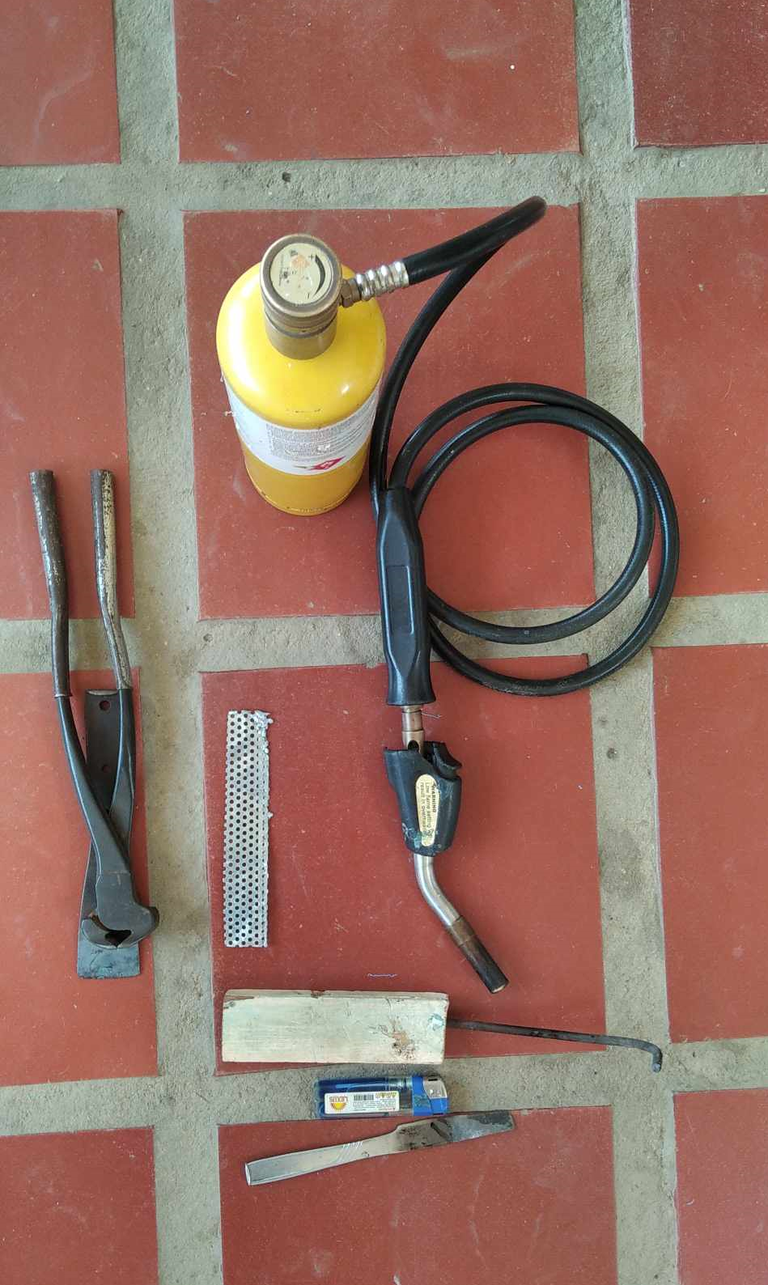
-1 Soplete.
-1 Espátula.
-Malla de acero con círculos pequeños.
-Yesquero.
-Una tenaza para cortar cabilla.

Paso 1: Moldear la malla de acero.
Como bien lo dice el título, este paso consta en darle forma a la malla, para ello se calcula que la misma pueda pasar por encima de la grieta, esto fue algo complejo ya que la superficie a tratar era de tipo irregular, sin embargo con la ayuda de la tenaza pude dar un molde lo más ajustado a la superficie, hay que tratar de ser lo más exacto posible, cabe recalcar la importancia de ello ya que el plástico del cual está hecho la silla no resisten altas temperaturas durante mucho tiempo.

Paso 2: Alizar la grieta y adherir la malla.
Este paso consta de escoger un objeto de metal en este caso una espátula, en la imagen diseñé este objeto compuesto de una cabilla puesta con un mango de madera, en todo caso haciendo uso del soplete encendido se procede a calentar la herramienta hasta alcanzar el calor suficiente para poder pasarlo por la silla y alisar la zona donde está la grieta, al alisar la zona se coloca la malla y en conjunto con la espátula y el calor del soplete puesto a cierta distancia de aproximadamente 20 cm, se hace presión, la intención es que el plástico pierda algo de solides y le permita que la malla se incruste.

No se debe hacer todo el proceso al incrustarse la malla, pegado en un extremo se deja enfriar el plástico hasta alcanzar la temperatura ambiente, se repite el mismo proceso varias veces para que toda la malla penetre en toda el área, esto es algo que toma paciencia y algo de delicadeza.

Mi padre al ver que estaba reparando la silla me sugirió echarle una resina compuesta por plástico derretido con gasolina, esto como un refuerzo, si el trabajo se hizo al pie de la letra no debería ameritar otra cosa, ya que la función de la malla es que unir el plástico y evitar que la tensión siga extendiendo la grieta, aquí estoy probando que tan bien quedó, todo bien, aguantó los 105 kilos que estoy pesando, ha pasado la prueba.

Esto ha sido todo por ahora, esta técnica la he aplicado en tanques de agua teniendo resultados exitosos, espero que la información haya sido de interés, de igual manera que les haya gustado el post.
English Versión.

Greetings Diyhub community, I hope you are well, today I come with to show how I could recover a plastic chair, which has a crack in the part of the innkeeper, damage that can be avoided by applying the following strategy.
)
As can be seen in the image, the crack has run to such an extent that it may worsen, disabling the crack in its entirety. To avoid this, the following implements are needed.
- 1 Blowtorch.
- 1 Spatula.
- Steel mesh with small circles.
- Tinder.
- A pliers to cut cabilla.
Step 1: Shaping the steel mesh.
As the title says, this step consists of shaping the mesh, for this it is calculated that it can pass over the crack, this was somewhat complex because the surface to be treated was irregular, however with the help of the pliers I could give a mold as tight to the surface, you have to try to be as accurate as possible, it is important to emphasize the importance of this because the plastic which is made of the chair does not withstand high temperatures for a long time.
Step 2: Smooth out the crack and adhere the mesh.
This step consists of choosing a metal object, in this case a spatula. In the image I designed this object composed of a rod attached to a wooden handle. In any case, using the lit torch, we proceed to heat the tool until it reaches heat. enough to be able to pass it through the chair and smooth the area where the crack is. When smoothing the area, the mesh is placed and together with the spatula and the heat of the blowtorch placed at a certain distance of approximately 20 cm, pressure is applied, the intention is that the plastic loses some solidity and allows the mesh to become embedded.
Do not do the whole process when embedding the mesh, glued at one end let the plastic cool to room temperature, repeat the same process several times so that all the mesh penetrates the entire area, this is something that takes patience and some finesse.
My father seeing that I was repairing the chair suggested me to pour a resin composed of melted plastic with gasoline, this as a reinforcement, if the work was done to the letter should not merit anything else, since the function of the mesh is to bind the plastic and prevent the tension continues to spread the crack, here I am testing how well it was, all well, withstood the 105 kilos I'm weighing, has passed the test.
This has been all for now, I have applied this technique in water tanks having successful results, I hope the information has been of interest, likewise I hope you liked the post.


