ESPAÑOL 🇪🇸
Hola a todos
por fin podemos jugar en el nuevo modo PRO en Rising Star, ya teníamos la posibilidad de conseguir las cartas PRO en el juego y ahora podemos ir al modo "Professional" y ponerlas a prueba. En caso de que aún no sepas como conseguir las cartas PRO aquí tienes un pequeño tutorial donde explico cómo hacerlo.
El objetivo de esta nueva modalidad de juego es sacar singles y obtener la mejor puntuación posible en los "CHARTS", en esto influye el número de miembros de la banda, las misiones "promote a single" que hayas hecho y los valores de tus cartas PRO. Pero vayamos paso a paso.
LAS CARTAS
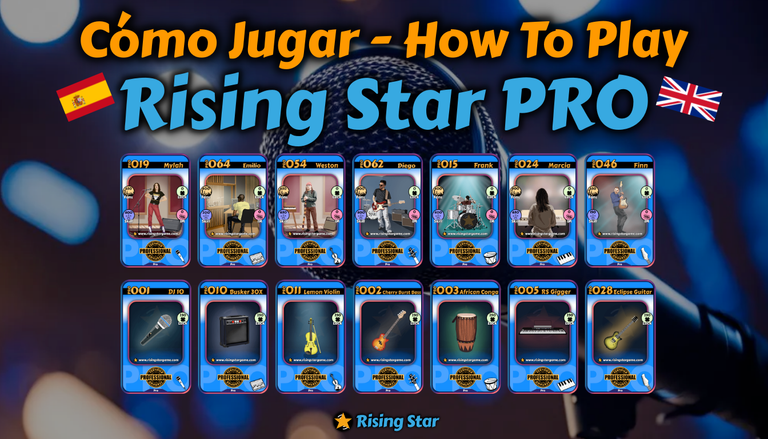
Las cartas PRO tienen algunas diferencias respecto a las normales, se pueden subir de nivel y además hay diferentes tipos, ya sea un personaje o un instrumento, tienen en la esquina inferior derecha indicado a cual corresponden, hay 7 tipos: Guitarra, Bajo, Batería, Orquestal, Producción, Canto y Teclados:


Esto significa que, a diferencia del modo normal, a la hora de crear la banda necesitamos asignar a los personajes los instrumentos correctos, es decir, si tu personaje es guitarra deberás asignarle siempre guitarras como instrumento.
LAS MISIONES
Ahora que ya sabemos cómo conseguir las cartas y sus características podemos acceder al nuevo mapa, debemos hacer click en la etiqueta "PROFESSIONAL" que se muestra en la imagen:
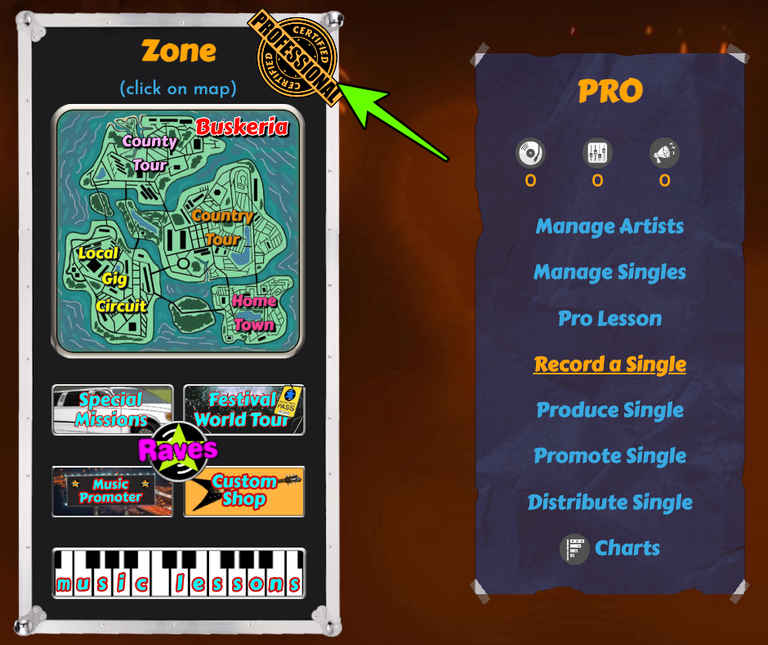
aquí podemos ver la misiones que podemos hacer y además gestionar la banda PRO y los "sencillos" (singles) que podremos grabar, pero antes de grabar debemos hacer lecciones PRO para obetener el nivel requerido.
Para poder grabar un single necesitamos que nuestras cartas lleguen como mínimo al nivel 10 haciendo lecciones PRO (PRO Lessons). Esta es otra cualidad nueva que poseen las cartas PRO, se pueden subir de nivel.
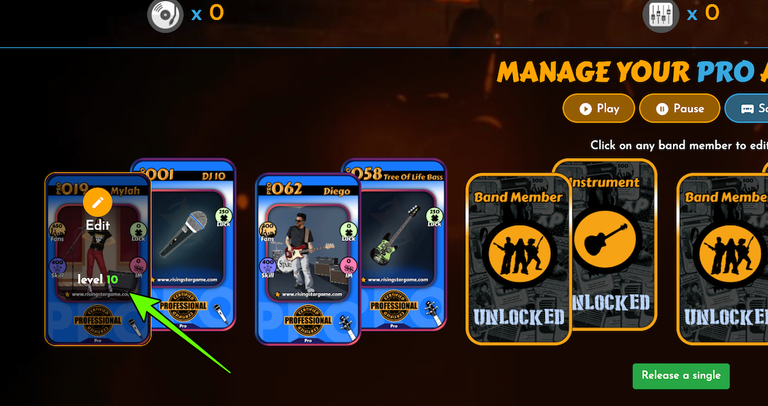
Para grabar necesitaremos al menos un personaje y un instrumento, la buena noticia es que al hacer la lección PRO subimos de nivel tanto el personaje como el instrumento que hayamos elegido. Una vez que tenemos al menos un personaje y un instrumento en nivel 10 tenemos que ir a "Manage Artists" y crear una banda, el metodo para crear la banda es igual que en modo normal, ahora bien, no olvides que el personaje debe llevar el tipo de instrumento que le corresponde. Ahora ya puedes hacer la misión "Record a Single".
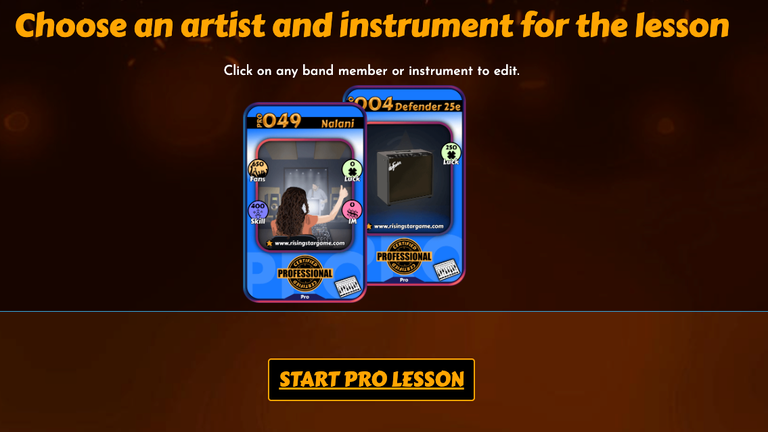

Es importante ponerle un nombre a la banda ya que se pueden crear múltiples formaciones, así será más fácil distinguirlas
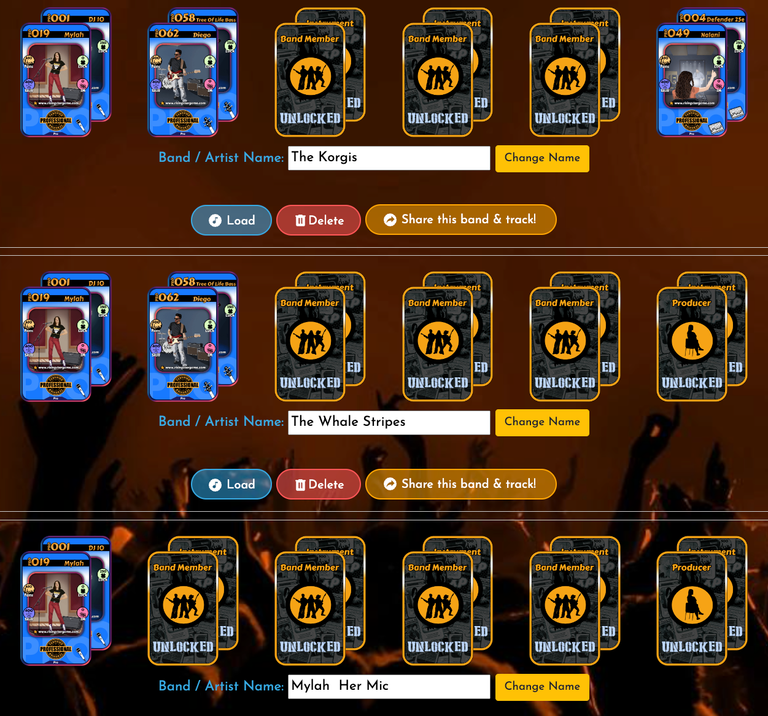
Si ya has terminado la misión "Record a Single" debes pasar a las dos siguientes, "Produce a Single" y "Promote a Single", esta última tiene coste (0,0005 STARPRO) y además es opcional, pero por cada una que tengas hecha añadirás 100 puntos a tu puntuación. Verás en el menú PRO tres indicadores que te dicen cuantas misiones tienes de cada: Record, Produce and Promote (a Single).
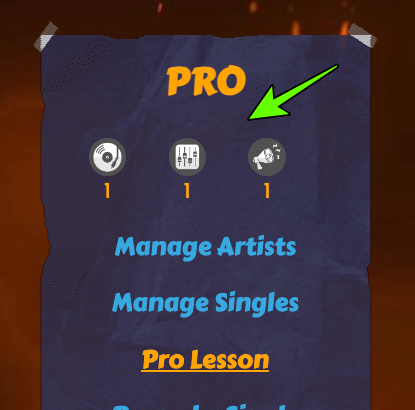
Una vez hecho todo lo anterior veremos que el indicador (foto arriba) va añadiendo las misiones, puedes acumularlas o bien lanzar el single en cuanto tengas una de cada, es el momento de ir a "Distribute a Single".
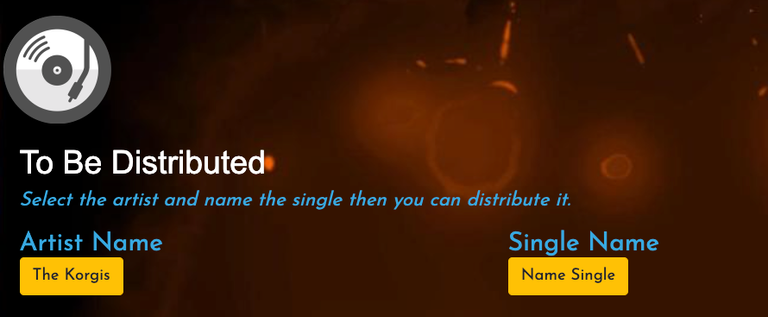
En "Distribute a Single" tendrás que elegir una banda que hayas creado y un título para la canción, que también se podrá escuchar en los "charts". Cuando hayas puesto el título haz click en el botón verde "Distribute a Single".

CHART
El CHART es la tabla de puntuación en la que veremos en qué posiciones quedan nuestros singles, las ganancias que nos corresponden y donde podremos escuchar las canciones.
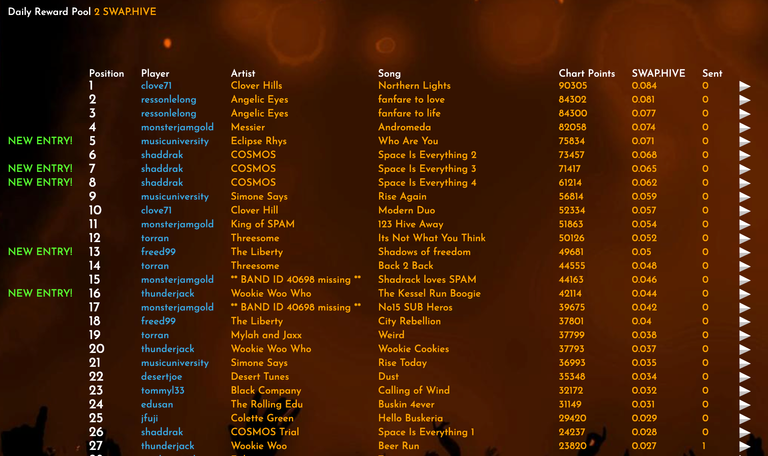
Así pues, una vez terminada la misión "Distribute Single" debemos ir a "Manage Singles" y enviarlo para que aparezca en los charts (Submit To Charts). Si tienes varios pendientes de sacar puedes lanzarlos como más te convenga. Primero le damos a "Release Single" y aparecerá una tabla con las puntuaciones y el botón verde "Submit To Charts".

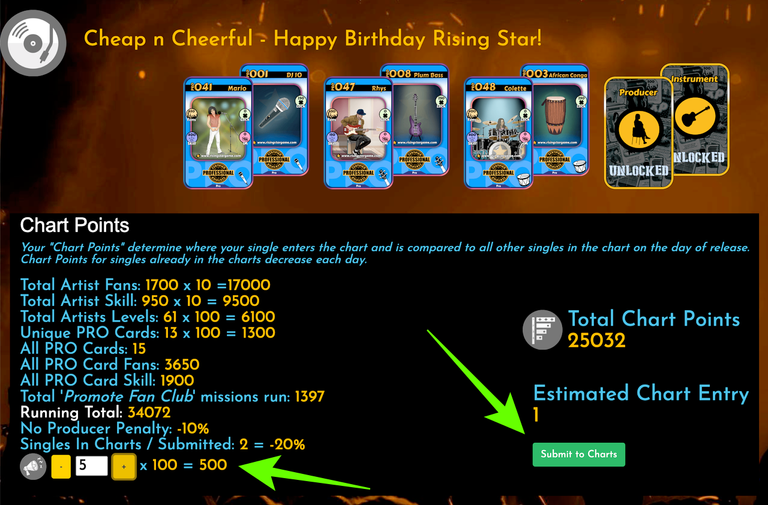
Como se puede ver en la imagen de arriba, antes de darle a "Submit To Charts" podemos ver cuantos puntos vamos a obtener y en base a que criterios. Como ya mencioné al principio influyen los valores de las cartas, las misiones "Promote a Single" que tengamos hechas, cada una añade 100 puntos, el nivel de nuestras cartas, el numero de miembros en la banda, el numero total de cartas PRO, el número de misiones "Promote Fan Club" que tengas hechas y también las penalizaciones, hay una por no tener productor (producer) y otra por subir muchos singles. Verás también el "Estimated Chart Entry" con un número debajo, que te dice, en base a los singles que ya hay en el chart, en qué posición quedaría el tuyo. Recuerda que si haces más "Promote Single" añades 100 puntos por cada una que hagas y la misión es de solo cinco minutos.
Los singles aparecerán en los charts al día siguiente, con un funcionamiento parecido al del ranking general, es decir, hay un pool de HIVE (actualmente no muy elevado ya que aun sigue en modo prueba) que se reparte entre los participantes. El pool de HIVE se reparte diariamente entre los 100 mejores singles.
Espero que este tutorial haya sido de utilidad y os animéis a jugar a Rising Star PRO.
Saludos
Billy

ENGLISH 🇬🇧
Hello everyone
We can finally play in the new PRO mode in Rising Star, we already had the possibility of getting the PRO cards in the game and now we can go to the "Professional" mode and put them to the test. In case you still don't know how to get the PRO cards here is a small tutorial where I explain how to do it.
The objective of this new game mode is to get singles and obtain the best possible score in the "CHARTS", this is influenced by the number of members of the band, the "promote a single" missions that you have done and the values of your PRO cards. But let's go step by step.
THE CARDS
The PRO cards have some differences from the normal ones, they can be leveled up and there are also different types, whether it is a character or an instrument, they have an indication in the lower right corner to which one they correspond to, there are 7 types: Guitar, Bass, Drums , Orchestral, Production, Singing and Keyboards:


This means that, unlike normal mode, when creating the band we need to assign the correct instruments to the characters, that is, if your character is a guitar player you must always assign guitars as an instrument.
THE MISSIONS
Now that we know how to get the cards and their characteristics, we can access the new map, we must click on the "PROFESSIONAL" label shown in the image:

Here we can see the missions that we can do and also manage the PRO band and the "singles" that we can record, but before recording we must do PRO lessons to obtain the required level.
In order to record a single we need our cards to reach at least level 10 by doing PRO Lessons. This is another new quality that PRO cards have, they can be leveled up.

To record we will need at least one character and an instrument, the good news is that by doing the PRO lesson we level up both the character and the instrument we have chosen. Once we have at least one character and an instrument at level 10 we have to go to "Manage Artists" and create a band, the method to create the band is the same as in normal mode, but do not forget that the character must carry the type of instrument that corresponds to it. Now you can do the "Record a Single" mission.


It is important to give the band a name since multiple formations can be created, this way it will be easier to distinguish them

If you have already finished the mission "Record a Single" you must move on to the next two, "Produce a Single" and "Promote a Single", the latter has a cost (0.0005 STARPRO) and it is optional to do it, but for each one you have done you will add 100 points to your score. You will see in the PRO menu three indicators that tell you how many missions you have of each: Record, Produce and Promote (a Single).

Once all the above is done we will see that the indicator (photo above) is adding the missions, you can accumulate them or launch the single as soon as you have one of each, it is time to go to "Distribute a Single".
When you click on "Distribute a Single" you will have to choose a band that you have created and a title for the song, which can also be listened on the charts. Once you have done it click on "Distribute a Single", the green button.


CHART
The CHART is the score table in which we will see what positions our singles are in, the earnings that correspond to us and where we can listen to the songs.

So, once the "Distribute Single" mission is finished, we must go to "Manage Singles" and send it so that it appears on the charts (Submit To Charts). If you have several pending, you can launch them as best suits you. First we click on "Release Single" and a table will appear with the scores and the green "Submit To Charts" button.


As you can see in the image above, before sending the single we can see how many points we are going to obtain and based on what criteria, as I already mentioned at the beginning, the points are influenced by the values of the cards, the number of members in the band, the total number of PRO cards, the "Promote a Single" missions that we have done, each one adds 100 points, the level of our cards, total "Promote Fan Club" missions done and also the penalties, there is one for not having a producer and another for uploading many singles. You will also see the "Estimated Chart Entry" with a number below, which tells you, based on the singles already on the chart, where yours would be. Remember that if you do more "Promote Singles" you add 100 points for each one you do and the mission is only five minutes.
The singles will appear on the charts the next day, with a functioning similar to that of the general ranking, that is, there is a pool of HIVE (currently not very high since it is still in test mode) that is distributed among the participants. The HIVE pool is distributed daily among the top 100 singles.
I hope this tutorial has been useful and you are encouraged to play Rising Star PRO.
Greetings
Billy
Find @stickupboys on HIVE
You should visit them to listen their awesome music and enjoy their funny GIFs!
