You can now set up your own Hive front end using the new Break Away communities from the team at the @spknetwork. These communities utilize the @ecency framework with your own Hive community to easily create your own Hive front end, all it takes is a domain, cheap web server with some setup, and of course, a Hive community!
In this post I am going to go over the steps I took, from scratch to create the BlockTunes Social community front end for the @blocktunes music project!
You can also check out the original guide from @psorigins, but this goes into a bit more detail.
Step 1 - Start A Hive Community
This part is simple and only costs 3 $HIVE to create a community. For this example, I will be using Peakd.com to create the community.
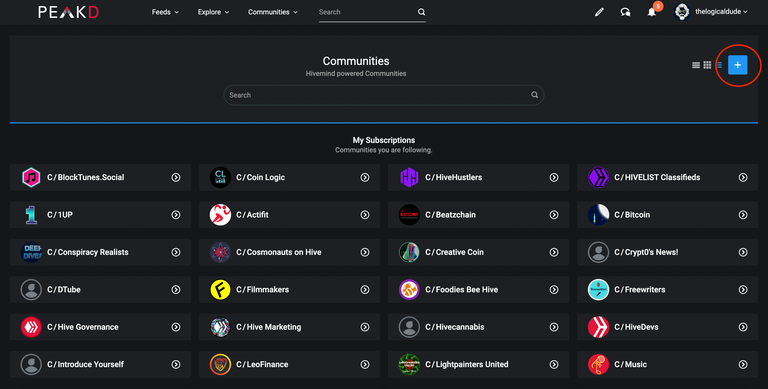
On the communities page on Peakd, you will see a list of communities on Hive as well as the button to create a new community. Creating a community is similar to creating a Hive account.
Once you click the plus button, you will see the following page, this is where you will chose the name of your community and you will see the private keys for that community. You will need to make sure to download the private keys in the given text file, and then secure them in a safe location.
Once you have the community created, it may take a minute or so for peakd to get everything set up in the background.
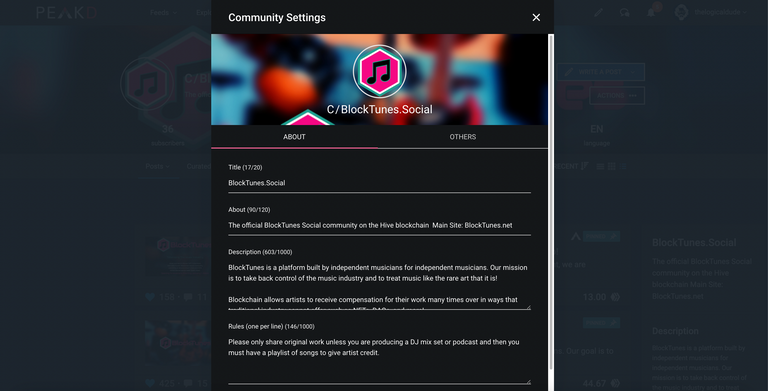
Once it is ready you will be able to make setting changes to your community, add images, description, rules, etc, just like a regular Hive account.
So now that you have your community created, you will need the 'hive-12345' number that came with your community. This is what you will need when you go through the front end setup. In the case of BlockTunes.Social, the hive community number is hive-176363.
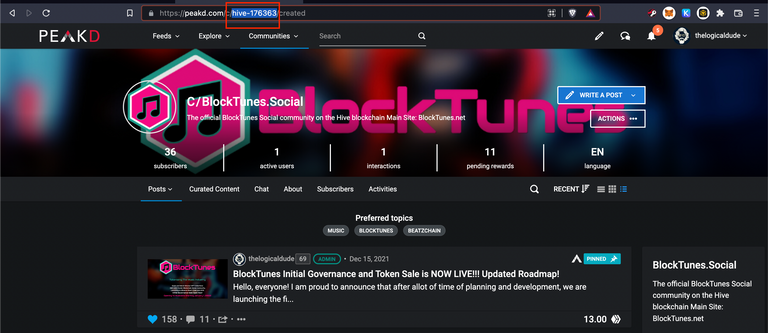
You are finished on this side for now. Keep that community number handy for later.
Step 2- Get a VPS or Server Setup with IPv4
You can use a variety of different hosts to accomplish this task. You will need to get a server setup that will allow you to log in using an IP address.
Privex.io is what was used in the original video, but their lower priced webbox that was used in the guide is out of stock, so I am using another VPS host, Linode.com to set up. They have a $5 per month server that is perfect for this operation.
The original guide was created using Debian OS for Linux, so I stuck with that.
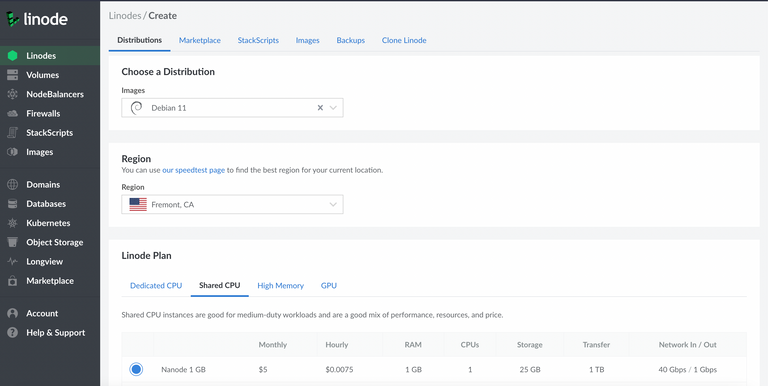
Once you order your server, you will then get the credentials needed to sign into your terminal using SSH. Linode makes it easy to access this information where you can just copy and paste it into your terminal.

You will set the name of the server and password when you are ordering it. Now that is all done, you will move along to the next step...
Step 3- Buy A Domain
Next step is to purchase a domain for your community. You can do this on services like GoDaddy.com or Namecheap.com, which is what I am using these days to buy my domains.
Once you find the perfect domain and purchase it, you will then need to go in and set your DNS settings to point your domain to your new server you just created. I found it easier to get this all set up first before starting the front end setup.
Using Namecheap, but it's pretty similar across all domain registration companies, you will need to go to your DNS settings. In Namecheap, you will then need to go to the Advanced DNS to add a record. Most registrars just give you the option to change the nameservers in the base settings, so that is why you may need to look for advance settings.
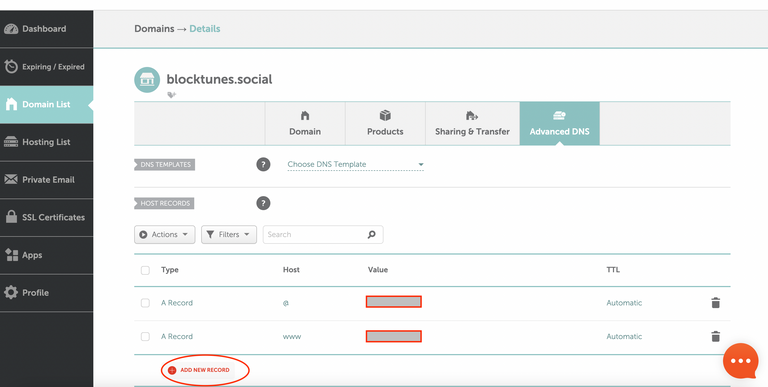
When you get started, you will not have any records. What you see is in this image is what you need to set up. I have hidden the active IP address for security.
You will Add New Record, then set up 2 A records. One using the '@' symbol as the host, with the IP address of your server as the Value. This is your root file
The second A record needs to be www as the host and then your server's IP address as the value. This is the www subdomain. You can set it up using a subdomain of an already existing domain as well.
Once that is set up, you are done there and the next step is to get into the terminal and get our hands dirty there.
Step 4 - Setting Up The Server
Before you can get the front end setup, you will need to first install some dependencies on your server for it to operate properly.
Again,in the original guide they used Privex Web Box which has allot of this already setup, but since we are starting from scratch, you will need to walk through these steps.
Open Your Terminal And Sign In To Server
You will need to locate the terminal program on your computer. I am on a Mac so I will just search for the Terminal program, it should be the same on Windows as well.
Once you have your Terminal open, you will go to your server and copy the ssh address and paste it into your terminal to sign in.

You can also just enter:
ssh root@YOURIPADDRESS then hit enter
You may be prompted to save the IP address into your system as it is the first time you have accessed it. Hit Y and continue.
Then you will enter the server password you set when you set up the server.
Once you are into your server, then you can proceed with installing the dependencies.
You can check to see if you server package came with some of these dependencies by checking the versions.
git --version
docker --version
docker-composer --version
These would be the main ones to look for by default. If they are not on your server, then continue with the following steps.
Install Git
First step is to install Git by entering the following commands:
First you want to make sure your system is up to date.
sudo apt update
Then once that process is finished, you will install Git:
sudo apt install git
You will be prompted to continue and verify the space usage.
Once that process is complete, you can verify Git installed by checking the version:
git --version
If you see an output with a version, you know you did it correctly.
Install Docker
This process got a little involved. I used this guide to help me along the way. I am also listing the steps below with images from the guide...
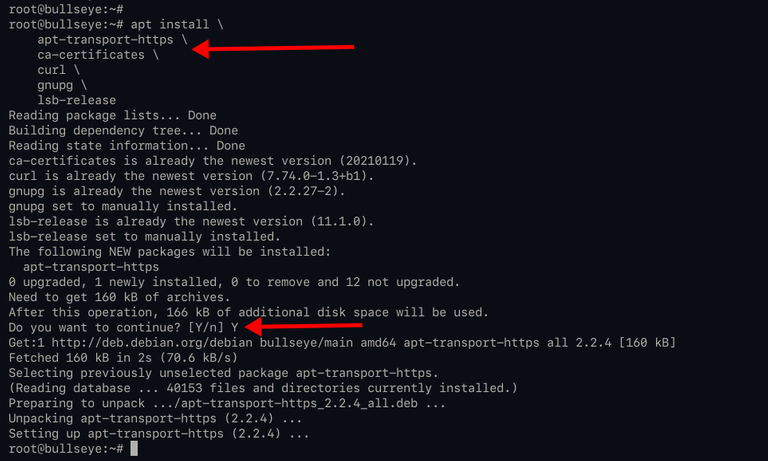
First start with the following command to install some dependencies that Docker needs to run:
apt install \
    apt-transport-https \
    ca-certificates \
    curl \
    gnupg \
    lsb-release
You will need to enter Y when prompted...
Next you will execute the following command to add the GPG key for Docker:
curl -fsSL https://download.docker.com/linux/debian/gpg | sudo gpg --dearmor -o /usr/share/keyrings/docker-archive-keyring.gpg
After that, add the Docker repository for Debian 11 system using the command below.
echo \
 "deb [arch=amd64 signed-by=/usr/share/keyrings/docker-archive-keyring.gpg] https://download.docker.com/linux/debian \
 $(lsb_release -cs) stable" | sudo tee /etc/apt/sources.list.d/docker.list > /dev/null
Now run the 'apt update' command to update/refresh all available repositories.
apt update
Now you're ready to install Docker to Debian 11...
Being that we have never installed Docker before, we do not need to remove old versions so to install Docker for the first time, enter the command:
apt install docker-ce docker-ce-cli containerd.io
Type 'y' and press 'Enter' to confirm the installation.

If the installation is complete, execute the following command to verify the installation...
- Check whether the service is enabled or not.
systemctl is-enabled docker
systemctl is-enabled containerd
Check Docker and Containerd service status.
systemctl status docker containerd
Below is the output you will get, well at least similar...
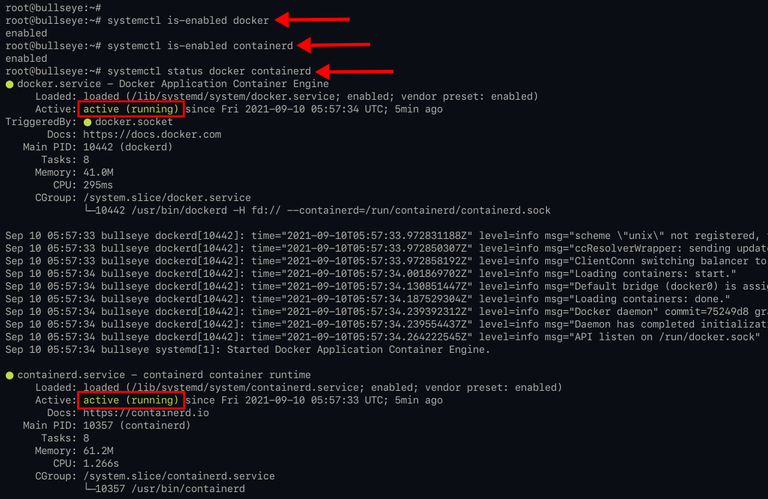
As seen, the Docker and Containerd services are active (running), and both services are enabled and will run automatically at system startup.
Install Docker Composer
Now that you have Docker installed, you will need to install the Docker Composer dependency. You can easily do this by entering the following command in your terminal:
curl -SL https://github.com/docker/compose/releases/download/v2.5.0/docker-compose-linux-x86_64 -o /usr/local/bin/docker-compose && sudo chmod +x /usr/local/bin/docker-compose
You will need to click Y when prompted to verify storage usage.
You can verify if it is installed by running the verify command
docker-composer --verify
You will get an output with a version if done correctly.
Install Nginx
Nginx is a popular web server that can be used as a reverse proxy and load balancer for your servers. It can also work as a standalone server or in conjunction with another application server. In order to make use of its functionality, we need to first install it. You need this to install the front end files from SPK Network.
Simply run the following command to install Nginx:
sudo apt install nginx -y
The process will look something like this:
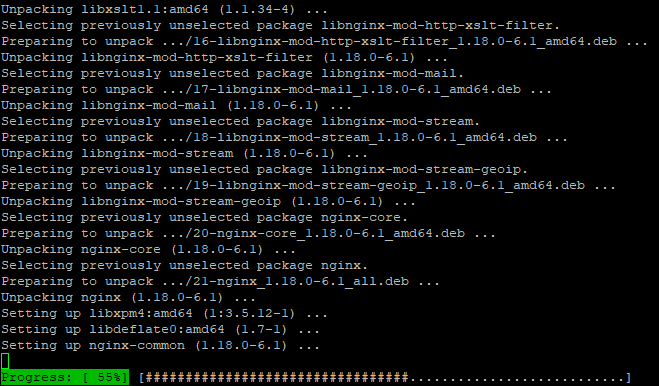
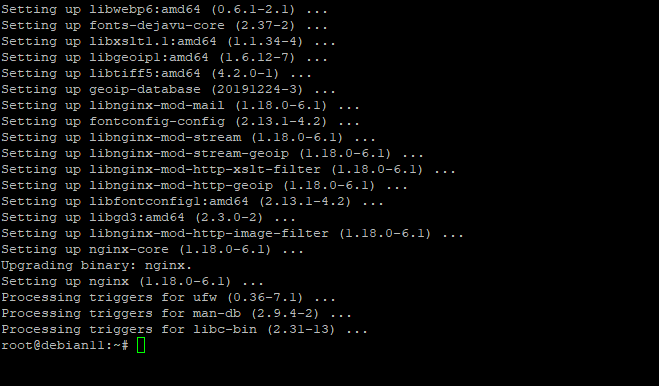
Once complete you can verify the installation by running the following command:
sudo systemctl status nginx
Install Certbot
Certbot allows you to set up a secure connection for your domain. This sets up the secure https for your domain.
First you have to install a dependency to allow you to install Certbot, called Snapd and Snapd core. To do this, enter the following commands:
First:
sudo apt install snapd
Then:
sudo snap install core
Once Snapd is installed, then install Certbot:
sudo snap install certbot --classic
And that part is complete.
Install Node.JS
The last step to the server setup process is installing Node.js. This runs the CLI for the Hive front end.
Install Node.JS and NPM by using the command below:
sudo apt install nodejs npm
You may be prompted to his Y for space usage, but other than that, that's it. Setup is complete. Now it's time for the fun stuff!
Step 5- Setting Up Your Hive Front End
This is really the easiest part of the process. First you will need to enter the admin portion by entering the following command:
sudo -i
In my case I didn't really see anything happen just gave me another space for another command.
That is when I took the next step of downloading the script to create the community. This happens by entering the following command, This is where you needed Nginx:
npx @spknetwork/community-create
Once you run this, you will then be prompted to enter your Hive community ID. This was that number that I told you to remember, in the case of BlockTunes Social, it is hive-176363. You enter the number then click 'Enter'.
In the next step you are asked to enter tags to be displayed in your community. You enter them with a comma in between (NO Spaces). For example: blocktunes,music,beatzchain
The next step is when you enter your domain names. You will enter both the base domain and or subdomain. For example, with a base domain, you would use both domain and www:
blocktunes.social,www.blocktunes.social
Then you hit 'Enter'. It goes through some processing steps and creates some files for you. Once you have done this, then you are pretty much done, except for the last step...
Step 6- Set Up Secure Domain With Certbot
This is the last part of the setup, setting up HTTPS. To do this enter the following command, and replacing the example.com with your own domain.
sudo certbot --nginx -d example.com -d www.example.com
In our case it was
sudo certbot --nginx -d blocktunes.social -d www.blocktunes.social
Hit 'Enter' and you will then get a notice that should say your domain is secured with HTTPS!
If you see that, then you are DONE!
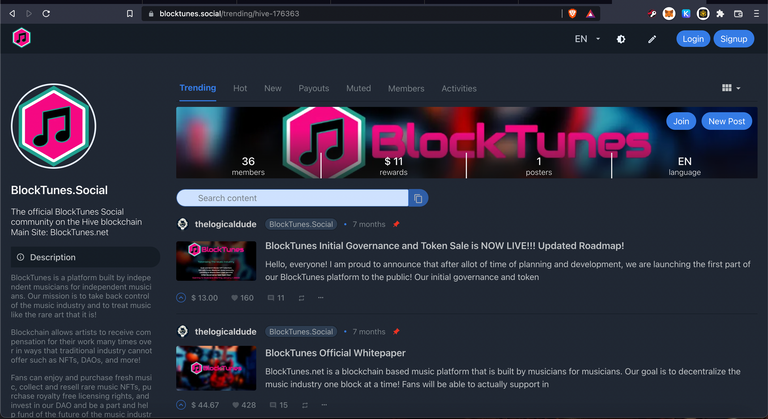
You now just need to go visit your newly set up domain and see your Hive break away community in all it's glory!!! If you already have a Hive community setup with content, you will then see the contents of that existing community as well as the description, rules, and images you set up earlier!
Congratulations!
You now have your own Hive front end for the grand total of the cost of the domain and the $5 a month for the Linode server, or whatever server you want to use, as long as it is IPv4 enabled!
Thanks to the @spknetwork for making this happen!
Be Cool, Be Real, and always Abide!
Support The Logical DAO
If you want to support the efforts of The Logical Dude and his projects that come out of The Logical Labs, you can support by purchasing a special NFT directly from the site using pHBD on Polygon! These funds are used to fuel the income engine in The Logical DAO
https://thelogicaldude.com/nfts
https://thelogicaldude.com/dao
The Logical Labs Projects
https://hivelist.io - Classifieds, NFTs, DEFI Pool, Online Retail
https://HiveHustlers.com - Community for Entrepreneurs and All Around Hustlers
https://coin-logic.com - Live crypto market data, news, and research
https://blocktunes.net - Music NFTs, DAO, Downloads, and more
https://groovelogic.audio - DJ/Producer/Sound Engineer music and services
https://weedcash.org - The Highest Form of Social Media
Video Channels
View my channel on 3speak.tv! Video platfrom for a free speech society!
https://3speak.tv/user/thelogicaldude
But if you must... here is the YouTube channel link:
https://www.youtube.com/channel/UCtGApfTp4ZzLHksDdImJ9JA
Other Ways To Support
If you like what I am doing, please consider voting for my Hive Engine witness with your staked WORKERBEE!
https://tribaldex.com/witnesses
Get started playing Splinterlands, the top blockchain game in the world, today!
https://splinterlands.com?ref=thelogicaldude


 -
- 


