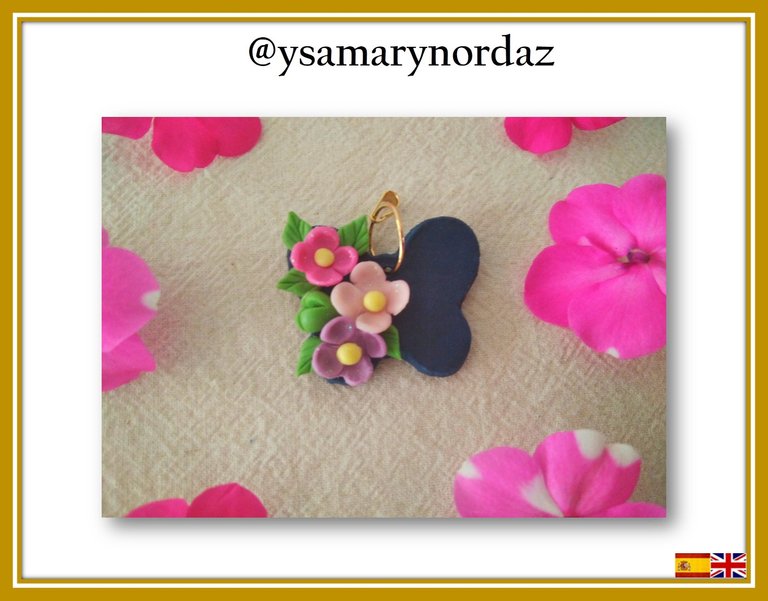
Hola amigos de esta gran comunidad de #jewelry. Cuando hablamos de accesorios de bisutería para las niñas existen infinidades de opciones tales como: zarcillos, pulseras, peinetas, dijes, entre otros. El día de hoy quiero mostrarles un paso a paso muy sencillo de cómo realizar un dije hecho con masa flexible en forma de mariposa y decorado con flores y hojas. Trabajar con masa flexible es fascinante ya que, utilizando cortadores y modelando piezas puedes crear hermosos accesorios de bisutería. A continuación, te presento el siguiente paso a paso. ¡Vamos a comenzar!
Hello friends of this great community of #jewelry. When we talk about jewelry accessories for girls, there are countless options such as: earrings, bracelets, combs, charms, among others. Today I want to show you a very simple step by step on how to make a pendant made with flexible clay in the shape of a butterfly and decorated with flowers and leaves. Working with flexible clay is fascinating because, using cutters and modeling pieces, you can create beautiful jewelry accessories. Here is the next step by step. Let's get started!

Materiales:
•Masa flexible de colores: azul oscuro, verde claro, rosado, fucsia, morado y amarillo
•Crema humectante
•Pega blanca
•Rodillo
•Esteca de cuchilla
•Bolillo metálico grande y pequeño
•Cortador en forma de mariposa
•Cortador en forma de hoja
•Pinza
•1 aros de bisutería dorados
•Porta dije
•Pincel
•Gel escarchado
Materials:
•Flexible clay colors: dark blue, light green, pink, fuchsia, purple and yellow
•Moisturizing lotion
•White glue
•Rolling pin
•Pottery clay cutter
•Metallic ball small and big
• Butterfly cutter
• Leaf cutter
•Plier
•1 jewelry ring
•Pendant holder
•Brush
• Frosty gel
Paso 1
Toma la masa de color azul oscuro y colócala sobre la superficie, con la ayuda del rodillo extiéndela. Una vez extendida, coloca el cortador en forma de mariposa sobre la masa (coloca en tus manos un poco de crema humectante para que sea más fácil trabajar con la masa).
Step 1
Take the dark blue clay and place it on the surface, with the help of the rolling pin, roll it out. Once rolled out, place the butterfly cutter on top of the clay (put some moisturizing cream on your hands to make it easier to work with the clay).

Paso 2
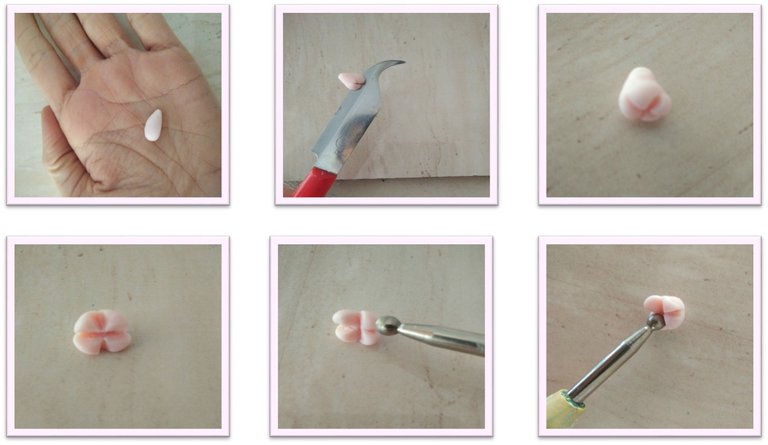
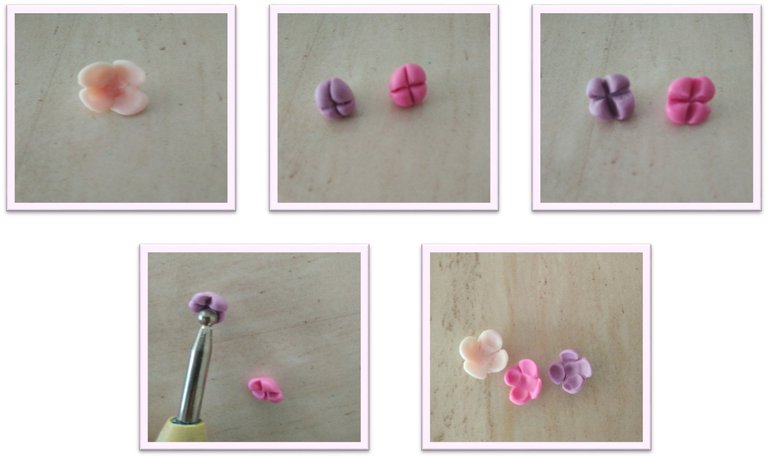
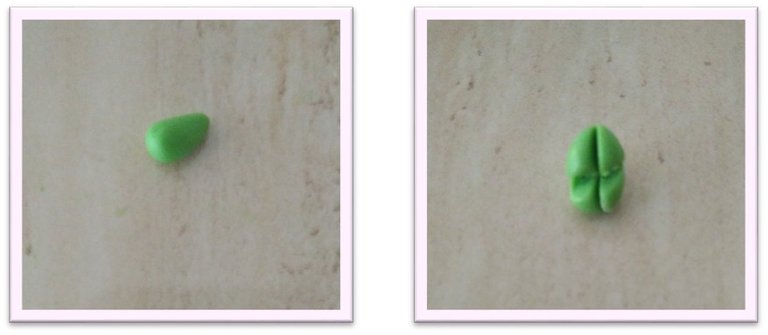
Para realizar las flores primero toma la masa de color rosado y forma un capullo. Luego, con la ayuda de la esteca de cuchilla realiza un corte en cruz como se observa en la imagen. Seguidamente, abre un poco las cuatro partes, que conformarán los pétalos. Ahora, toma el bolillo grande y, suaviza las puntas de los pétalos. Realiza el mismo procedimiento con la masa de color fucsia y morado.
Step 2
To make the flowers, first take the pink clay and form a bud. Then, with the help of the cutter, make a cross cut as shown in the image. Next, open the four parts a little, which will make up the petals. Now, take the large metallic ball and smooth the tips of the petals. Perform the same procedure with the fuchsia and purple clay.
Paso 3
Colócales a las flores en el centro una pequeña bolita hecha con masa de color amarillo.
Step 3
Place a small ball made of yellow clay in the center of the flowers.

Paso 4
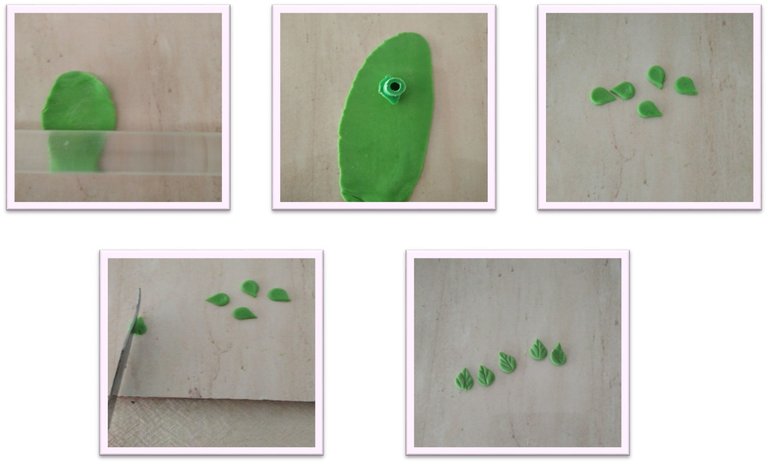
Con la ayuda del rodillo extiende la masa de color verde. Luego, coloca el cortador en forma de hoja sobre la masa para así, cortar 5 hojas. Seguidamente, con la ayuda de la esteca de cuchilla, ve marcando las nervaduras de las mismas. Ahora, vuelve a tomar la masa de color verde y forma un capullo y realiza el mismo procedimiento que realizaste en el paso 2, solo hasta marcar el capullo en cruz.
Step 4
With the help of the rolling pin, spread the green clay. Then, place the leaf-shaped cutter on the clay to cut 5 leaves. Next, with the help of the knife stem, go marking the ribs of the same. Now, take the green clay again and form a bud and perform the same procedure you did in step 2, only until you mark the bud in a cross.
Paso 5
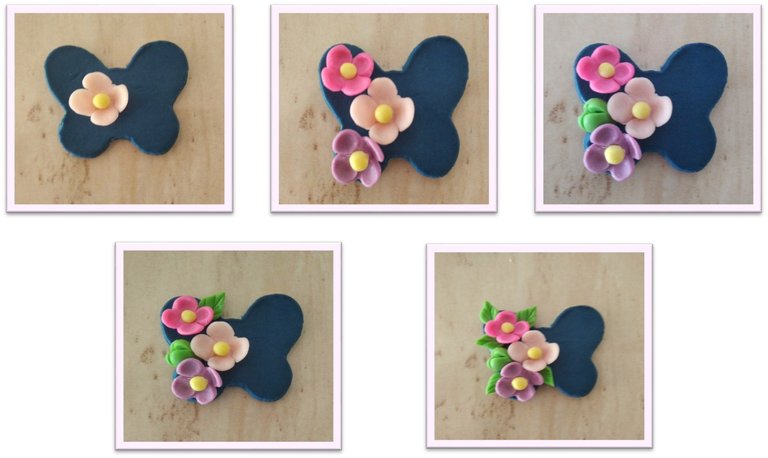
Para decorar la mariposa coloca un poco de pega en las flores y pégalas como se observa en la imagen. Luego, ve pegando las hojas distribuyéndolas alrededor de las flores.
Step 5
To decorate the butterfly, place a little glue on the flowers and glue them as shown in the image. Then, go gluing the leaves, distributing them around the flowers.
Paso 6
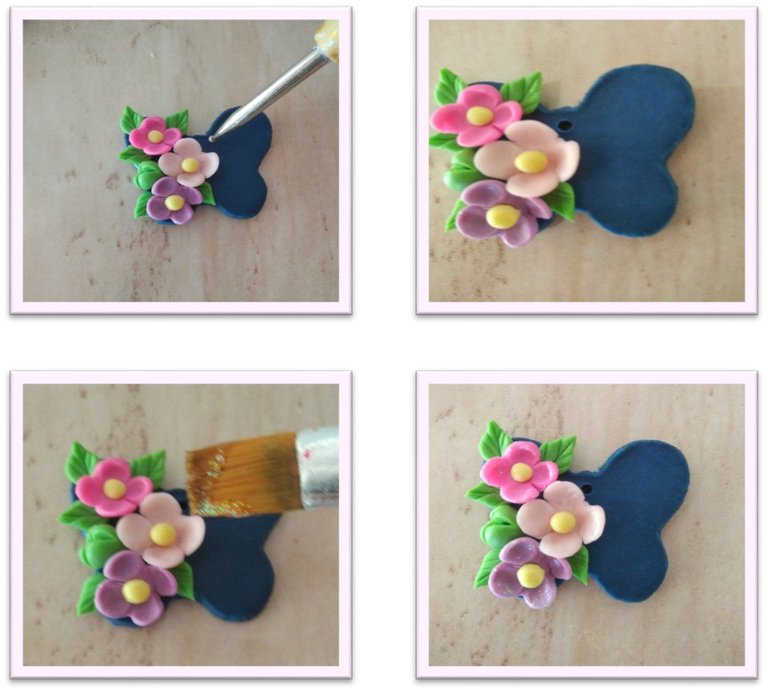
Toma el bolillo pequeño y abre un orificio en la parte superior de la pieza. Para que las flores se vean aún más lindas, aplícales con el pincel el gel escarchado.
Step 6
Take the small metallic ball and make a hole in the top of the piece. To make the flowers look even prettier, apply the frosty gel to them with the brush.
Paso 7
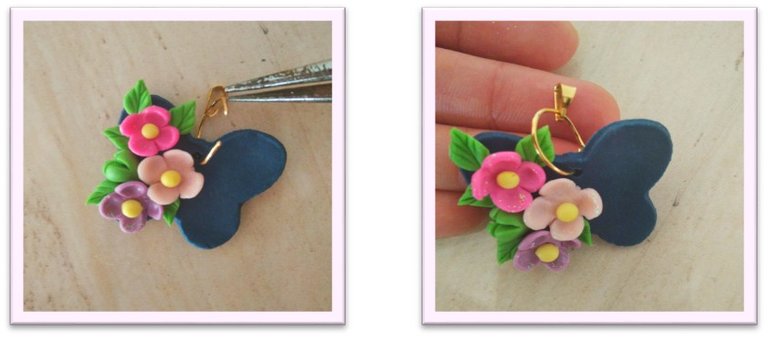
Para colocar el porta dije, te recomiendo que la pieza esté seca. Introduce el anillo con el porta dije por el orificio y, con ayuda de la pinza ciérralo.
Step 7
To place the pendant holder, I recommend that the piece is dry. Insert the ring with the pendant holder through the hole and, with the help of the pliers, close it.
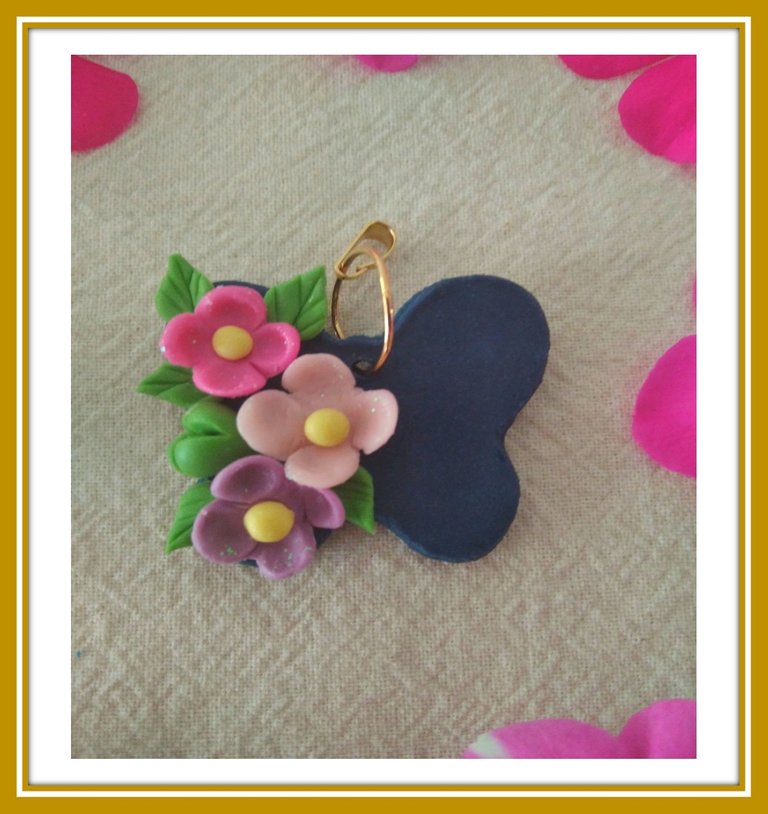
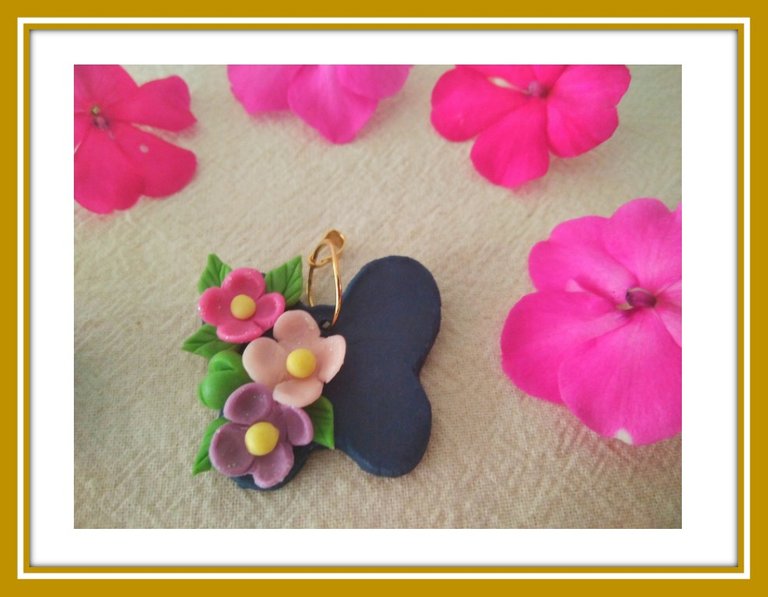
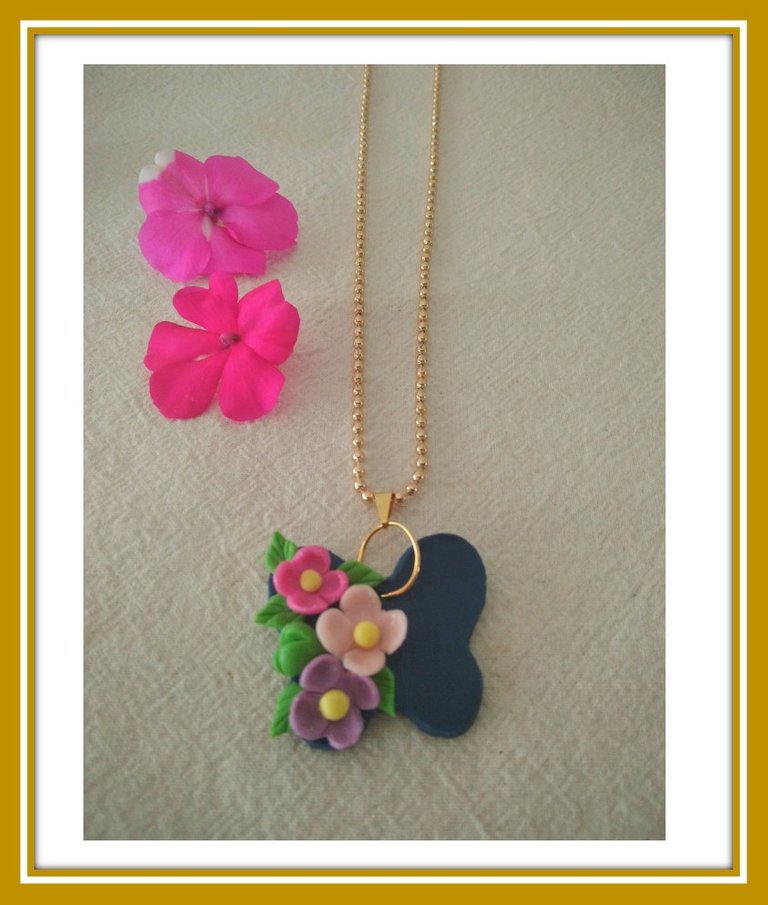
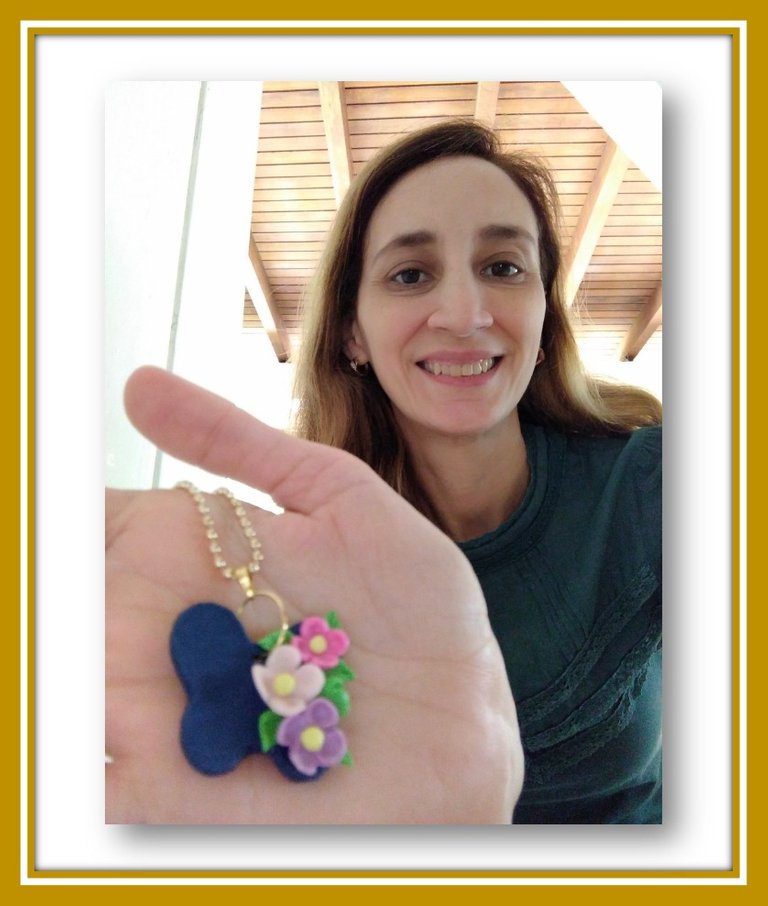
El dije de mariposa está terminado y, me ha gustado mucho como se ve. Utilizando el color azul oscuro como base hace que resalten los colores de las flores. Esta es una excelente opción para dar como regalo a las niñas que les encanta este motivo de mariposa y flores. Espero les haya gustado este paso a paso y se animen a realizarlo. ¡Hasta una próxima oportunidad!
The butterfly pendant is finished and I really liked how it looks. Using dark blue as a base makes the colors of the flowers stand out. This is an excellent option to give as a gift to girls who love this butterfly and flower motif. I hope you liked this step by step and are encouraged to do it. See you soon!
Las fotografías fueron tomadas por mí con mi teléfono celular Redmi Note 8.
Utilicé el programa Microsoft Power point
Traducción: Google Translation
The images were taken by myself with my Redmi Note 8 cell phone.
Translation: Google Translation
I used the program Microsoft Power point


