Heeeyho Readers! Lat's talk about transmissions!
Today I wanna talk about transmissions. The mailman has just delivered the last tiny bits for the monster-cross, meaning the transmission is now complete. There's a lot to a bicycle transmission to take into account that a lot of us forget when building a bicycle from scratch. I'm here to elucidate, hopefully.
This project's bicycle came out originally with a 21-speed groupset — 18 and 21-speed mountain-bikes were pretty much standard in the late 80's, 90's and beyond. Setups were, as we call, three-by-six or three-by-seven, meaning bicycles had 3 chainrings at the front and six or seven sprockets at the back; 24 and 27-speed bikes came out later.
Without getting into details, there are advantages and disadvantages of having three-by groupsets, hence, most recent mountain-bikes are coming out with one-by transmissions. There's a single chainring at the front and a combination of sprockets at the back, ranging from 8 speed all the way up to 12. Such setup eliminates the front derailleur and simplifies the transmission system a lot.
Because I already had a 11-speed groupset laying around (shifter, derailleur and rear cassette), converting the monster-cross from three-by-seven to one-by-eleven seemed the way to go. It's just a matter of putting the puzzle together.
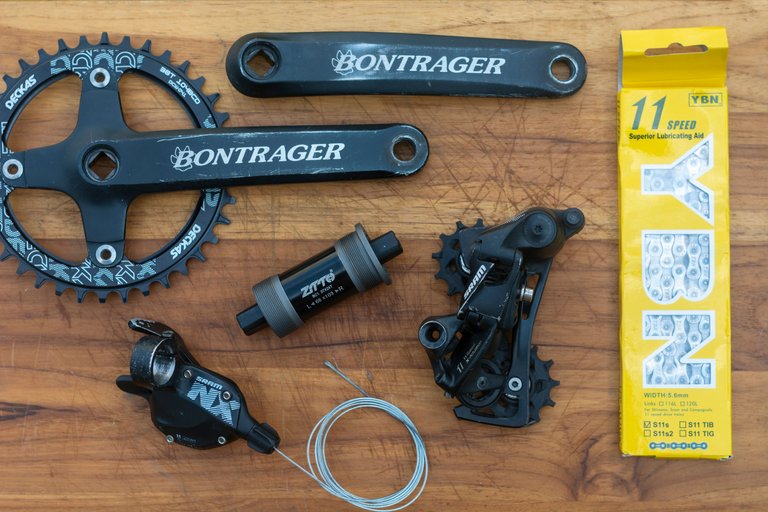
A groupset, however, is not only made up of a shifter, derailleur, and cassette; there's the chain, crank arms, bottom-bracket and chainring too. All these parts need to match and align perfectly to guarantee smooth gear changes.
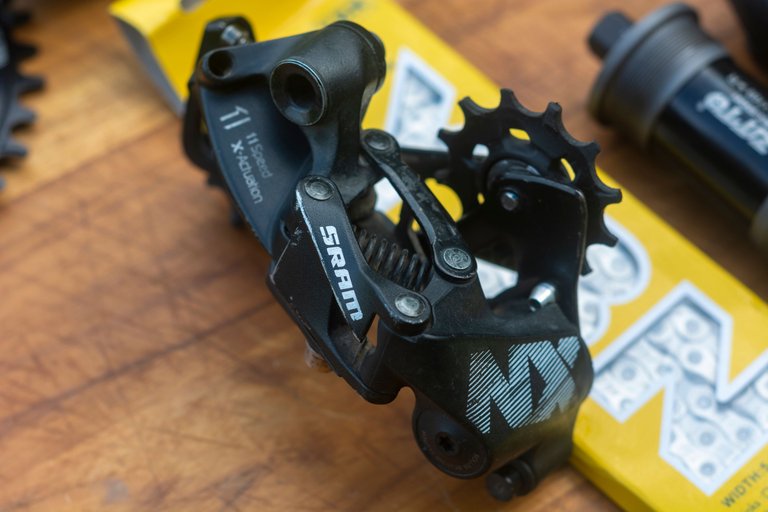
The simplest matching parts are the shifter and derailleur. Both need to match, otherwise gear changes won't happen. Each click on the shifter pulls the cable precisely enough to ensure one gear change, so we have to use the correct shifter for the derailleur (same gear numbers, same brand). In our case, we have a 11-speed shifter for a 11-speed derailleur.

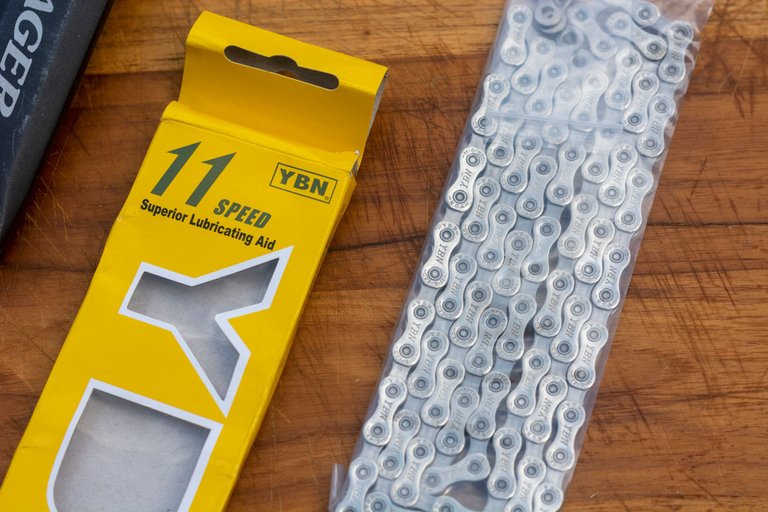
Next comes the chain. A bicycle chain needs to match the groupset because, the higher the gears, the thinner the chain (rear cog spacing gets narrower on 9, 10, 11 and 12 speeds). Original Sram 11-speed chain was quite expensive, so I ordered this YBN — great price and reviews.
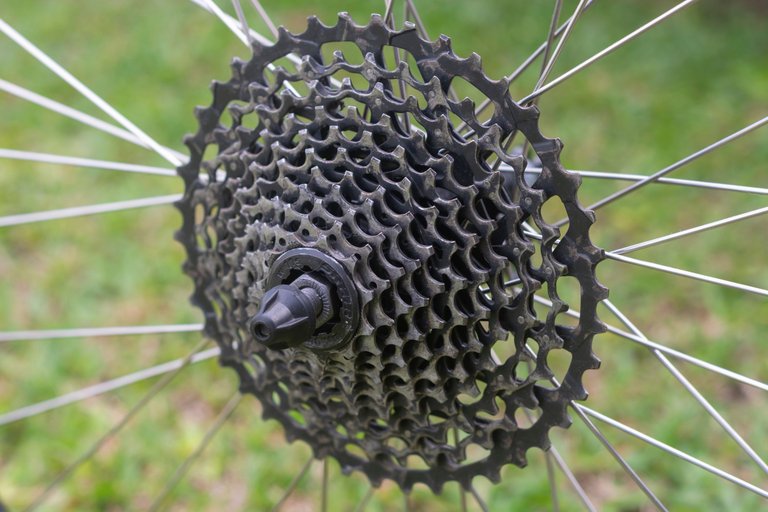
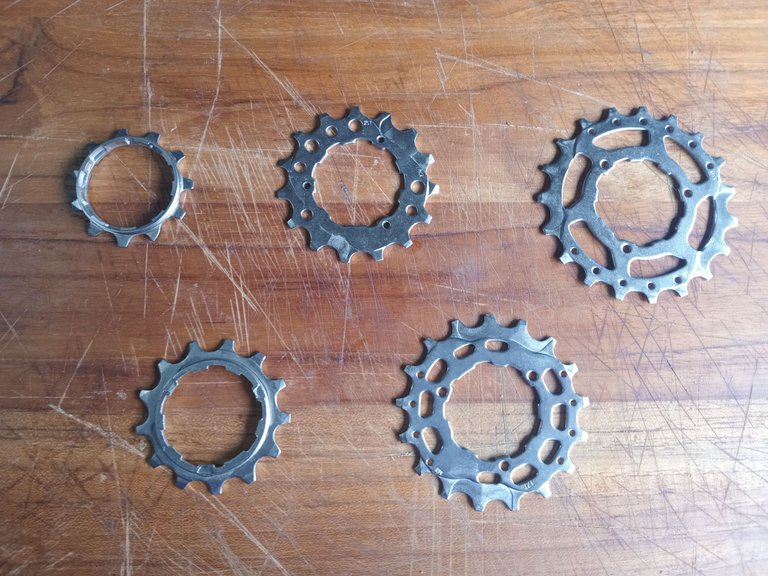
Rear cassette is also 11 speed. Each sprocket spacing is designed to work with 11 speed parts; as I said, everything needs to match. This is also a mountain-bike cassette, which is different than road bike cassettes. Different brands produce rear cassettes nowadays that work interchangeably across different groupset brands: Shimano and Sram being the famous ones. Some cassette sprockets are riveted; others are separate.
Sram's SX and NX line of cassettes are not riveted. That's one advantage, because it gives us the opportunity to change a single sprocket when that gets damaged/worn. Precisely the case here. Lower sprockets on my cassette are a bit used, so I ordered new ones from China; instead of replacing the entire cassette, I'm swapping the 11-13-15-17 and 19 teeth sprockets.
Now to the last parts of a transmission: crank arms, chainring and bottom-bracket. I left these to the end because one particular measurement is very important! That is... if you are building a bicycle from scratch.
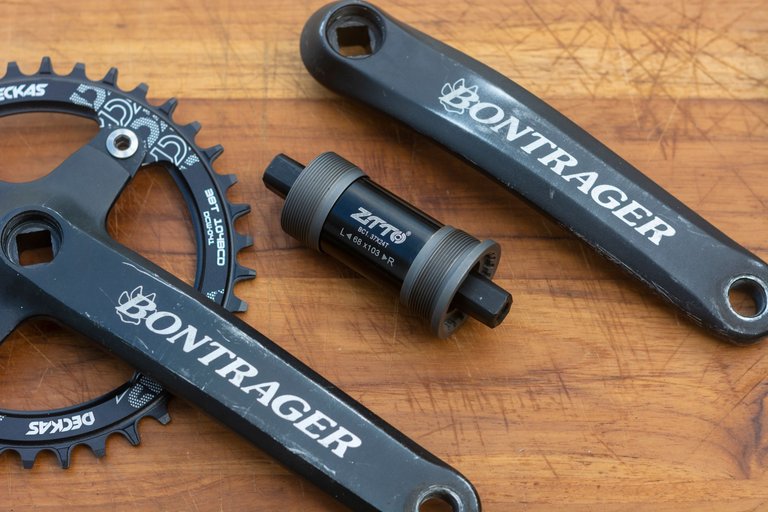
Chainrings are quite simple and easy to swap. The reason why people swap them often is simple: the smaller the chainring, the easier to go uphill; the bigger the chainring, the faster your final speed. It's a compromise, really... one cannot have both. I opted for a 38 teeth chainring, but I might change it later depending on how the bike responds.
What I wanted to talk about, however, is the relation between all the before-mentioned parts and the bottom-bracket. Install the wrong bottom-bracket and the bicycle will never shift right and may even damage your chain. That's due to a measurement called the chain line.
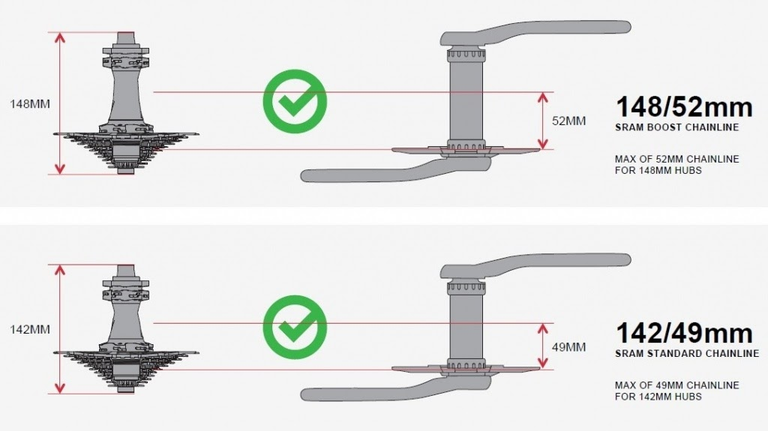
A very simplified explanation: chainline is the angle of a bicycle chain relative to the centerline of the bicycle frame (parallelism). The chain, when in the middle sprocket, should be straight (not twisted); when on the highest or lowest gears, it's normal to have the chain a bit twisted. See example on the right.
Measuring chainline isn't difficult, though it's outside the scope of this post. Knowing that such measurement exists is enough for now. Why? Because bicycles using square-tapared bottom-brackets (99% of older bikes and most cheap modern ones) should have the right length bottom-bracket axle. Mine, for example, required a 103mm axle length to ensure the correct spacing between the centerline of the bicycle and the chainring.
If you are just planning to swap your faulty bottom-bracket for a new one, make sure to check the measurement (generally marked onto the bottom-bracket). If you are building a bicycle from scratch, I'm afraid to say a bit of math is required.
Conclusion
Uff! That's a lot of information delivered in a single post, isn't it? Sounds daunting, but fear not. Don't get discouraged to work on your own bicycle or even venture into assembling one from zero.
The information given above might not teach your everything into tiny details, but gives bullet-points of stuff you shouldn't miss. For all the rest, don't be afraid to ask me.
Would you work on your bike?
Do you ever feel like building one? If not... why not?
Peace.
If you enjoyed this post consider leaving your upvote for a hot coffee.
Find me on Twitter: https://twitter.com/mrprofessor_
~Love ya all,
Disclaimer: The author of this post is a convict broke backpacker, who has travelled more than 10.000 km hitchhiking and more than 5.000 km cycling. Following him may cause severe problems of wanderlust and inquietud. You've been warned.