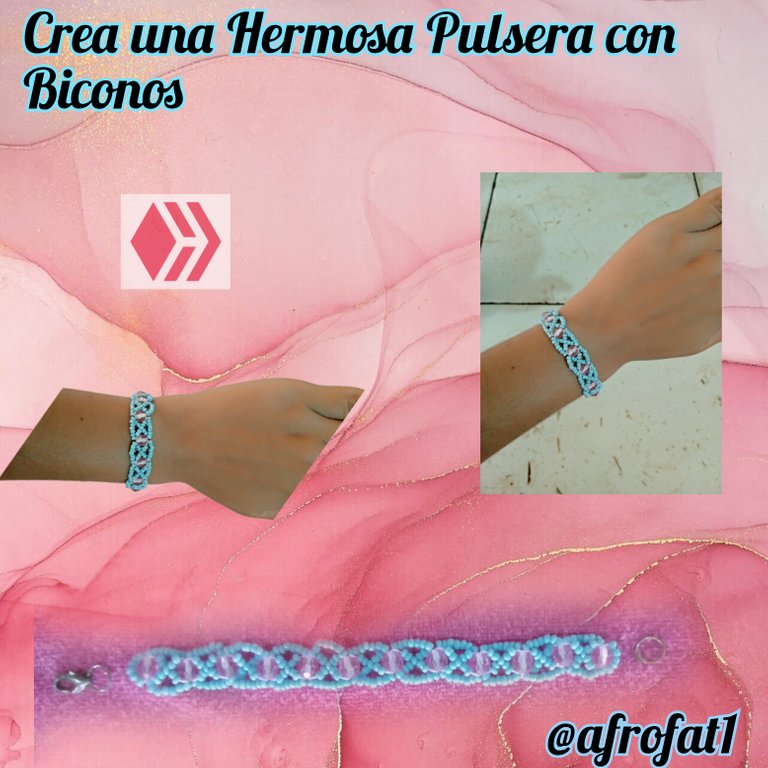
Un cordial saludos tengan todos mis compañeros de hive,y de esta hermosa comunidad de jewerly, agradecido con Dios por darme la oportunidad de compartir con todos ustedes este nuevo tutorial de como realizar esta hermosa pulsera con biconos y mostacillas
Agradecido con esta hermosa comunidad por darnos la oportunidad de compartir estas hermosas creaciones,muchas felicidades a todos mis compañer@s por tener tan bonita creatividad y por esforzarse cada dia para tarernos contenido de calidad
Muchas felicidades
Ahora les mostare los materiales Utilizados y el paso a paso a seguir para la elaboración de esta hermosa pulsera de biconos y mostacillas
🔵MOSTACILLAS DE COLOR AZUL
🩷BICONOS DE COLOR ROSADO
🔗ARGOLLAS
🔗TRANCADERO O SEGURO
🪡AGUJA
🧵HILO NAILIN
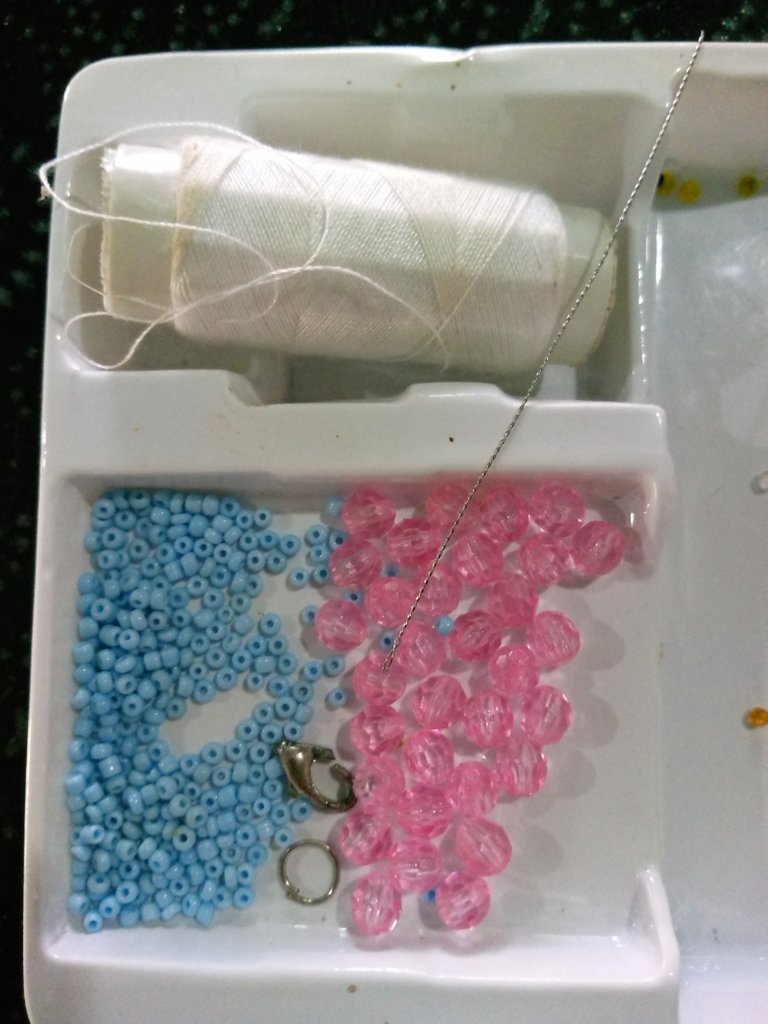
A continuación les estare presentando el paso a paso a seguir para la elaboración de esta hermosa pulsera con mostacillas y biconos
PASO 1
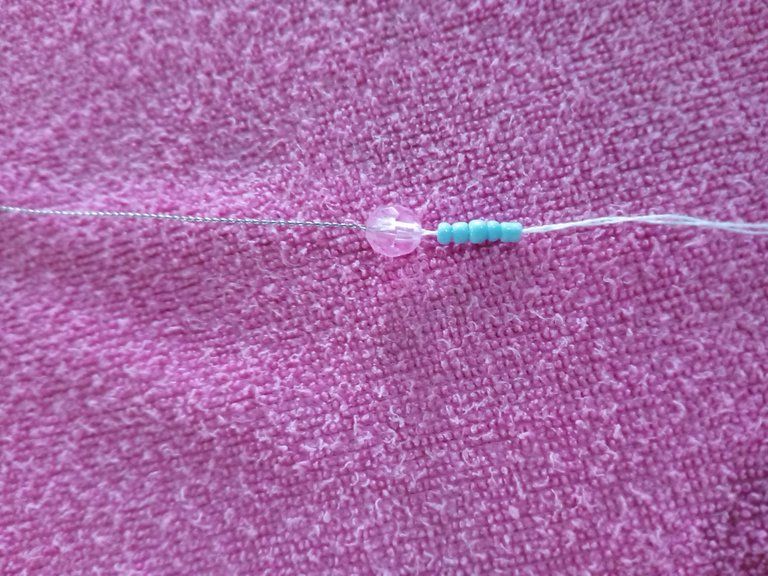
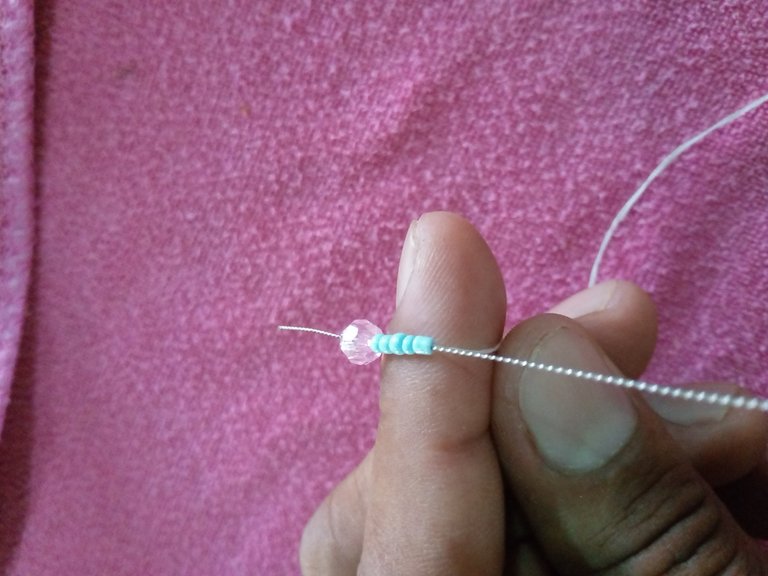
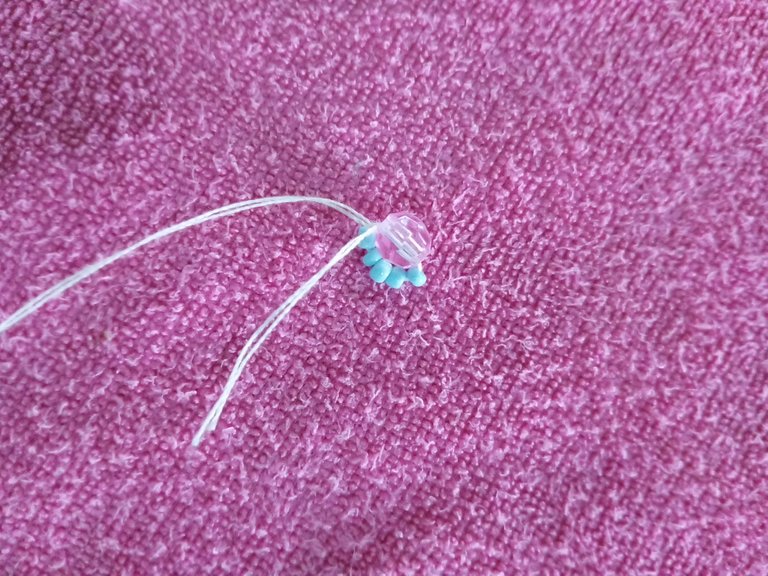
Lo primero que hicimos fue tomar un aproximado de 1metro de hilo , yo lo puse doble para que sea más resistente,lo siguiente es tomar 5 mostacillas de color azul y un bicono rosado,luego con la ayuda de nuestro dedo pasaremos la aguja de atrás hacia adelante,tiramos del hilo y obtendremos un pequeño circulo,el excedente del hilo lo cortaremos al final.
PASO 2
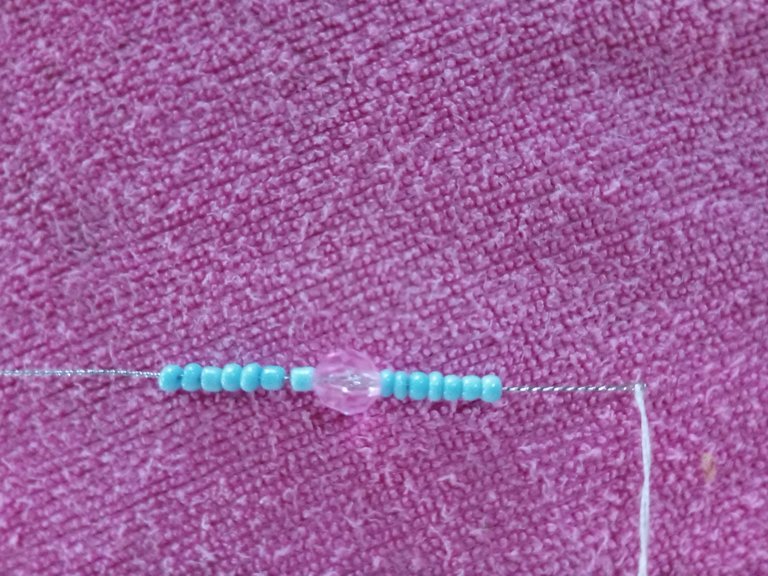
Para el siguiente paso lo que haremos será,tomar 7 mostacillas 1 bicono y luego 7 mostacillas,las llevaremos al final para introducir nuestra aguja por el centro del bicono así tirar de nuestro hilo y tener un pequeño circulo
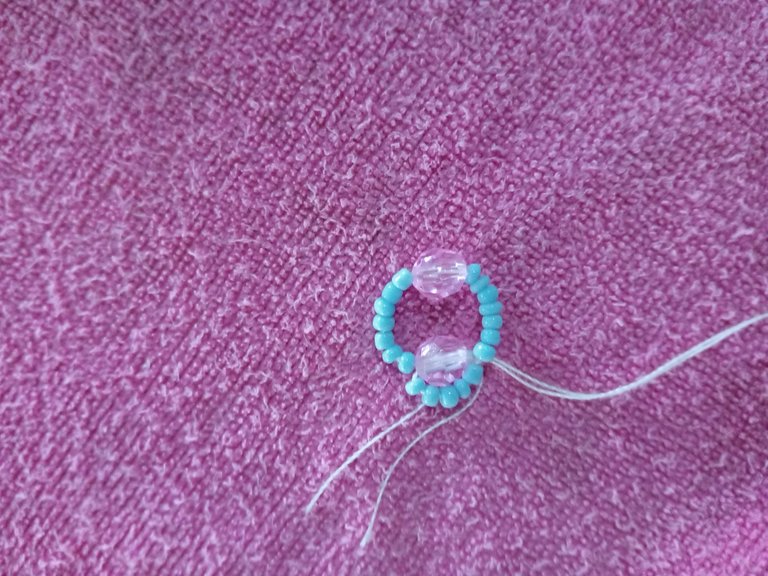
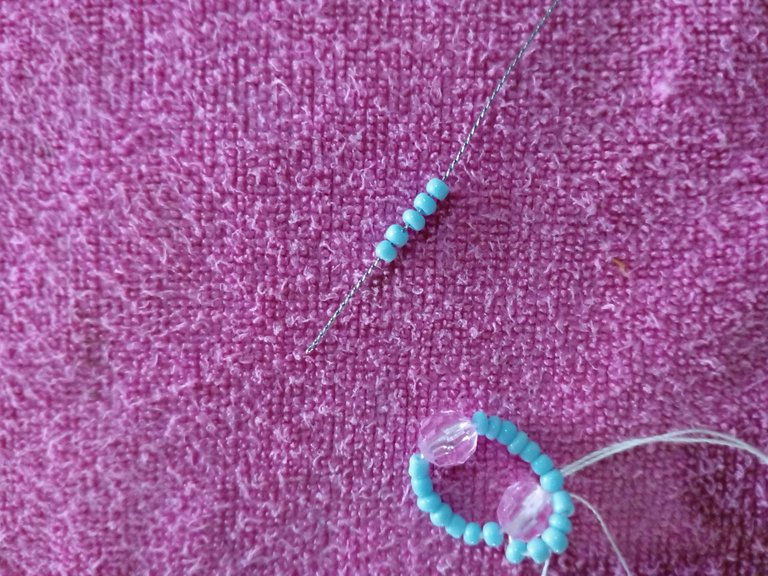
Luego tomaremos 5 mostacillas de color azul y de igual manera la vamos a introducir por el bicono q acabamos de colocar el cual quedará de esta manera

PASO 3
Luego tomaremos 7 mostacillas 1 bicono y 7 mostacillas Y de igual manera la vamos a introducir por el centro del bicono rosado buscando la manera de que nos quede un círculo como el anterior
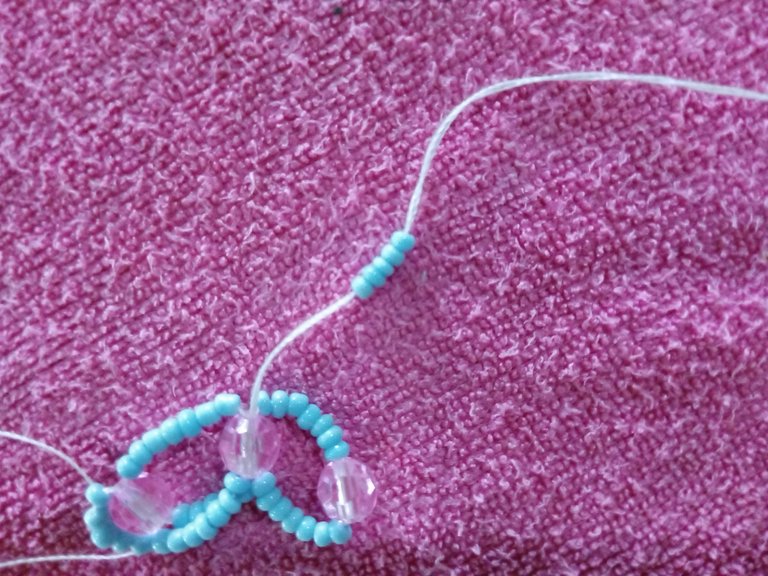
Luego tomamos 5 mostacillas azules está vez la vamos a introducir al contrario de dónde nos salga nuestro hilo para que valla quedando 1 raya de mostacillas por el medio
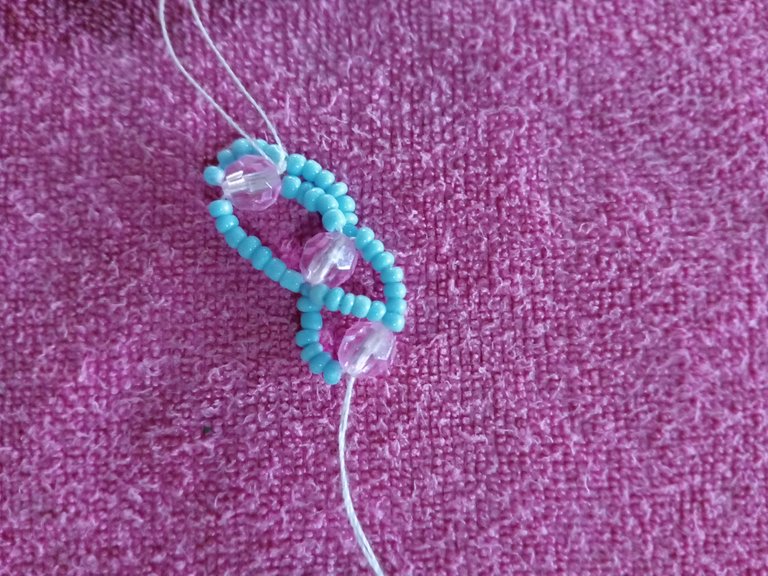
Vamos a repetir este mismo proceso hasta que tengamos el largo de la pulsera que deseamos
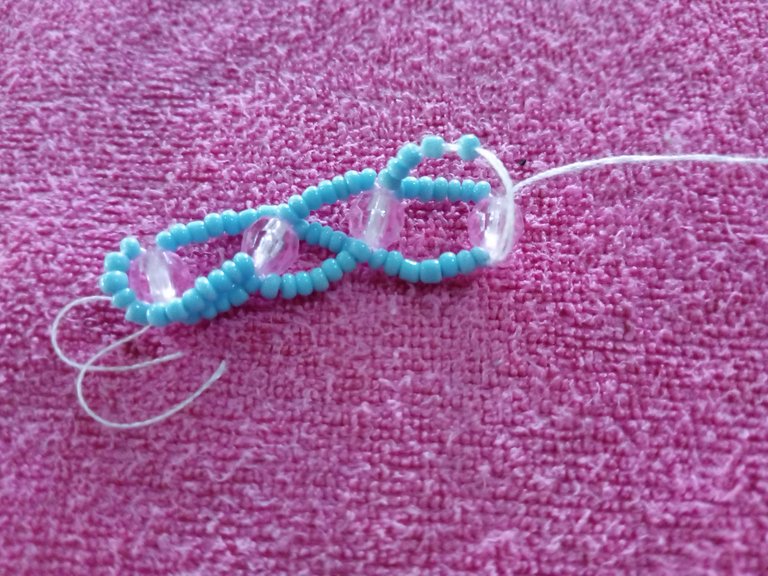
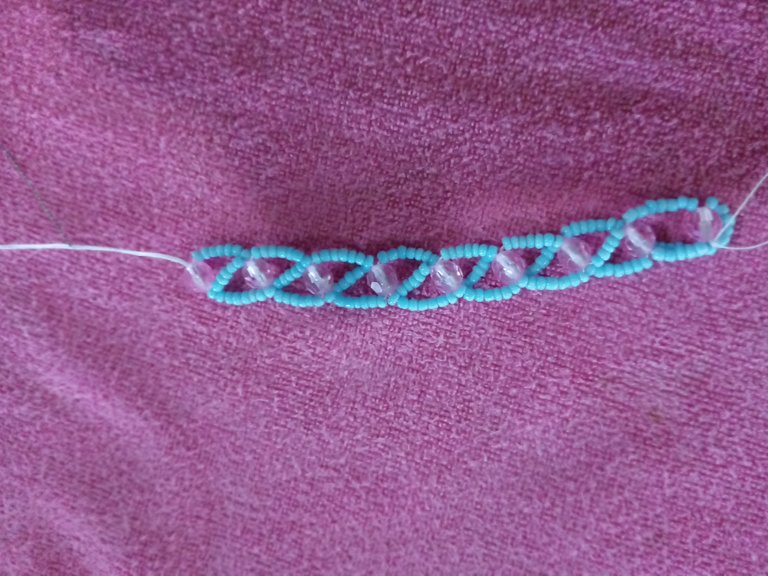
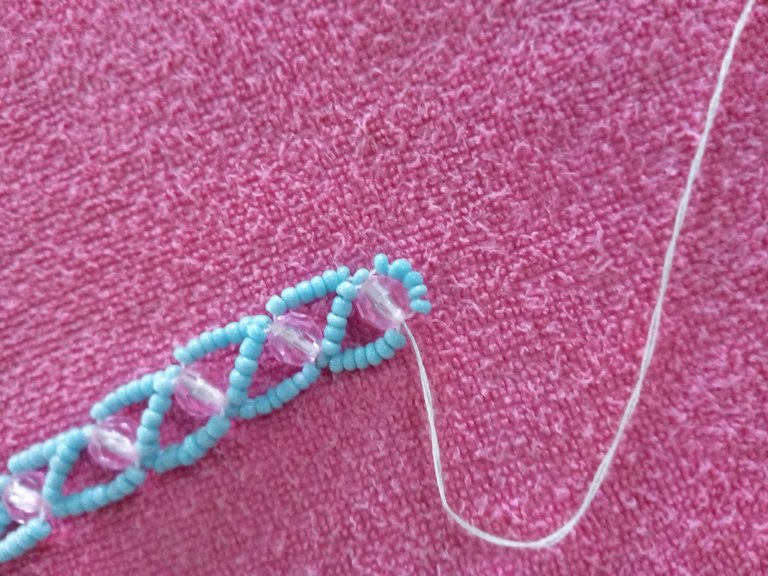
Lo que haremos al final sera tomar 5 mostacillas de color azul y la introduciremos por el bicono para asi tener donde poner el trancadero
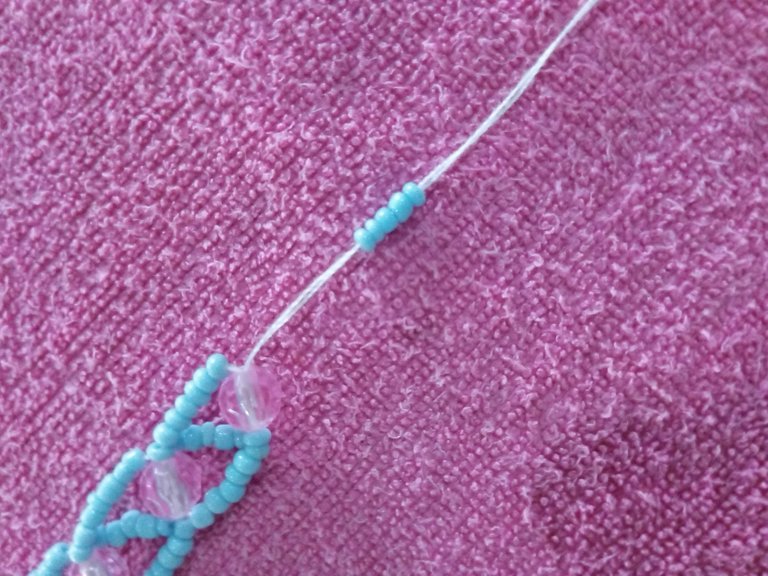
PASO 4
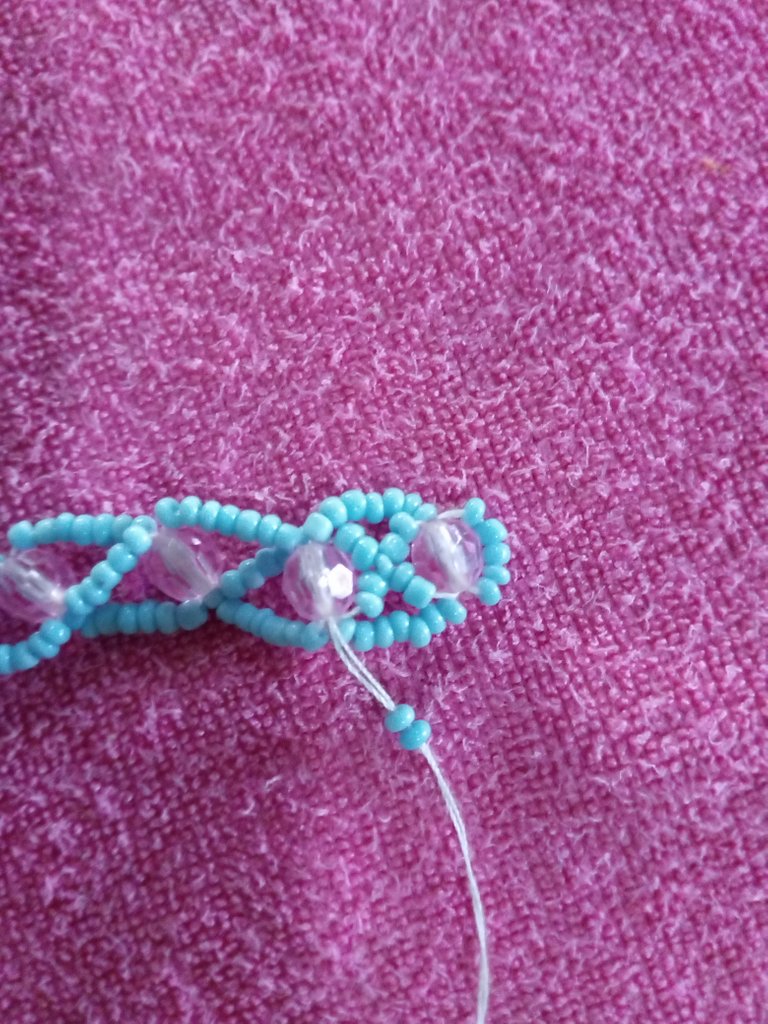
Ya teniendo el largo deseado lo que haremos será tomar 2 mostacillas azules y de las 5 mostacillas del medio contamos 3 y pasaremos nuestra aguja con el hilo por ahí
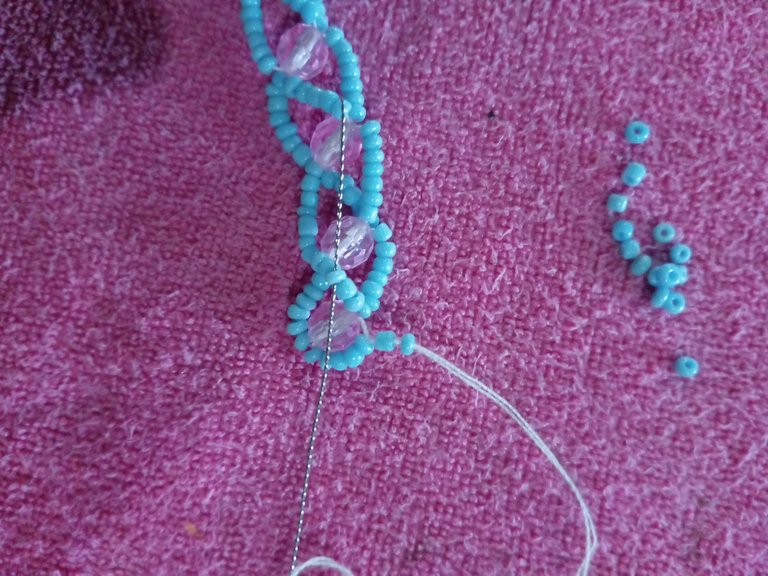
Luego de abajo hacia arriba vamos a introducir la aguja por el bicono para ir haciendo una especie de equis (X)
PASO 5
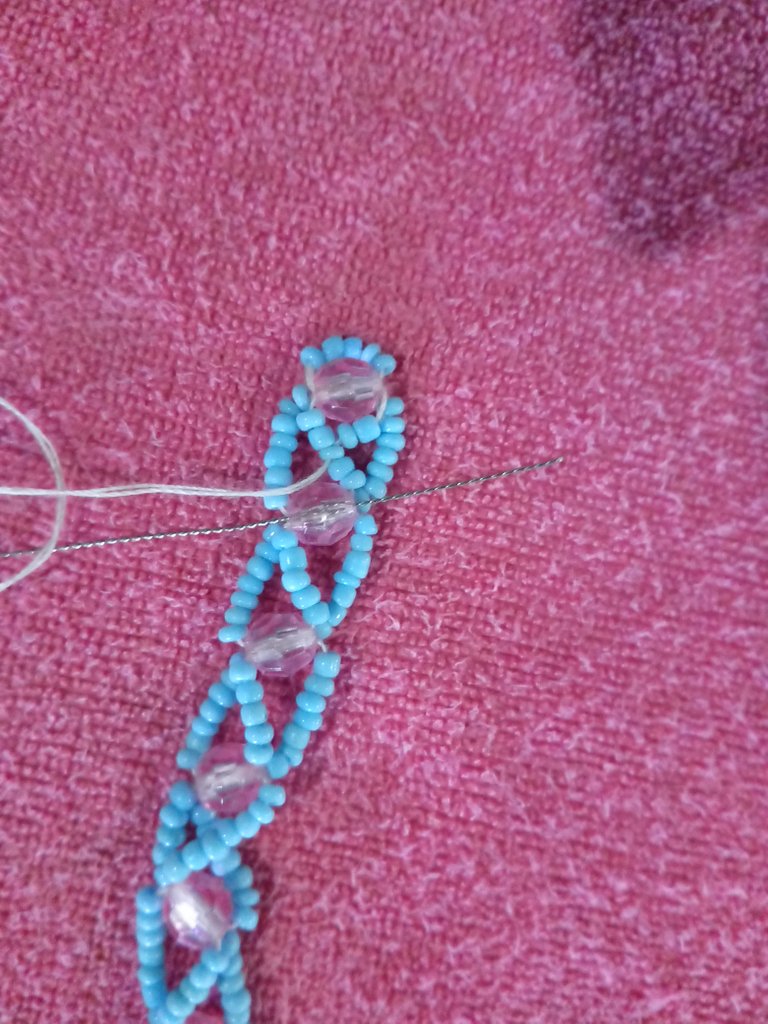
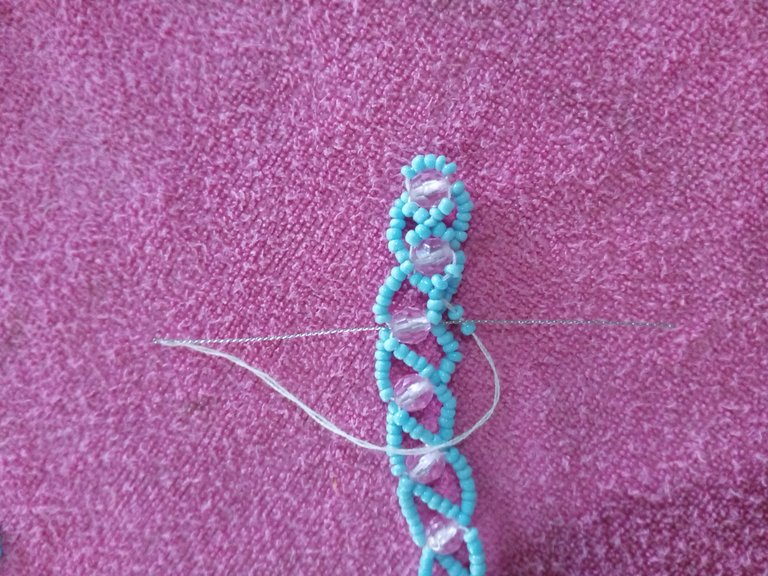
Para el paso 4 d e igual manera vamos a colocar 2 mostacillas de color azul y contaremos 3 mostacillas para introducir nuestra aguja y hacer nuestro diseño en equis,luego de abajo hacia arriba introducimos nuestra aguja y culminaremos nuestro segunda equis
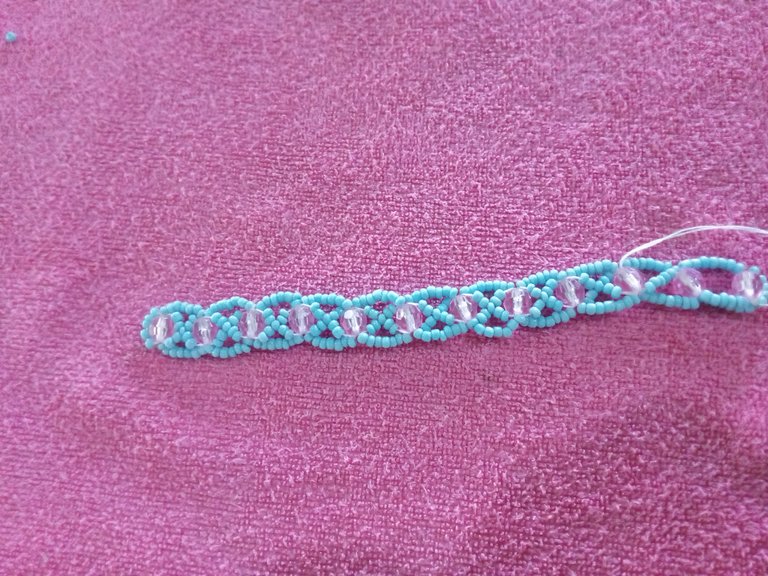
Vamos a seguir el mismo procedimiento hasta terminar de colocar las mostacillas restantes,tomando en cuenta que cada vez que vallamos colocando nuestras mostacillas la pulsera va ir tomando forma y será más resistente
**PASO 6 **
Ya por último con el excedente que nos había quedado haremos 2 nudos simples para así asegurar nuestra hermosa pulsera,lo que nos quedaría será colocarle nuestro aro ñ,trancadero o seguro,esto es lo más fácil,con la ayuda de una tenaza abriremos el trancadero y con mucho lo colocamos el el extremo de la pulsera.
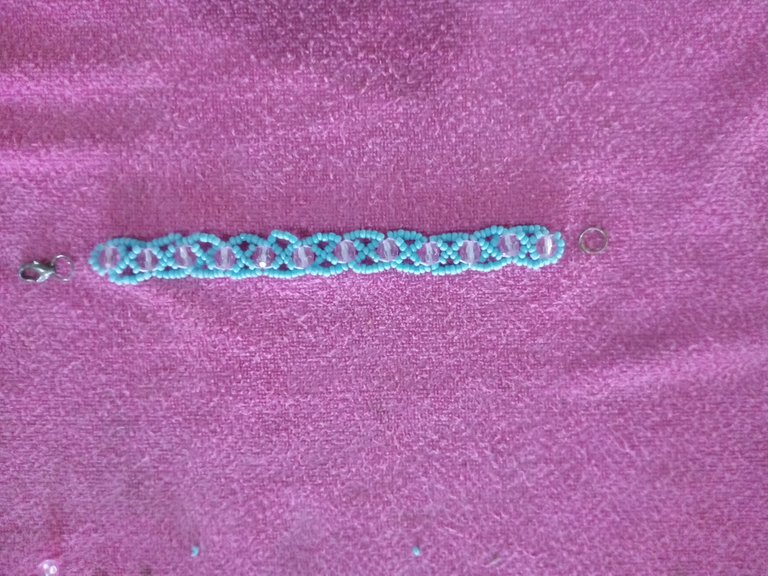
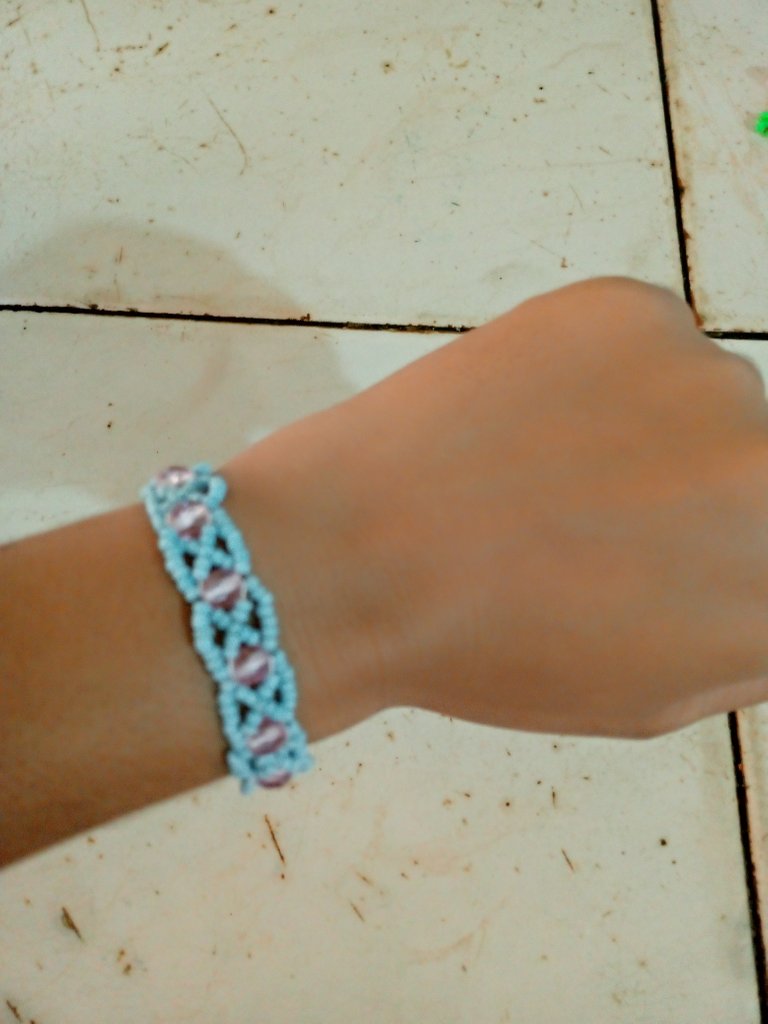
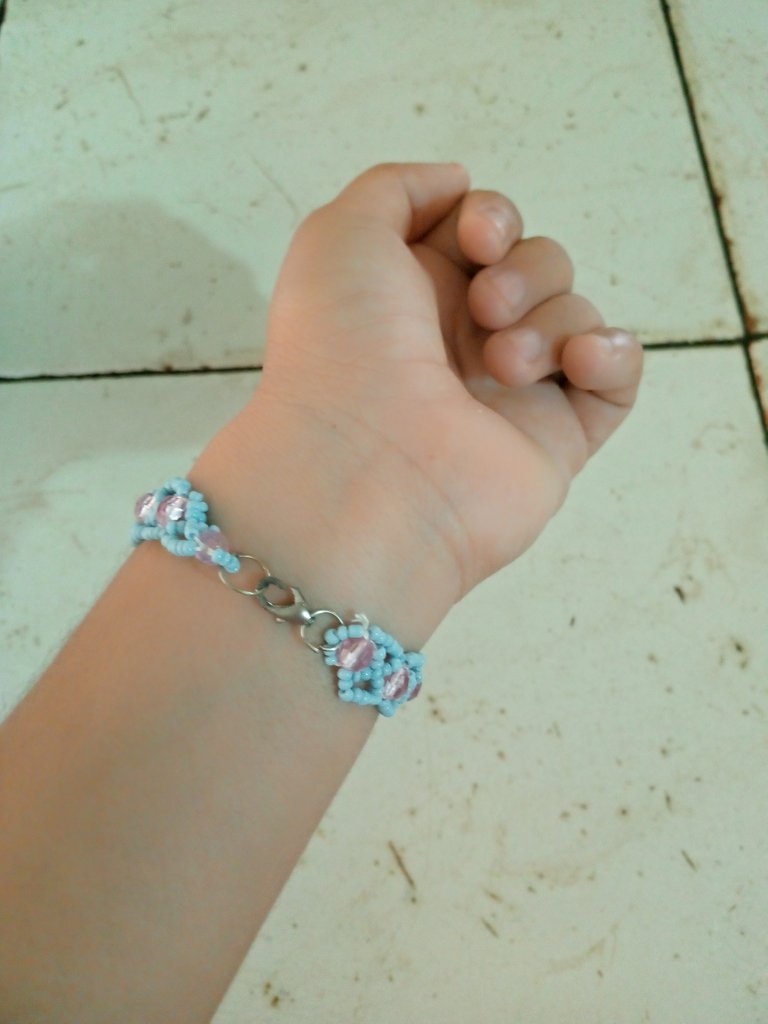
Este proceso fue muy fácil y divertido espero les haya gustado este tutorial y sea de su ayuda para realizar este tipo de diseño de pulsera,muchas gracias por su atención que Dios me los bendiga y los guíe siempre
ÉXITOS
- Las imagenes son de mi propiedad y fueron tomadas por mi telefono tecno spark Go 2023
- Traductor utilizado Deelp traslater
- las imagenes son editadas mediante la aplicacion editos de fotos polish

A cordial greeting to all my fellow hive, and this beautiful community of jewerly, grateful to God for giving me the opportunity to share with you all this new tutorial on how to make this beautiful bracelet with bicones and beads.
Grateful to this beautiful community for giving us the opportunity to share these beautiful creations, many congratulations to all my colleagues for having such beautiful creativity and for striving every day to give us quality content.
Many congratulations
Now I will show you the materials used and the step by step to follow for the elaboration of this beautiful bicone and beads bracelet.
🔵BLUE COLORED BEADS
🔵PINK COLORED BICONES
🔗RINGSTONES
🔗TRANCADERO OR INSURANCE
🪡NEEDLE
🧵NAILIN YARN

Here is the step by step guide to make this beautiful bracelet with beads and bicones.
**STEP 1
The first thing we did was to take approximately 1meter of thread, I put it double to make it more resistant, the following is to take 5 blue beads and a pink bicone, then with the help of our finger we will pass the needle from back to front, we pull the thread and we will obtain a small circle, the excess thread we will cut it at the end.


STEP 2
For the next step we will take 7 beads, 1 bicone and then 7 beads, we will take them to the end to introduce our needle through the center of the bicone to pull our thread and have a small circle.


Then we will take 5 blue beads and in the same way we will introduce them through the bicone that we have just placed, which will look like this


STEP 3
Then we will take 7 beads 1 bicone and 7 beads And in the same way we are going to introduce it through the center of the pink bicone looking for the way that we have a circle like the previous one

Then we take 5 blue beads, this time we are going to introduce them in the opposite direction of where our thread comes out so that we have 1 stripe of beads in the middle.

We will repeat this same process until we have the length of the bracelet we want.


What we will do at the end will be to take 5 blue beads and we will introduce them through the bicone so we will have a place to put the locking device.

STEP 4
Once we have the desired length, we will take 2 blue beads and from the 5 beads in the middle we will count 3 and pass our needle with the thread through them.

Then from the bottom to the top we will introduce the needle through the bicone to make a kind of cross (X).

STEP 5
For step 4 in the same way we are going to place 2 blue beads and we will count 3 beads to introduce our needle and make our design in x, then from the bottom up we introduce our needle and we will finish our second x.
We will follow the same procedure until we finish placing the remaining beads, taking into account that each time we are placing our beads the bracelet will be taking shape and will be more resistant.


STEP 6
And finally with the surplus that we had left we will make 2 simple knots to secure our beautiful bracelet, what remains is to place our ring ñ, trancadero or insurance, this is the easiest, with the help of pliers we will open the trancadero and with a lot we place it at the end of the bracelet.


This process was very easy and fun, I hope you liked this tutorial and that it will help you to make this kind of bracelet design, thank you very much for your attention, may God bless you and guide you always.
SUCCESS
- The images are my own property and were taken by my phone tecno spark Go 2023
- Translator used Deelp translator
- images are edited using polish photo editing application