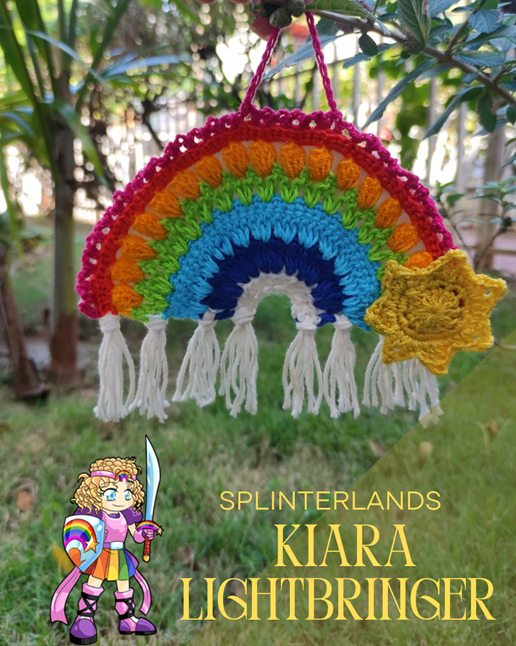
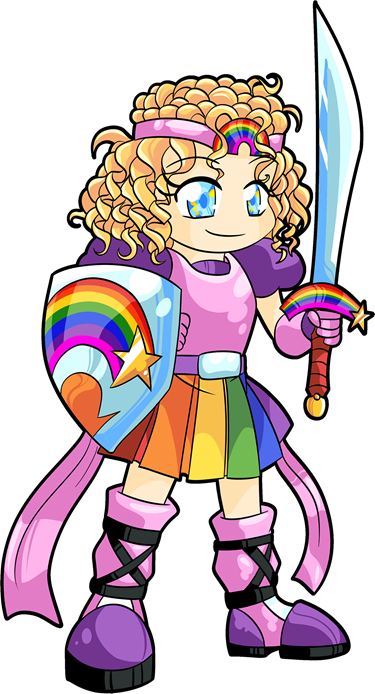
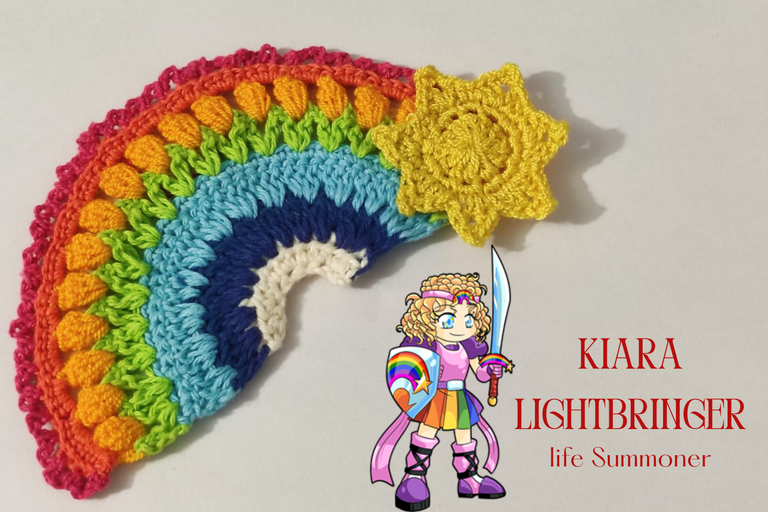
Kiara Portadora de Luz
Warm greetings to all my Needleworkmonday friends and especially to all those crafters who are fans of the Splinterlands game. Today I come with a new creation dedicated to a tournament princess named Kiara.
From what I was researching about this beautiful character she is one of the youngest characters ever and she is the daughter of two famous summoner leaders. Ah I also found out that she has a sister named Talia and all together they make up one of the most powerful families in Splinterlands.
Un saludo cariñoso a todos mis amigos de Needleworkmonday y en especial a todos aquellos artesanos fanáticos del juego Splinterlands. Hoy vengo con una nueva creación dedicada a una princesa del torneo llamada Kiara.
Por lo que estuve investigando sobre este hermoso personaje se trata de uno de los personajes más jóvenes que existe y es hija de dos líderes invocadores famosos. Ah tambien me entere que tiene una hermana llamada Talía y todos juntos constituyen una de las familias más poderosas de Splinterlands.
Splinterlands Art Contest Week 330!
Splinterlands Fanart
Kiara has enchanted me, from what I've seen in the previous contests she is one of the female characters that crafters are most encouraged to design any artistic piece. Of course I am not going to be the exception, I also encouraged myself to elaborate something beautiful worthy of this cheerful warrior.
Of course the colors were what attracted me the most, I confess that I am number one fan of the rainbow because it inspires me joy, magic, surprise, power, hope, peace and renewal.
Kiara me ha encantado, por lo que estuve viendo en los concursos anteriores es uno de los personajes femeninos en quien más se animan los artesanos para diseñar cualquier pieza artística. Por supuesto yo no voy a ser la excepción, yo tambien me animé a elaborar algo hermoso digno de esta alegre guerrera.
Por supuesto que los colores fue lo que más me atrajo, confieso que soy fan número uno del arcoíris porque me inspira alegría, magia, sorpresa, poder, esperanza, paz y renovación.
Según cuenta la historia es una verdadera khymiana ya que fue creada o moldeada de manera distinta a su hermana Talia. Pero si quieres saber más de su historia te invito a visitar este enlace https://next.splinterlands.com/card-detail/73/regular/1?tab=lore de Splinterlands donde podemos conocer más sobre nuestros personajes favoritos, su historia y sus poderes.
As the story goes, she is a true Khymian since she was created or molded differently from her sister Talia. But if you want to know more about her story I invite you to visit this link https://next.splinterlands.com/card-detail/73/regular/1?tab=lore of Splinterlands where we can learn more about our favorite characters, their history and their powers.
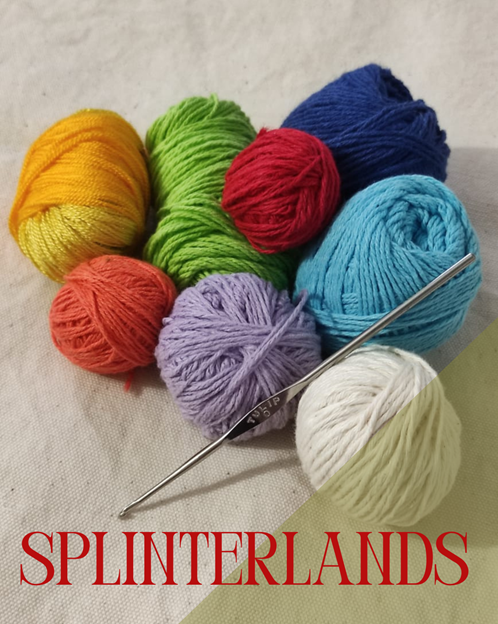
Now I am going to tell you a little about the elaboration process and the Materials I used.
Materials:
- Colored wick
- Crochet knitting needle #2,5 millimeters
- Scissors, wool needle
- And a lot of desire to knit.
Ahora les voy a contar un poco sobre el proceso de elaboración y los Materiales que utilicé.
Materiales:
- Pabilo de colores
- Aguja de tejer crochet #2,5 milímetros
- Tijera, aguja lanera
- Y muchas ganas de tejer.
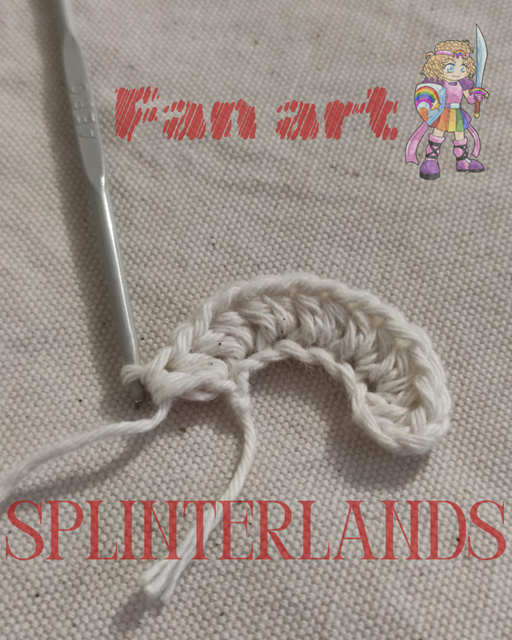
Step by step:
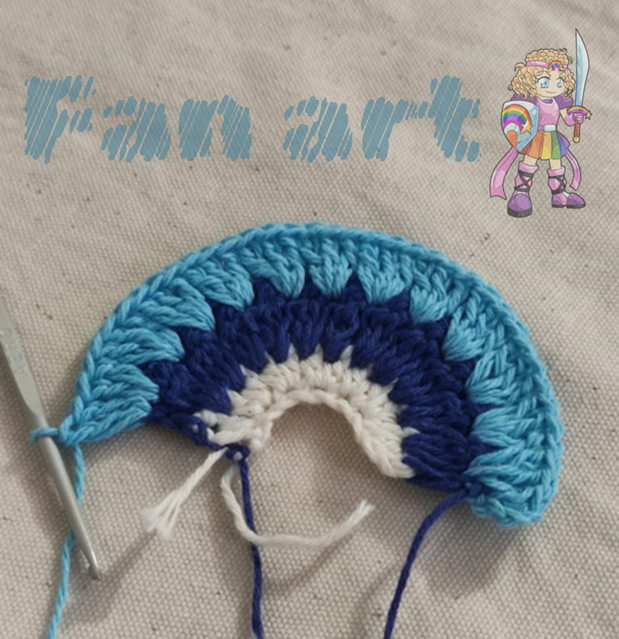
The first thing we make is a magic hoop and in it we knit 13 half stitches.
Second row in blue color, now knitting only in the back strand we raise 3 chains, in that same stitch we knit two high stitches without finishing, we take out all the strands and thus we form what is called a speck, we repeat the speck in each base stitch until we finish.
Pasó a paso:
Lo primero que hacemos es un aro mágico y en el tejemos 13 medios puntos.
- Segunda vuelta en color azul, ahora tejiendo solo en la hebra de atrás levantamos 3 cadenetas, en ese mismo punto tejemos dos puntos altos sin terminar, sacamos todas las hebras y así formamos lo que se llama una mota, repetimos la mota en cada punto de base hasta terminar.
Third row in light blue we knit three chains, and do the following sequence: in the separation stitches between the mote and the mote we knit two double crochet and over the mote stitch we knit one single crochet until the end of the row.
In the next row we knit a round of single crochet, in the same light blue.
- Tercera vuelta en azul claro tejemos tres cadenetas, y hacemos la secuencia siguiente: en los puntos de separación entre mota y mota tejemos dos puntos altos y sobre el punto de la mota un punto alto nada más hasta terminar.
- En la siguiente vuelta tejemos una ronda de puntos bajos, en el mismo azul claro.
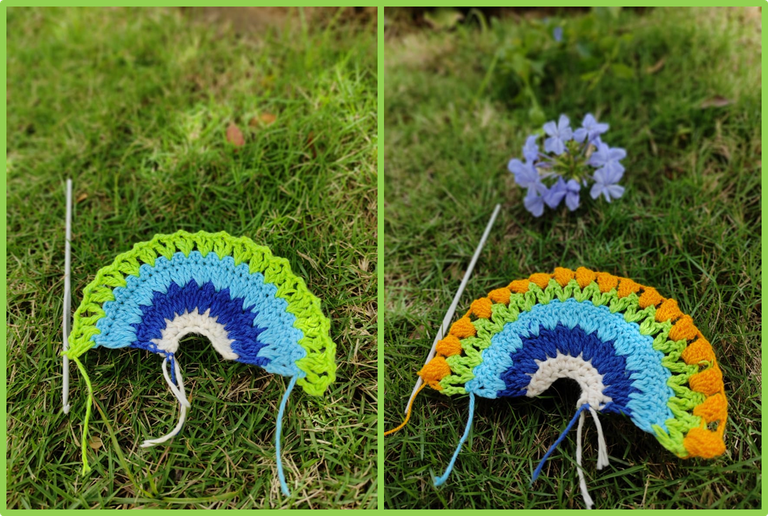
- In green color we knit three chains and then we will skip a base stitch and in the next one we will knit a double crochet two chains and in the same base space another double crochet. We repeat this same procedure always leaving a base chain of separation and we finish with a single crochet.
- En color verde tejemos tres cadenetas y sucesivo vamos a saltarnos un punto de base y en el siguiente tejeremos un punto alto dos cadenetas y en el mismo espacio de base otro punto alto. Repetimos este mismo procedimiento siempre dejando una cadena de base de separación y terminamos con un punto alto.
- Yellow color: we knit three chains and a separating chain stitch, we get into the V stitch with five double crochets, we remove the needle and join the first stitch with the last one to form a pochot stitch, we repeat the same stitch in each V until we finish the row with a chain stitch and a double crochet in the last base stitch.
- Color amarillo: tejemos tres cadenas y un punto cadena de separación, nos metemos en el punto V con cinco puntos altos, retiramos la aguja y unimos el primer punto con el último así formaremos punto pochot, repetimos el mismo punto en cada V hasta terminar la vuelta con una cadeneta y un punto alto en el último punto de base.
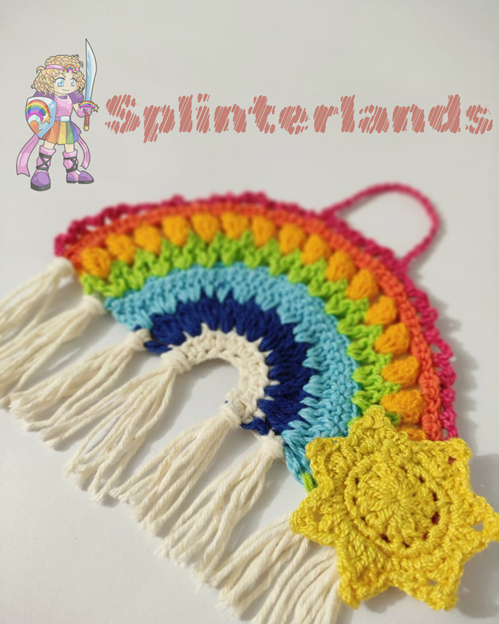
Cambiamos al color naranja y tejemos una cadeneta y seguido tejemos en cada espacio de cadeneta 4 medios puntos hasta terminar la vuelta.
Por ultimo tejemos cuatro cadenas saltamos un punto de base y pinchamos en el siguiente con un punto bajo. Asi hasta terminar toda la vuelta.
Star
For the star we will knit 12 double crochet and close with a slip stitch. In the next round we will knit the peaks or rays of the sun as follows. We pick up a chain, in that same place we knit a half stitch, we move to the next base stitch and knit a high stitch, three chains, we go back and knit a slip stitch in the first chain. We knit another slip stitch in the same base stitch and in the next stitch we knit a half stitch. So we follow that sequence of a half stitch, go to the next stitch and knit a double crochet, three chains, go back and knit a slip stitch in the first chain, knit another double crochet in the same base stitch and knit a half stitch in the next stitch.
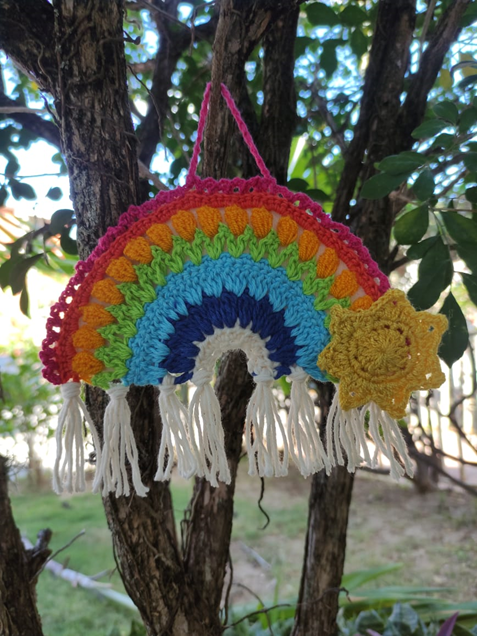
Well friends, I was really glad to have achieved this result.
Estrella
Para la estrella tejeremos 12 puntos altos y cerramos con un punto deslizado. En la siguiente vuelta haremos los picos o rayos del sol de la siguiente manera. Levantamos una cadena, en ese mismo lugar tejemos un medio punto, pasamos al siguiente punto de base y tejemos un punto alto, tres cadenas, nos devolvemos y tejemos un punto deslizado en la primera cadena. Tejemos otro punto alto en el mismo punto de base y en el siguiente tejemos un medio punto. Asi seguimos esa secuencia de un medio punto, pasamos al siguiente y tejemos punto alto, tres cadenas, nos devolvemos y tejemos un punto deslizado en la primera cadena, tejemos otro punto alto en el mismo punto de base y en el siguiente tejemos un medio punto.
Bien amigos, de verdad me alegró mucho de haber conseguido este resultado.
Splinterlands Art Contest Week 330!