Hello everyone... 🐱🐾💕
Hello to my dear Hiver and the dear community of #Jewelry, first of all a very special greeting full of blessings for those who make life in this beautiful community. I am very pleased to be here to show you a new work full of love, and especially for you.
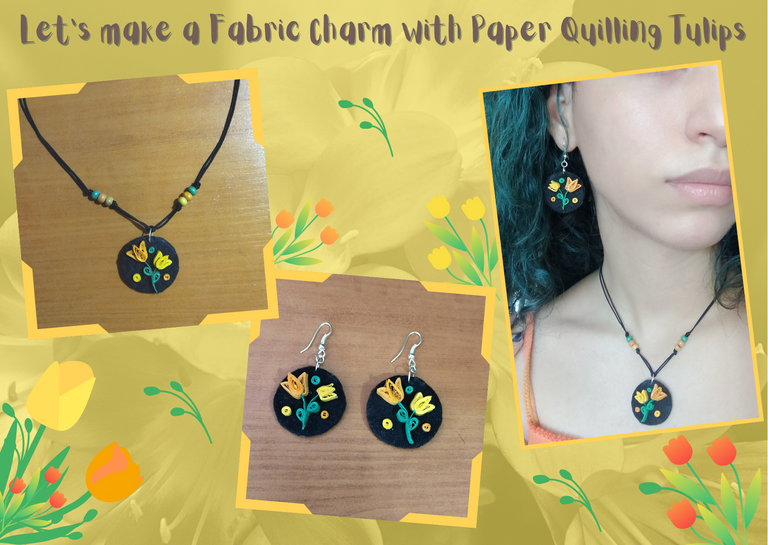
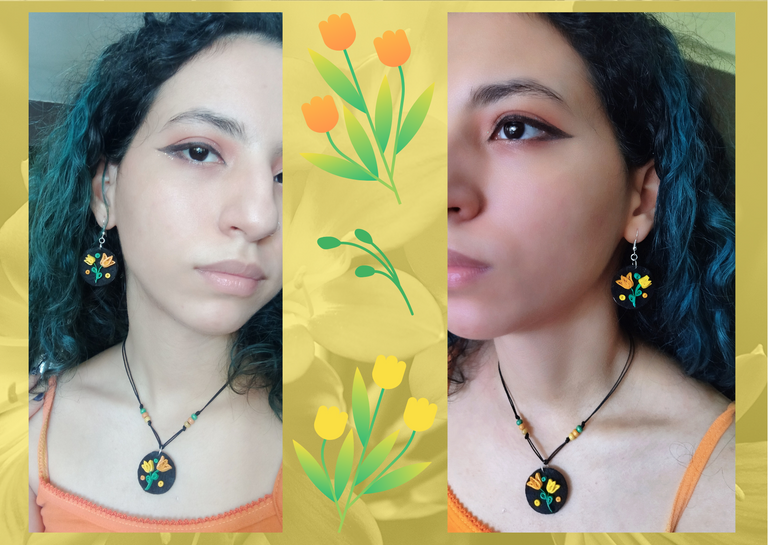
For today I bring you a charm made in fabric with cardboard, decorated with a small bouquet of tulips made in the paper quilling technique, which you can use as you like either as a medallion for a necklace, or as a hanging earrings, it's just a matter of taste and let your imagination run wild.
Let's get started: 😃

Hola a todos... 🐱🐾💕
Hola a mis queridos Hiver y a la querida comunidad de #Jewelry, ante todo un saludo muy especial lleno de bendiciones para los que hacen vida en esta bonita comunidad. Me encuentro muy complacida de encontrarme por acá para mostrarles un nuevo trabajo lleno de amor, y especialmente para ustedes.
Para el día de hoy les traigo un dije realizado en tela con cartón, decorado con un pequeño ramo de tulipanes realizados en la técnica de paper quilling, el cual pueden utilizar como sea de su agrado tanto en forma de medallón para un collar, como para unos zarcillos colgantes, solo es cuestión de gustos y de dejar volar tu imaginación.
Let's get started: 😃

• Cintas de quilling de 3mm de ancho, amarillo, anaranjado y verde grama.
• Cintas de quilling de 1mm de ancho amarillo y anaranjado.
• Trozo de cartón fino.
• Alfiler punta gruesa.
• Tela color negro (manta polar), o la de tu preferencia.
• Regla con diversas medidas de circunferencia.
• Lápiz o bolígrafo.
• Aguja con ranura para enrollar quilling.
• Pega blanca extra fuerte (carpintería).
• Tijera.
• Alicate punta fina.
• Argollas medianas y pequeñas de bisutería.
• Hilo Chino negro.
• Tapa nudos.
• Perlas de madera color, amarillo, anaranjado y verde.
• Anzuelo para zarcillos.
• Pincel.
- 3mm wide quilling ribbons, yellow, orange and grass green.
- 1mm wide quilling ribbons, yellow and orange.
- Piece of thin cardboard.
- Thick pin.
- Black fabric (polar blanket), or the one of your preference.
- Ruler with different circumference measurements.
- Pencil or pen.
- Needle with a slot to roll quilling.
- Extra strong white glue (carpentry).
- Scissors.
- Fine-nosed pliers.
- Medium and small costume jewelry rings.
- Black Chinese thread.
- Knot cover.
- Wooden beads, yellow, orange and green.
- Hook for tendrils.
- Brush.

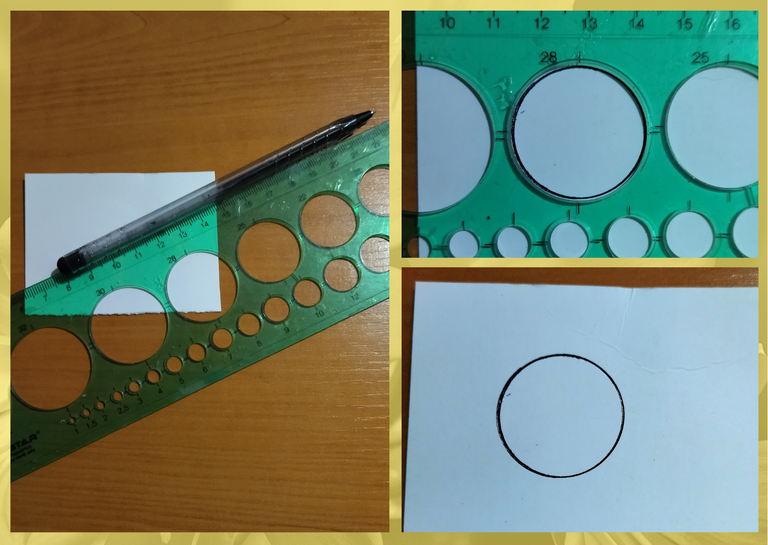
Let's start by taking a piece of thin cardboard, no matter what color it is, with the circumference ruler we will mark the cardboard with a pen, in my case I chose the circumference number 28, this will depend on the size we want to make our pendant, you can make it the size of your preference. Cut out the circle. This circle, apart from being a pattern, will serve as a base to make the pendant.
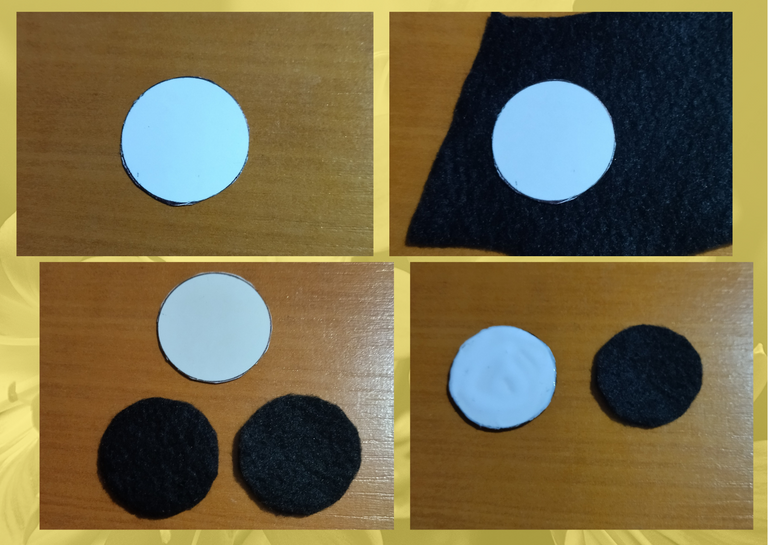
Let's take a piece of black fabric, you can use the one you prefer, I used some pieces of polar blanket, with the cardboard circle we are going to cut out two equal circles.
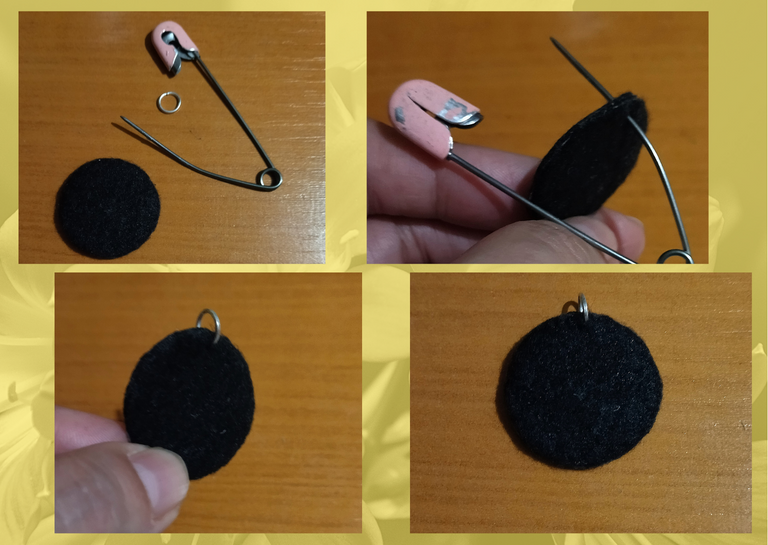
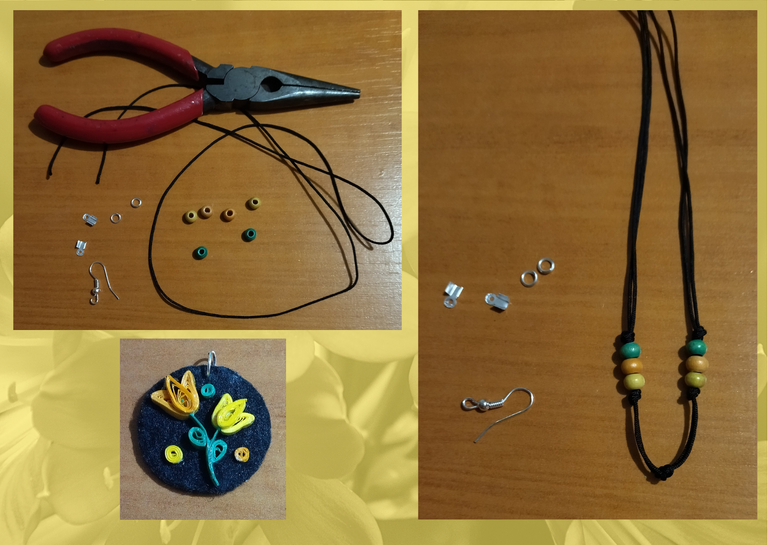
Once the fabric circles are cut out, we are going to take some extra strong white glue and glue both circles to the cardboard, this will be the base of our pendant. With a thick pin we are going to make a hole at the top of the pendant, in this hole we will put a medium size costume jewelry ring. We reserve our base.

• Vamos a comenzar tomando un trozo de cartón fino, no importa del color que sea, con la regla de circunferencias vamos a marcar con un bolígrafo el cartón, en mi caso escogí la circunferencia número 28, esto va a depender del tamaño que queramos hacer nuestro dije, ustedes pueden hacerlo del tamaño de su preferencia. Recortamos el círculo. Este círculo aparte de un patrón, nos va a servir de base para realizar el dije.
• Tomemos un trozo de tela negra, pueden utilizar la que mas prefieran, yo utilice unos trozos de manta polar, con el circulo de cartón vamos a recortar dos círculos iguales.
• Una vez recortados los círculos de tela, vamos a tomar pega blanca extra fuerte y pegamos ambos círculos al cartón, esta va a ser la base de nuestro dije. Con un alfiler punta gruesa le vamos a hacer un hoyo a la parte de arriba del dije, en ese hoyito meteremos una argolla mediana de bisutería. Reservamos nuestra base.
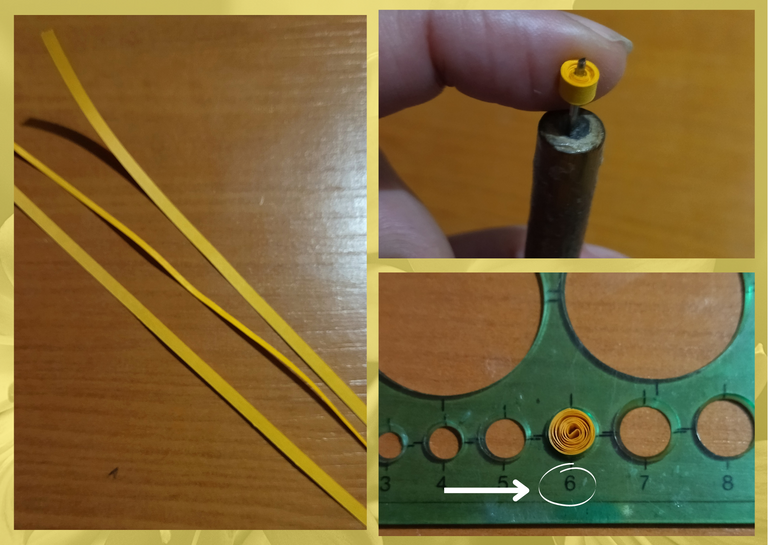
- Let's make the ornament of the charm: let's take a piece of orange quilling ribbon 3mm wide x 7cms long, with the quilling needle we will roll it up, take it out of the needle and put it in the circumference ruler in the circle number 6, take it out of the ruler and seal it, we will obtain a small open circle, from this circle we will need 2, we will repeat the same process with an orange ribbon of 1mm wide x 7cms long. In this way we will obtain 3 open circles, we reserve.
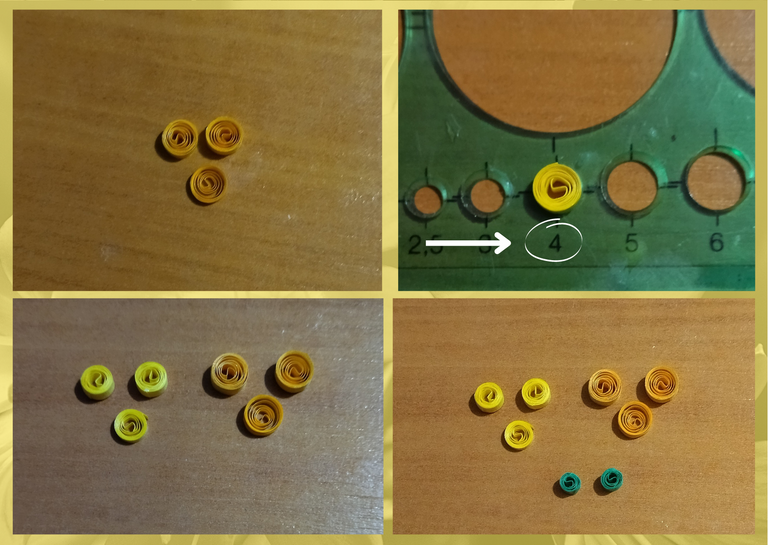
- We will repeat all the previous process with the yellow quilling ribbons, we will do it with the same measures, with the only difference that we will place the circles on the circumference ruler in the circle number 4, we will obtain another 3 small open circles, we reserve.
- Finally we will take 2 pieces of green ribbon of 3mm wide x 4cms long approximately, we roll them in the quilling needle and we will make two more small circles, we reserve.

• Vamos a realizar el adorno del dije: tomemos un trozo de cinta de quilling color anaranjado de 3mm de ancho x 7cms de largo, con la aguja para quilling enrollaremos, sacamos de la aguja y metemos en la regla de circunferencias en el círculo número 6, sacamos de la regla y sellamos, vamos a obtener un pequeño círculo abierto, de este círculo necesitaremos 2, vamos a repetir el mismo proceso con una cinta anaranjada de 1mm de ancho x 7cms de largo. De esta manera obtendremos 3 círculos abiertos, reservamos.
• Vamos a repetir todo el proceso anterior con las cintas de quilling amarillas lo haremos de las mismas medidas, con la única diferencia que colocaremos los círculos en la regla de circunferencias en el circulo número 4, obtendremos otros 3 pequeños círculos abiertos, reservamos.
• Por último tomaremos 2 trozos de cinta color verde de 3mm de ancho x 4cms de largo aproximadamente, enrollamos en la aguja para quilling y haremos dos pequeños círculos más, reservamos.
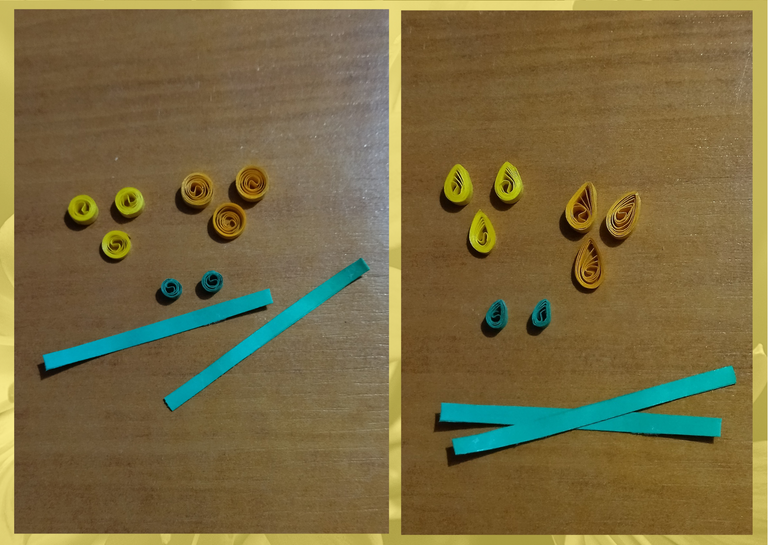
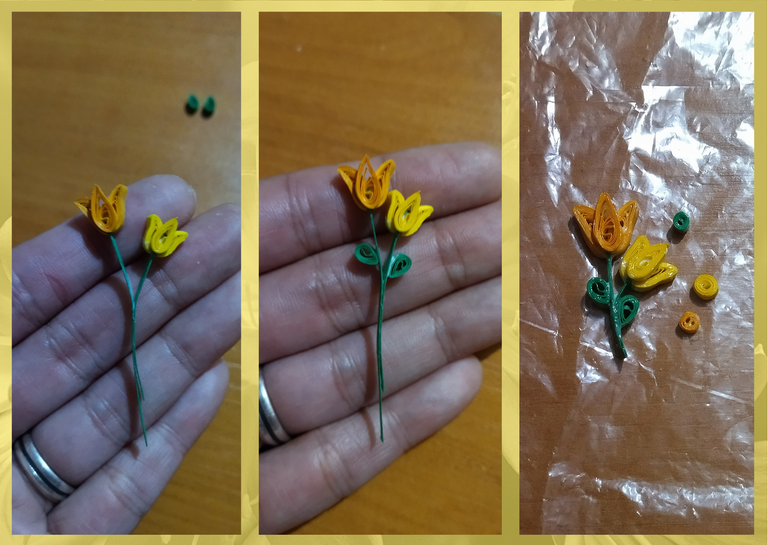
- We are going to assemble our pendant ornament which in this case will be some small tulips, for this we are going to need additionally two pieces of green ribbon 3mm wide, all the circles that we have made we are going to mold them in the shape of a drop.
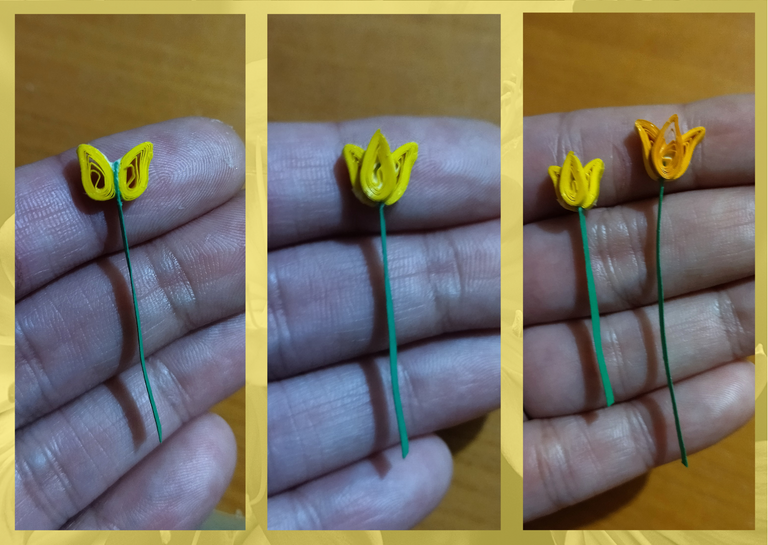
- Let's take the two wider yellow drops and one of the pieces of green ribbon, we will glue one next to the other placing the green ribbon in the middle which will be the stem of the flower, once these pieces are glued, we will place the remaining drop which is the thinnest one in the middle of the two thicker drops. We mold the leaves of the tulips to our liking. Repeat the same procedure with the orange pieces.
- To finish forming our piece that will adorn the pendant, which in this case will be a sprig of two tulips, we join the green ribbons and decorate with the other two small green drops, which will be the leaves of the stem of the flowers.
- Before gluing the bouquet on the pendant I put a layer of extra strong white glue, so that it takes shine and protection. Additionally I made some small circles of the colors that I will use to decorate other parts of the pendant.
- Once the glue that I applied to the tulip bouquet was dry, I placed it on the fabric medallion with extra strong white glue, to finally decorate it.
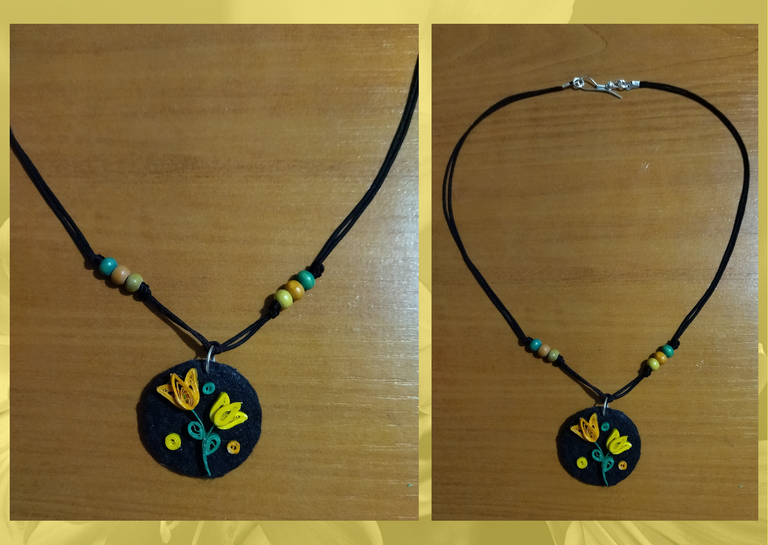
- I decided to make a double necklace with fine black Chinese thread, I placed some yellow, orange and green wooden beads and made simple knots, closing it with its knot cover, jewelry ring and used a hook as a brooch.
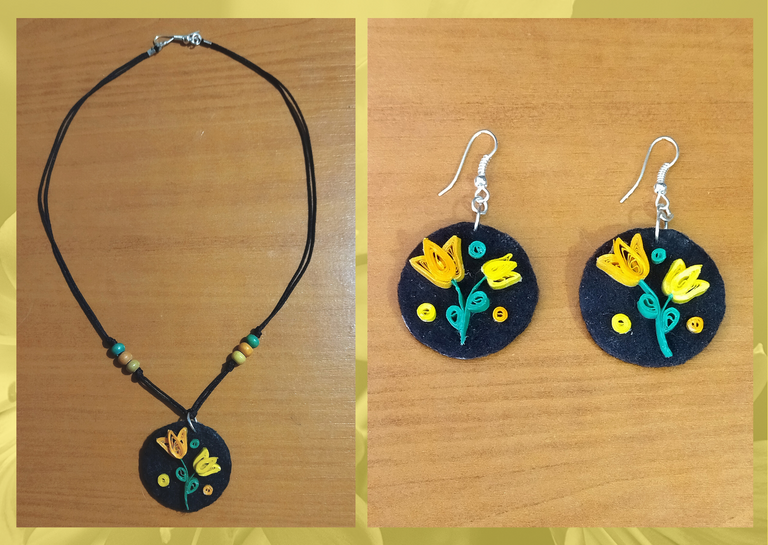
We put the fabric medallion with tulips on her necklace, and we have a nice accessory ready for use.
As I made two pendants, to one I placed a hook as a pendant base, so you can see how the pendant looks like a tendril, it will be up to you if you want to make the complete set, it looks very nice as a pendant for necklace and as hanging tendrils.

• Vamos a armar nuestro adorno del dije que en este caso serán unos pequeños tulipanes, para esto vamos a necesitar adicionalmente dos trozos de cinta verde de 3mm de ancho, todos los círculos que tenemos hechos los vamos moldear en forma de gota.
• Tomemos las dos gotas amarillas más anchas y uno de los trozos de cinta verde, vamos a pegar uno al lado del otro colocando la cinta verde en el medio que será el tallo de la flor, una vez pegada estás piezas, vamos a colocar la gota restante que es la más delgada en medio de las dos gotas más gruesas. Moldeamos las hojas de los tulipanes a nuestro gusto. Repetimos el mismo procedimiento con las piezas anaranjadas.
• Para finalizar de formar nuestra pieza que adornará el dije que en este caso será un ramito de dos tulipanes, unimos las cintas verdes y decoramos con las otras dos pequeñas gotas verdes, que serán las hojas del tallo de las flores.
• Antes de pegar el ramo en el dije le puse una capa de pega blanca extra fuerte, para que tome brillo y protección. Adicionalmente hice unos pequeños círculos de los colores que utilizare para decorar otras partes del dije.
• Seca la pega que le aplique al ramo de tulipanes, lo coloque en el medallón de tela con pega blanca extra fuerte, para finalmente decorarlo.
• Decidí realizar un collar doble con hilo chino fino negro, le coloque algunas perlas de madera amarillas, anaranjadas, verdes y le hice nudos sencillos, cerrando con su tapa nudos, argolla de bisutería y utilice un anzuelo cómo broche.
Colocamos el medallón de tela con tulipanes en su collar, y tenemos un lindo accesorio listo para su uso.
Como realice dos dijes, a una le coloque un anzuelo como base colgante, para que vean como luce como zarcillo el dije realizado, todo quedara en ustedes si desean realizar el conjunto completo, luce muy bonito como dije para collar y como zarcillos colgantes.

What did you think, did you like it?
I hope you did, I hope you liked my explanation, procedure and photos, I made them with love for you.
"Let out that muse that inspires you, and let your imagination fly".
Thank you all, see you next time. 🐾🐱💕

¿Que les pareció, les gustó?
Espero que sí, que les haya gustado mi explicación, procedimiento y fotos, los hice con mucho cariño por y para ustedes.
"Deja salir esa musa que te inspira, y deja volar tu imaginación".
Gracias a todos, nos vemos en la próxima. 🐾🐱💕

Todas las fotos usadas en este post son de mi autoría y han sido sacadas en mi celular personal un Redmi 9T y editadas Canva Banner y separador hecho por mí en Canva Traducido con la ayuda de DeepL


