Hello everyone...✨
Hello to my dear Hivers and the dear community of artists #HiveDIY, as always very pleased and excited to be here again, showing you my work made with love and especially for you.
Today I bring you another character that my daughter loves, she is very fond of series, animes, video games and much more.
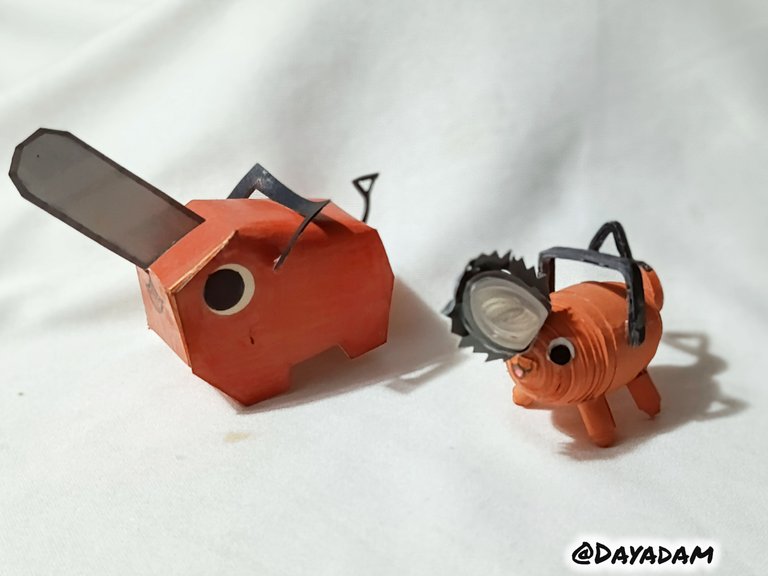
There is a special character which she likes so much, that she made it herself in the technique of cardboard and at the same time a friend who is out of the country sent her a great stuffed animal of this character in question, it is "Pochita ", a small and adorable kawaii chainsaw, which belongs to the anime Chainsaw Man.
I decided to make a decorative 3D figure in the quilling technique, to give it as a gift to my baby, as you can see she likes to collect all this kind of figures.
Hoping you like it, I leave you my creative process:
Let's get started:😃

Hola a Todos...✨
Hola a mis queridos Hivers y a la querida comunidad de artistas #HiveDIY, como siempre muy complacida y emocionada de encontrarme por acá nuevamente, mostrándole mi trabajo hecho con mucho amor y especialmente para ustedes.
Para hoy les traigo otro personaje qué le encanta a mi hija, ella es muy amante de series, animes, videojuegos y mucho más.
Hay un personaje en especial el cual le gusta tanto, que ella misma lo elaboró en la técnica de cartonaje y al mismo tiempo un amigo que se encuentra fuera del país le envío un gran peluche de este personaje en cuestión, se trata de "Pochita", una pequeña y adorable motosierra kawaii, que pertenece al anime Chainsaw Man.
Decidí realizar una figura de decorativa en 3D en la técnica de quilling, para obsequiarla a mi bebé, como pueden observar a ella le gusta coleccionar todo este tipo de figuras.
Esperando que sea de su agrado, les dejo mi proceso creativo:
Comencemos:😃
 |

• Cintas de quilling de diversas medida y colores.
• Cartulinas.
• Guillotina.
• Molde para círculos.
• Conos para moldear triangulos.
• Hija blanca, lápiz, colores.
• Pega blanca extra fuerte (de carpintería).
• Tijera.
• Pincel.
- Quilling ribbons of different sizes and colors.
- Cardboard.
- Guillotine.
- Mold for circles.
- Cones to mold triangles.
- White daughter, pencil, colors.
- Extra strong white glue (carpentry glue).
- Scissors.
- Brush.

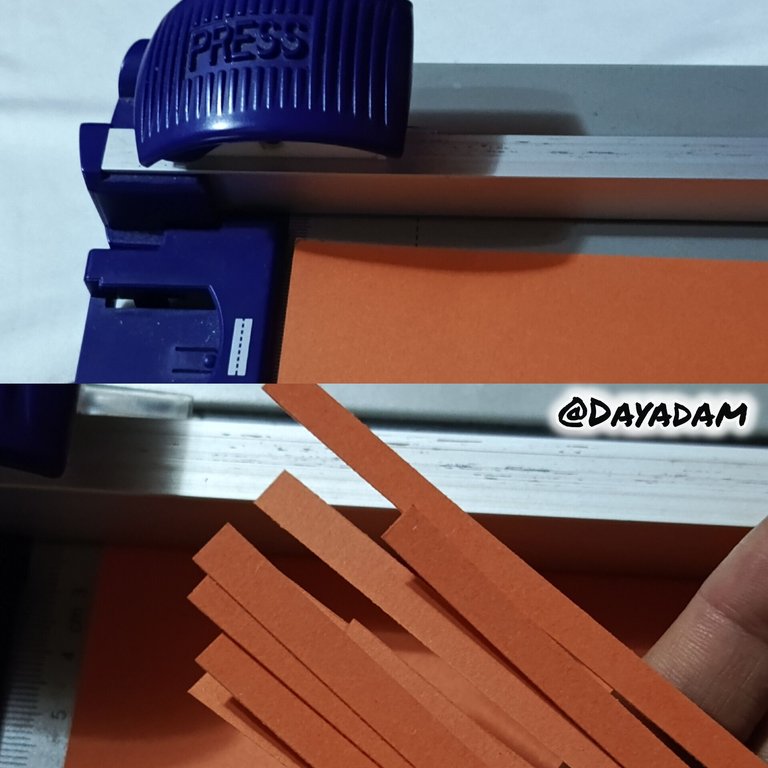
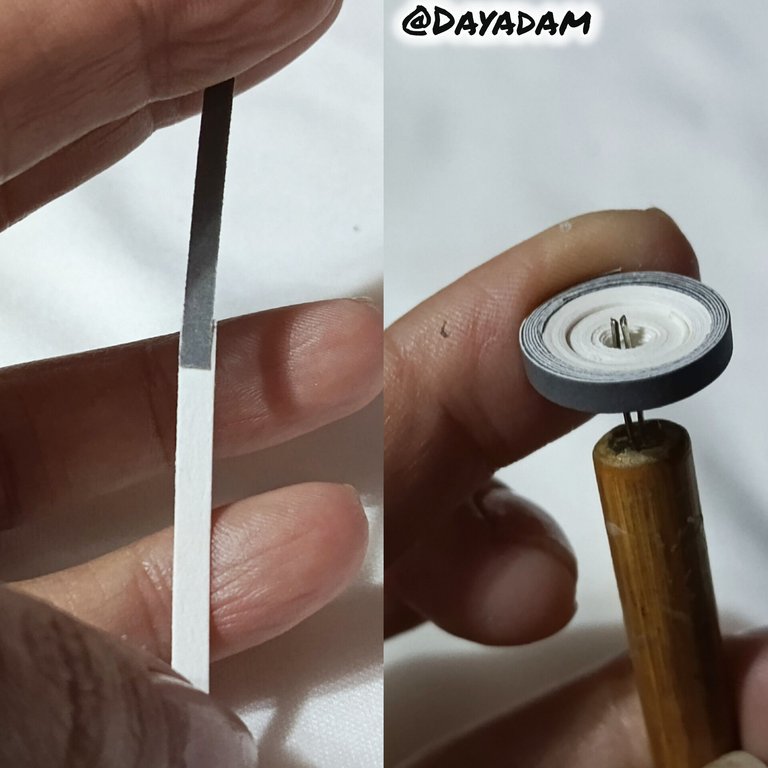
For the realization of this little character I proceeded to buy cardboard of the necessary colors from which I cut strips of the required sizes with a guillotine.
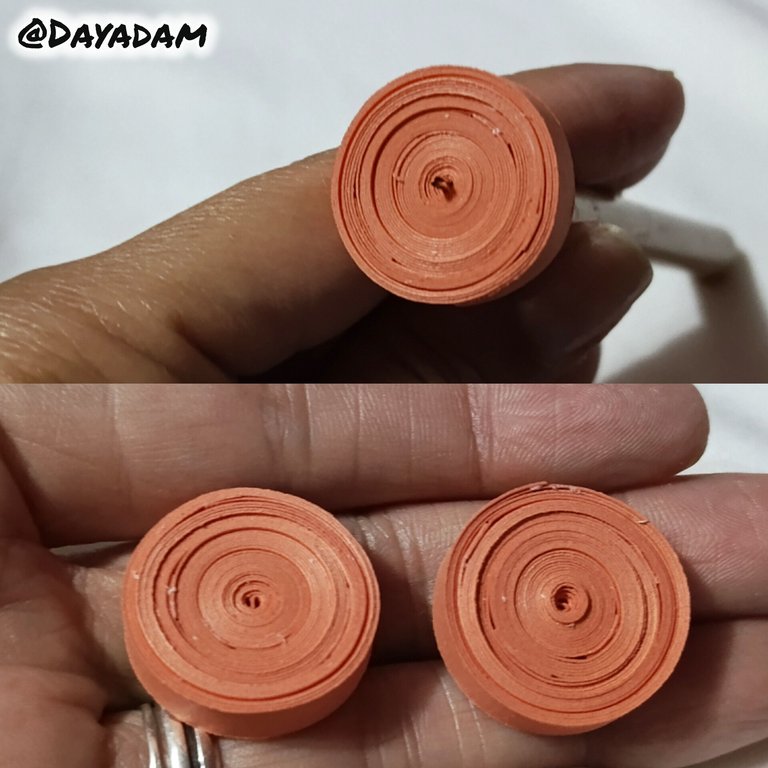
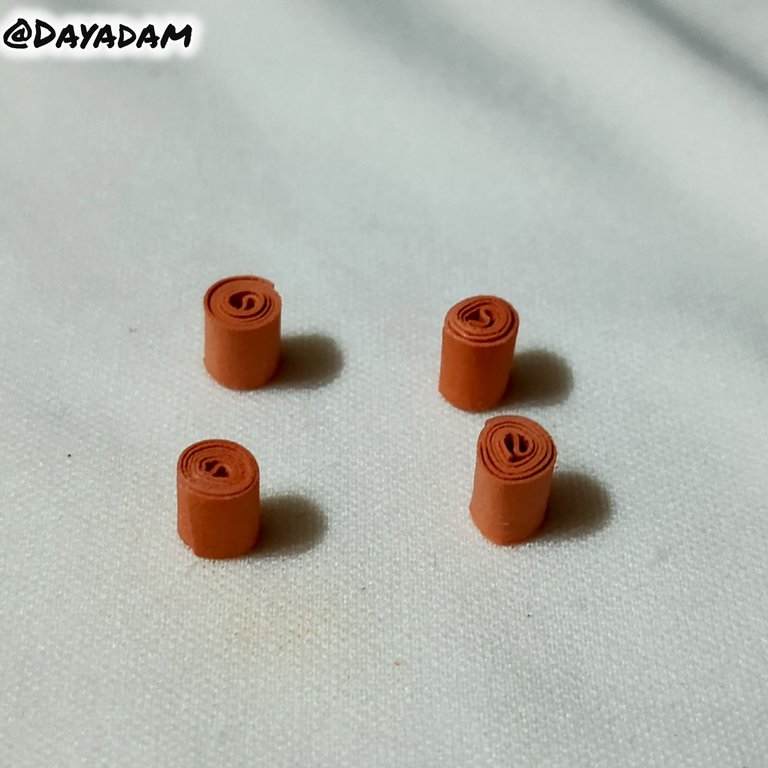
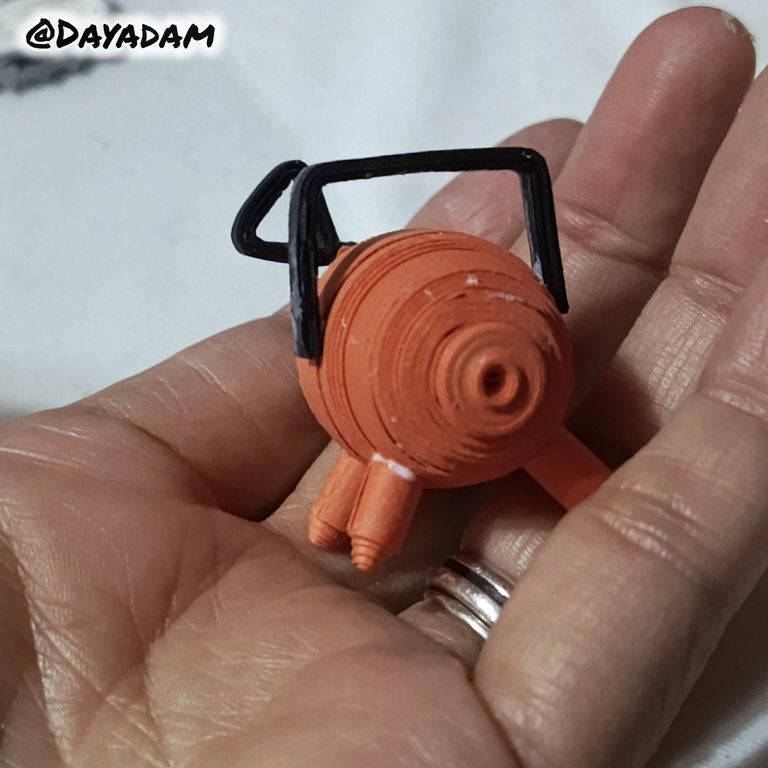
- With 4 mm wide strips I proceeded with the help of a quilling needle to make 2 closed circles.
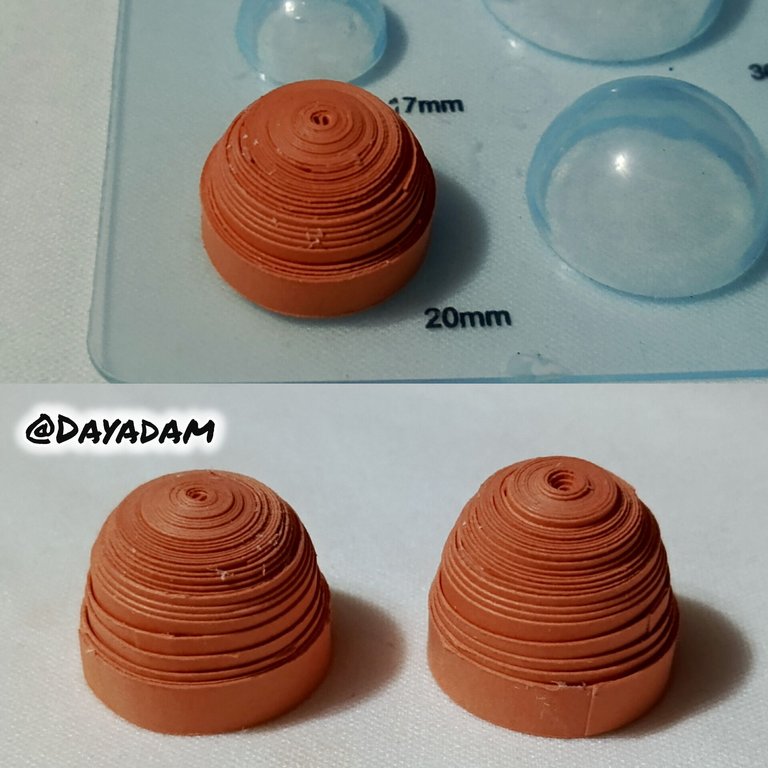
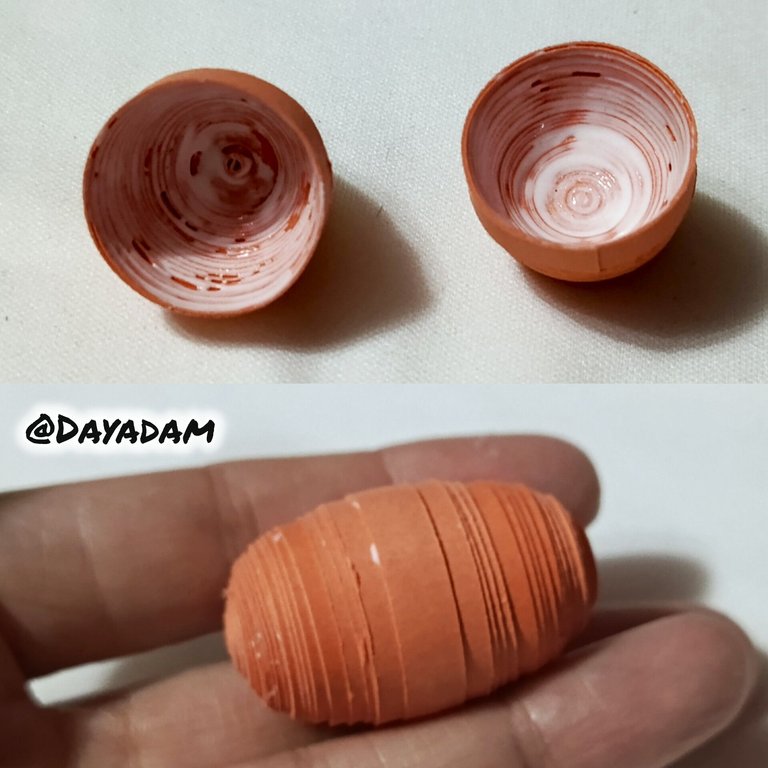
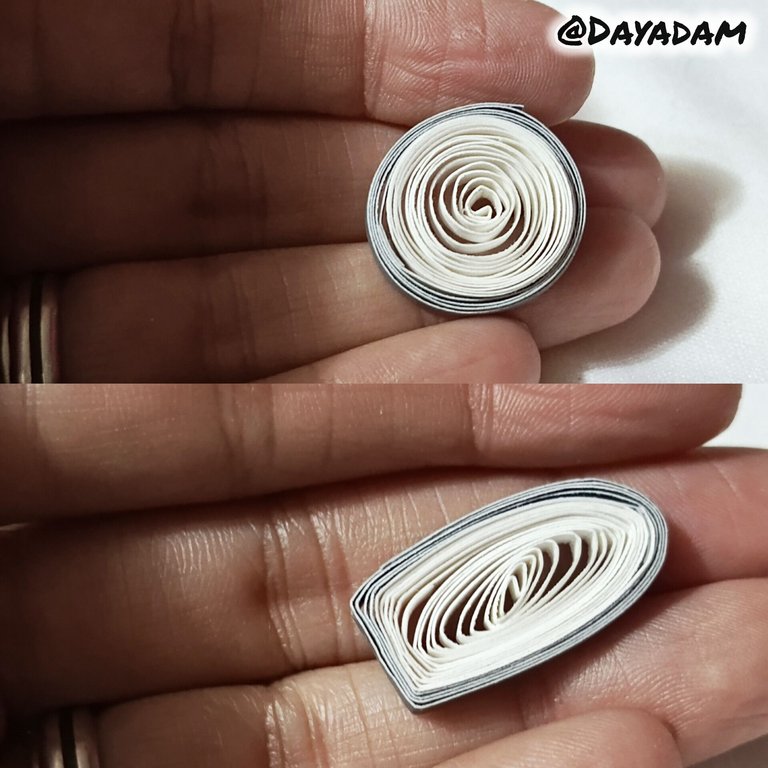
- These 2 circles will be molded in a ruler to mold circles in the measure number 20 mm, then I took them out of the mold and applied extra strong white glue on the inside and let them dry very well, this to prevent the pieces from moving or deforming.
- We proceed to join both circles with extra strong white glue.

Para la realización de este pequeño personaje procedí a comprar cartulina de los colores necesarios de los cuales saqué tiras de las medidas requeridas con una guillotina.
• Con tiras de 4 mm de ancho procedí con la ayuda de la aguja para quilling a realizar 2 círculos cerrados.
• Estos 2 círculos los moldearemos en una regla para moldear círculos en la medida número 20 mm, luego saqué del molde apliqué pega blanca extra fuerte en la parte interna y dejé secar muy bien, esto para evitar que las piezas se muevan o se deformen.
• Procedemos a unir ambos círculos con pega blanca extra fuerte.
 |  |
 |  |
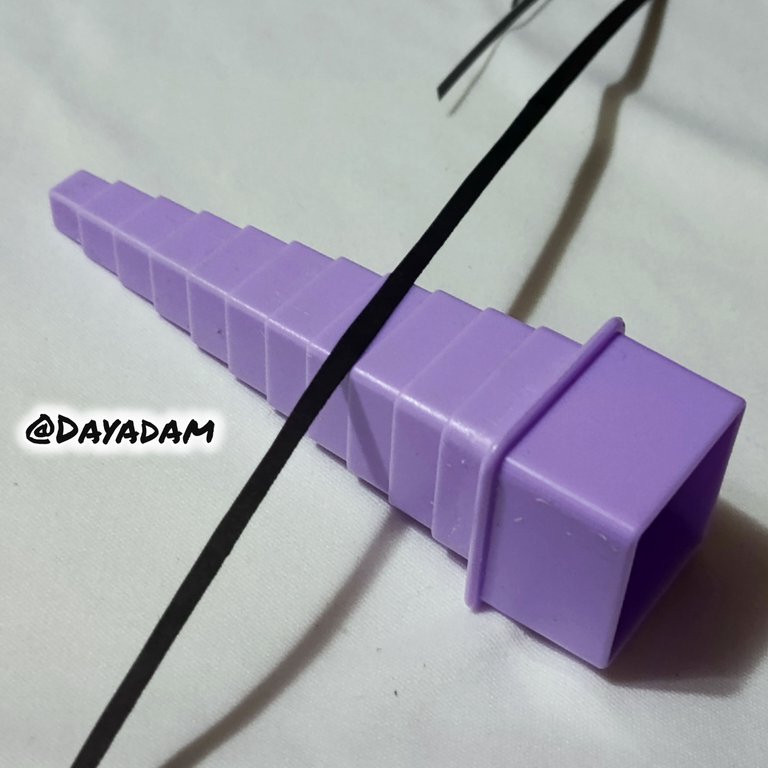
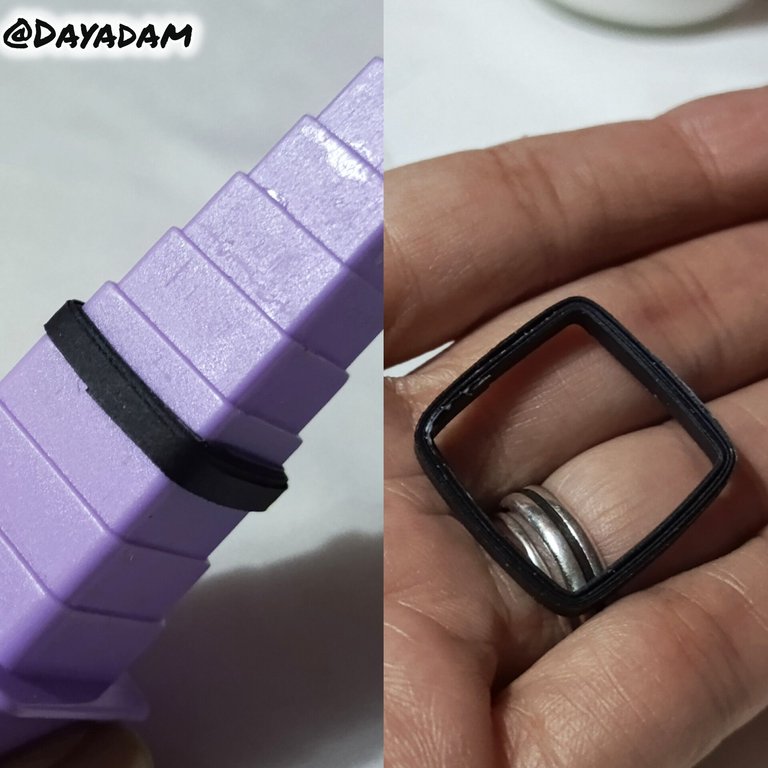
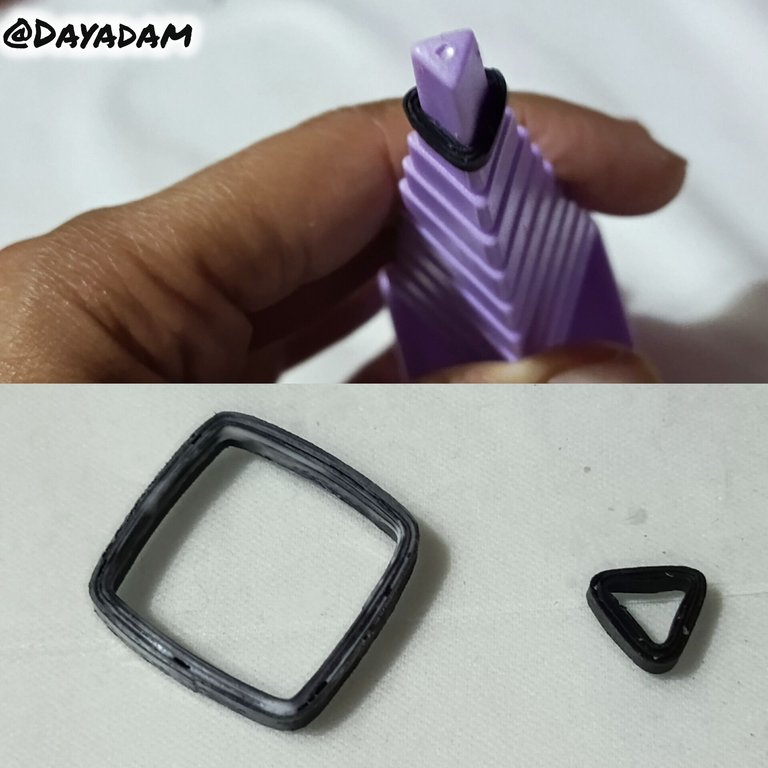
- With a black strip of approximately 3 mm wide, I proceeded to make a hollow square with the help of a cone to mold squares, I used an intermediate measure of the cone.
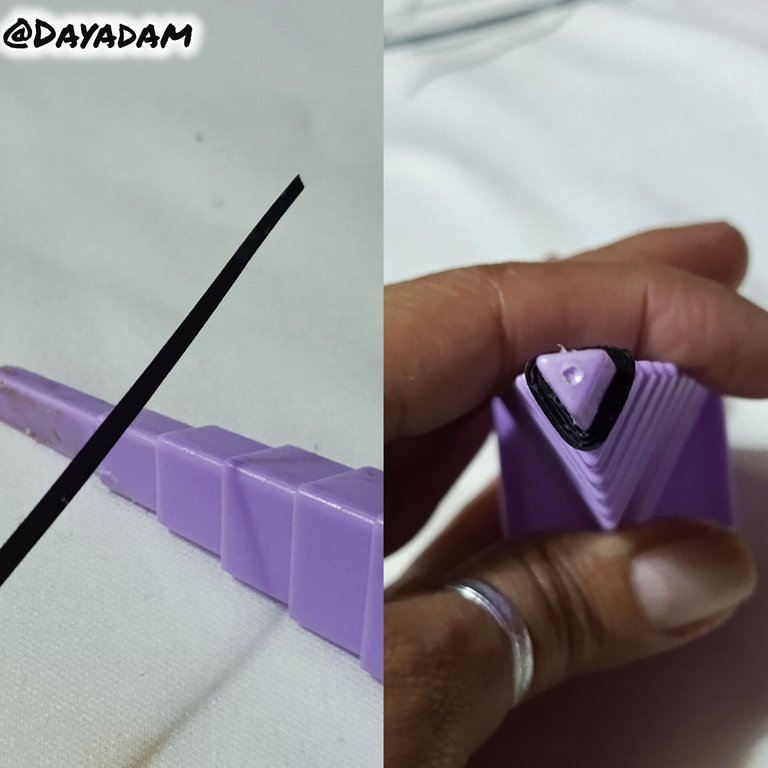
- Now with a tape of approximately 2 mm wide, I made a small triangle with a cone to mold triangles, of which I used the first measure, the smallest one.
- Take the square and the triangle, I applied several layers of glue and let it dry very well.
• Con una tira de color negro de aproximadamente 3 mm de ancho, procedí a realizar un cuadrado hueco esto con ayuda de un cono para moldear cuadrados, utilicé una medida intermedia del cono.
• Ahora con una cinta de aproximadamente 2mm de ancho, realicé un pequeño triángulo con un cono para moldear triángulos, del mismo utilicé la primera medida, la más pequeña.
• Tome el cuadrado y el triángulo, le apliqué varias capas de pegar dejando secar muy bien.
 |  |
 |  |
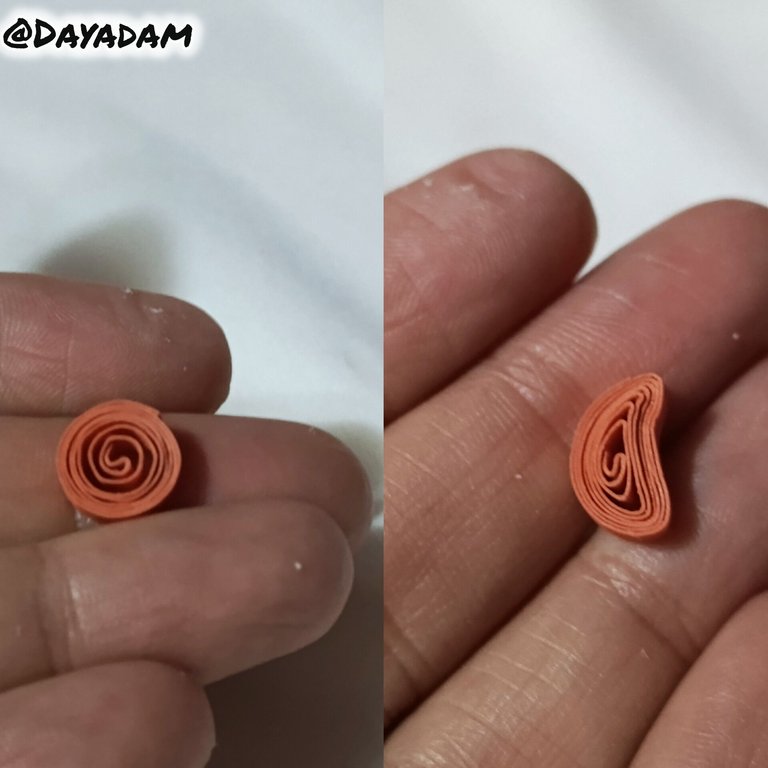
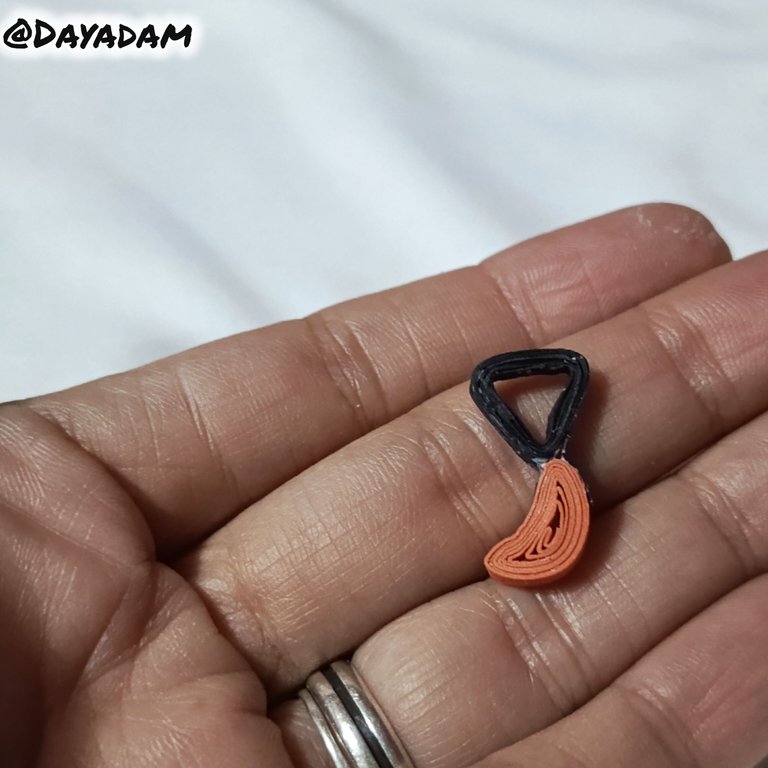
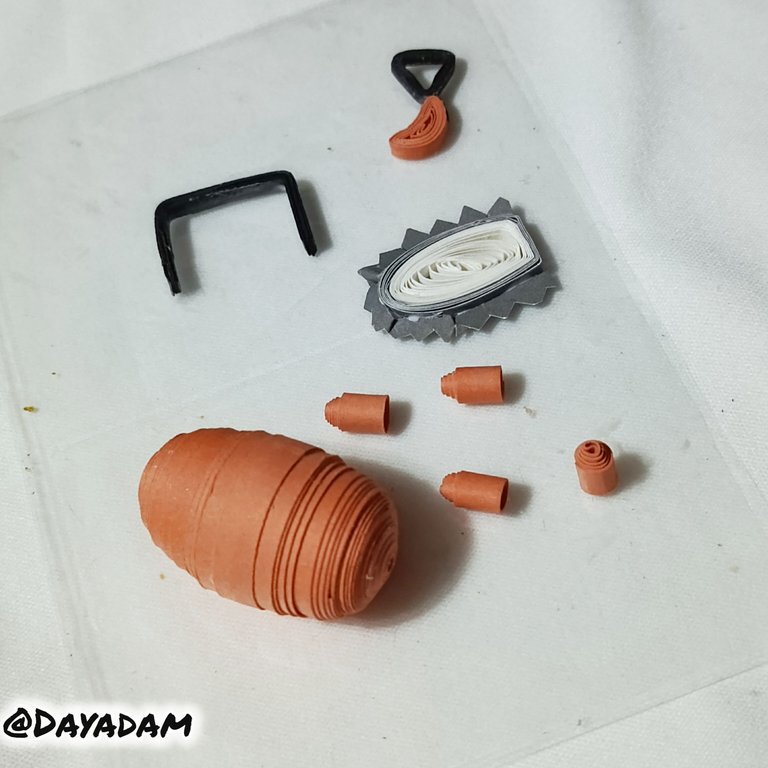
- To make the tail, I made an open circle with orange tape 3 mm wide, this circle was molded in the shape of a half moon, then I glued on top the triangle that I made previously.
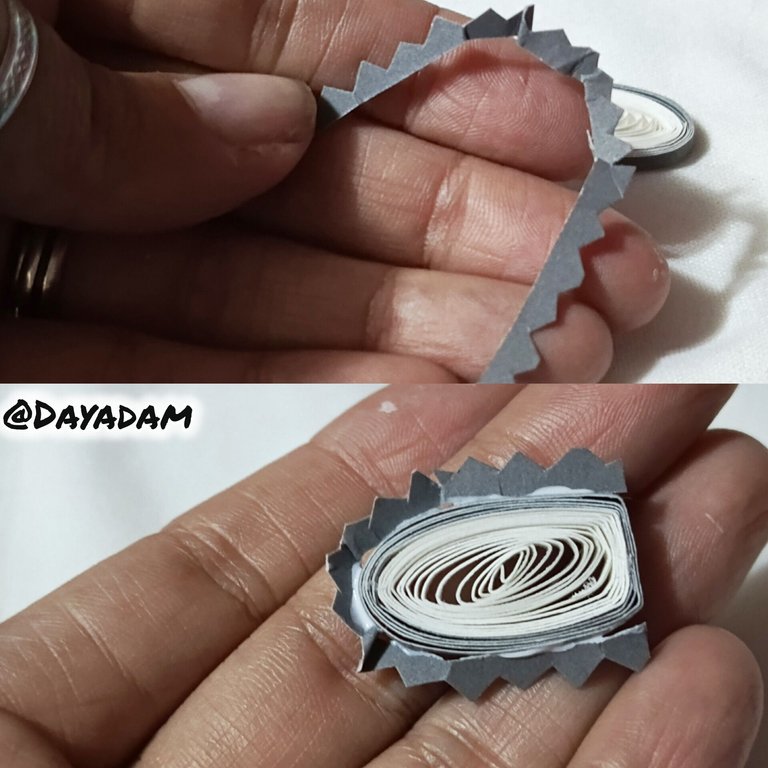
- To make the saw I made an open circle with white and gray strips, ready the circle molded it as you can see in the image, then I took a piece of gray cardboard to which I made small peaks with the scissors, I glued it around the previous piece.
• Para realizar la cola, realicé un círculo abierto con cinta de color naranja de 3 mm de ancho este círculo lo moldee en forma de media luna, luego le pegué en la parte de arriba el triángulo que realicé previamente.
• Para realizar la sierra lleve a cabo un círculo abierto con tiras de color blanco y gris, listo el círculo lo moldea tal como pueden ver en la imagen, luego tomé un trozo de cartulina color gris al cual hice pequeños picos con la tijera, este lo pegué alrededor de la pieza anterior.
 |  |  |
 |  |  |
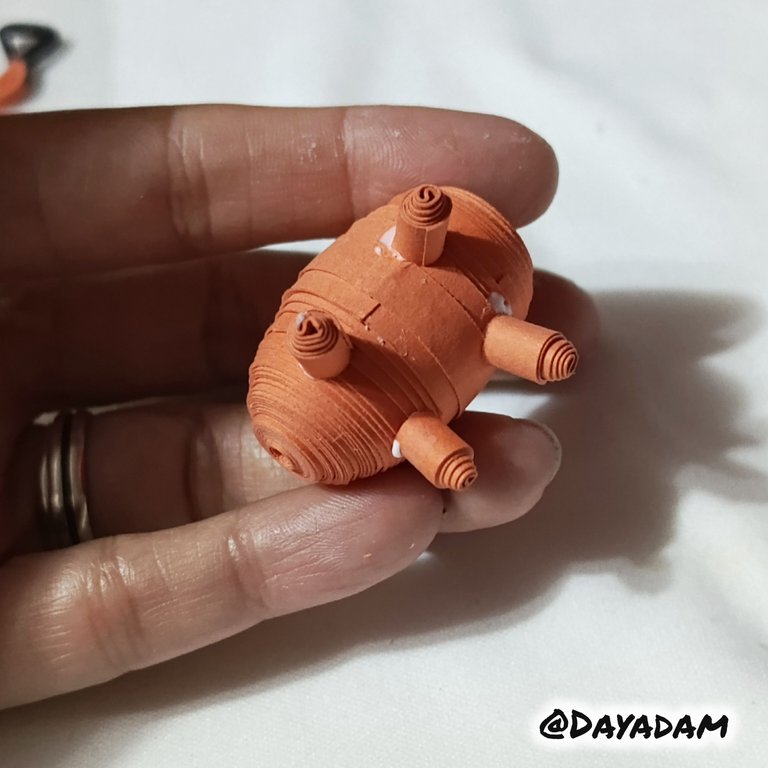
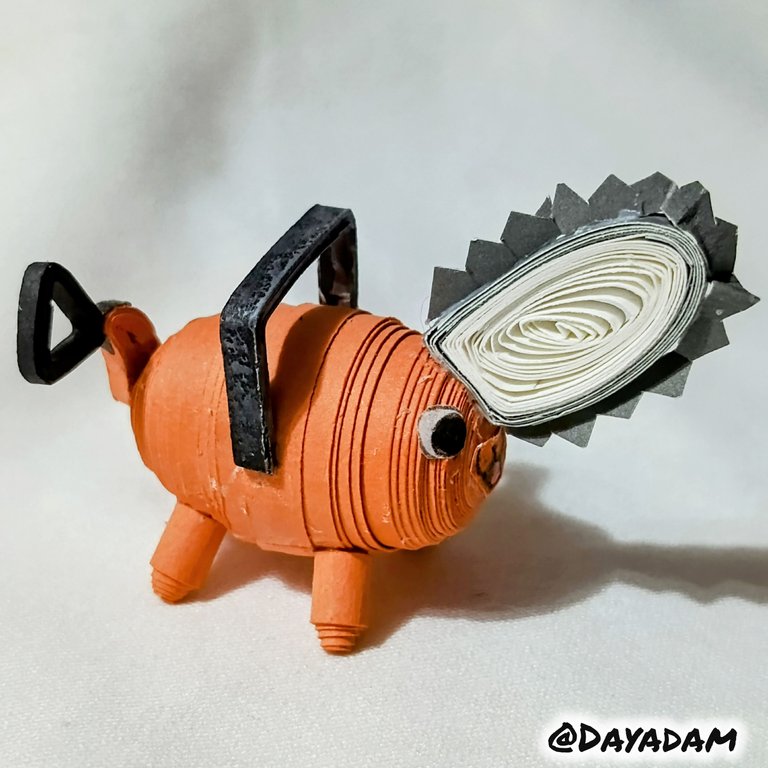
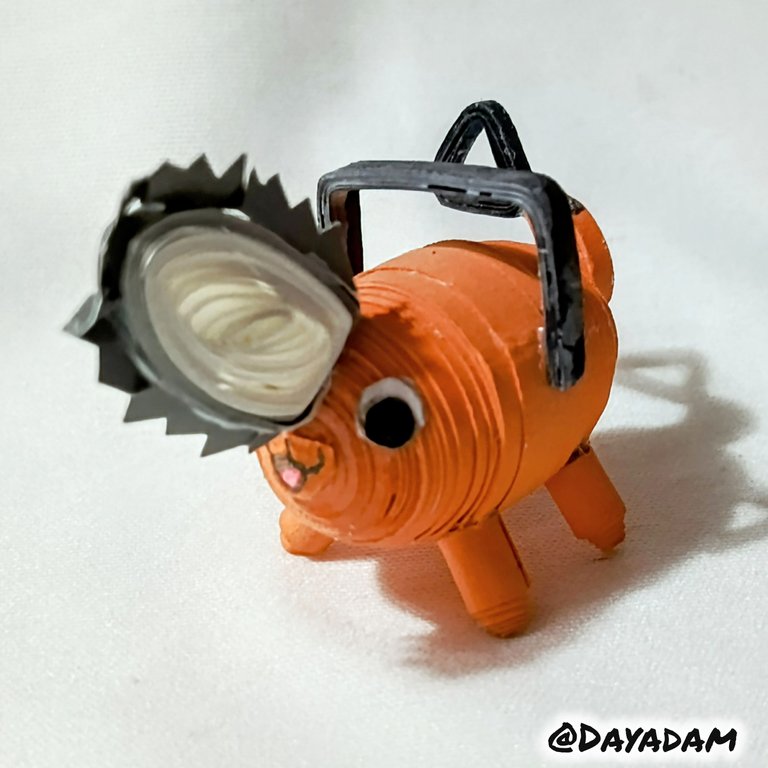
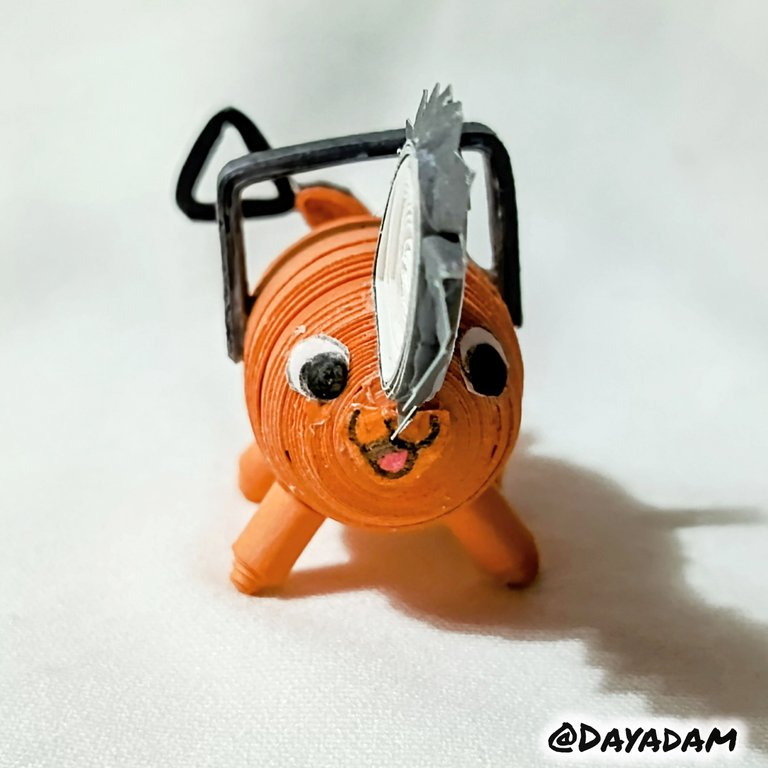
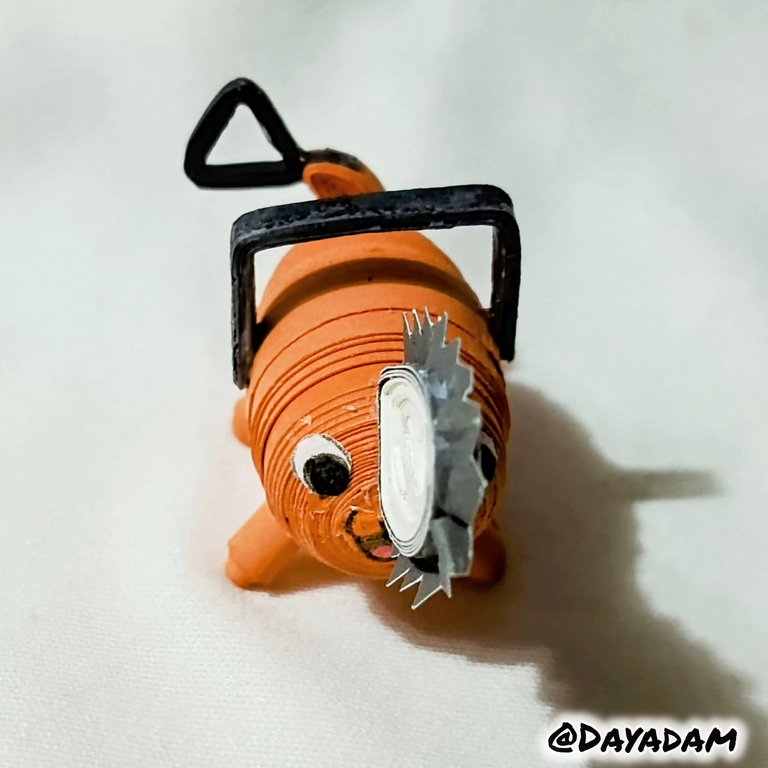
- Having all the pieces ready we are going to put them together as you can see in the pictures.
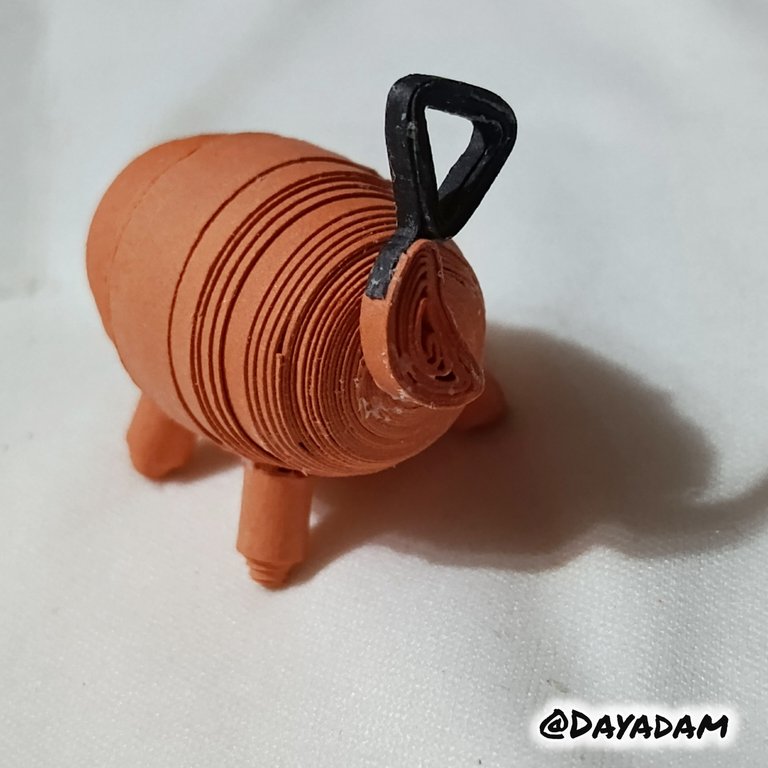
- Finally I drew with pencil and colors on a white sheet the eyes and mouth of the character and glued them in the corresponding place.
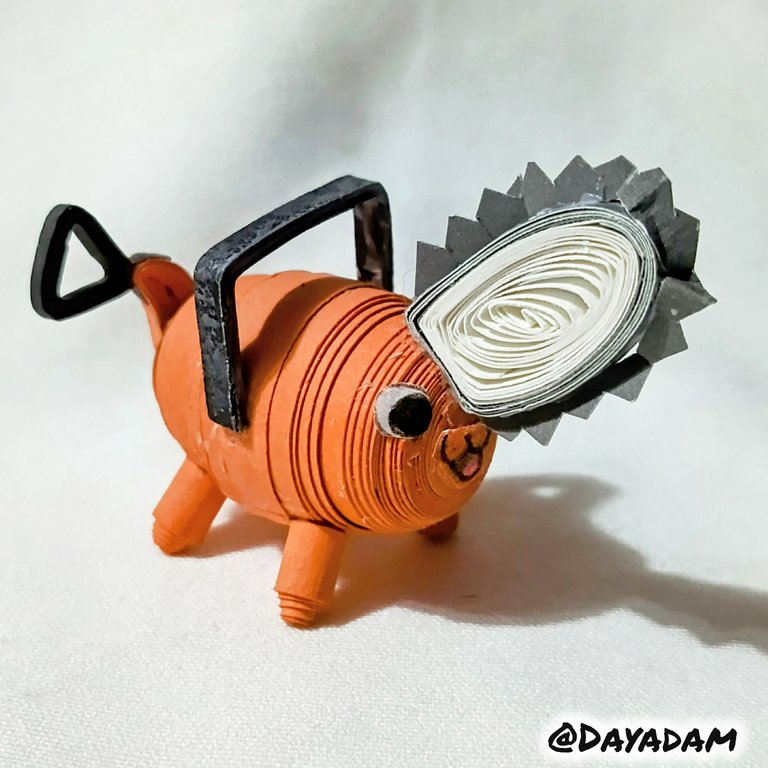
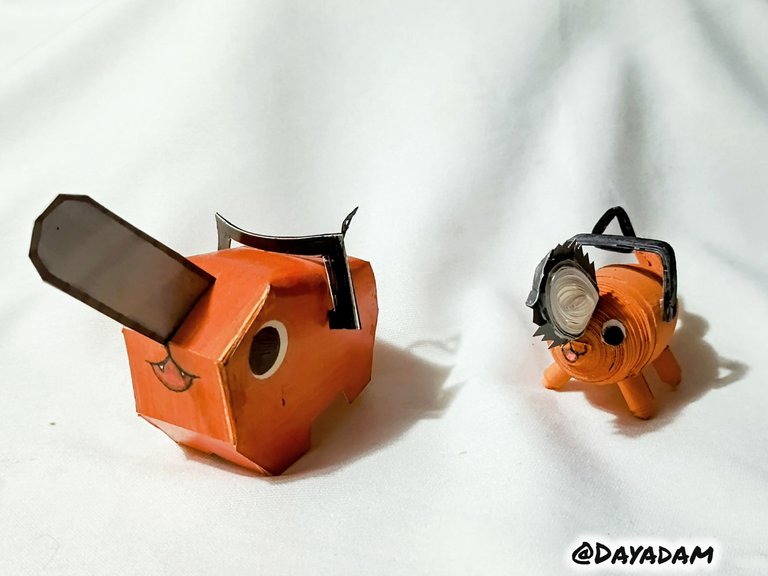
In this way I finished this cute figure of Pochita decorative 3D, in the technique of cardboard combined with the quilling technique.
• Teniendo todas las piezas listas vamos a unirlas tal como pueden ver en las imágenes.
• Para finalizar dibujé con lápiz y colores en una hoja blanca los ojos y boca del personaje los pegué en el sitio correspondiente.
De esta manera finalice esta tierna figura de Pochita decorativa en 3D, en la técnica de cartonaje combinada con la técnica de quilling.
 |  |  |
 |  |

|
 |  |
 |  |
 |  |
 |
I hope you did, I hope you liked my explanation, procedure and photos, I made them with love for you.
Posted Using INLEO |