Hello everyone... 🐱🐾💕
Hello to my dear Hiver and the dear community of artists #Jewelry, as always very pleased and excited to be here again, showing you my work made with love and especially for you.
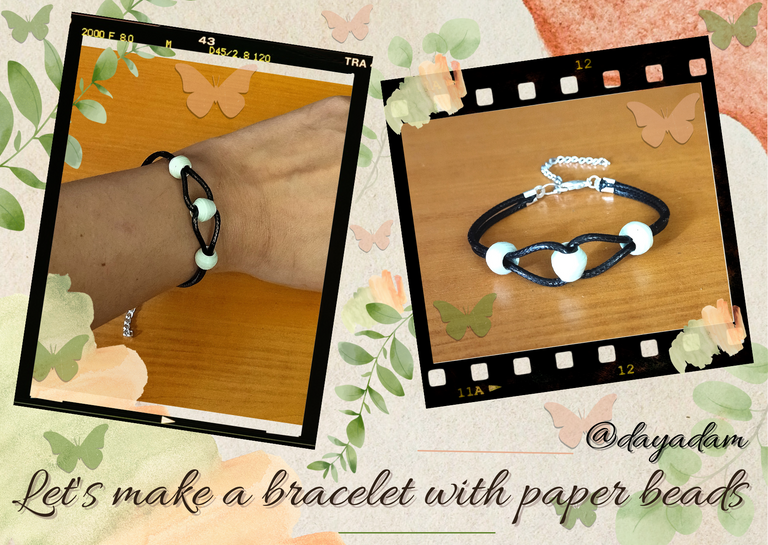
For today I bring you the step by step for the elaboration and decoration of a thick snakeskin bracelet, but what is the best, that the beads will be made by ourselves on paper with the quilling technique. I use most of the time ribbons that I have available since I got this material some time ago for my enterprise, but as I always tell you and suggest, the quilling can be made by yourselves with any piece of paper of the color of your preference that you have at home, to make these beads you can use even a piece of a white sheet that you have available, magazine paper, in short, everything is in recycling and letting our imagination fly ....
Soon I will make other models of bracelets and necklaces, making other beads in different colors. I hope you like this beautiful work. That said:
Let's get started:😃

Hola a todos... 🐱🐾💕
Hola a mis queridos Hiver y a la querida comunidad de artistas #Jewelry, como siempre muy complacida y emocionada de encontrarme por acá nuevamente, mostrándole mi trabajo hecho con mucho amor y especialmente para ustedes.
Para hoy les trago el paso a paso para la elaboración y decoración de una pulsera en piel de serpiente gruesa, pero que es lo mejor, que las perlas serán realizadas por nosotros mismos en papel con la técnica de quilling. Yo utilizo la mayoría de las veces cintas que tengo disponibles ya que me hice de este material hace un tiempo para mi emprendimiento, pero como siempre les digo y sugiero, el quilling lo pueden elaborar ustedes mismos con cualquier trozo de papel del color de su preferencia que tengan en casa, para realizar estas perlas pueden usar hasta un trozo de una hoja blanca que tengan disponible, papel de revista, en fin, todo está en reciclar y dejar volar nuestra imaginación…
Próximamente les hare otros modelos de pulseras y collares, elaborando otras perlas en diferentes colores. Espero sea de su agrado este bonito trabajo. Dicho esto:
Comencemos:😃

• 2 Cintas de papel (quilling) de 9mm de ancho x 28cms de largo, o cualquier papel que tengan sobrante en casa del color de tu preferencia.
• Pincel o cualquier otro objeto que tenga aproximadamente 4cms de circunferencia en su base.
• Regla básica.
• Lápiz.
• Regla con diferentes medidas de circunferencia.
• Tijera.
• Pega blanca extra fuerte (carpintería).
• Pincel.
• Alicate punta fina.
• Argollas de bisutería medianas y pequeñas.
• Tapa nudos.
• Trancadero pico de loro.
• Cadena de bisutería.
- 2 paper ribbons (quilling) 9mm wide x 28cms long, or any paper you have left over at home in the color of your choice.
- Paintbrush or any other object that has approximately 4cms of circumference at its base.
- Basic ruler.
- Pencil.
- Ruler with different circumference measures.
- Scissors.
- Extra strong white glue (carpentry).
- Paintbrush.
- Fine-nosed pliers.
- Medium and small bijouterie rings.
- Knot cover.
- Parrot's beak locker.
- Costume jewelry chain.

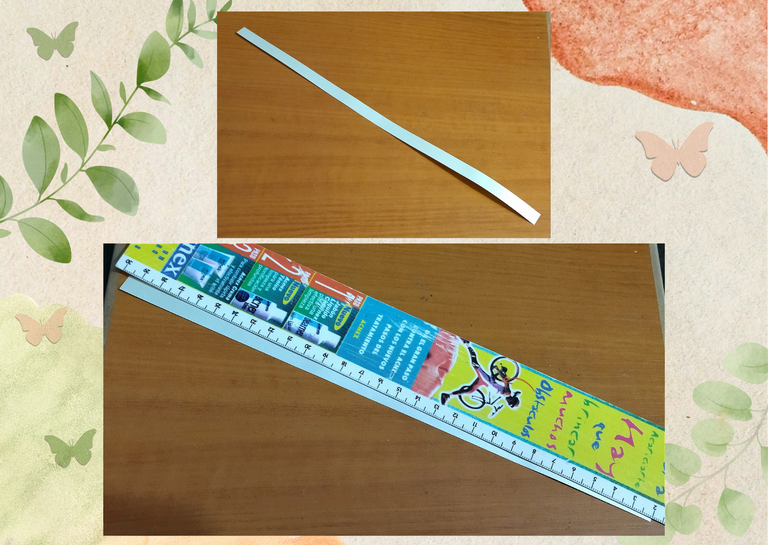
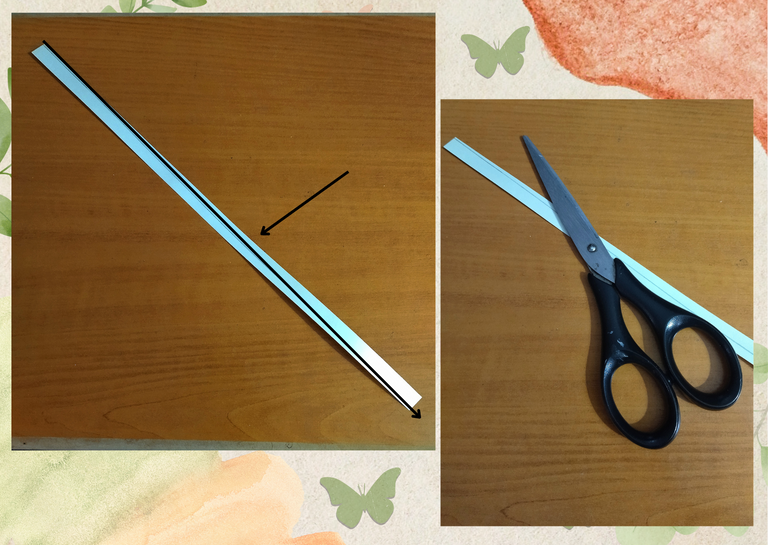
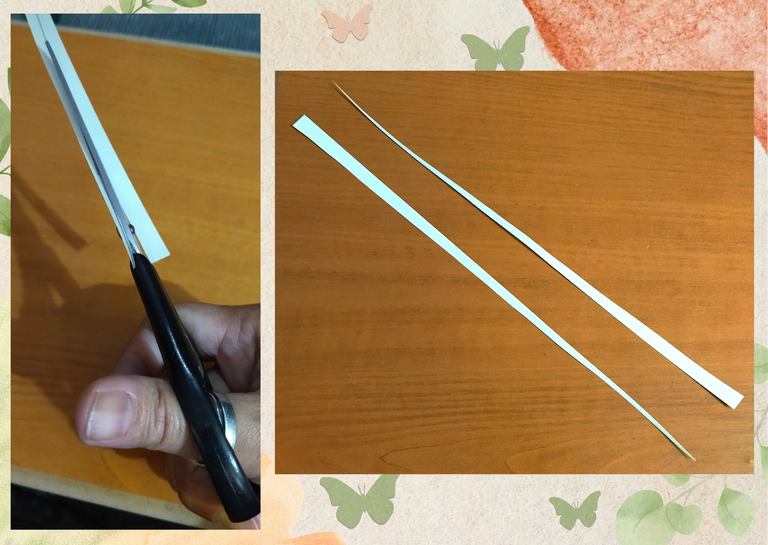
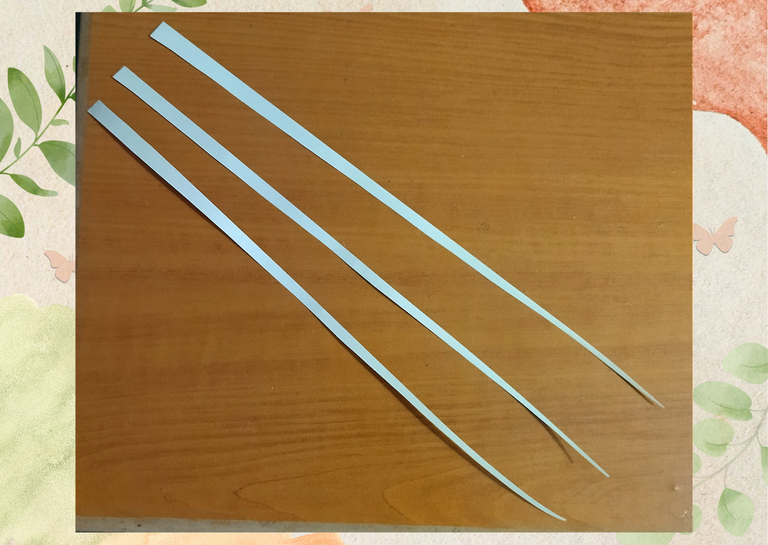
- Let's start making the paper beads that will be the decoration of our bracelet, we take a quilling ribbon 9mm wide by 28cms long, in my case I will use a bright emerald green color, we stretch the ribbon along a table or base, with a pencil and a ruler we will draw a diagonal line on it, after this we will cut it to obtain two strips with a triangular shape. We will repeat the same procedure with another strip. I am going to make 3 beads for the bracelet, so we will need 3 ribbons cut diagonally.

• Vamos a comenzar realizando las perlas de papel que serán la decoración de nuestra pulsera, tomamos una cinta de quilling de 9mm de ancho por 28cms de largo, en mi caso usare un color verde esmeralda brillante, estiramos la cinta a lo largo de una mesa o base, con un lápiz y una regla trazaremos una línea en diagonal en la misma, luego de esto recortaremos para obtener dos tiras con una forma triangular. Vamos a repetir el mismo procedimiento con otra cinta. Voy a realizar 3 perlas para la pulsera, por lo cual necesitaremos 3 cintas cortadas en diagonal.
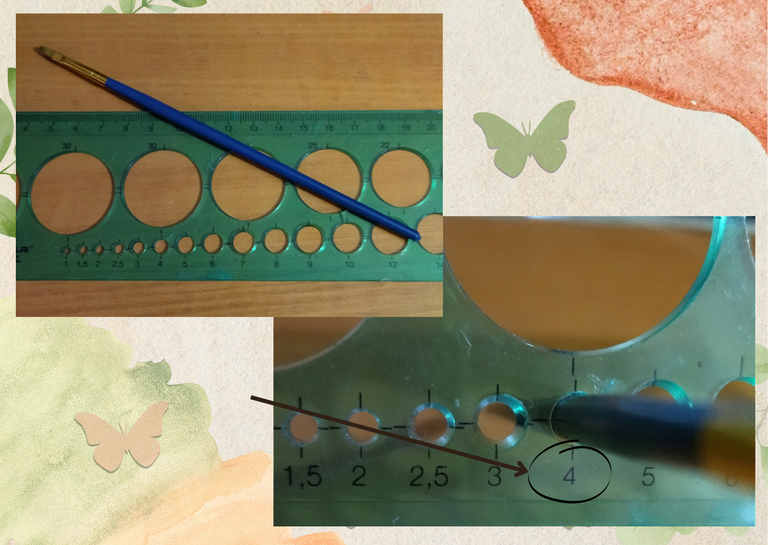
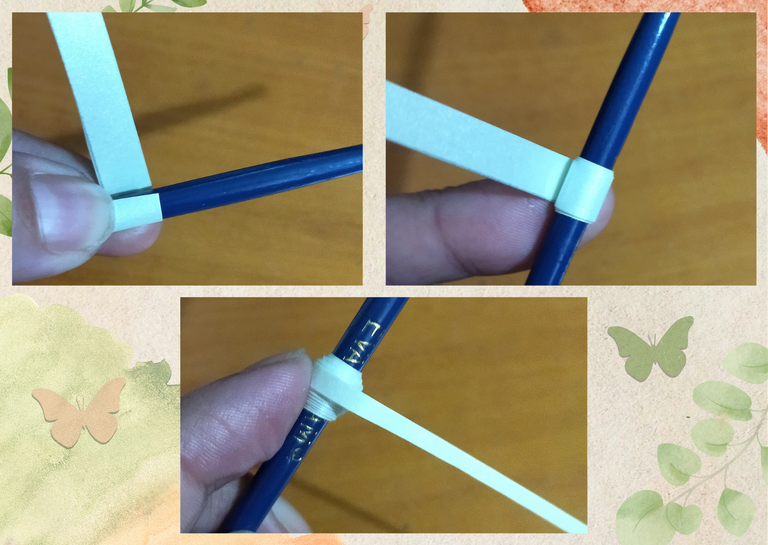
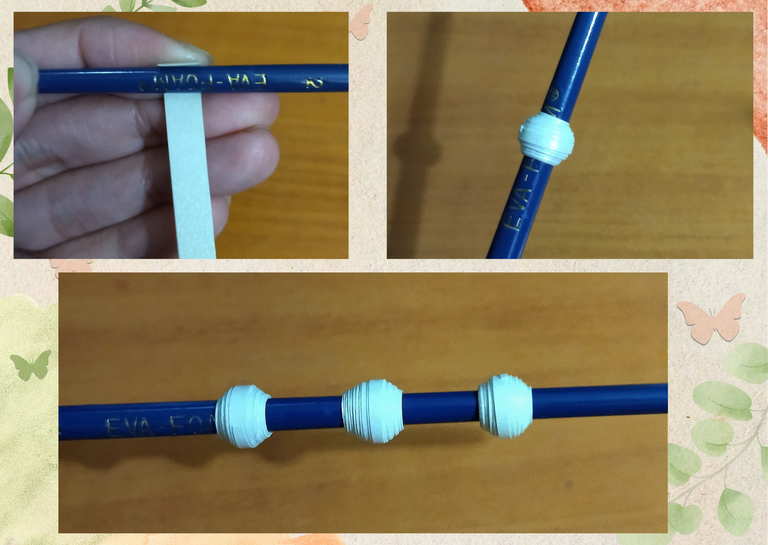
- To make the main pearl. Let's take one of the cut ribbons, a brush or any other instrument you have at hand, which measures its base approximately 4cms in circumference, to show you I measured it on a ruler with circumference measurements, but you can do it in the measure you want depending on the width of the cord that you will use to make the bracelet, the one I will use is somewhat thick and I will put it in the pearl in a double way, that is why I need the hole to be relatively large. Then as I mentioned before we take the ribbon and we are going to roll it in the brush, starting with the thickest part of the ribbon, we will do it little by little so that it does not lose its shape and it looks like a rounded bead, when we finish rolling the ribbon we will seal it with extra strong white glue.
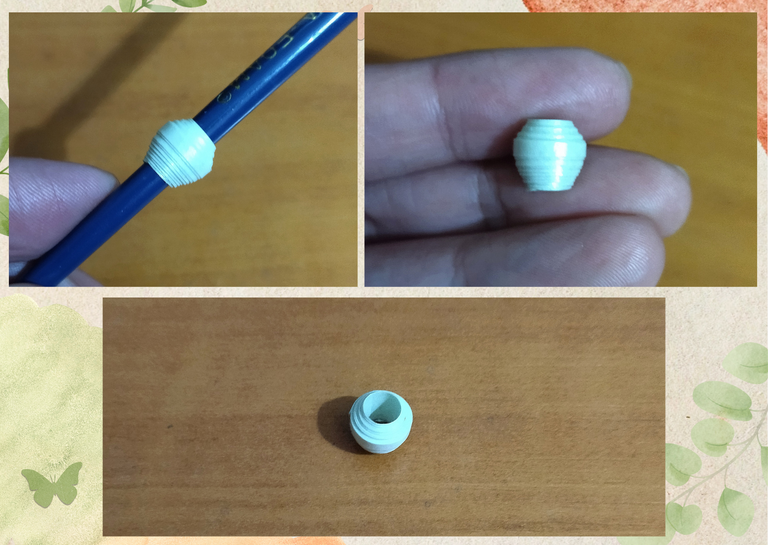
- Now let's go with the two remaining pearls that will adorn the bracelet on the sides, I will make them in the same way as the first one, with the only difference that I will make them in the brush a little lower, having more or less 3.5mm in circumference, I will do this by eye percent since the rule does not have that measure, but if you like you can do it with the same measure as the previous one, what I want with this is that the pearl is more adjusted to the cords of the bracelet so they do not move and to make them look a little smaller. As you can see in the picture, I placed the three beads at the base of the brush and the last two are a little smaller.
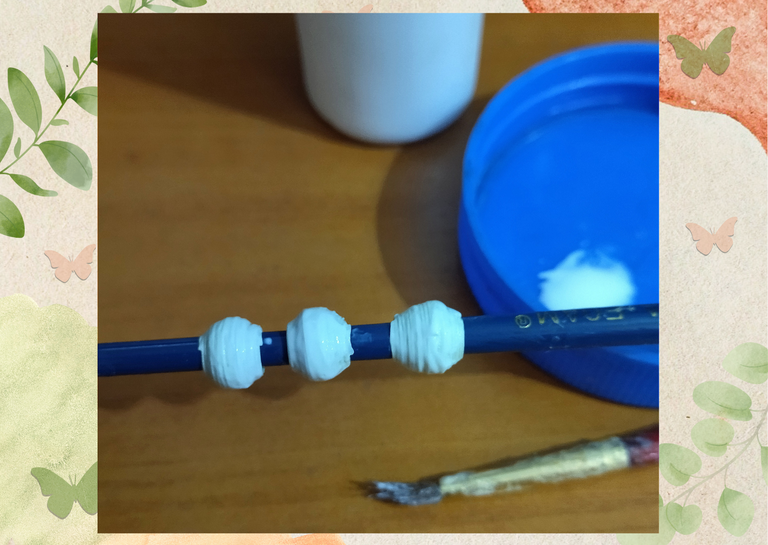
- We are going to laminate the paper quilling beads, we will take a brush and apply extra strong white glue to each one of them, we will add several layers of glue to provide good protection and lamination, letting it dry between one and another.

• Para realizar la perla principal. Vamos a tomar una de las cintas cortadas, un pincel o cualquier otro instrumento que tengas a la mano, que mida su base aproximadamente 4cms de circunferencia, para mostrarles a ustedes lo medí en una regla con medidas de circunferencia, pero ustedes pueden hacerlo de la medida que deseen según sea el ancho del cordón que van a usar para realizar la pulsera, el que usare es algo grueso y lo meteré en la perla de manera doble, por ello es que necesito que el agujero quede relativamente grande. Entonces como mencionaba con anterioridad tomamos la cinta y la vamos a enrollar en el pincel, empezando por la parte más gruesa de la cinta, lo haremos poco a poco para que no pierda la forma y quede como una perla redondeada, al terminar de enrollar la cinta sellaremos con pega blanca extra fuerte.
• Ahora vamos con las dos perlas restantes que adornaran la pulsera por los lados, Estas las hare de la misma manera que la primera, con la única diferencia que las realizare en el pincel un poco más abajo, que tenga más o menos 3.5mm de circunferencia, esto lo hare al ojo por ciento ya que la regla no tiene esa medida, Pero si gustan la pueden hacer con la misma medida que la anterior, yo lo que deseo con esto es que la perla quede más ajustada a los cordones de la pulsera para que no se muevan y para que luzcan un poco más pequeñas. Como podrán ver en la imagen, les coloqué las tres perlas en la base del pincel y las dos últimas son un poquito más pequeñas.
•Vamos a plastificar las perlas de paper quilling, tomaremos un pincel y le colocaremos pega blanca extra fuerte a cada una de ellas, añadiremos varias capas de pega para proporcionar una buena protección y plastificado, dejando secar entre una y otra.
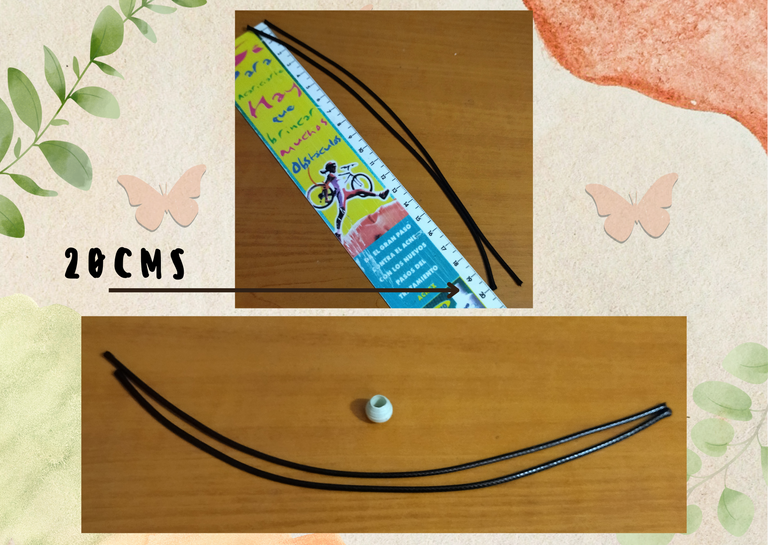
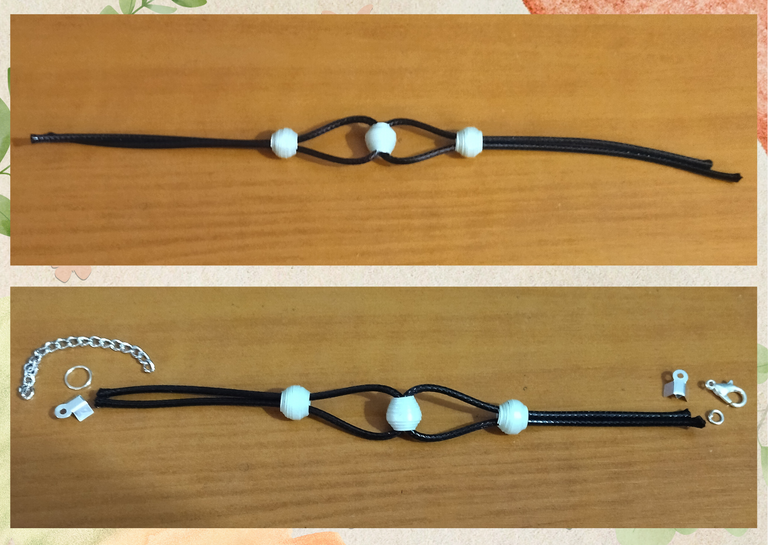
- Once our pearls are dry, we are going to assemble and decorate our simple bracelet, we take two pieces of thick black snake skin, we cut them approximately 20cms long.
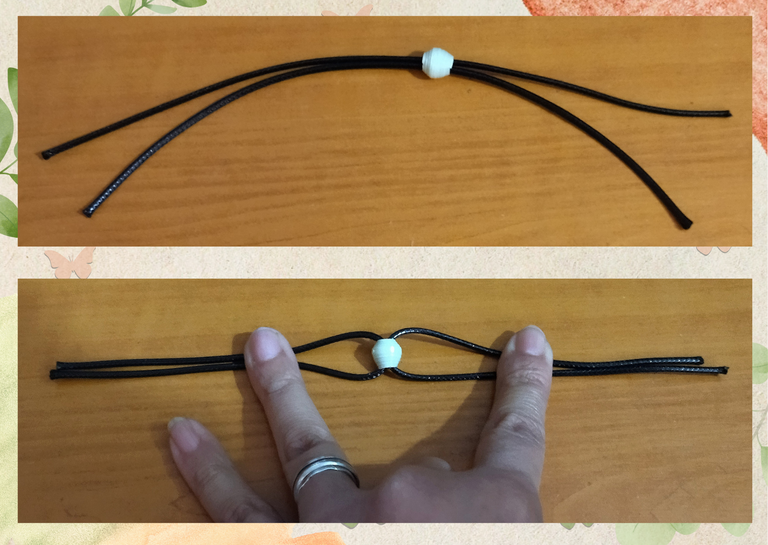
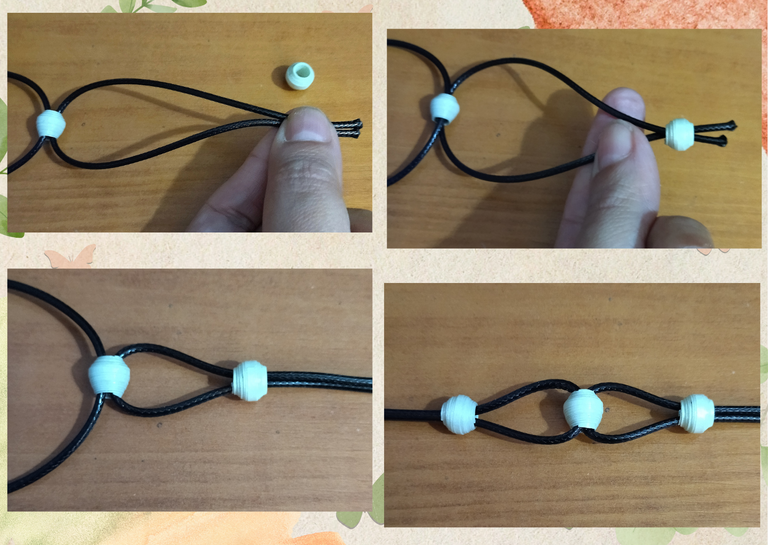
- Now we will take the biggest pearl, and we will place the two strands side by side, we will put the pearl in the middle of the two strands. Then we are going to separate the threads and we will take one to the left and the other to the right joining the ends, in the middle of these two joined threads we will put the two remaining smaller beads one on each side.
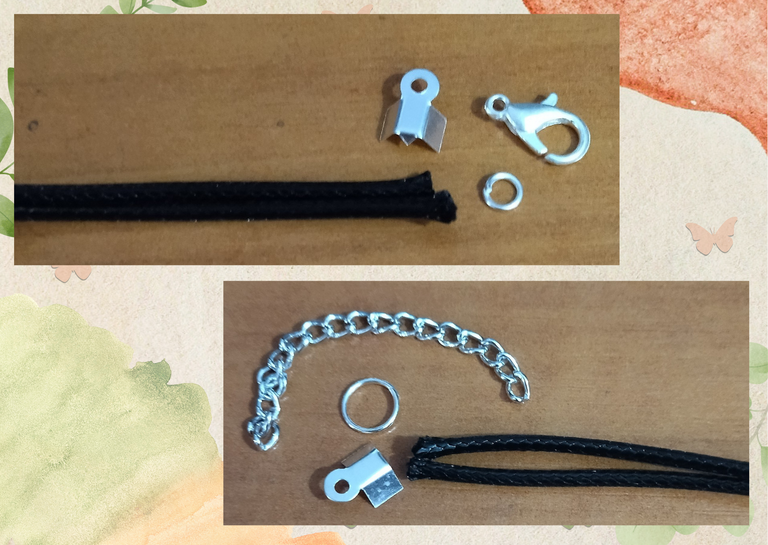
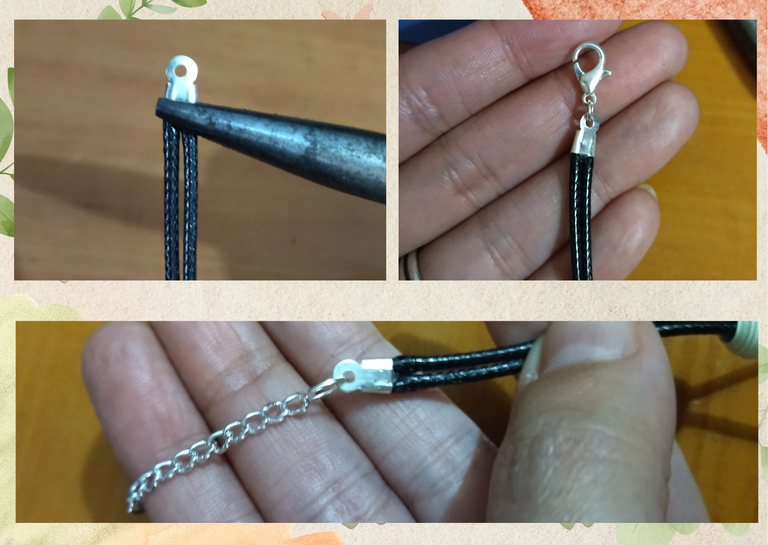
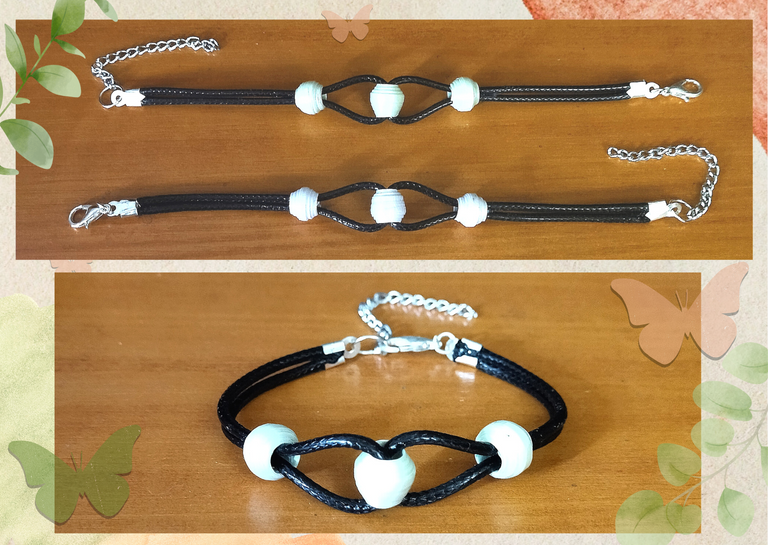
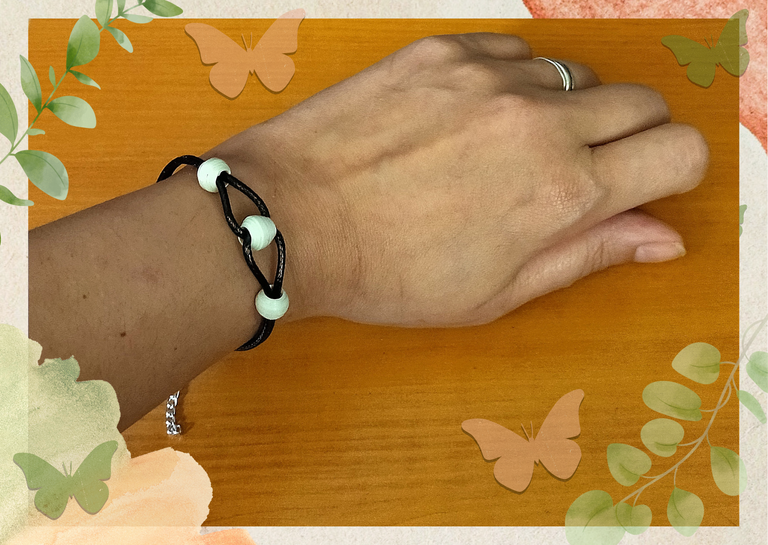
- At this point we will measure the bracelet of the measure of your preference according to the width of the wrist, we will place your tapanudos on each side, your costume jewelry rings, the trancadero parrot beak on one side and a piece of chain on the other, the chain is optional to make the adjustable bracelet. And this way we will have ready our simple snakeskin bracelet decorated with some quilling paper beads, made by ourselves.
I made another one with bright colon melon beads, unfortunately my camera I think it did not help to differentiate between colors, since they are warm and very similar. Anyway in the images I leave you both.

• Secas nuestras perlas vamos a armar y decorar nuestra sencilla pulsera, tomamos dos trozos de piel de serpiente gruesa color negro, las cortamos de aproximadamente 20cms de largo.
• Ahora tomaremos la perla más grande, y colocaremos los dos hilos uno al lado del otro meteremos la perla en medio de los dos hilos. Luego vamos a separar los hilos y llevaremos uno a la izquierda y otro a la derecha uniendo las puntas, en medio de esos dos hilos unidos meteremos las dos perlas restantes más pequeñas una de cada lado.
• Llegado a este punto mediremos la pulsera de la medida de tu preferencia según al ancho de la muñeca, colocaremos su tapanudos en cada lado, sus argollas de bisutería, el trancadero pico de loro en un lado y un trozo de cadena en el otro, la cadena es opcional para hacer la pulsera ajustable. Y de esta manera tendremos lista nuestra sencilla pulsera de piel de serpiente decorada con unas perlas de quilling paper, realizadas por nosotros mismos.
Realice otra con perlas colon melón brillantes, lamentablemente mi cámara creo que no ayudo a diferencias entre colores, ya que son cálidos y se asemejan mucho. De igual manera en las imágenes les dejo las dos.

What did you think, did you like it?
I hope you did, I hope you liked my explanation, procedure and photos, I made them with love for you.
"Let out that muse that inspires you, and let your imagination fly".
Thank you all, see you next time. 🐾🐱💕

¿Que les pareció, les gustó?
Espero que sí, que les haya gustado mi explicación, procedimiento y fotos, los hice con mucho cariño por y para ustedes.
"Deja salir esa musa que te inspira, y deja volar tu imaginación".
Gracias a todos, nos vemos en la próxima. 🐾🐱💕
Los invito que apoyen a "La Colmena", dale tu voto ✨
 Vote la-colmena for witness By @ylich

Todas las fotos usadas en este post son de mi autoría y han sido sacadas en mi celular personal un Redmi 9T y editadas Canva Banner y separador hecho por mí en Canva Traducido con la ayuda de DeepL


