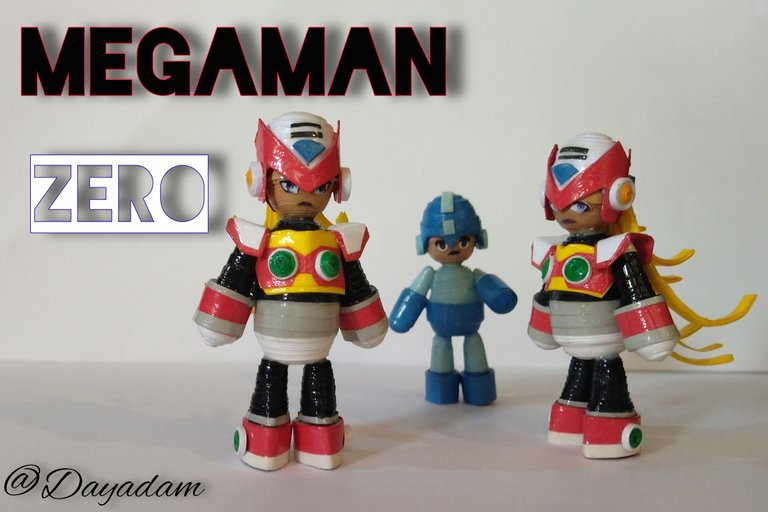
Hello everyone... 💙
Hello to my dear Hivers and the dear community of artists #HiveDIY, as always very pleased and excited to be here again, showing you my work made with love and especially for you.
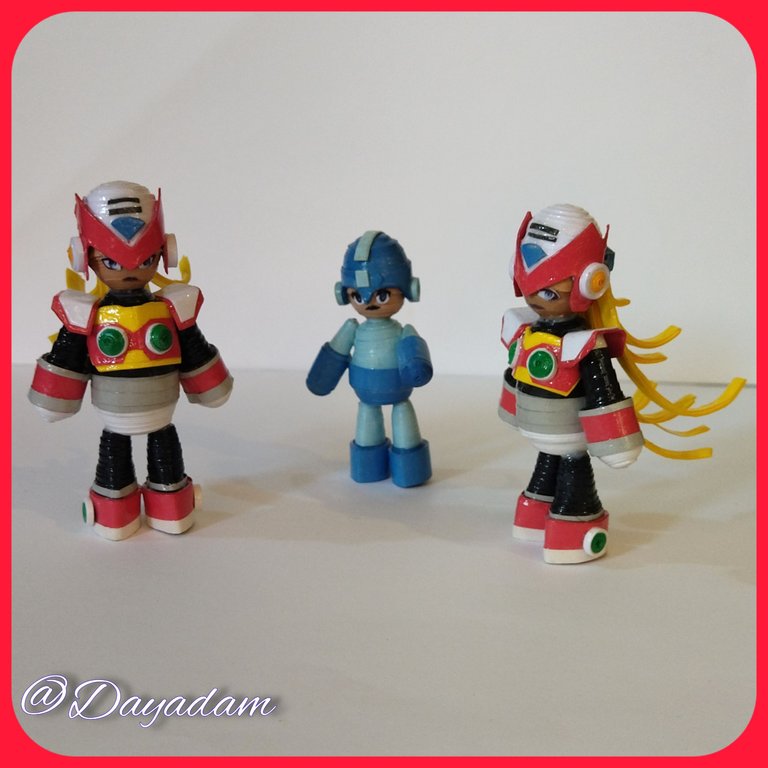
A few months ago by request of a very special person I made a 3D figure of the character Megaman to give it to him as a gift, he challenged me somehow to make it and I did it, it was not the only one he had asked me but compared to the others he had mentioned this was less complex, and still it cost me something to make it, it took me several weeks until I managed to find the necessary forms.
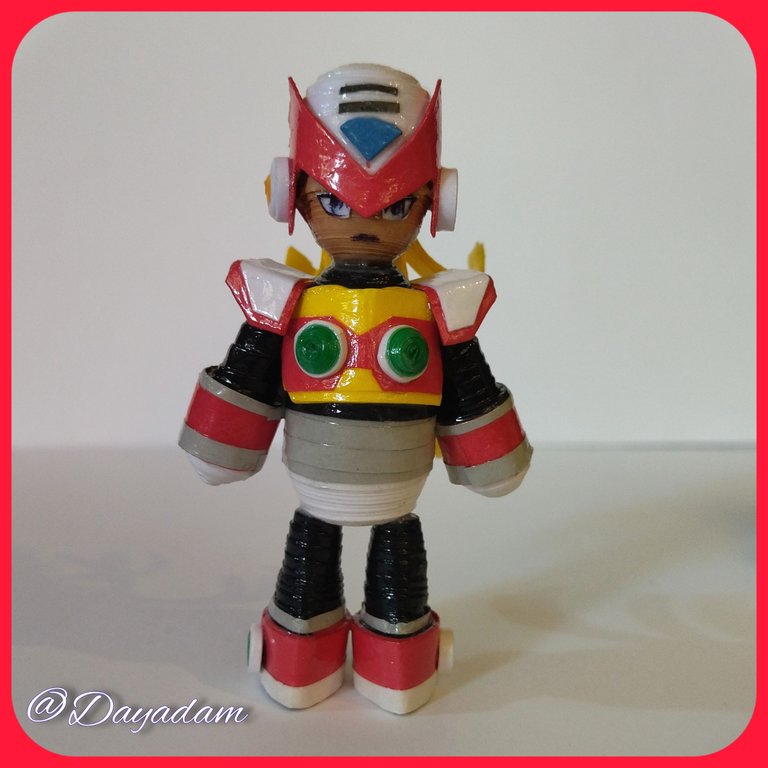
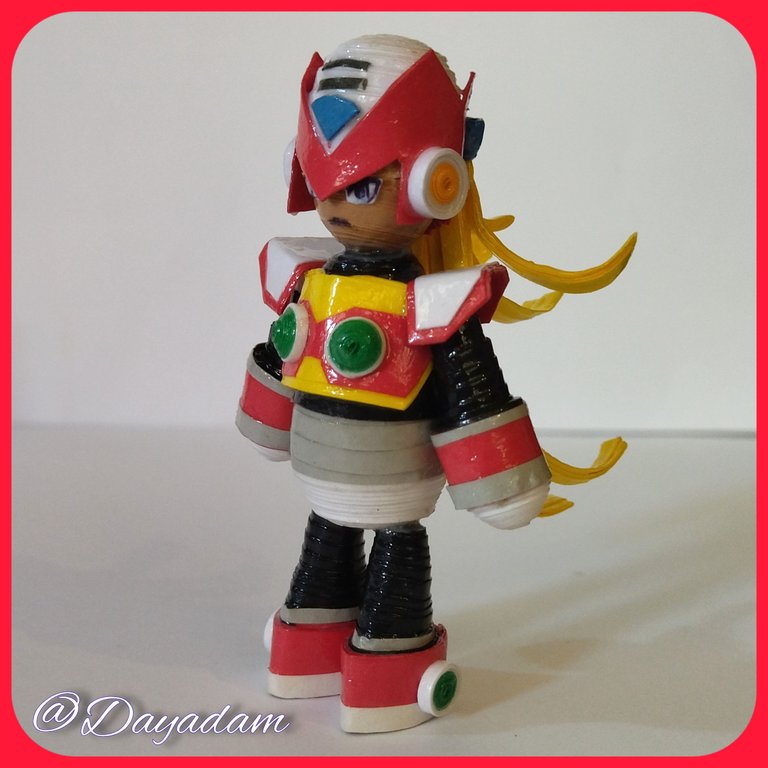
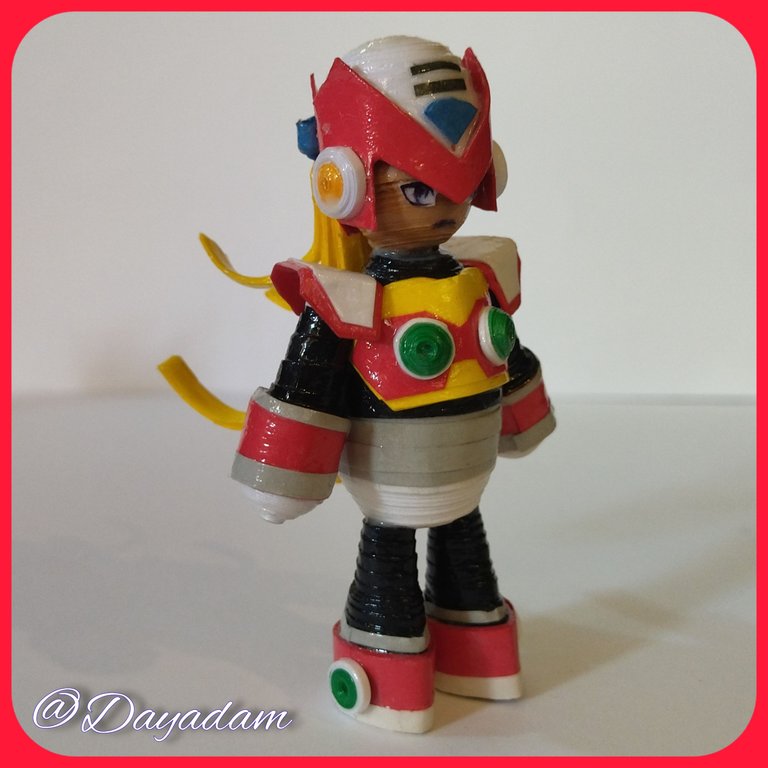
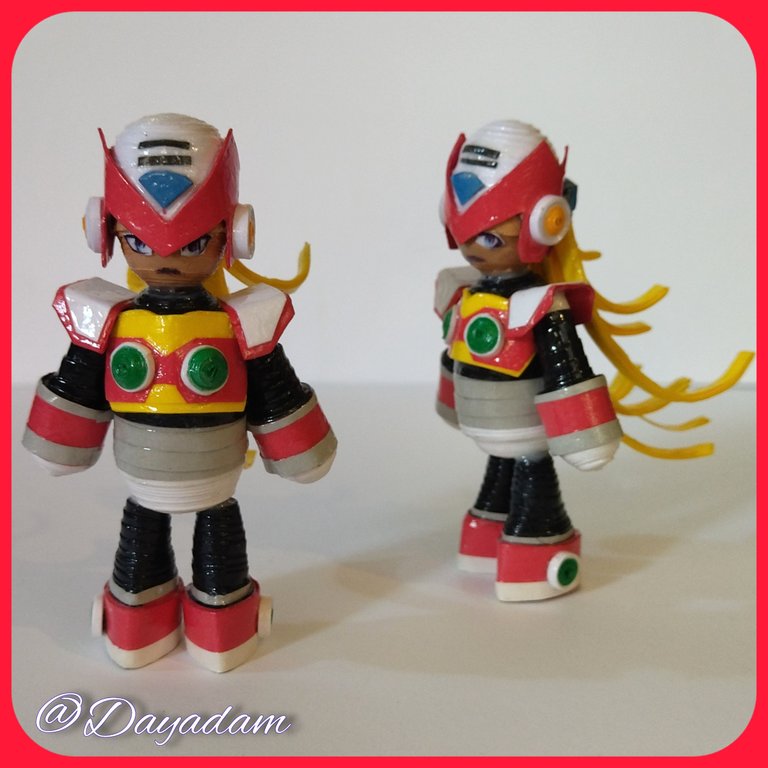
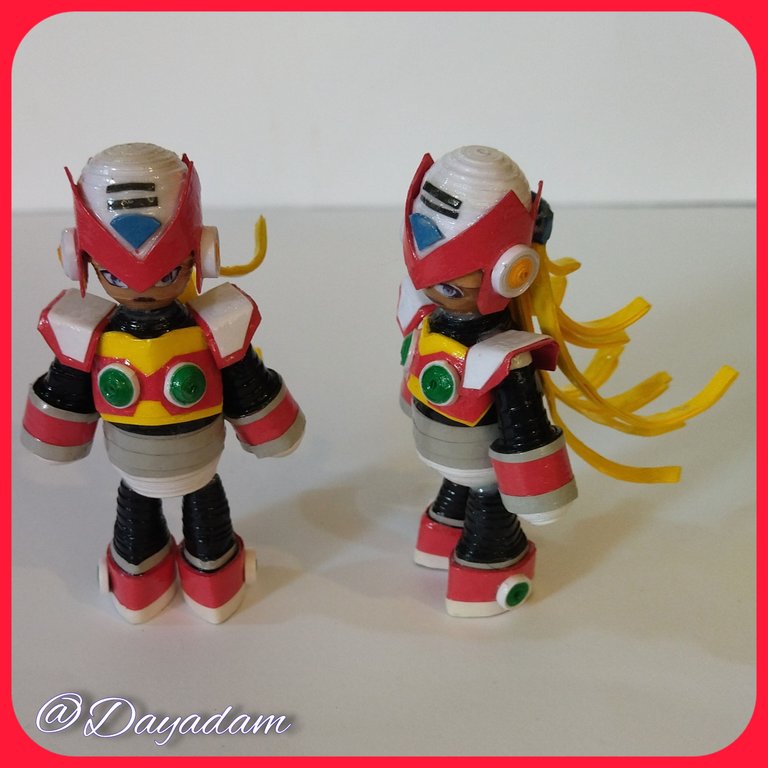
For today I decided to go a step further in terms of complexity and many details, taking into account that the material I use are strips of paper, and carried out a "Zero in 3D" in the quilling technique, for the person I mentioned earlier, which has supported me, I thank life for sending me angels and blessings that have helped me to take big steps in my life with so much love and affection, and I couldn't stop sharing my creative process with all of you.
Personal Note: another achievement unlocked, I keep getting over the little snakes, I made this especially for you and for you, (T... very, very, very, very much 💙). I hope you like it.
If you want to see how I made the first "Megaman" here is the link: * https://peakd.com/hive-189641/@dayadam/megaman-in-3d-quilling-technique
Without further ado, join me in this creative process.
Let's get started:😃

Hola a Todos... 💙
Hola a mis queridos Hivers y a la querida comunidad de artistas #HiveDIY, como siempre muy complacida y emocionada de encontrarme por acá nuevamente, mostrándole mi trabajo hecho con mucho amor y especialmente para ustedes.
Hace unos meses por petición de una persona muy especial lleve a cabo una figura en 3D del personaje Megaman para dársela de obsequio, me reto de alguna manera a lograr hacerla y lo logre, no era la única que me había pedido pero en comparación con las demás que me había mencionado esta era menos compleja, y aun así me costo algo hacerla, pasaron varias semanas hasta que logre dar con las formas necesarias.
Pues para el día de hoy decidí dar un paso mas en cuanto a complejidad y muchos detalles, tomando en cuenta que el material que uso son tiras de papel, y lleve a cabo un "Zero en 3D" en la técnica de quilling, para la persona que le mencione anteriormente, la cual me ha apoyado, impulsado e inspirado a lograr mucho de lo que mi mente o mis manos pensaron hacer, le agradezco a la vida por enviarme ángeles y bendiciones que me han ayudado a dar grandes pasos en mi vida con tanto amor y cariño, y no podía dejar de compartir mi proceso creativo con todos ustedes.
Nota Personal: otro logro desbloqueado, sigo superando las culebritas, esto lo hice especialmente por ti y para ti, (T… mucho, mucho, mucho 💙). Espero te guste.
Si quieres ver como realice el primer "Megaman" por acá te dejo el link: https://peakd.com/hive-189641/@dayadam/megaman-in-3d-quilling-technique
Sin mas preámbulos, acompáñenme en este proceso creativo.
Comencemos:😃

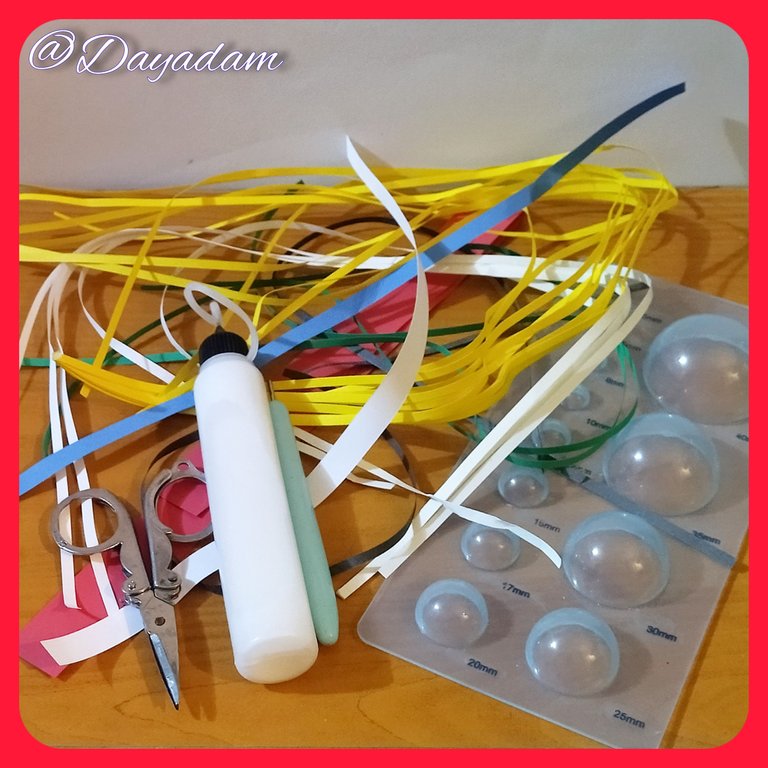
- Quilling ribbons of different colors and measures of width and length.
- Skin color cold paint.
- Needle for quilling.
- Template to mold circles.
- Extra strong white glue (carpentry glue).
- Scissors.
- Paintbrush.
- Quilling ribbons of different widths, light blue, dark blue, white.
- Skin color cold paint.
- Quilling needle.
- Template to mold circles.
- Extra strong white glue (carpentry glue).
- Scissors.
- Paintbrush.

Head and Helmet:
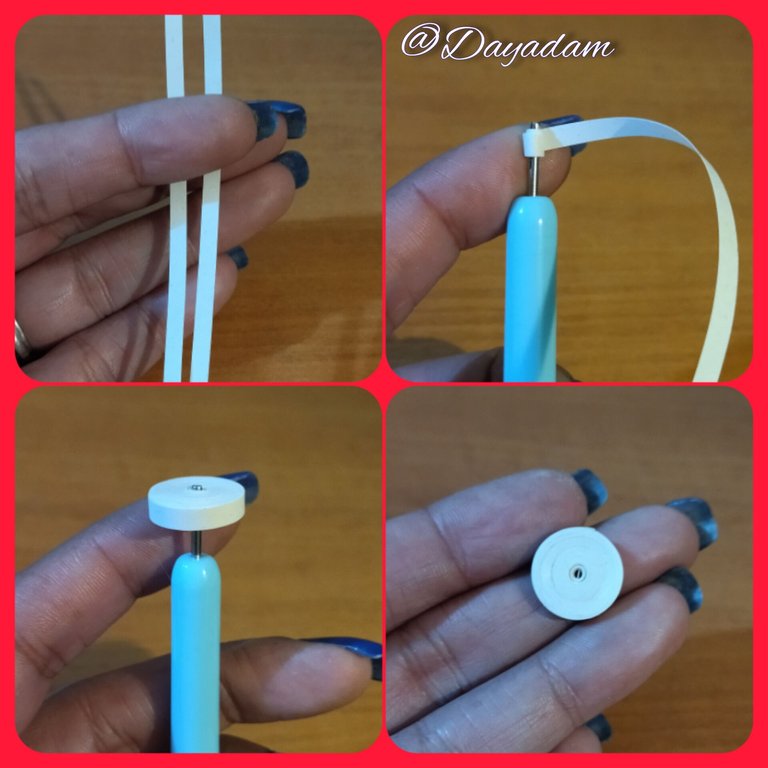
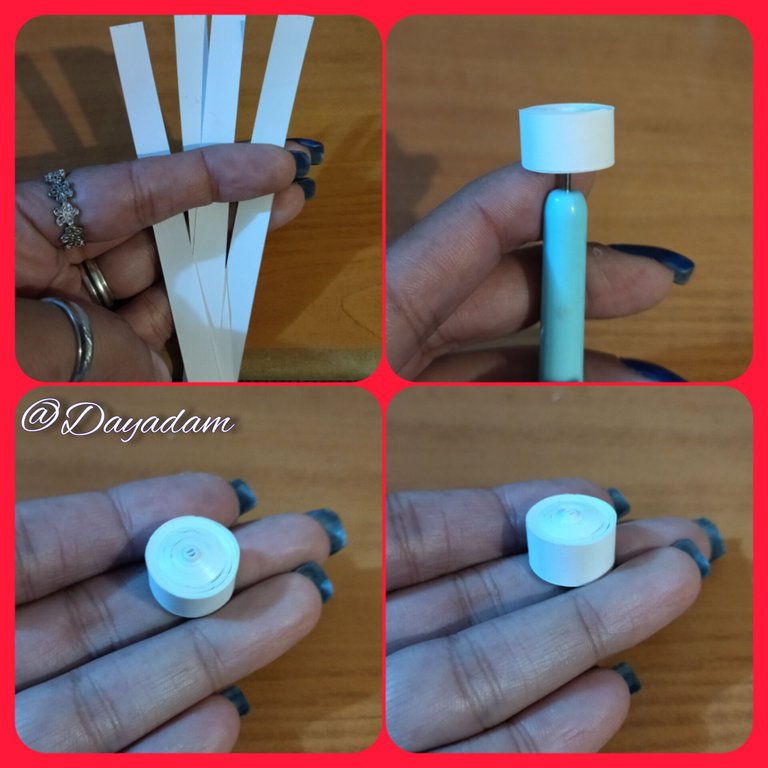
- We start taking white quilling tape, we will join a strip of 3mm wide x 150cms long, we roll with the quilling needle until we reach the end of the tape, we seal with extra strong white glue, we take it out of the needle, to obtain a closed circle.
- We are going to mold with the circle template in the 15mm size, at the end on the inside we add a little glue and let it dry to prevent the piece from moving.
- Once the circle is dry, apply with a paintbrush cold skin color paint.

Cabeza y Casco:
• Comenzamos tomando cinta para quilling blanca uniremos una tira de 3mm de ancho x 150cms de largo, enrollamos con la aguja para quilling hasta llegar al final de la cinta, sellamos con pega blanca extra fuerte, sacamos de la aguja, para obtener un círculo cerrado.
• Vamos a moldear con la plantilla de círculos en la medida 15mm, al finalizar en la parte de adentro agregamos un poco de pega y dejamos secar para evitar que se mueva la pieza.
• Una vez seco el circulo, le aplique con un pincel pintura al frio color piel.
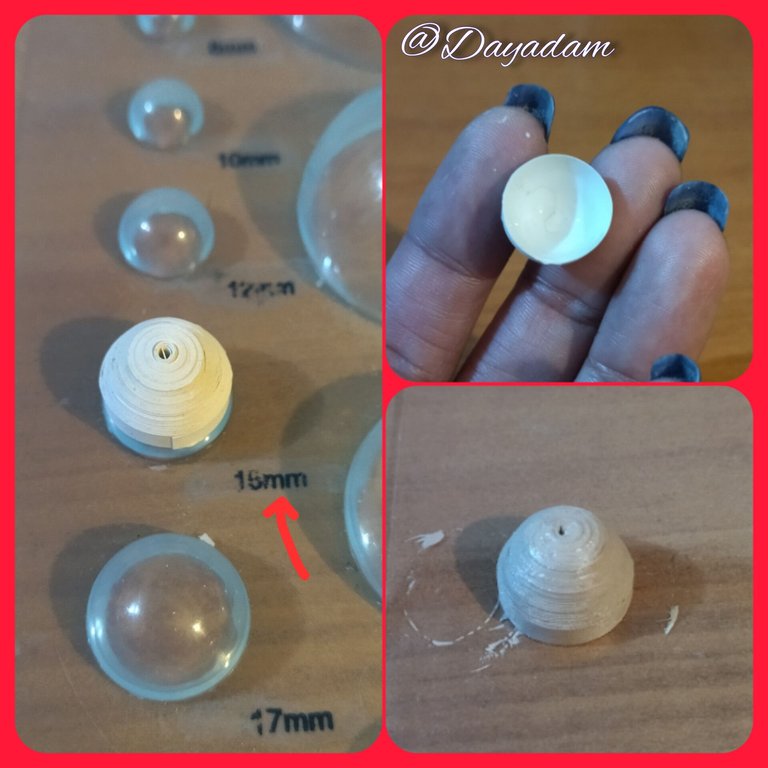
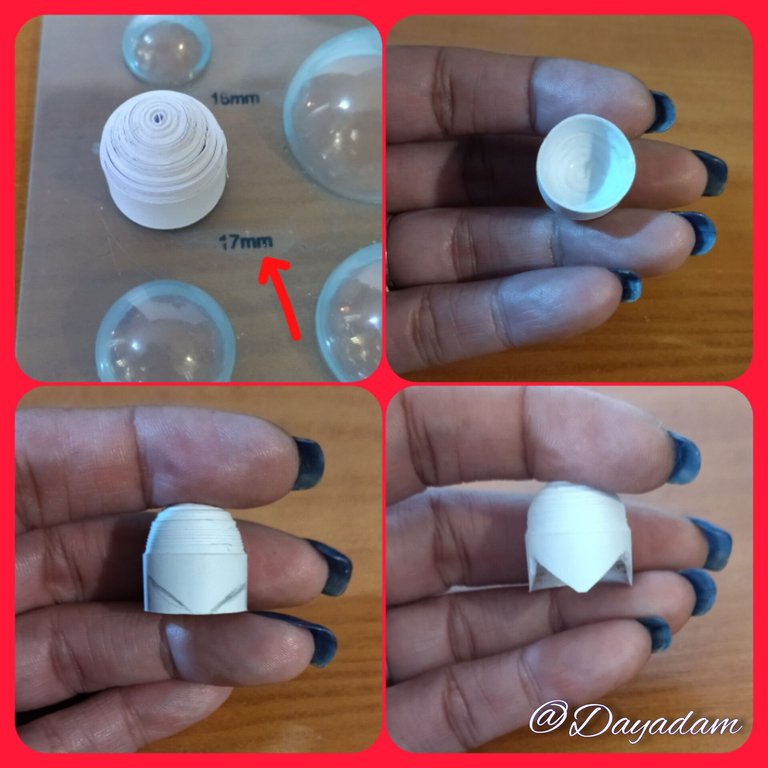
- Now under the same parameters above we will make a closed circle with tape 9mm wide x 170cms long white color and mold in the template for circles in the measure number 17mm, at the end in the inside we add a little glue, and let dry to prevent the piece from moving, then I marked with a pencil the shape I wanted to give the helmet and cut out.
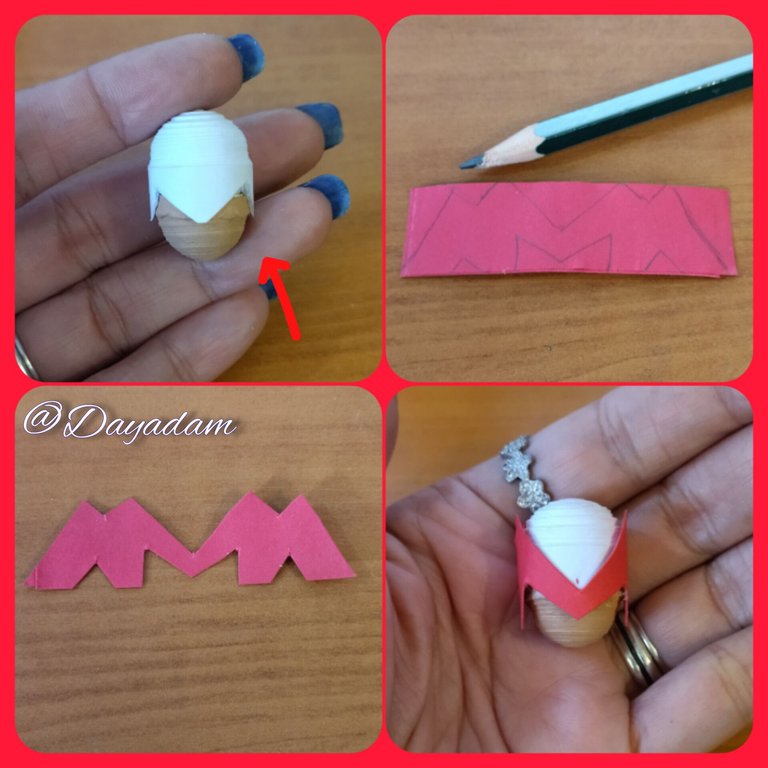
- Let's take both pieces, the helmet and part of the head, join them with white glue and let them dry.
- To make the central detail of the helmet take a thick red ribbon, which previously folded into several parts and add white glue to make it more resistant, with a pencil draw the desired shape and cut with scissors, at the end paste around the white part of the helmet.
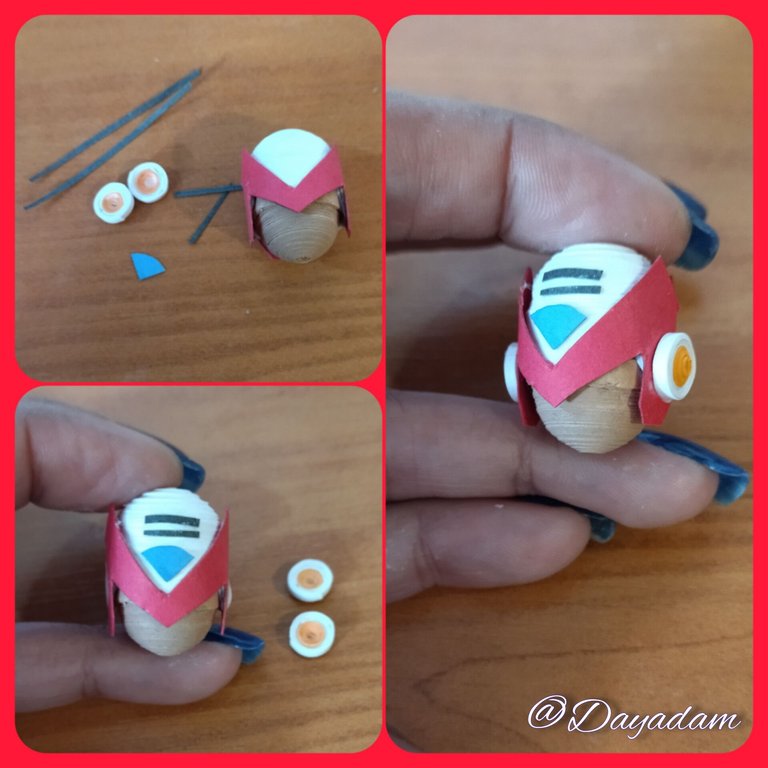
- To finish with the helmet, take ribbons of different colors and sizes to make the remaining details, a blue triangle, some gray lines, and two closed white circles with orange that I placed on the sides.

• Ahora bajo los mismos parámetros anteriores haremos un círculo cerrado con cinta 9mm de ancho x 170cms de largo color blanca y moldearemos en la plantilla para círculos en la medida número 17mm, al finalizar en la parte de adentro agregamos un poco de pega, y dejamos secar para evitar que se mueva la pieza, luego marqué con un lápiz la forma que le quería dar al casco y recorte.
• Vamos a tomar ambas piezas el casco y parte de la cabeza, las uniremos con cola blanca, dejaremos secar.
• Para hacer de detalle central del casco tome una cinta gruesa de color rojo, la que previamente doble en varias partes y le agregue pega blanca para hacerla mas resistente, con un lápiz dibuje la forma deseada y recorte con una tijera, al finalizar pegue alrededor de la parte blanca del casco.
• Para finalizar con el casco, tome cintas de diversos colores y tamaños para hacer los detalles restantes, un triangulo de color azul, unas líneas de color gris, y dos círculos cerrados blancos con naranja que coloque a los lados.
Body:
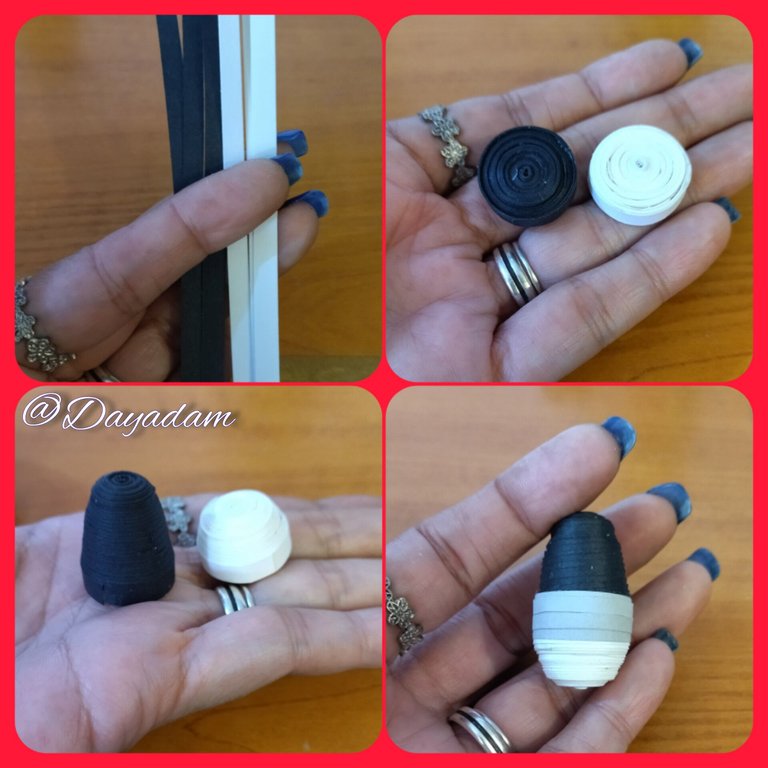
- We are going to take a 6mm wide white ribbon and a black ribbon of 200cms long respectively, with the quilling needle we are going to make 1 closed circle of each color, then we will mold both circles according to how we want the body to be, we apply white glue in the hollow part so that the pieces are not deformed and we will join both with a piece of gray ribbon.
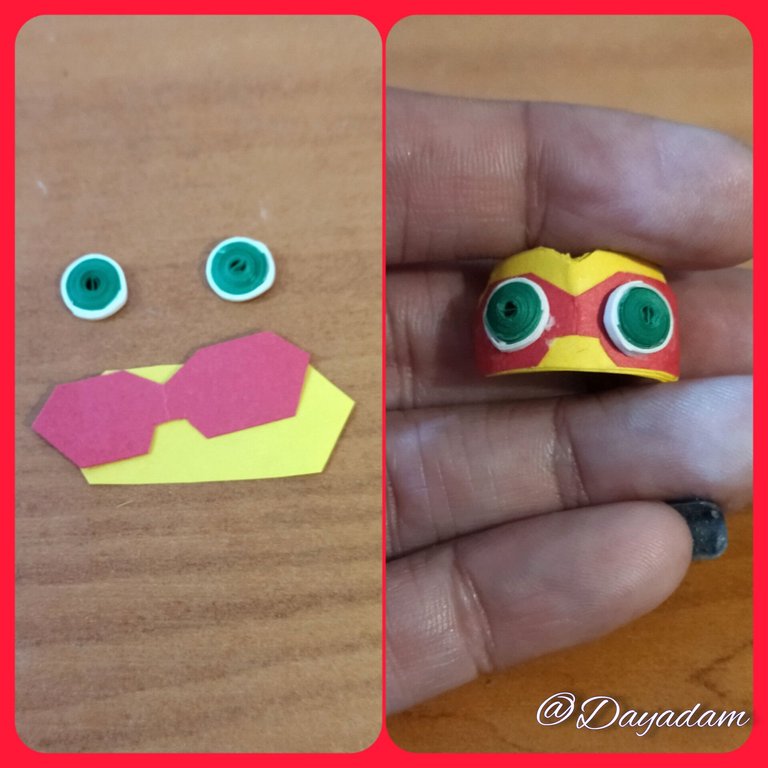
- With red and yellow ribbons make a kind of breastplate that carries the body, additionally make 2 closed circles of green and white, which glue to it.
Arms:
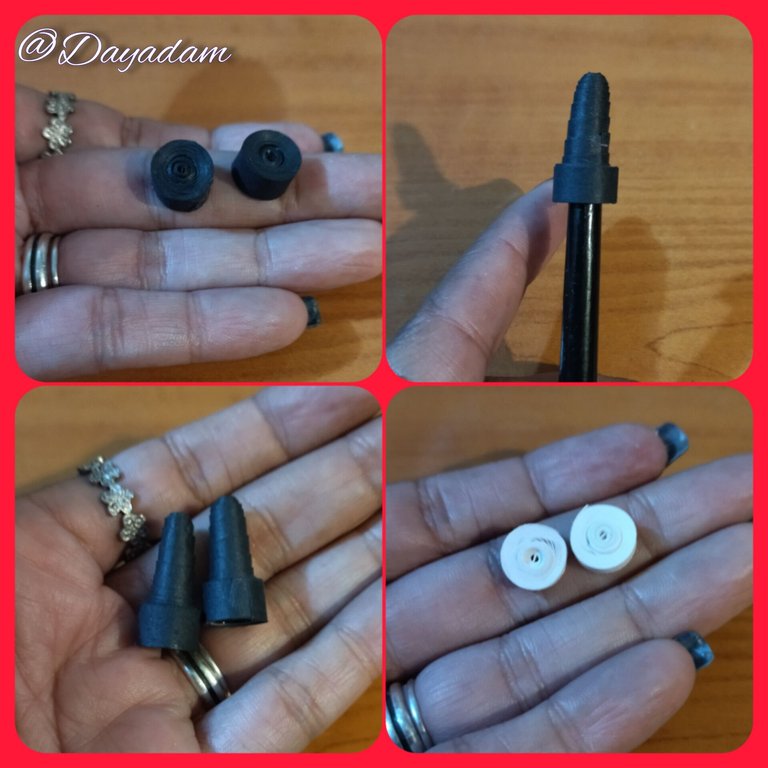
- We are going to take 1 piece of black ribbon 9mm wide x 40cms long, we roll with the needle at the end we seal with a touch of glue to form a closed circle, like this we will need 2, finished we will mold rising with some object to form a cone, by the hollow part we will apply glue so that it does not deform.
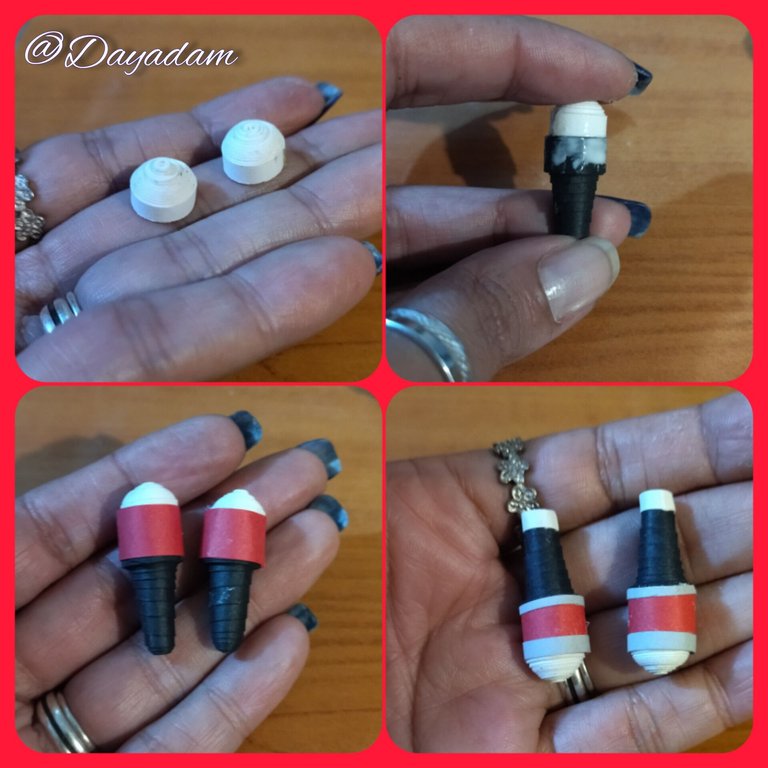
- We will need another piece for the arms, we will make this one with 3mm wide white ribbon, 3mm wide x 40cms long, we roll it to form a closed circle then we will take a little bit out to give it a rounded touch, we will join the other piece in the shape of a cone with a piece of red ribbon, add other details with white and gray ribbon.

Cuerpo:
• Vamos a tomar una cinta de 6mm de ancho blanca y una negra de 200cms de largo respectivamente, con la aguja para quilling vamos a realizar 1 círculo cerrado de cada color, luego moldearemos ambos círculos según como queramos que quede el cuerpo, aplicamos pega blanca en la parte hueca para que no se deformen las piezas y uniremos ambas con un trozo de cinta gris.
• Con cintas rojas, amarillas realice una especie de pechera que lleva el cuerpo, adicionalmente realice 2 círculos cerrados de color verde y blanco, los cuales pegue al mismo.
Brazos:
• Vamos a tomar 1 trozos de cinta negra de 9mm de ancho x 40cms de largo, enrollamos con la aguja al finalizar sellamos con un toque de pega para formar un círculo cerrado, como este necesitaremos 2, terminados moldearemos subiendo con algún objeto para formar un cono, por la parte hueca aplicaremos pega para que no se deforme.
• Necesitaremos otra pieza para los brazos esta la haremos con cinta de 3mm de ancho color blanco de 3mm de ancho x 40cms de largo, enrollamos para formar un círculo cerrado luego sacaremos un poco hacia afuera para darle un toque redondeado, uniremos a la otra pieza en forma de cono con un trozo de cinta roja, agregue otros detalles con cinta color blanca y gris.
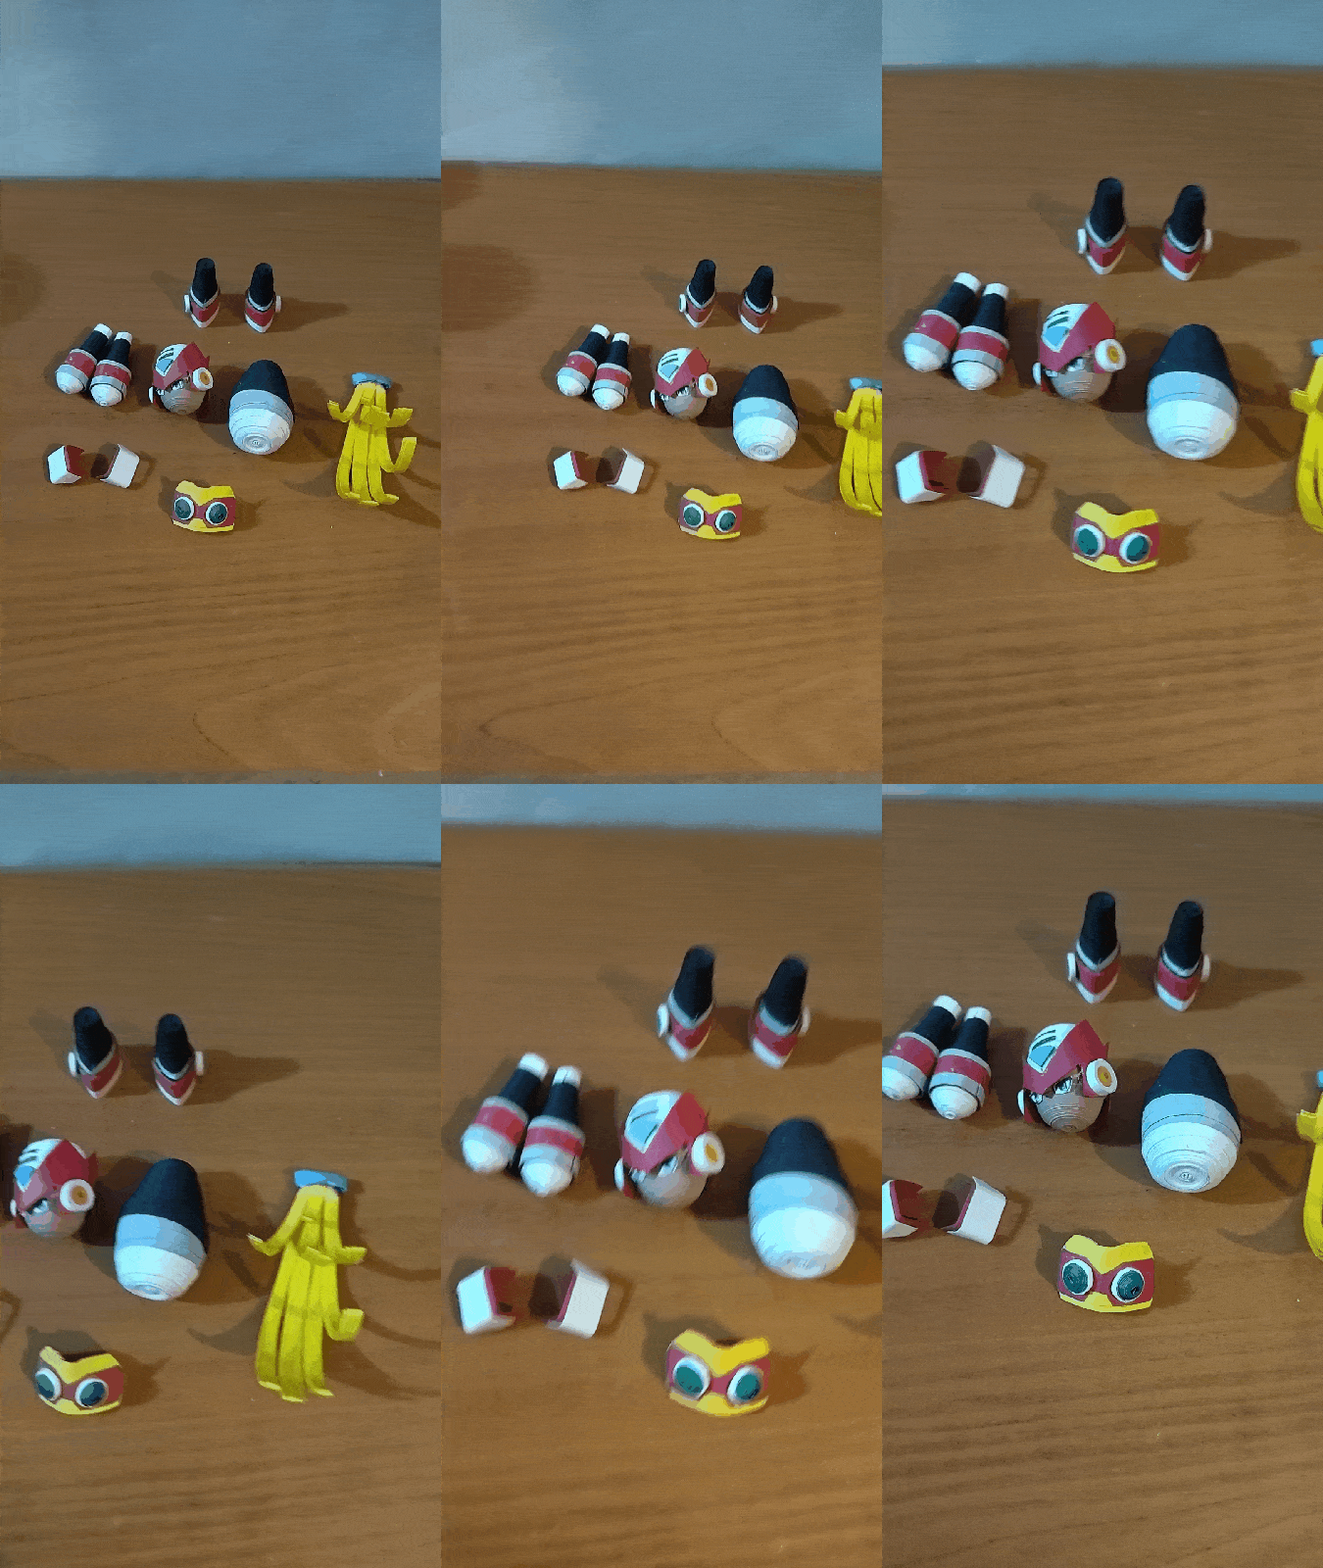
Legs:
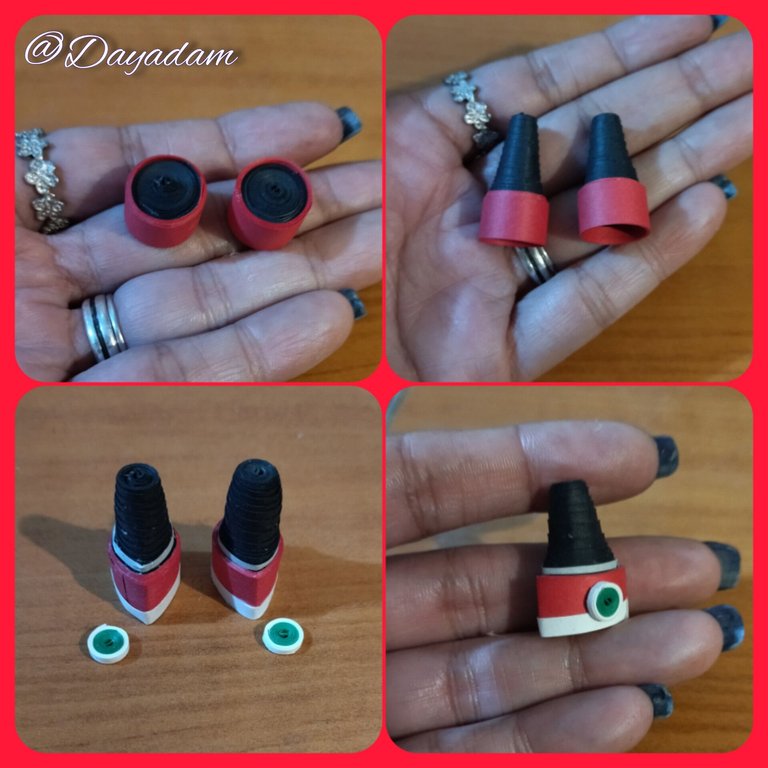
- We will take 9mm wide black and red ribbon, we will join 50cms and 25cms respectively and we will follow the same process of the arms with the only difference that when we have the cone ready we will give it a pointed shape at the tip to shape a kind of shoe, as you will see in the image.
- With some colored ribbons I added some details, as well as a small closed circle, white with green on each side of the shoe.
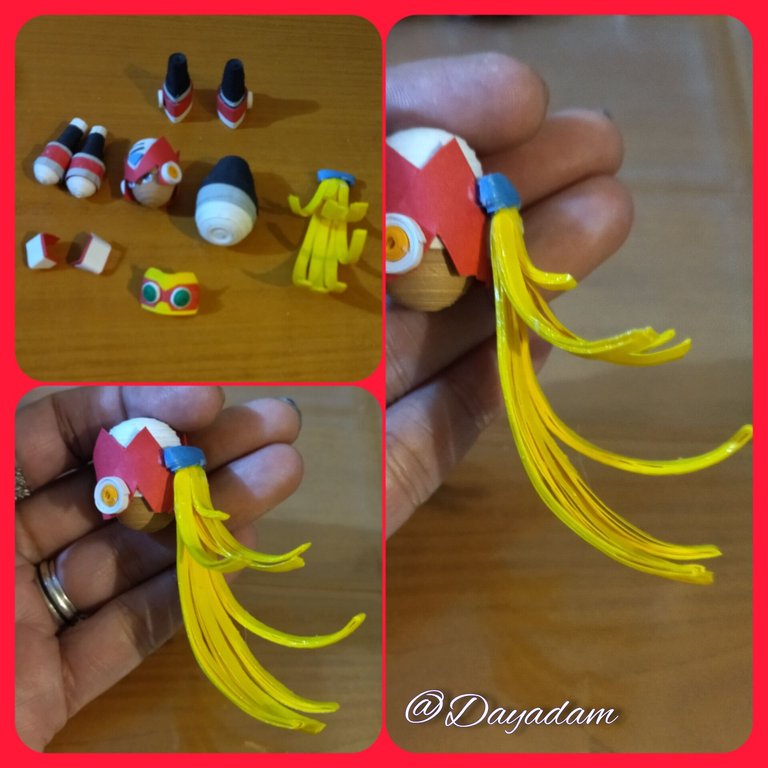
Hair:
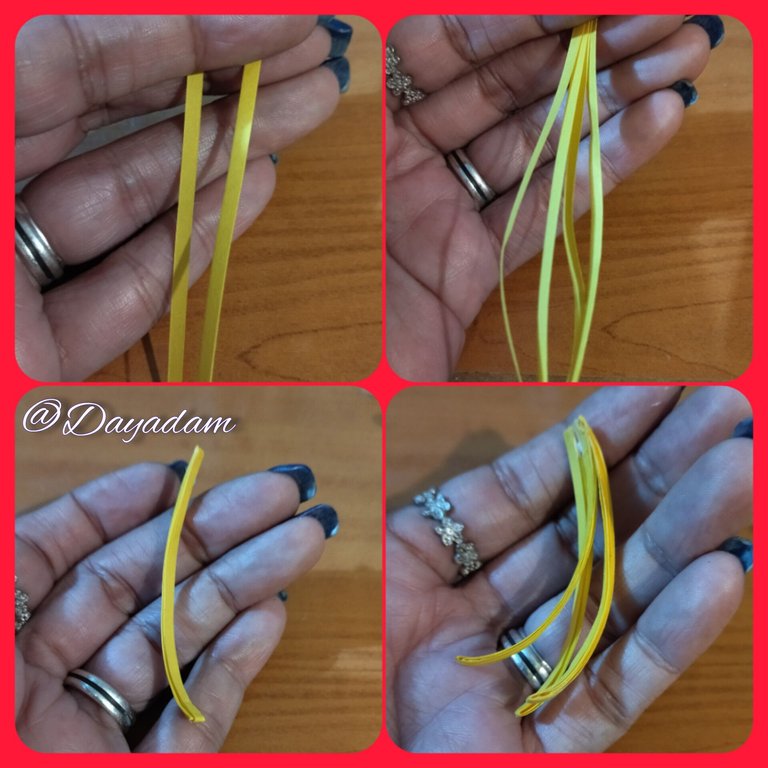
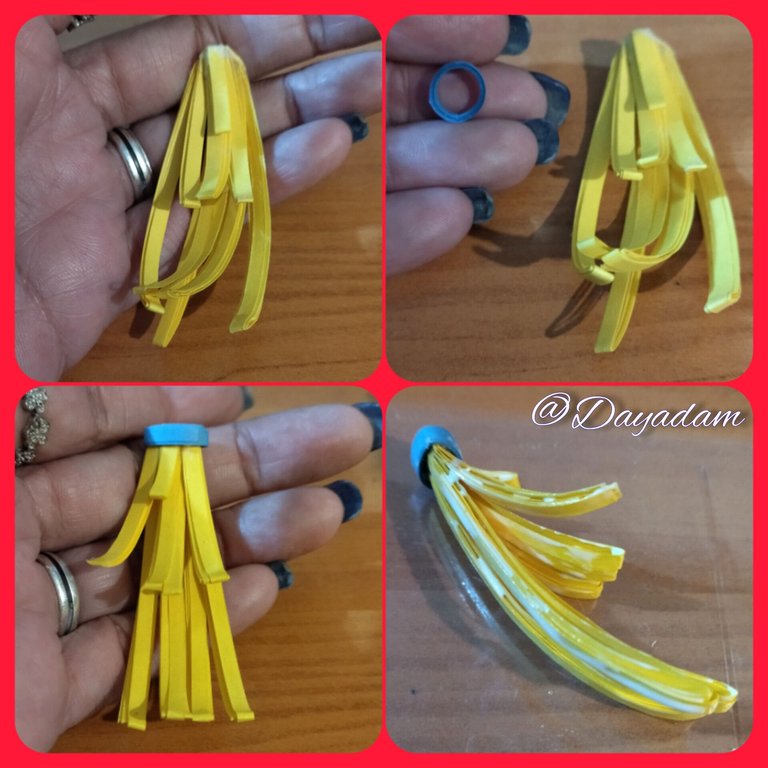
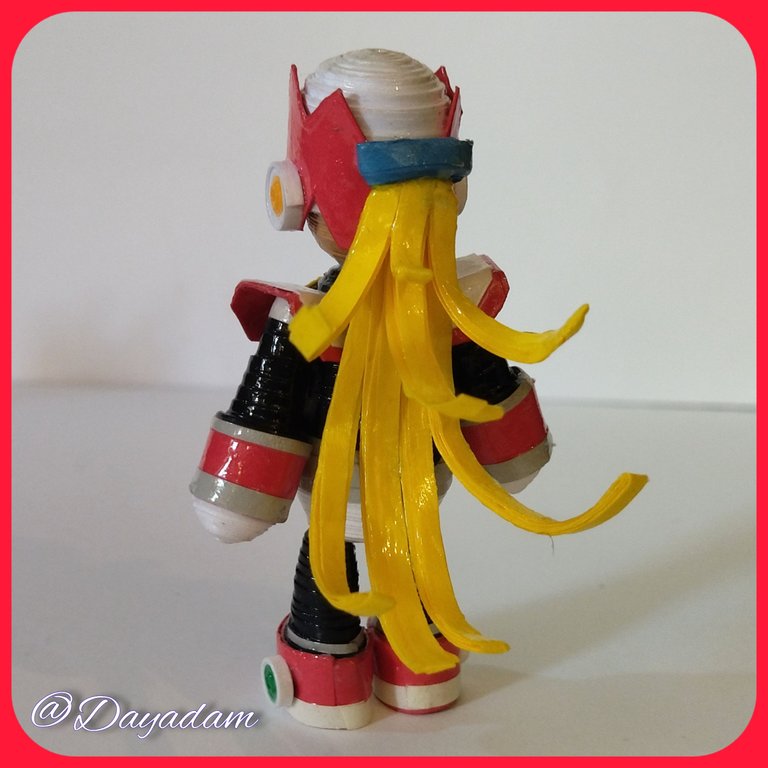
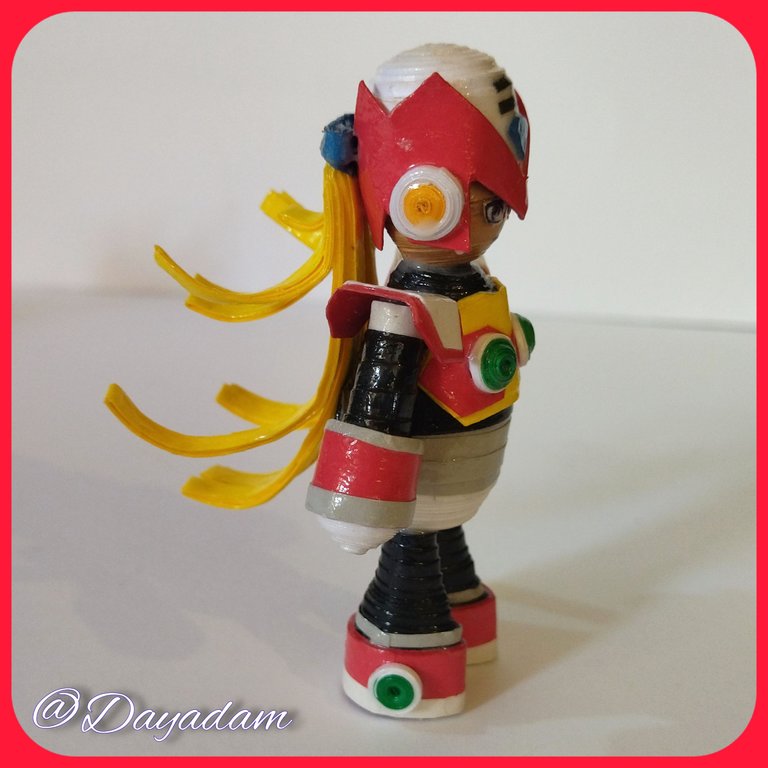
- Let's go with the hair, I took 3mm wide yellow ribbons, I folded them and glued them evenly, then I molded and glued them in groups, I made a small hollow blue ring which I placed on top of the hair to resemble a ponytail.
- Add a few layers of white glue to the hair, before gluing it to the body or head, so that it will harden.
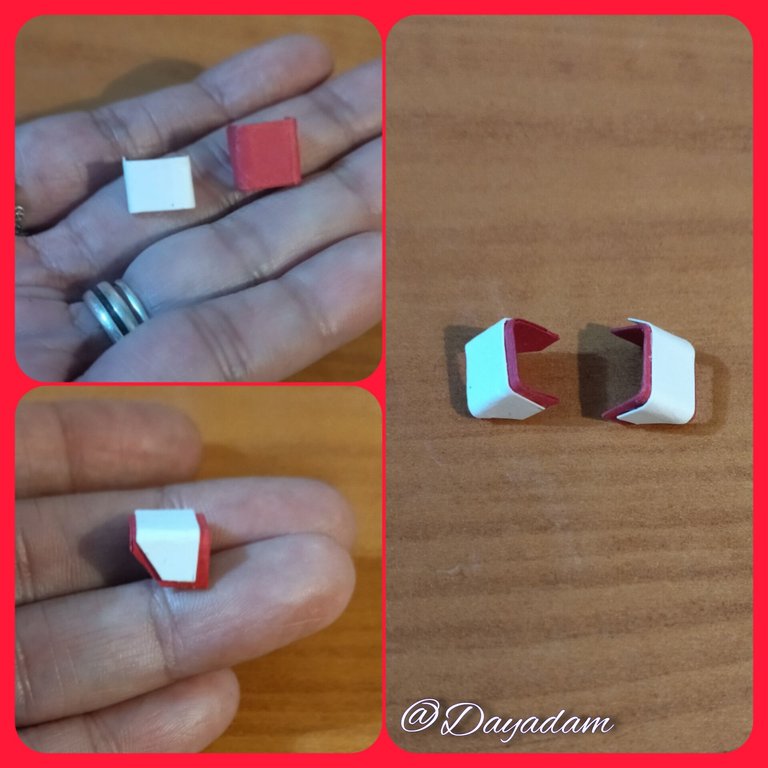
- Make a small piece of white and red cardboard to add to the body specifically the arms when assembling the figure.

Piernas:
• Tomaremos cinta de 9mm de ancho negra y roja, uniremos 50cms y 25cms respectivamente y seguiremos el mismo proceso de los brazos con la única diferencia que al tener el cono listo vamos a darle una forma puntiaguda en la punta para dar forma a una especie de zapato, como verán en la imagen.
• Con cintas de algunos colores le coloque algunos detalles, al igual que agregue un pequeño circulo cerrado, blanco con verde en cada uno de los lados del zapato.
Cabello:
• Vamos con el cabello, tome cintas amarillas de 3mm de ancho, fui doblándolas y pegando de manera uniforme, luego fui moldeando y pegando en grupos, realice u pequeño aro azul hueco el cual coloque arriba del cabello para semejar una coleta.
• Agregue algunas capas de cola blanca al cabello, antes de pegar al cuerpo o cabeza, para que vaya endureciendo.
• Realice una pequeña pieza de cartón blanco y rojo, para añadirlo al cuerpo específicamente los brazos al ensamblar la figura.
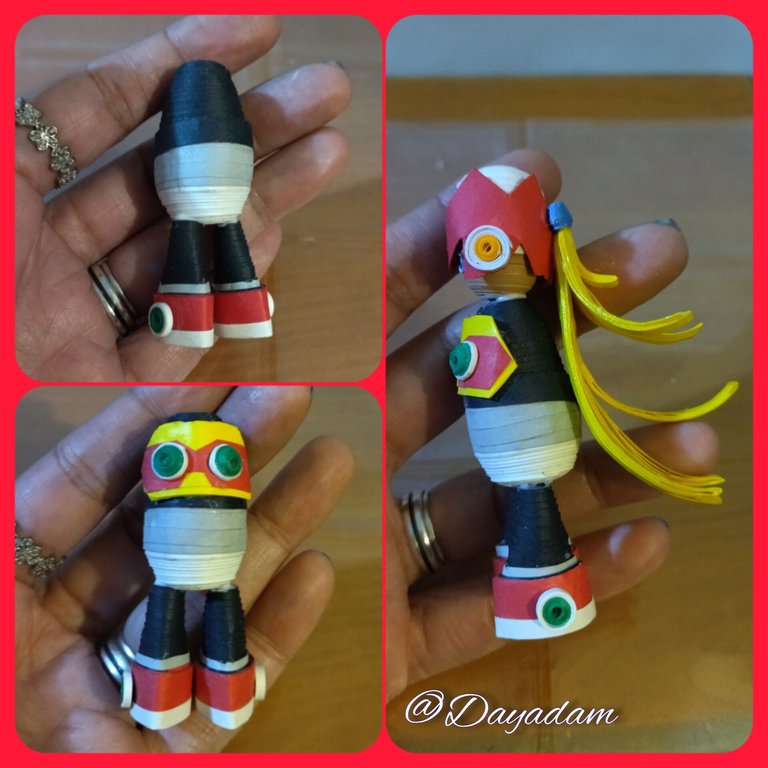
- We are going to join the pieces, this must be done with patience and one by one, waiting for them to dry very well to prevent them from moving or peeling off, you can do it the way you want and in the way you want to place them.
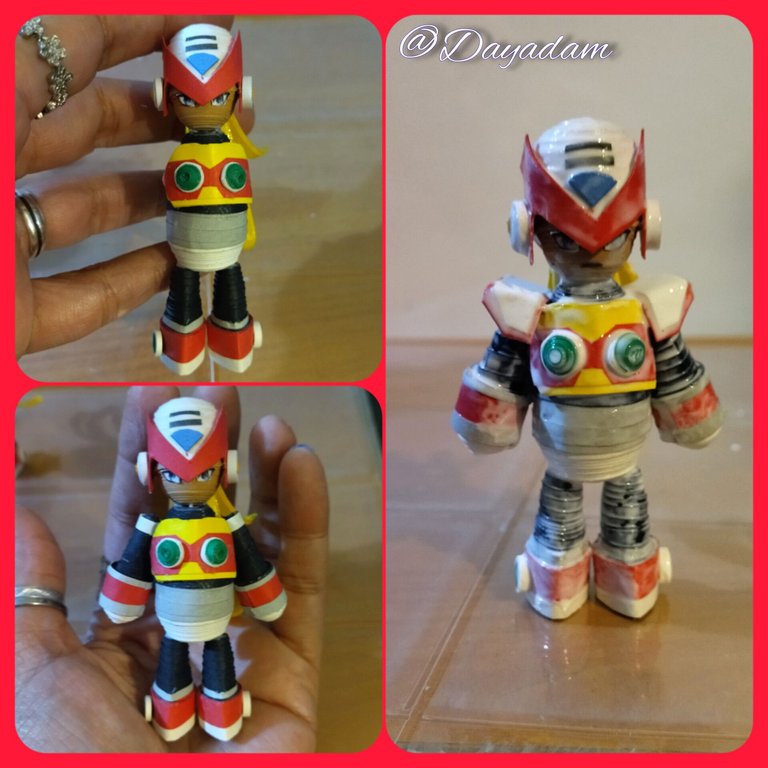
- We are going to apply a liquid protection (plasticizing), applying with a brush one or two coats of extra strong white glue, letting it dry between one coat and the other.
This way is ready this figurine that I made with love for that special person 💙

• Vamos a unir las piezas, esto debemos hacerlo con paciencia y una a una, esperando que sequen muy bien para evitar que se muevan o se despeguen, pueden hacerlo de la manera que lo deseen y en la forma que quieran colocarlas.
• Vamos a aplicar una protección liquida (plastificado), aplicando con un pincel una o dos capas de pega blanca extra fuerte dejando secar entre una capa y otra.
De esta manera está lista esta figurita que realice con cariño para esa personita especial.💙

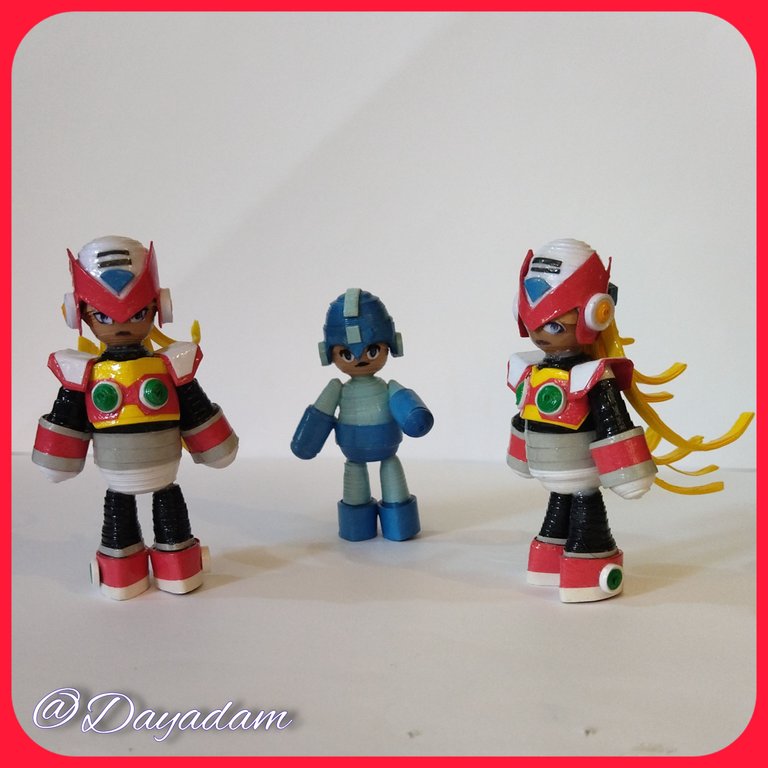

What did you think, did you like it?
I hope you did, I hope you liked my explanation, procedure and photos, I made them with love for you.
"Let out that muse that inspires you, and let your imagination fly".
Thank you all, see you next time.💙

¿Que les pareció, les gustó?
Espero que sí, que les haya gustado mi explicación, procedimiento y fotos, los hice con mucho cariño por y para ustedes.
"Deja salir esa musa que te inspira, y deja volar tu imaginación".
Gracias a todos, nos vemos en la próxima.💙

Todas las fotos usadas en este post son de mi autoría y han sido sacadas en mi celular personal un Redmi 9T y editadas en Canva y en Inshot Banner y separador hecho por mí en Canva Traducido con la ayuda de DeepL
