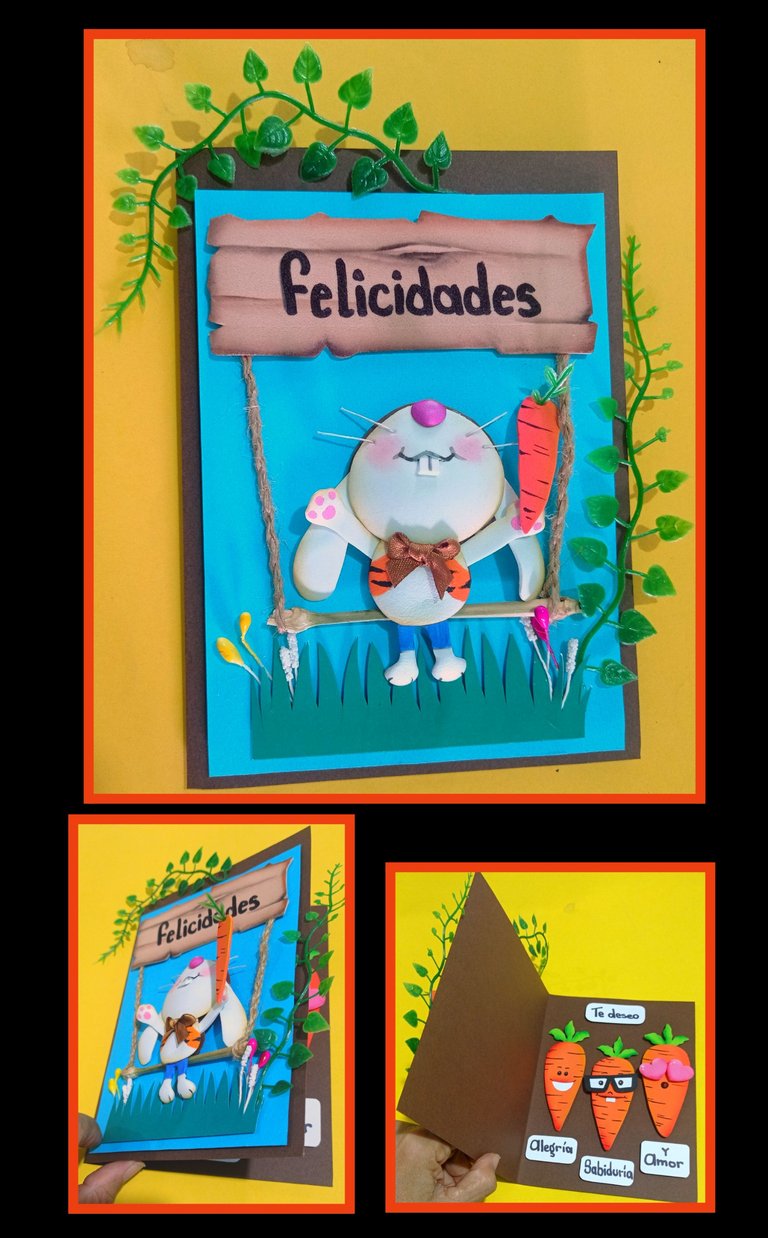
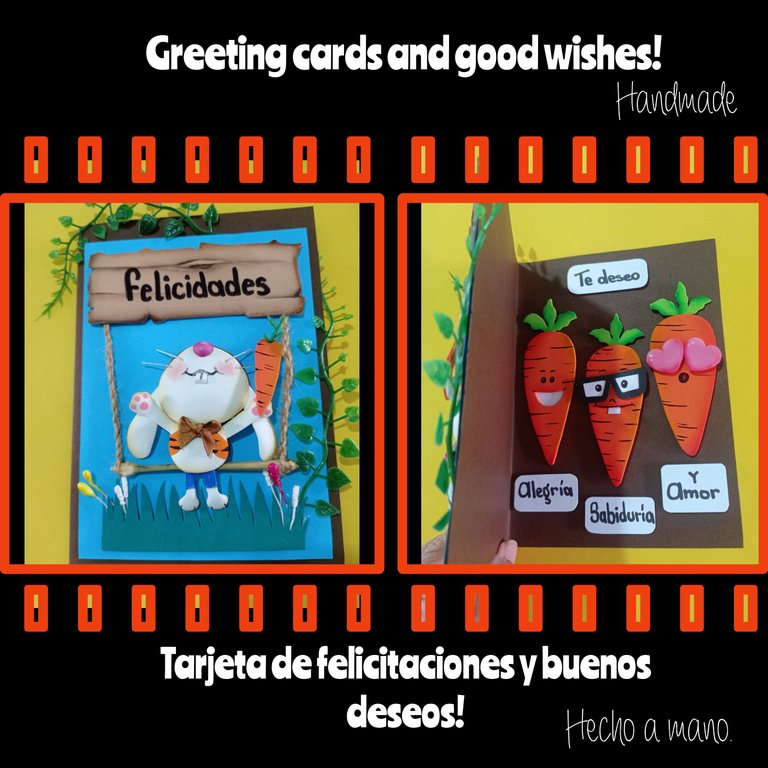
Hola queridos amigos y creadores, bienvenidos sean todos a mi blog.
Los materiales que utilicé son:
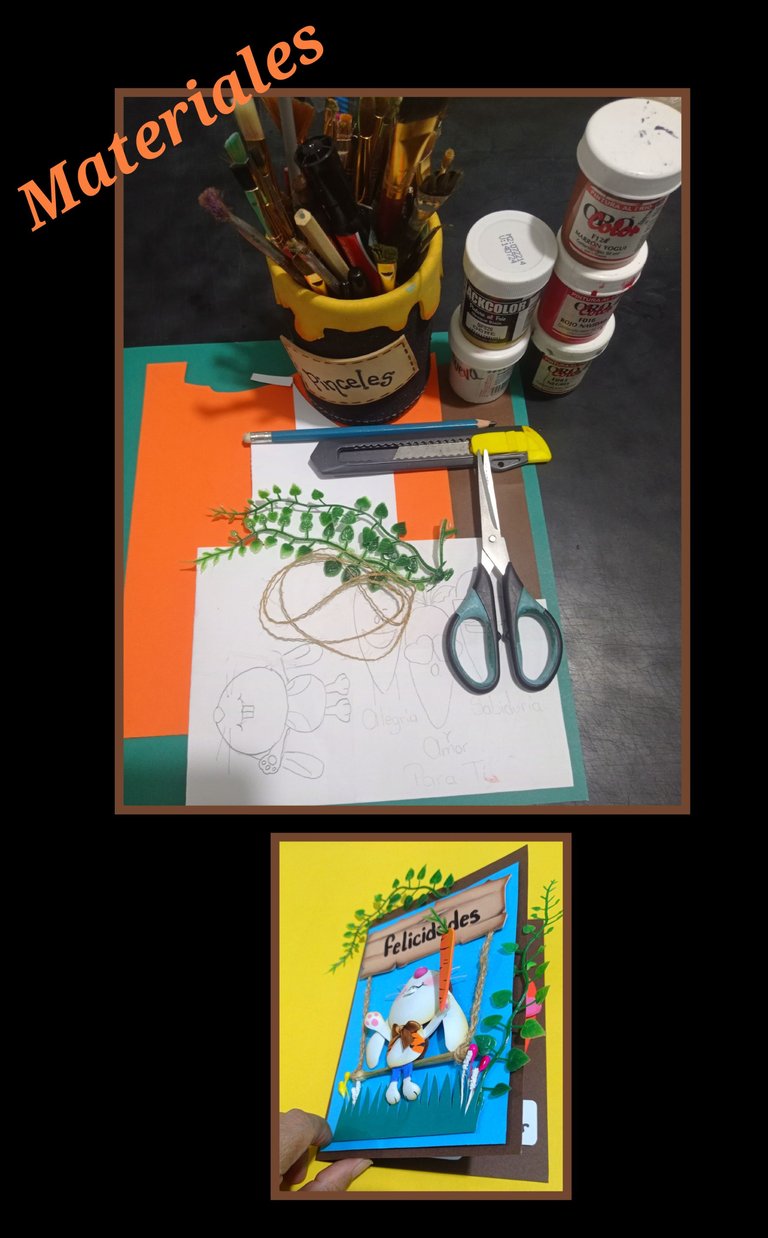
Cartulinas de colores
Foami (recortes)
Ramas plásticas
Hilo mecatillo
Tijera, cuchilla
Pinturas y pinceles
Dibujo, lápiz y marcador.
Plancha eléctrica.
Comencemos:
Paso 1:
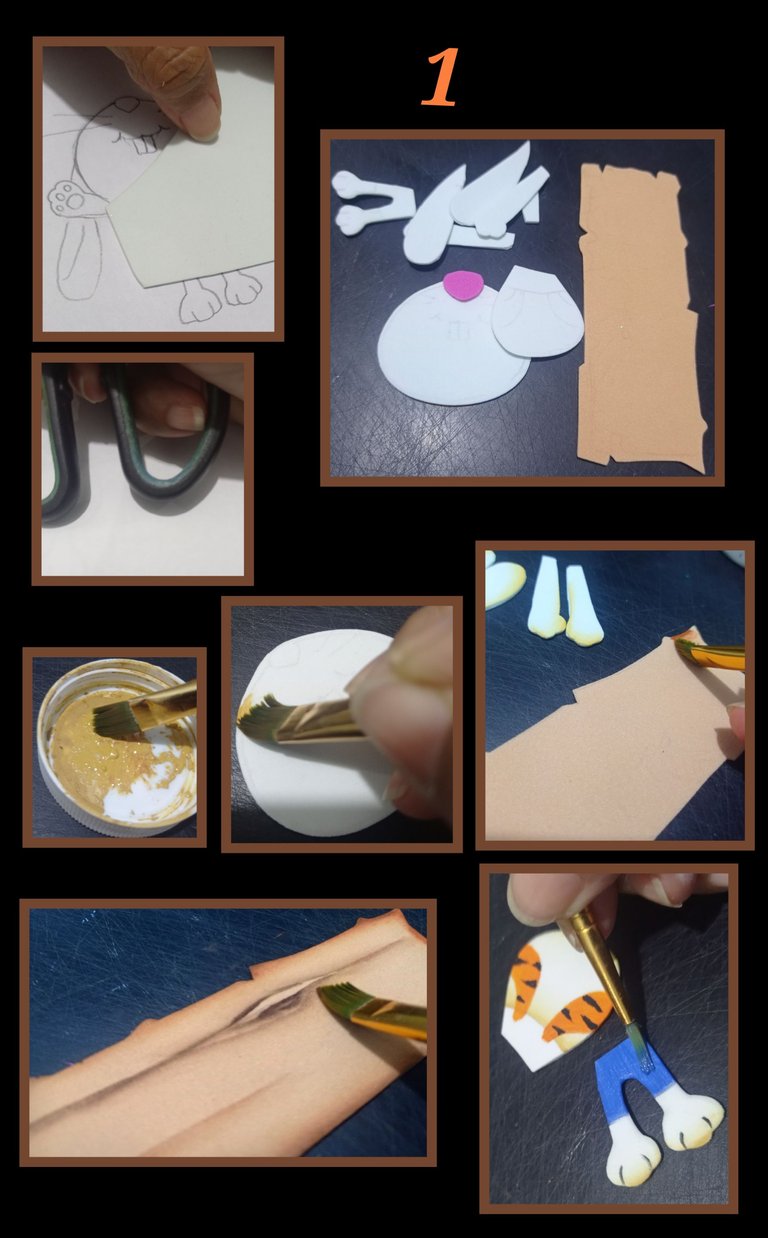
- Remarca el dibujo con lápiz de mina blanda, Preferiblemente de la serie B ya que se transfiere mejor al foami, luego comienza recortando pedazos de foami y coloca sobre el dibujo asegurando que la parte a transferir quede bien centrada.
- Frota el papel sobre el foami con la tijera y recorta todas las piezas marcadas.
- Ahora moja la punta del pincel en la pintura a usar y comienza a pasar por todo el contorno de las piezas, para el conejo usé color ocre, para pintar la tabla, pinta la orilla con marrón yogui y haz betas con marrón oscuro intenso.
- Luego pinta el chaleco con naranja y haz manchas como de tigre, delinea patas y pinta el pantalón.
Paso 2:
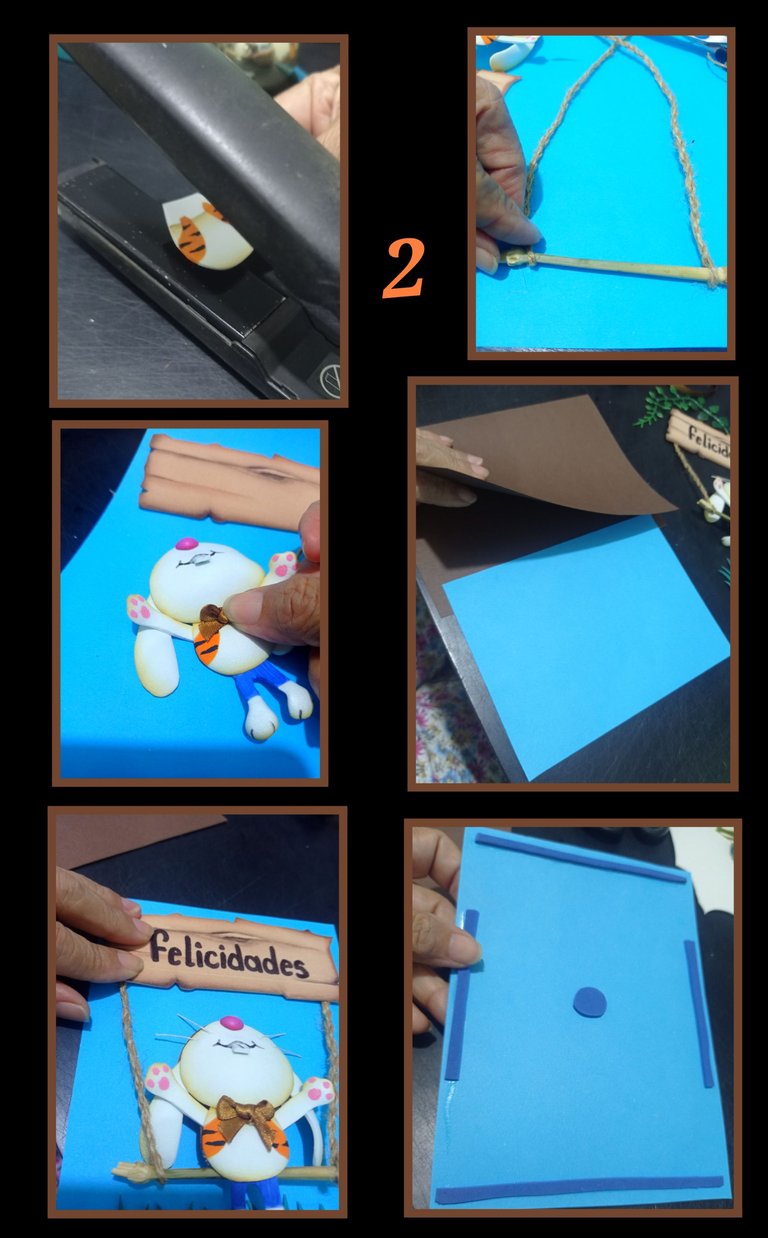
- Calienta la plancha y coloca las piezas del conejito para termoformar,
aparte coloca en ambos extremos del palito, mecatillo. - Ahora comieza a armar el conejito uniendo todas las piezas y decora con un lazo en el cuello.
- Comienza a recortar un rectángulo grande del tamaño que prefieras en cartulina marrón y dobla por la mitad.
- Luego recorta un rectángulo para pegar al frente de la tarjeta en cartulina azul.
- Aplica silicón a las piezas y comienza a pegar sobre la cartulina azul y deja secar.
- Luego recorta tiras de foami y pega en la parte trasera para dar volumen a la tarjeta y pega sobre la base marrón de la tarjeta.
Paso 3:
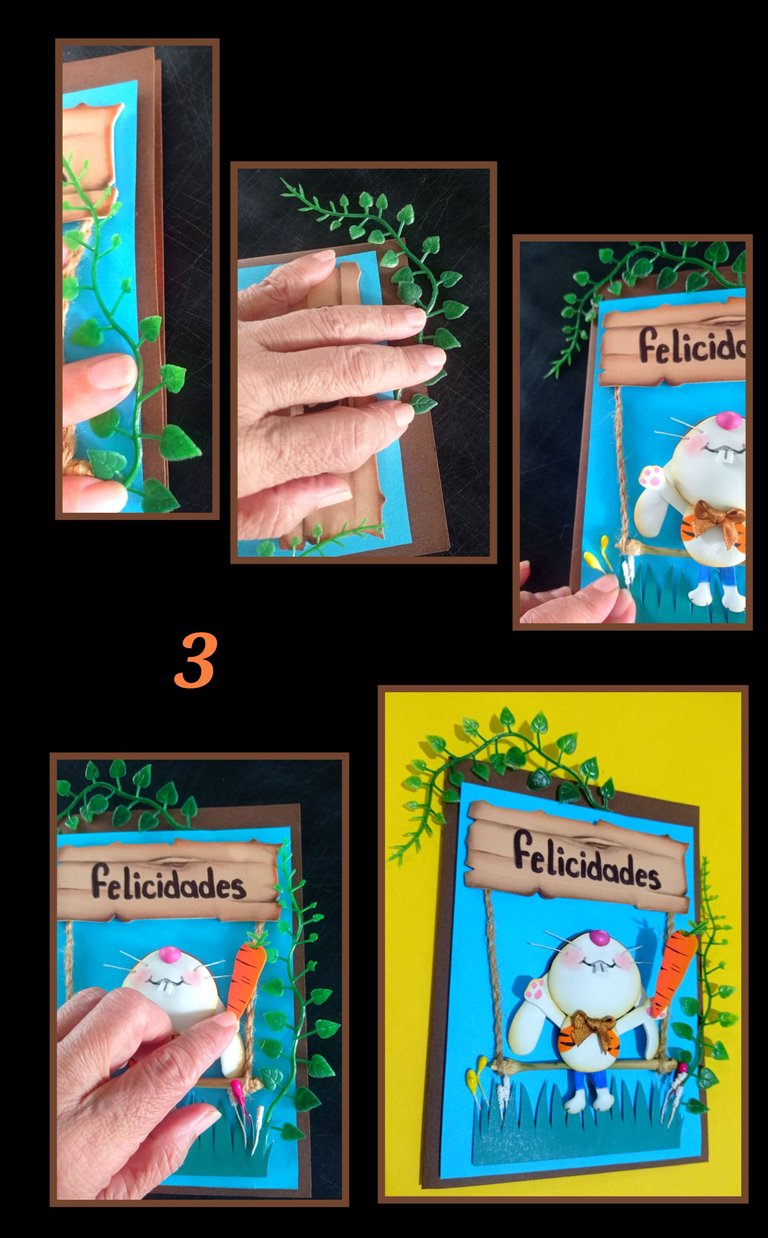
- Ahora decora pegando las ramas plásticas ubica una en un lateral y la otra en la parte superior.
- En la parte de abajo recorta y pega cartulina en forma de grama y decora con pistilos o con flores de papel.
- Haz un pequeña zanahoria y pega en la manito.
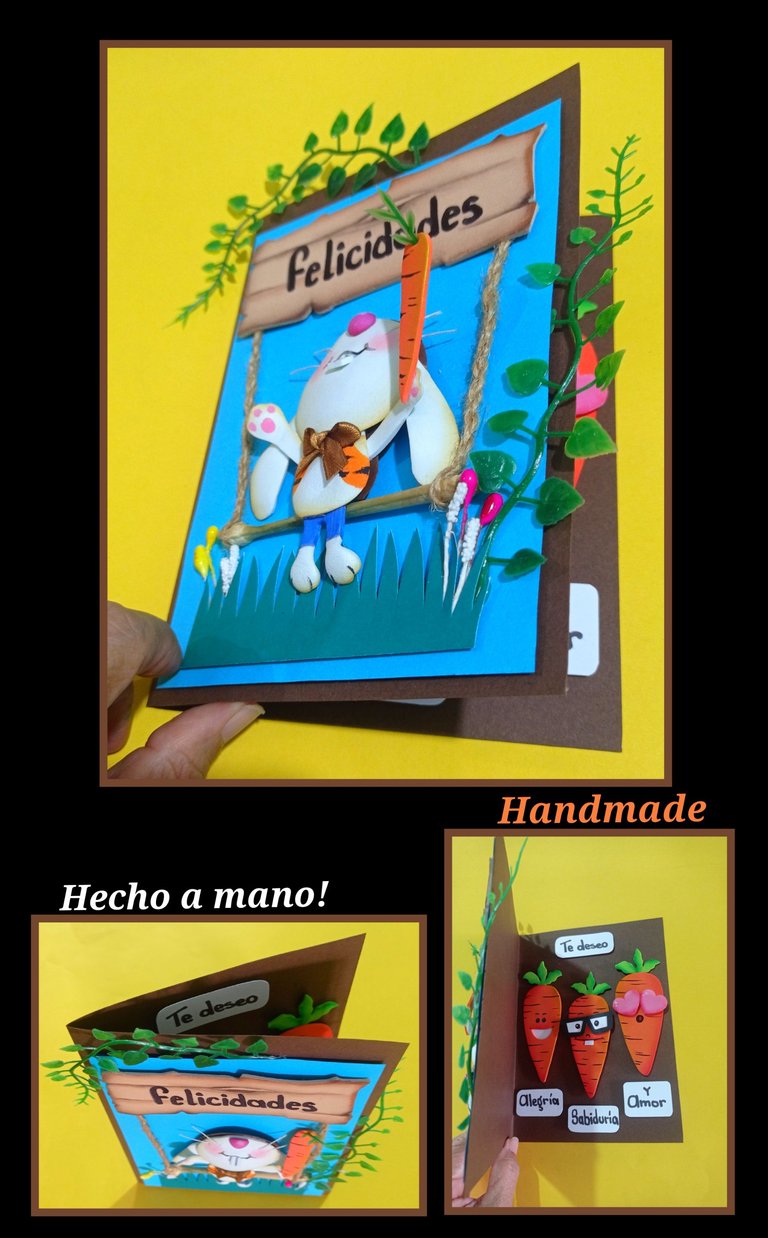
Así quedará lista la portada de la tarjeta.
Paso 4:
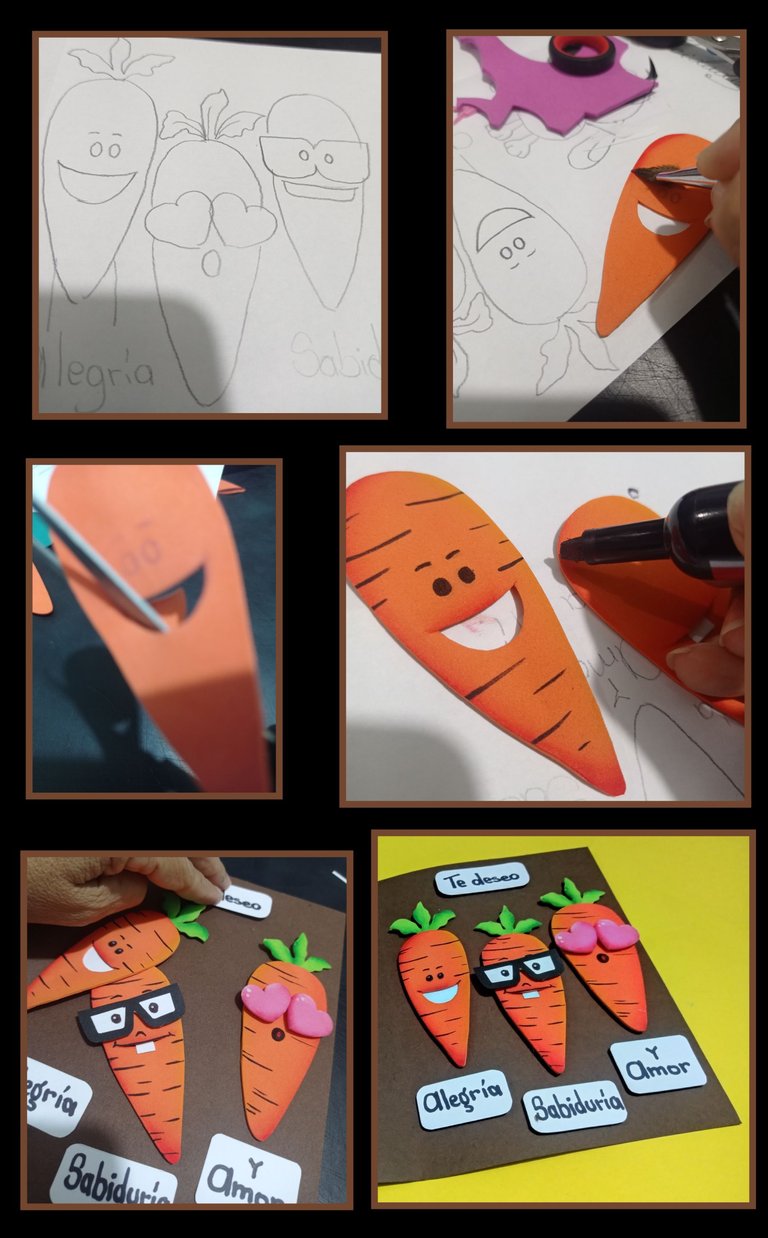
- Ahora haremos 3 zanahorias para decorar la parte interna de la tarjeta, para esto remarca los dibujos, transfiere al foami, pintalas y decora a tu gusto y pinta líneas horizontales con marcador, además quise agregar tres buenos deseos y los escribí sobre cartulina.
- En la parte posterior de todas estas piezas coloqué pedacitos de foami para dar relieve, apliqué silicón y pegué.
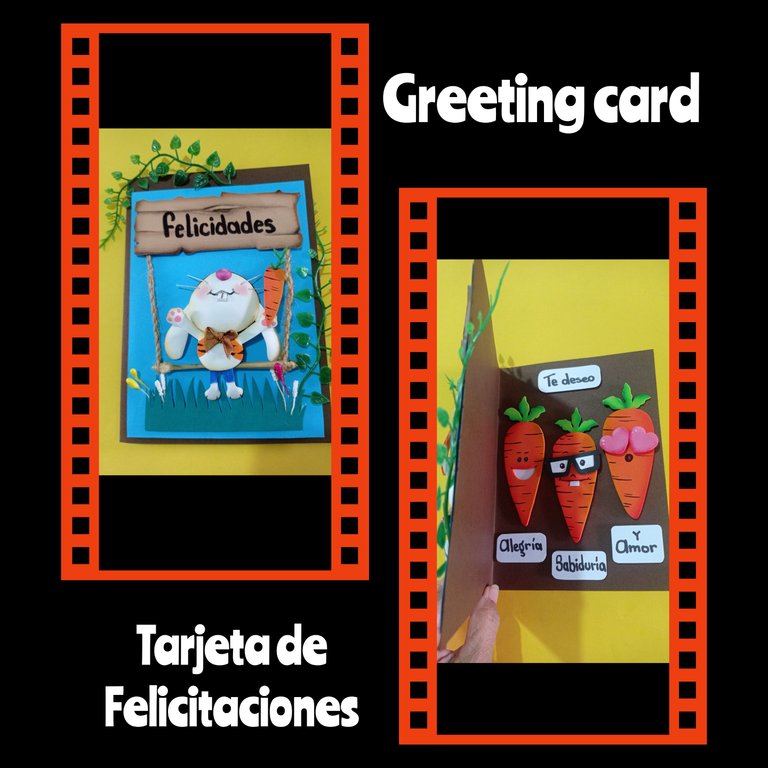
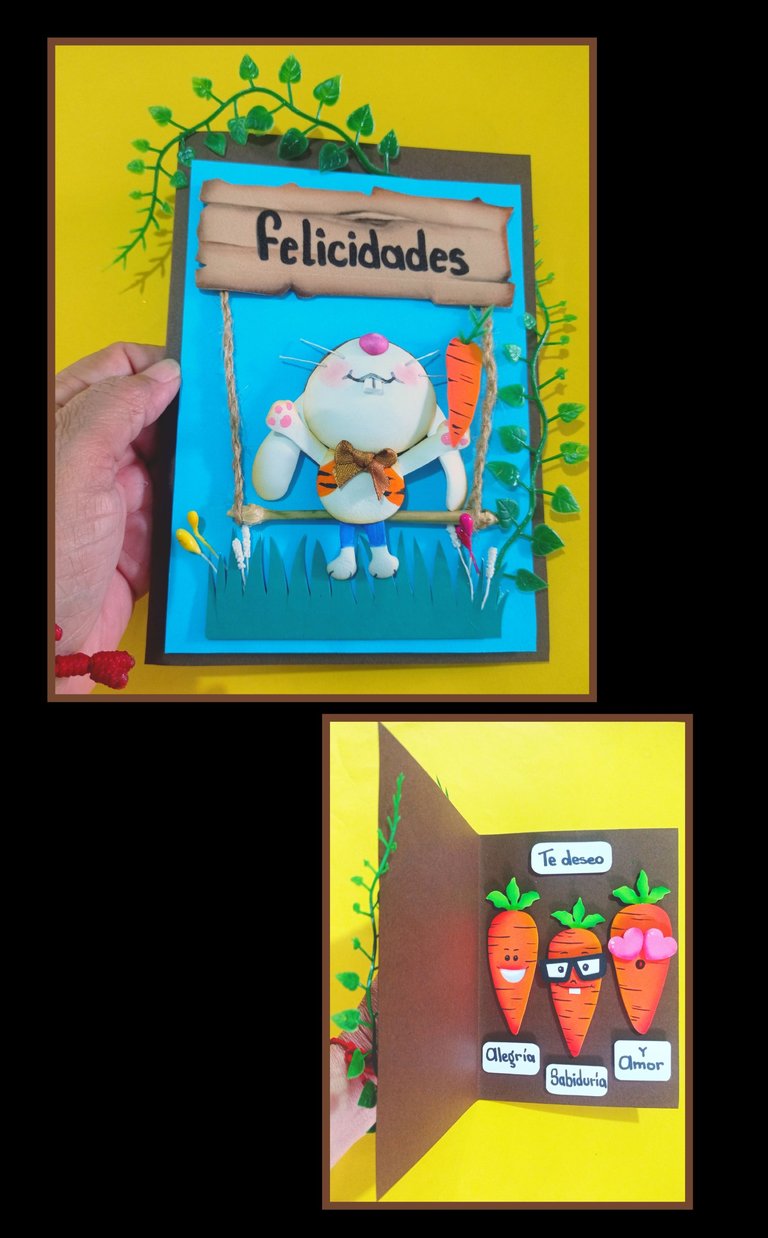
Así que ahora te muestro fotos de esta tarjeta realizada para mi amigo hoy en su cumpleaños y les cuento que le gustó mucho y me encantó ver su sonrisa al momento de recibirla.
Aquí una muestra de otras fotos capturadas.
Edité con etiquetas HTML
Fotos capturadas con mi Redmi Note 9
Editadas con GridArt.
Fuente:https://es.pinterest.com/pin/828240187734484081/

Ahora solo queda despedirme esperando sea de tu agrado mi publicación y que sirva de guía para que elabores una tarjeta a tu gusto, usando los materiales que tengas a la mano.
Saludos, Actívate y participa en esta iniciativa!
English:

Hello dear friends and creators, welcome to my blog.
Again here accepting the invitation to participate in this new initiative number 17 in which we must make a handmade card, then I invite you to join me and see the one I made for a friend who is birthday and nicknamed bunny, then I searched among my materials and got cardboard, foami cutouts, plastic branches, dry stick and others and I set out to create and design something nice but with lots of love and good wishes for him.The materials I used are:

Colored cardboard
Foami (cut-outs)
Plastic branches
Twine
Scissors blade
Paints and brushes
Drawing, pencil and marker
Electric iron.
Let's get started:
Step 1:

- Outline the drawing with soft lead pencil, preferably B series as it transfers better to the foami, then start cutting out pieces of foami and place over the drawing making sure that the part to be transferred is well centered.
- Rub the paper over the foami with the scissors and cut out all the marked pieces.
- Now dip the tip of the brush in the paint to be used and start going all around the contour of the pieces, for the rabbit I used ochre color, to paint the board, paint the edge with yogi brown and make betas with intense dark brown.
- Then paint the vest with orange and make tiger-like spots, outline paws and paint the pants.
Step 2

- Heat the iron and place the bunny pieces for thermoforming,
separately place on both ends of the stick, mecatillo. - Now start assembling the bunny by joining all the pieces together and decorate with a bow at the neck.
- Start cutting out a large rectangle in the size of your choice from brown cardboard and fold it in half.
- Then cut out a rectangle to glue to the front of the card in blue card stock.
- Apply silicone to the pieces and start gluing on the blue cardstock and let dry.
- Then cut out strips of foami and glue on the back to give volume to the card and glue on the brown card base.
Step 3

- Now decorate by gluing the plastic branches. Place one on the side and the other on the top.
- On the bottom cut out and glue cardboard in the shape of grass and decorate with pistils or paper flowers.
- Make a small carrot and glue it on the little hand.
The card cover is ready.
Step 4

- Now we will make 3 carrots to decorate the inside of the card, for this we will mark the drawings, transfer them to the foami, paint them and decorate them as you like and paint horizontal lines with marker, I also wanted to add three good wishes and I wrote them on cardboard.
- On the back of all these pieces I placed pieces of foami to give relief, applied silicone and glued.
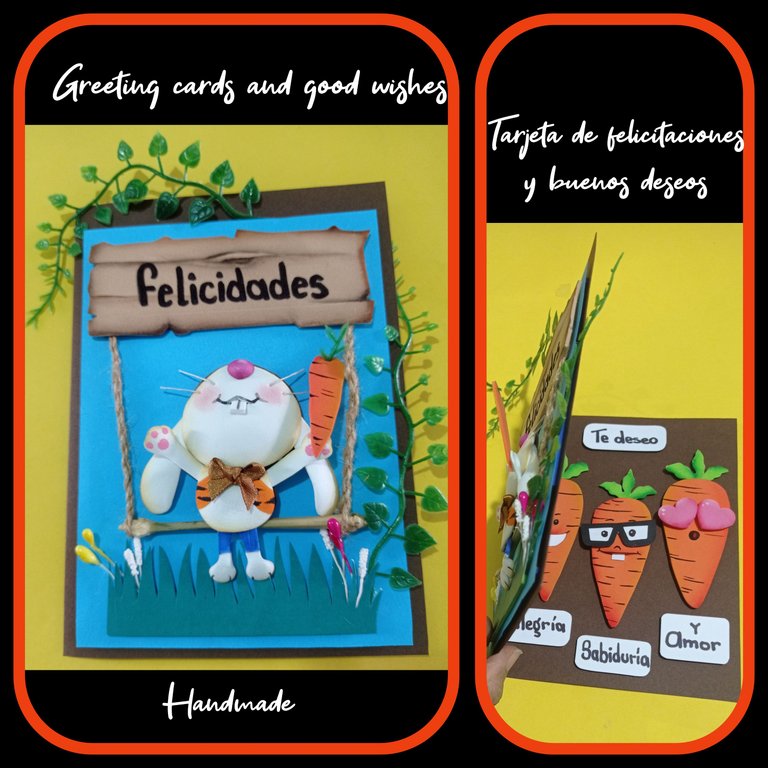
So now I show you pictures of this card made for my friend today on his birthday and I tell you that he liked it very much and I loved to see his smile when he received it.
Here is a sample of other captured photos.


I edited with HTML tags
Photos captured with my Redmi Note 9
Edited with GridArt.
Source: https://es.pinterest.com/pin/828240187734484081/


Now it only remains to say goodbye hoping that you like my publication and that it serves as a guide for you to make a card to your liking, using the materials you have on hand.
Greetings, get active and take part in this initiative!


