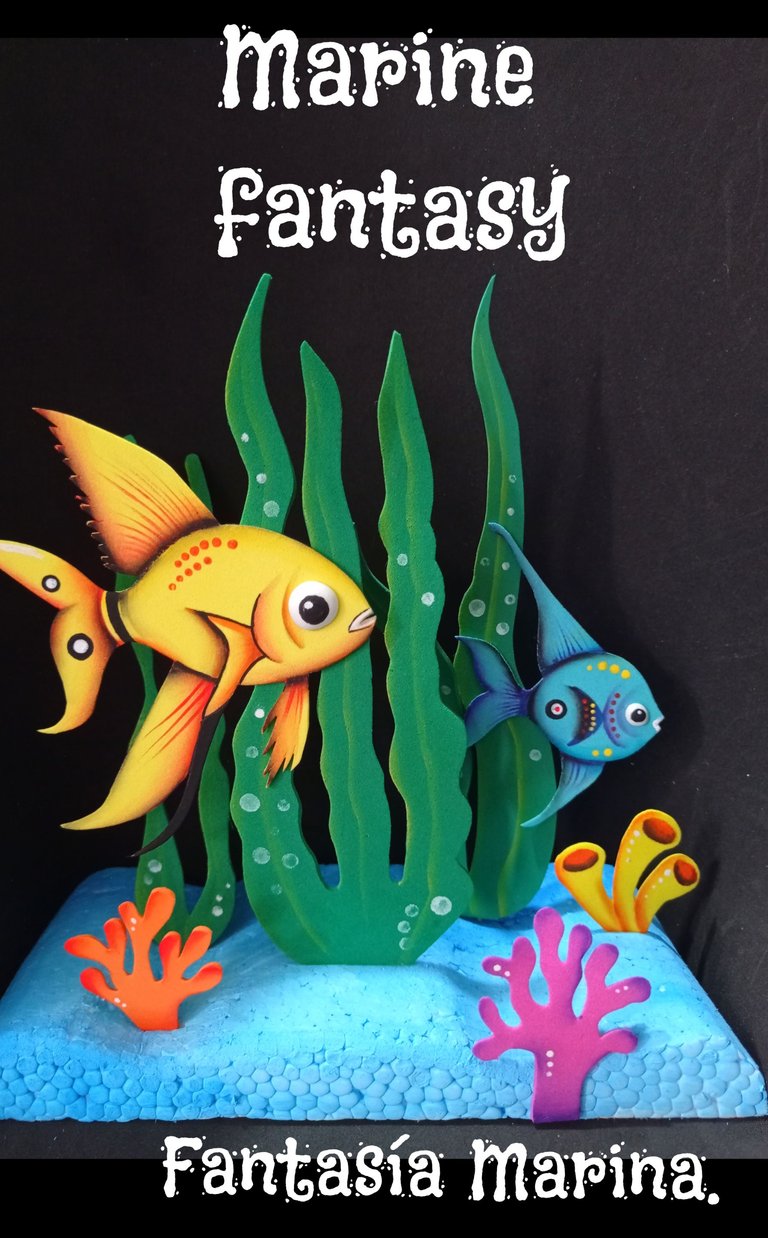
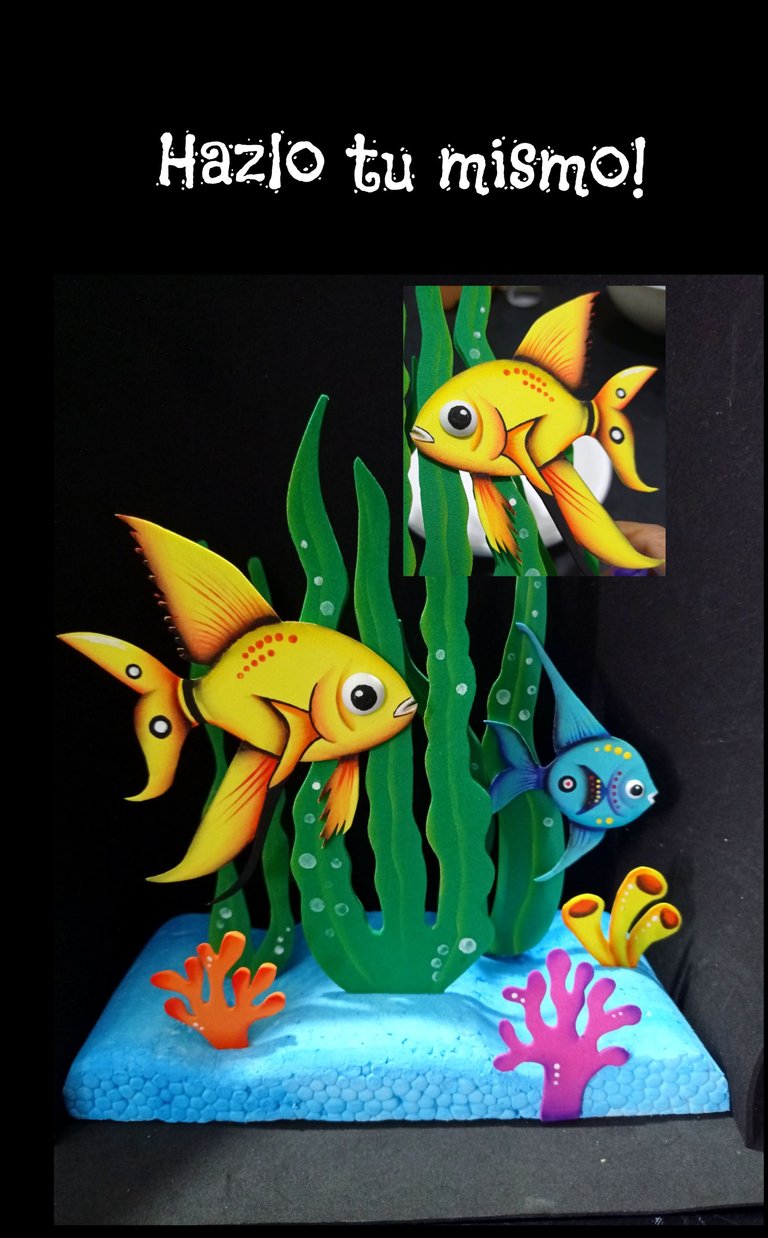
Saludos amigos y creadores que visitan mi Blog.
Bienvenidos todos.
Los materiales a usar son:
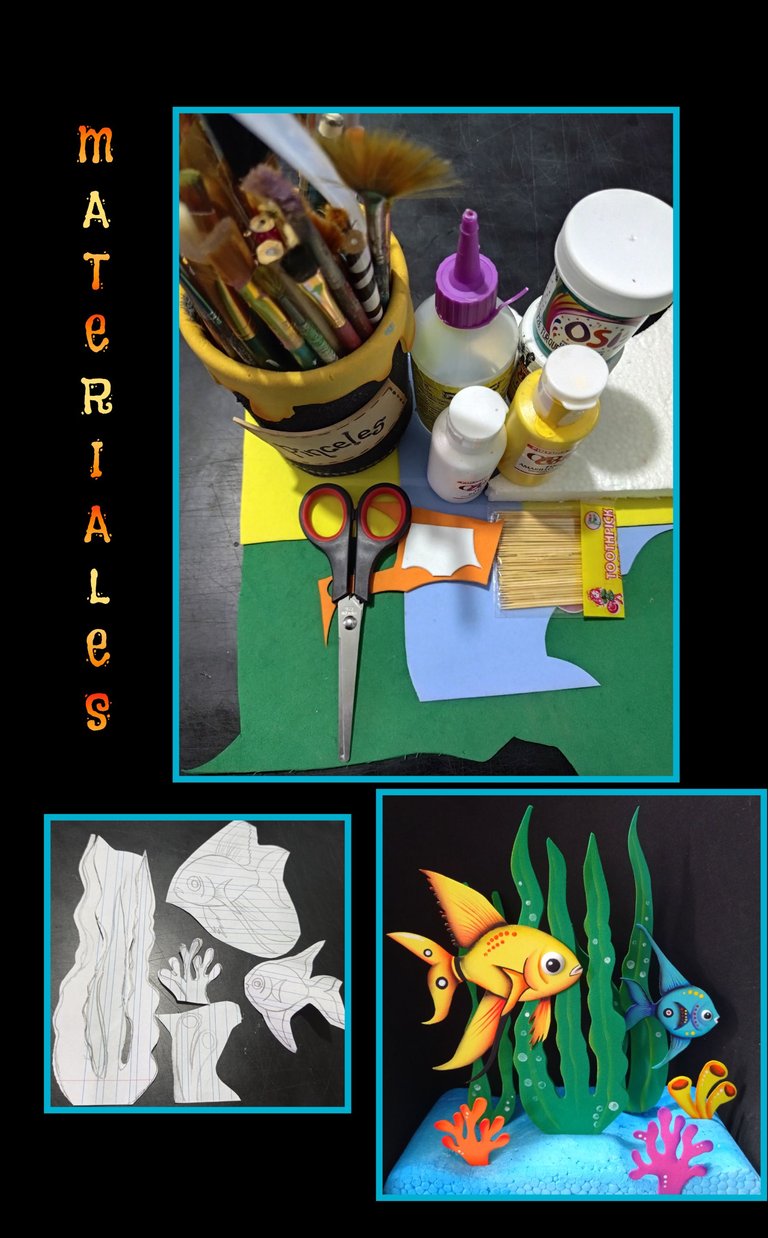
Foami de colores
Icopor o anime
Pinturas y pinceles
Lápiz y moldes
Palillos y silicón
Tijera
Comencemos:
PASO 1
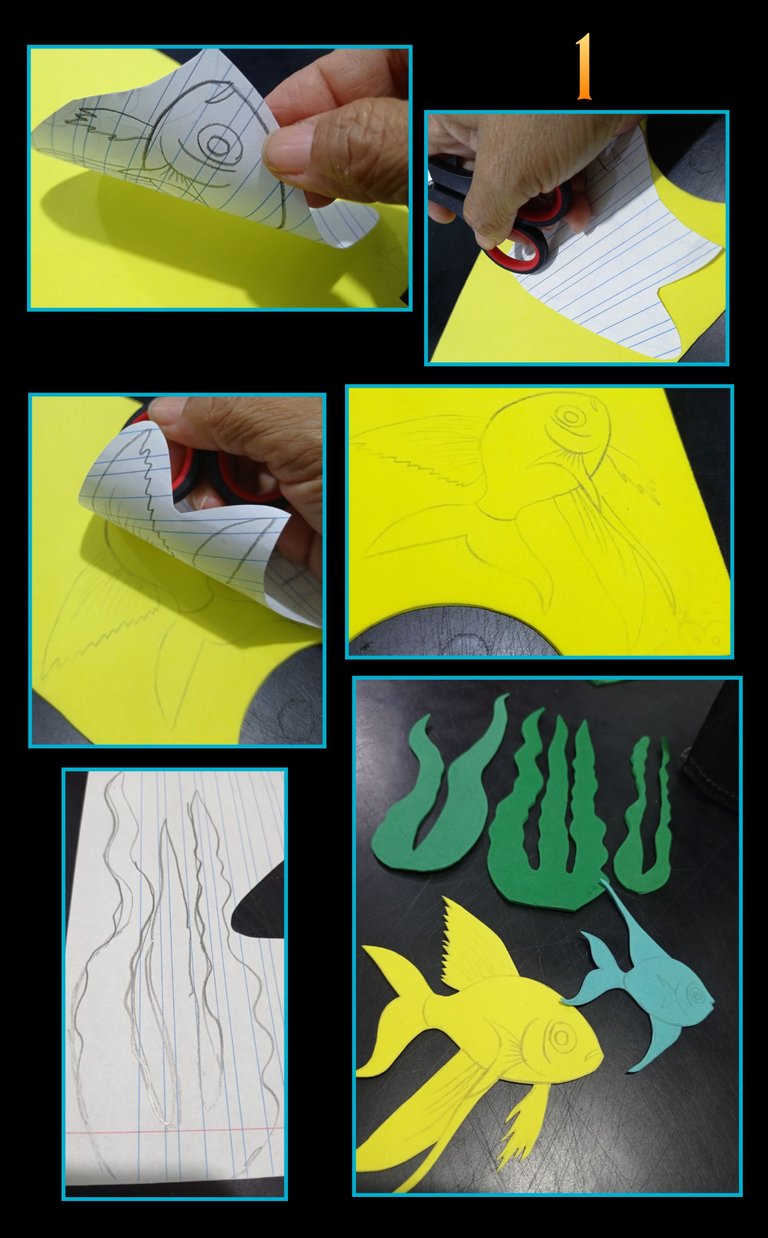
- Comienza remarcando el dibujo o la impresión con lápiz de mina blanda para que sea fácil de transferir, luego coloca sobre el foami y con los anillos de la tijera comienza a frotar por sobre el papel y ve levantando para asegurar que se está marcando, así harás con todas las piezas, luego con la tijera recorta todas las piezas.
Antes de comenzar con el paso 2 te mostraré como combinar colores y difuminarlos.
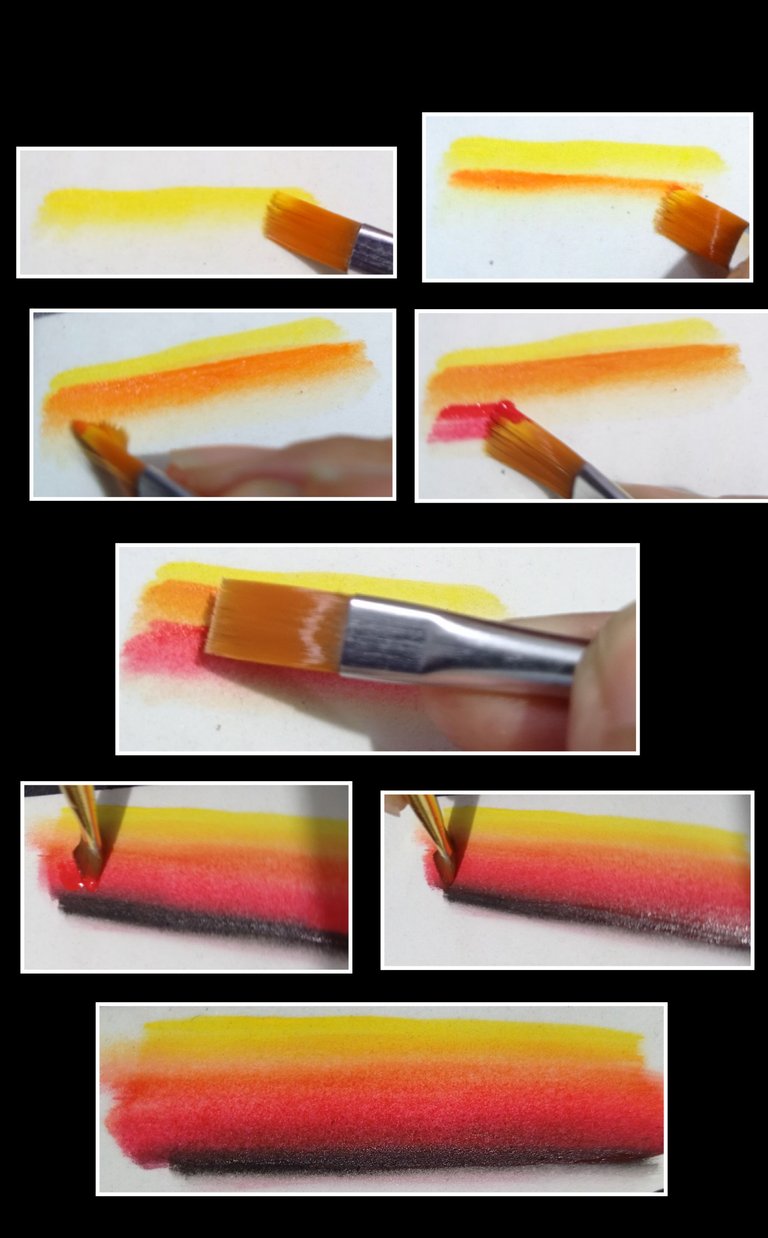
Lo primero que harás será mojar el pincel en agua luego, pasa por un pañito seco para quitar el exceso, seguido moja la punta del pincel en pintura amarilla y pasa de derecha a izquierda y viceversa, después sin lavar el pincel moja en pintura naranja y pasa justo debajo del amarillo y repite con el color rojo.
- Después con las pinturas aún húmedas, lava el pincel y quita el exceso de agua y pasa barriendo de un lado a otro hasta unir los colores, luego aplica el color negro debajo del rojo y moja en pintura roja como se ve en la foto 6 y une igual hasta degradar el color. Esto lo puedes hacer con otros colores.
PASO 2
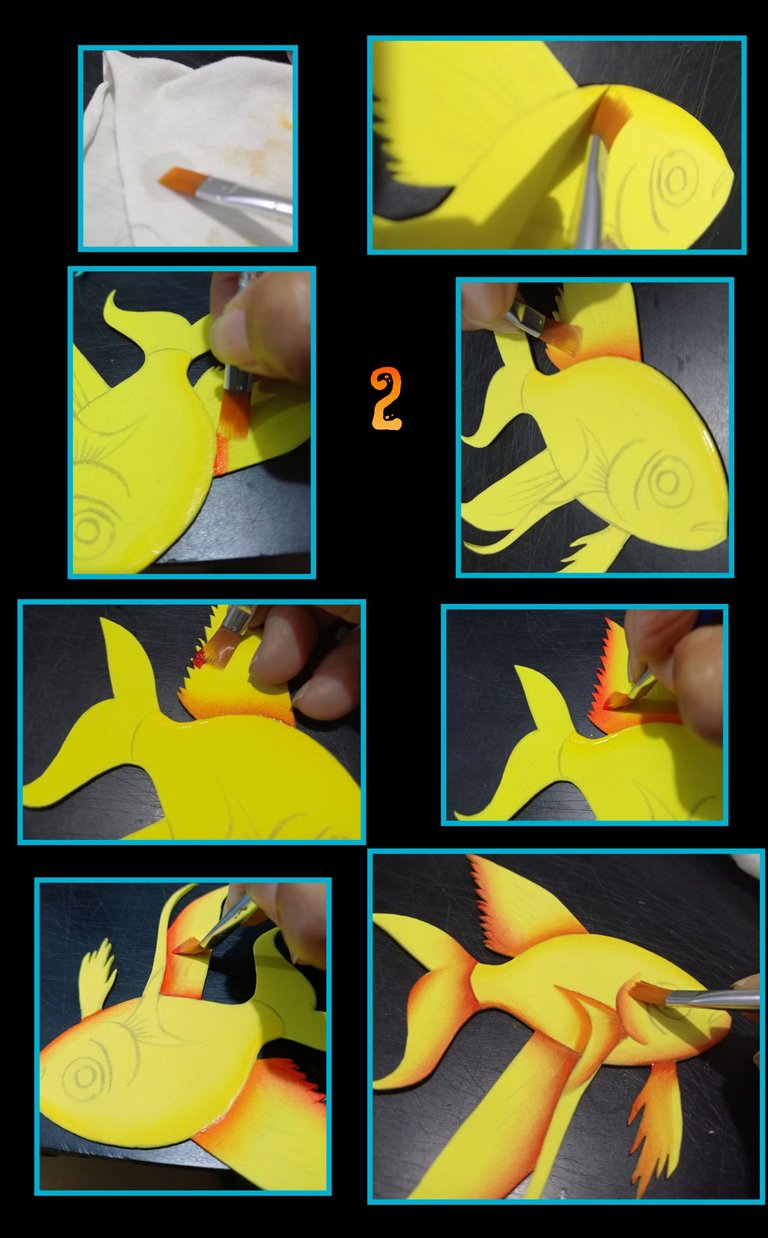
- Moja el pincel en agua y quita el exceso, después moja en pintura amarilla y pasa por el borde superior del pecesito, después repite el procedimiento con el color naranja y pasa por las líneas marcadas, también aplica rojo para dar sombras y colorido al pez, siempre guiándote por las fotos o por el dibujo que tengas del pez que escojas.
Paso 3
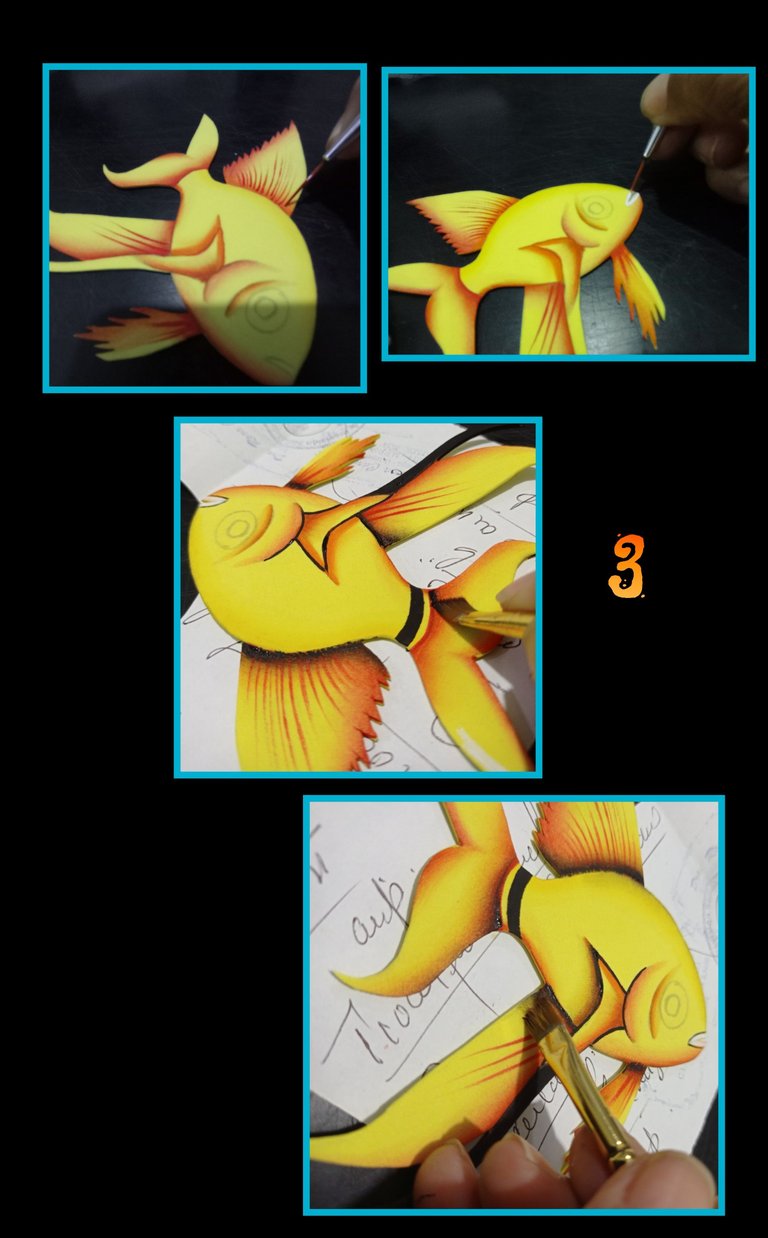
- Con un pincel delgado o marcador punta fina, haz líneas rojas en las aletas, luego con pintura blanca pinta la boca y delínea con pintura negra la aleta y haz líneas negras en la parte de la cola.
Paso 4:
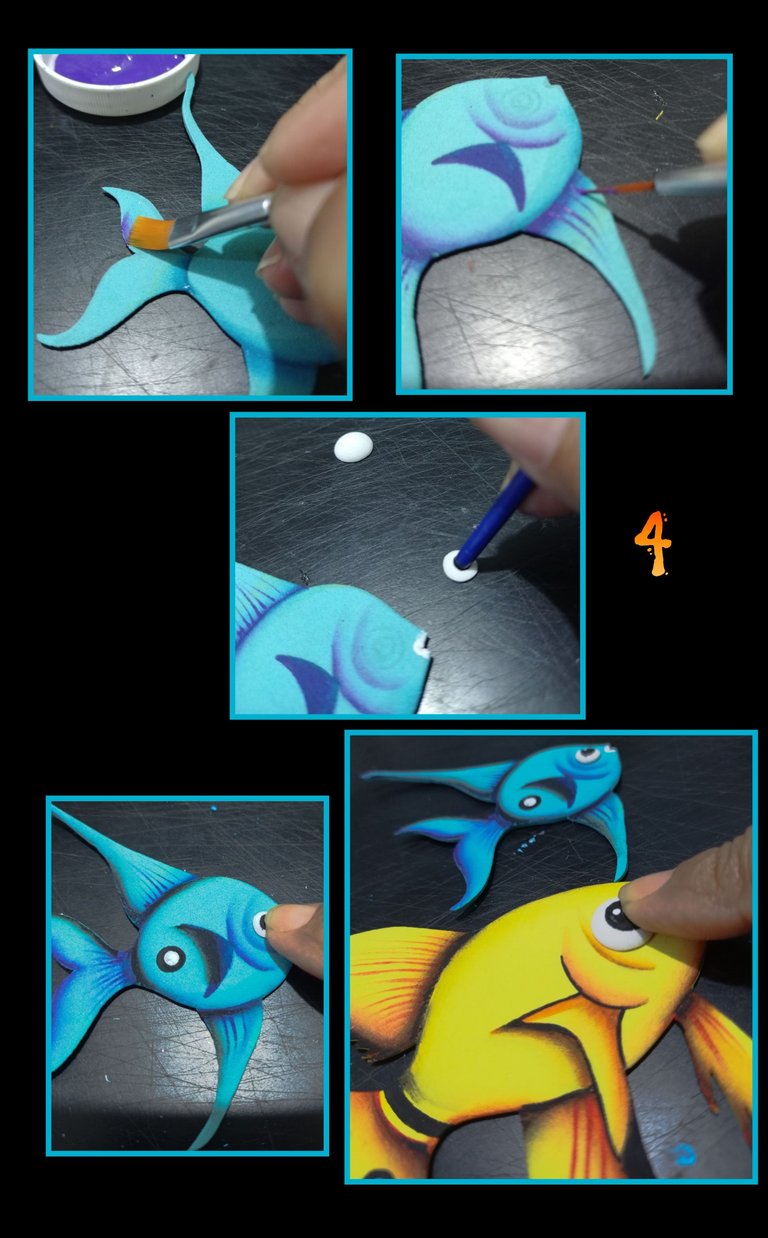
- Con el otro pez, repite el paso anterior.
- Luego recorta 2 círculos en foami blanco y pon un punto negro en el centro, deja secar y luego pon un punto de luz.
- Aplica silicón y pega.
Paso 5
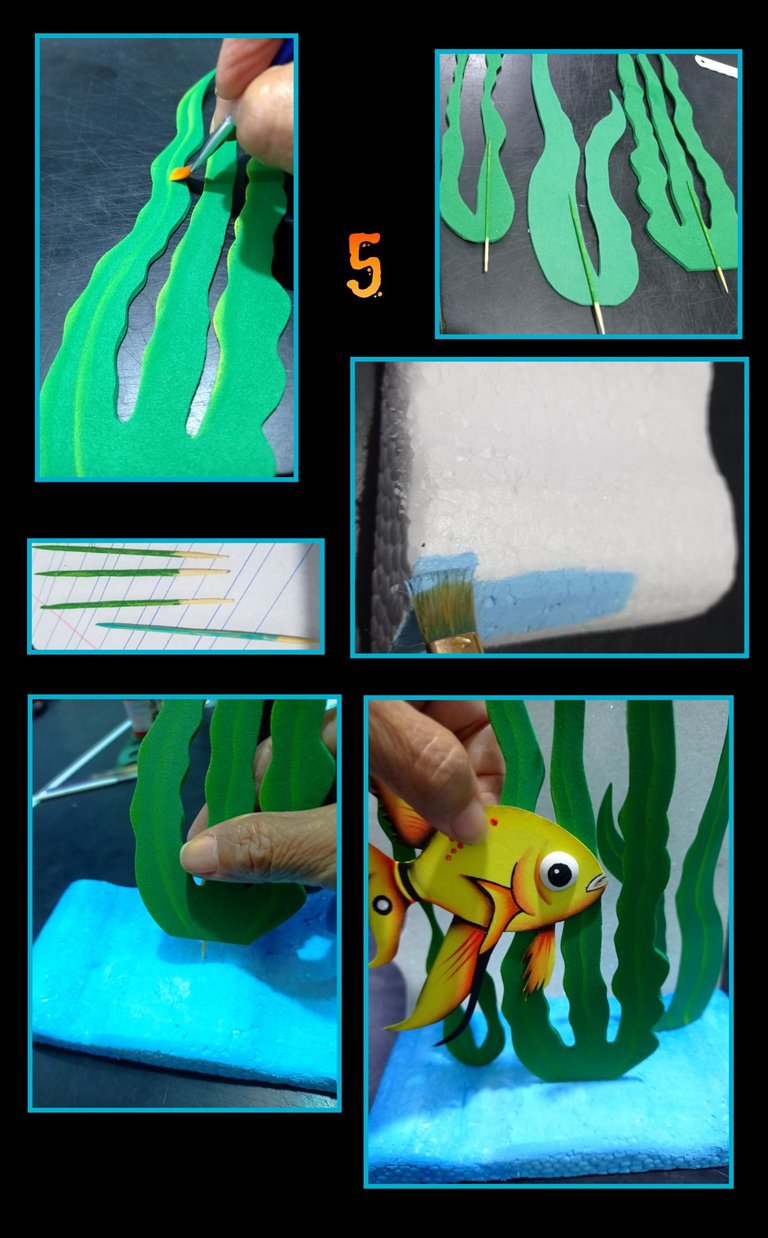
- Ahora pinta las algas con pintura amarilla por los bordes y el centro, luego pinta palillos y pega con silicón en la parte trasera de las algas.y deja secar.
- Pinta la base de icopor o anime con pintura azul, deja secar y luego decora con las algas y comienza a pegar los peces.
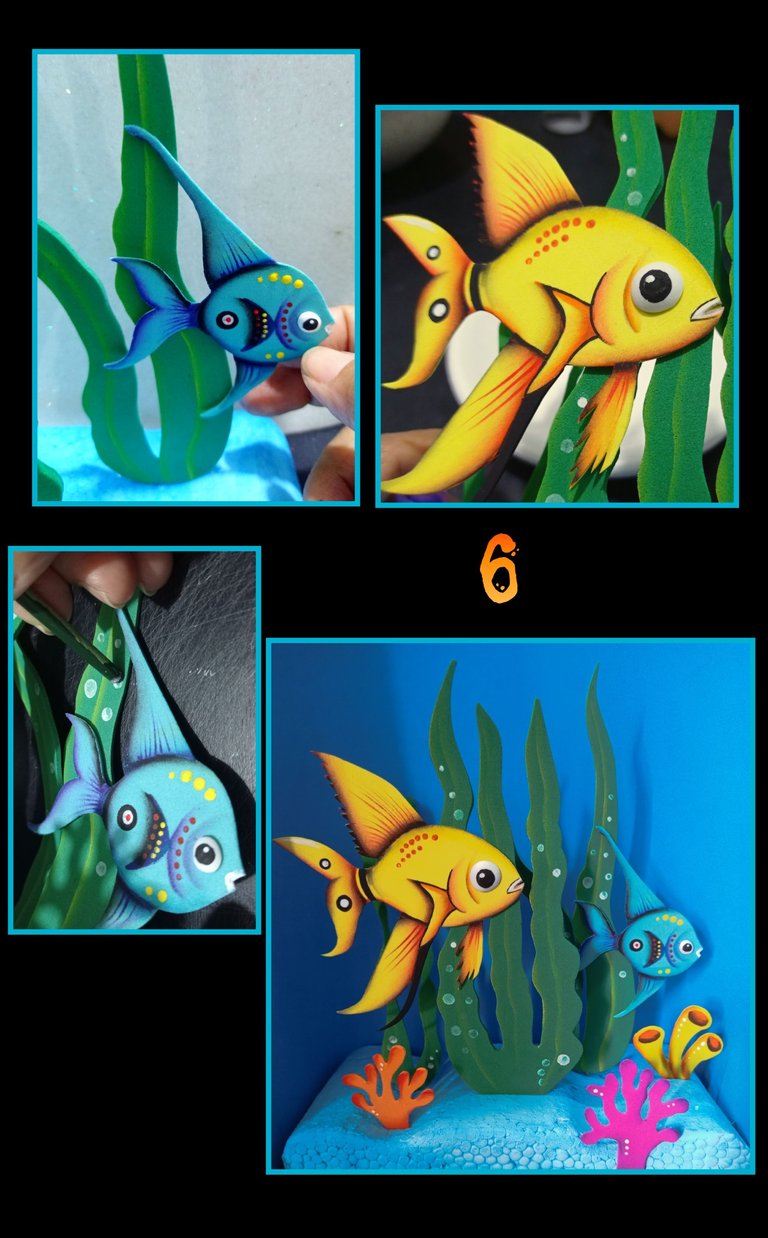
- Puedes colocar a tu gusto los peces, luego con la punta trasera del pincel pinta círculos como si fueran burbujas, también puedes recortar piezas como estrellas, corales y elementos marinos y decorar con colores llamativos.
Así quedó mi Fantasía Marina!
Como vez, con pocos materiales puedes crear sencillos pero hermosos adornos.


Las fotos las capturé con mi Redmi Note 9.
Editadas con GridArt.
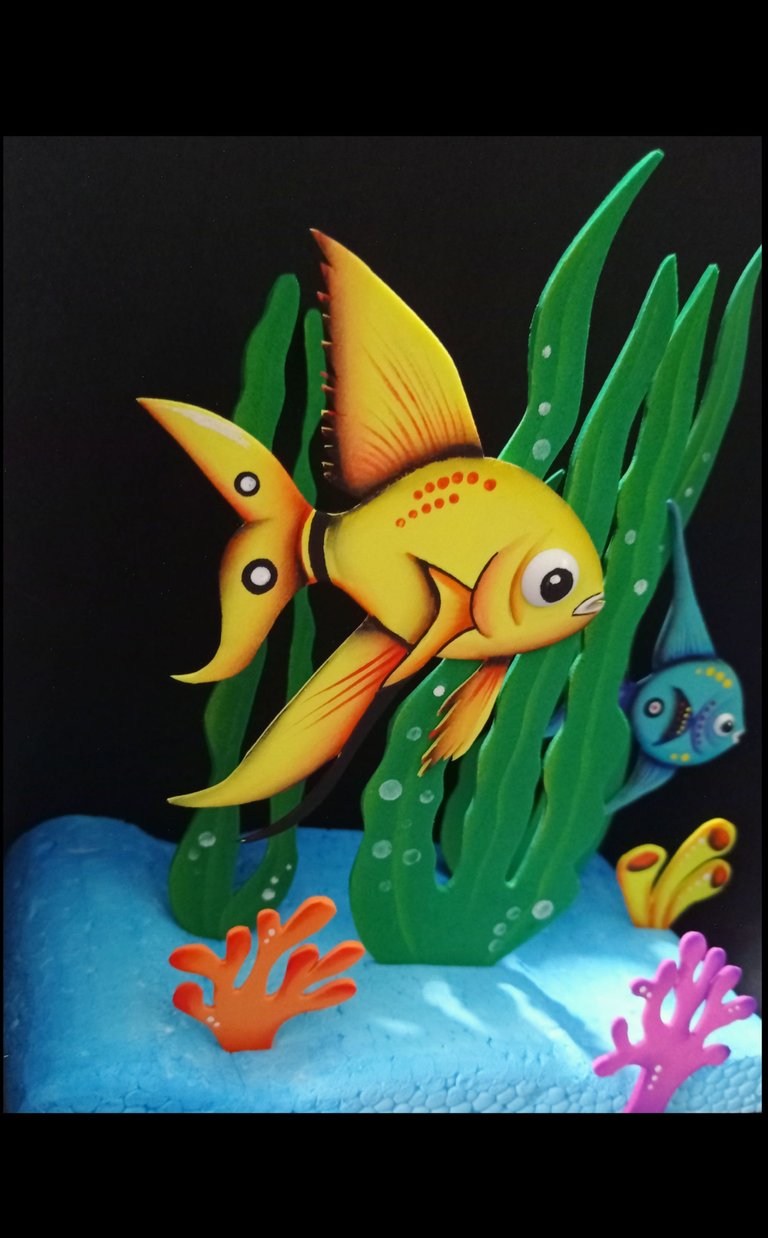
Y llegó la hora de despedirme deseando mi tutorial te sirva para aprender como puedes tu mismo realizar este bonito adorno que puedes lucir como centro de mesa, adorno decorativo para una habitación infantil o simplemente dar el uso que gustes.
Hasta mi próximo tutorial.
Saludos.
English:


Greetings friends and creators who visit my Blog.
Welcome to all of you.
The materials to use are:

Colored foami
Icopor or anime
Paints and brushes
Pencil and molds
Sticks and silicone
Scissors
Let's start:
STEP 1

- Start by highlighting the drawing or print with a soft lead pencil to make it easy to transfer, then place it on the foami and with the rings of the scissors begin to rub over the paper and lift to ensure that it is being marked, so you will do with all the pieces, then with the scissors cut out all the pieces.
Before starting with step 2 I will show you how to combine colors and blend them.
The first thing you will do is wet the brush in water, then wipe it with a dry cloth to remove the excess, then dip the tip of the brush in yellow paint and pass from right to left and vice versa, then without washing the brush dip it in orange paint and pass just below the yellow and repeat with the red color.
- Then with the paints still wet, wash the brush and remove the excess water and pass sweeping from one side to the other until joining the colors, then apply the black color under the red and dip in red paint as shown in photo 6 and join the same until degrading the color. You can do the same with other colors.

STEP 2

- Dip the brush in water and remove the excess, then dip it in yellow paint and go along the top edge of the fish, then repeat the procedure with the orange color and go along the marked lines, also apply red to give shadows and color to the fish, always guided by the photos or by the drawing you have of the fish you choose.
Step 3

- With a thin brush or fine tip marker, make red lines on the fins, then with white paint paint paint the mouth and outline with black paint the fin and make black lines on the tail part.
Step 4.

- With the other fish, repeat the previous step.
- Then cut out 2 circles in white foami and put a black dot in the center, let dry and then put a light spot.
- Apply silicone and glue.
Step 5

- Now paint the seaweed with yellow paint around the edges and center, then paint toothpicks and glue with silicone on the back of the seaweed.
- Paint the base with blue paint, let it dry and then decorate with the seaweed and start gluing the fish.

- You can place the fish as you like, then with the back tip of the brush paint circles as if they were bubbles, you can also cut out pieces such as stars, corals and marine elements and decorate with bright colors.
This is how my Marine Fantasy turned out!
As you can see, with few materials you can create simple but beautiful ornaments.


The photos were captured with my Redmi Note 9.
Edited with GridArt.

And it's time to say goodbye wishing my tutorial will help you to learn how you can make this beautiful ornament yourself that you can wear as a centerpiece, decorative ornament for a children's room or simply give the use you like.
See you in my next tutorial.
Greetings

