
Hola mis queridos amigos!
Feliz de estar nuevamente compartiendo con todos ustedes un nuevo tutorial.
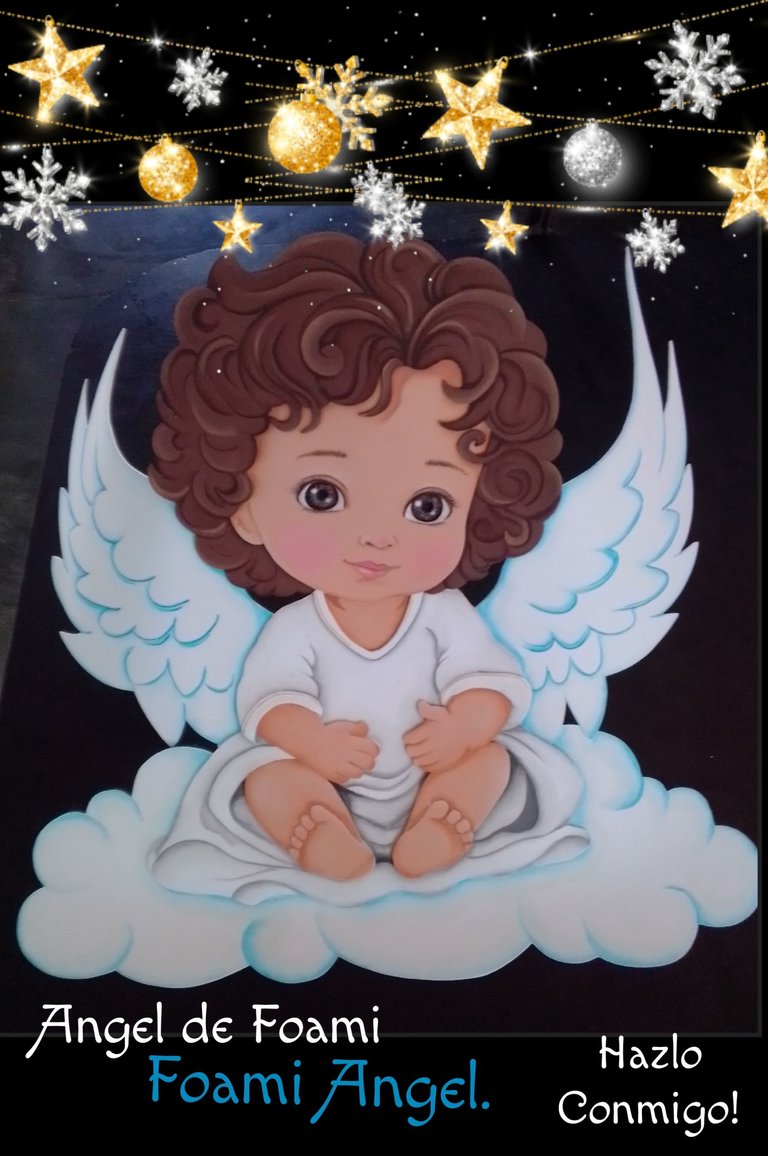
Hoy les voy a mostrar como hacer este Angelito hecho con foami y muy pocos materiales, lo puedes realizar del tamaño que desees, este mide 60cms de ancho por 45 de altura, asi que te quiero invitar a que me acompañes en el proceso y si gustas puedes realizarlo conmigo.
Necesitas:

| Foami blanco, piel y marrón | pinturas y pinceles |
|---|---|
| Tijera y cuchilla | Silicón |
| Tiza | Lápiz |
| Molde | marcador |
Listos los materiales, pongamos manos a la obra!

- Remarca el dibujo con lápiz de mina blanda, luego coloca sobre el foami a usar y con los anillos de la tijera frota sobre el dibujo para transferir al foami, esto lo harás con cada una de las piezas. luego recorta con la tijera y con la cuchilla haz los cortes en las líneas donde irán insertos los brazos y pierna.

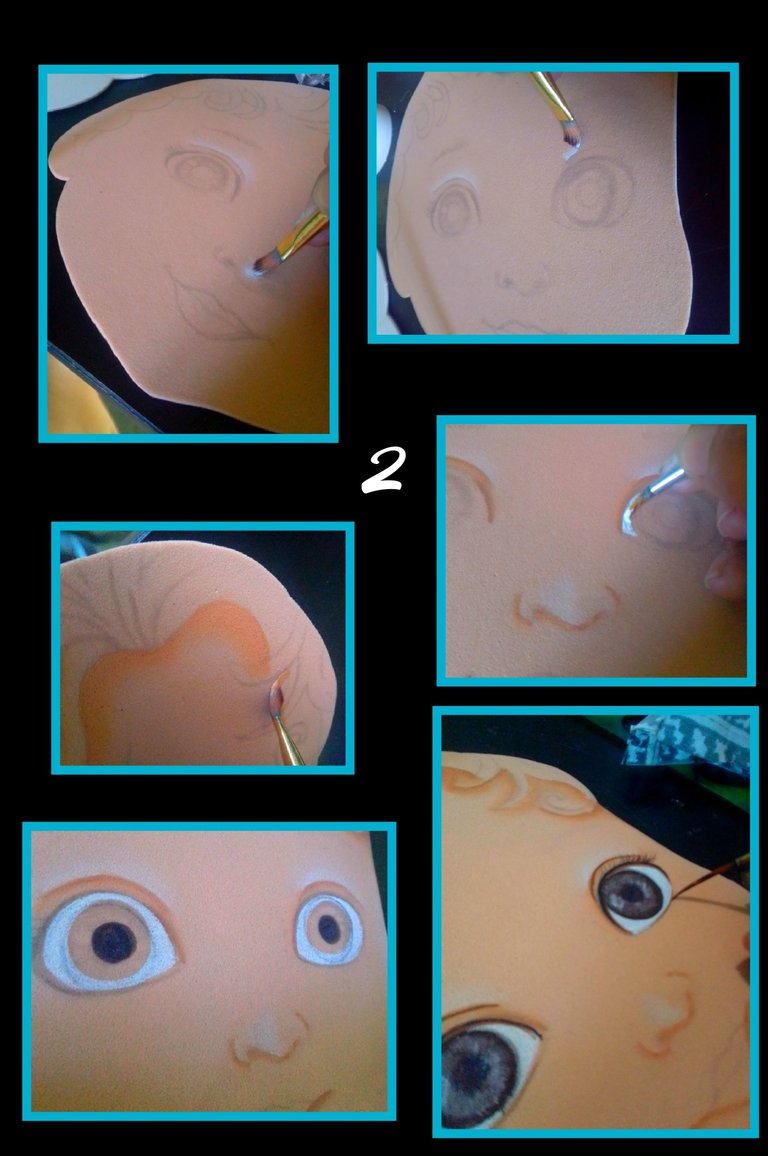
- Ahora comenzaremos a pintar, vas a utilizar un pincel angular, sino tienes puedes usar uno cuadrado el cual humedecerás en agua y quitarás el exceso pasando por un pañito seco, después mojarás una punta en pintura blanca y pasarás suavemente sobre la nariz y por los párpados.
- Luego lava el pincel y repite el procedimiento pero con pintura color piel canela y pasa por el borde de la cara, ojos, nariz y boca y deja secar, después con pintura blanca comienza a rellenar los ojos, deja secar y coloca otra capa de pintura, luego si no tienes mucha práctica pintando ojos, rellena el centro con marcador para que tengas una guía al comenzar a pintar el iris con pintura marrón, deja secar un poco y luego con pintura blanca aclara como se ve en la foto y deja secar.
- Ahora con un pincel o marcador punta fina haz el borde del ojo y pinta unas pequeñas líneas curvas para hacer las pestañas, deja secar y con la parte trasera del pincel pinta la pupila con pintura negra y rellena la boca con rosado.

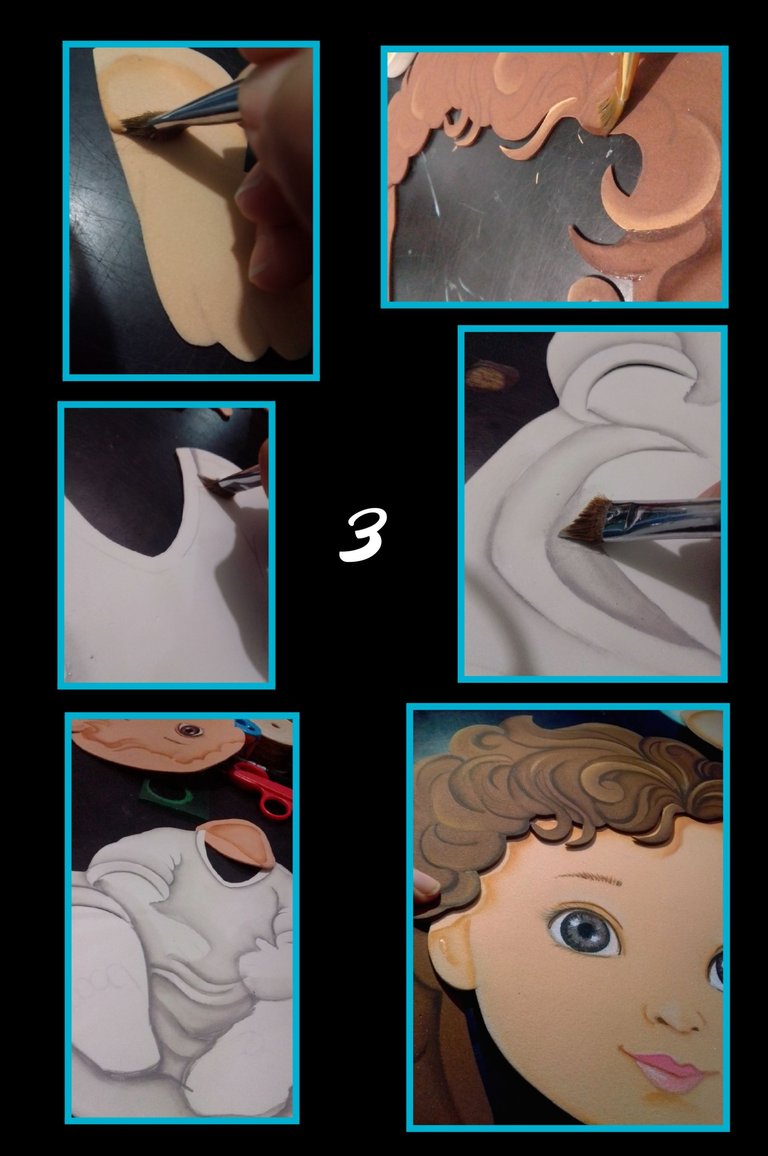
- Ahora repite el paso anterior para pintar los brazos, cabellos, piernas, cuello y puedes alternar varios colores en las líneas del cabello pero pronunciando las ondas con color marrón oscuro, también puedes ponerle el cabello amarillo o negro, todo es cuestión de gusto.
- Luego con pintura gris rellena los plises y líneas del vestido y deja secar.
- Ahora, aplica silicón en el cabello y comienza a armar.

Aplica silicón al vestido y pega el cuello, luego inserta y pega los brazos y piernas y con tiza pinta las mejillas suavemente haciendo movimientos en forma circular.
Luego pinta los bordes de las nubes y alas con pintura azul bebé, deja secar y pega el ángel sobre alas y nube.
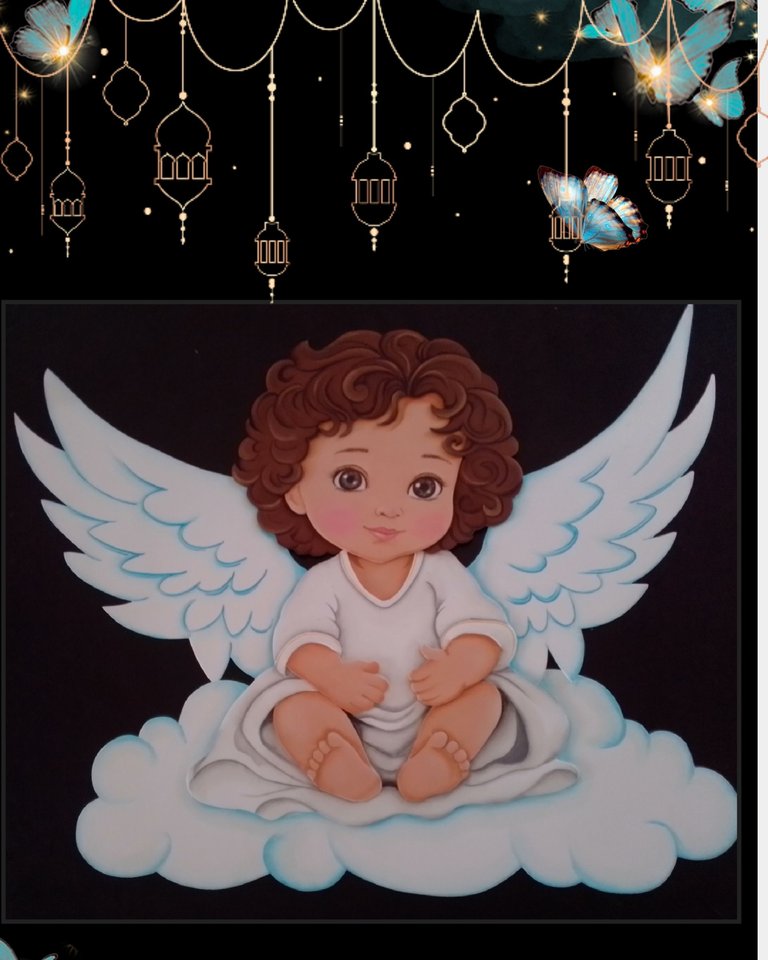
Ahora te muestro como quedó!

Espero les guste mi tutorial el cual edité con etiquetas HTML, usando el traductor DeepL y las fotos las capturé con mi BLU G5 y edité con GridArt.
Fuente:https://www.pinterest.es/pin/211174976392789/
Ahora me despido esperando les haya gustado mi publicación, cualquier duda estaré atenta.
Muchas gracias por acompañarme y apoyarme.

Ahora me despido esperando les haya gustado mi publicación, cualquier duda estaré atenta.
Muchas gracias por acompañarme y apoyarme.


Hello my dear friends!
Happy to be again sharing with you all a new tutorial.
You need:

| White, leather and brown foami | paints and brushes |
|---|---|
| Scissors and razor | Silicone |
| Chalk | Pencil |
| Mold | Marker |
Materials ready, let's get to work!

- Outline the drawing with soft lead pencil, then place it on the foami to use and with the rings of the scissors rub over the drawing to transfer to the foami, you will do this with each of the pieces. then cut with the scissors and with the blade make the cuts on the lines where the arms and leg will be inserted.

- Now we will begin to paint, you are going to use an angular brush, if you don't have one you can use a square brush which you will moisten in water and remove the excess by wiping it with a dry cloth, then you will dip a tip in white paint and pass it gently over the nose and eyelids.
- Then wash the brush and repeat the procedure but with cinnamon skin color paint and go over the edge of the face, eyes, nose and mouth and let dry, then with white paint begin to fill the eyes, let dry and put another layer of paint, then if you do not have much practice painting eyes, fill the center with marker so you have a guide to start painting the iris with brown paint, let dry a little and then with white paint lighten as shown in the photo and let dry.
- Now with a brush or fine tip marker make the edge of the eye and paint a few small curved lines to make the eyelashes, let dry and with the back of the brush paint the pupil with black paint and fill the mouth with pink.

- Now repeat the previous step to paint the arms, hair, legs, neck and you can alternate several colors in the lines of the hair but pronouncing the waves with dark brown, you can also put the hair yellow or black, it's all a matter of taste.
- Then with gray paint fill in the pleats and lines of the dress and let it dry.
- Now, apply silicone on the hair and start to assemble.

Apply silicone to the dress and glue the neck, then insert and glue the arms and legs and with chalk paint the cheeks gently making circular movements.
Then paint the edges of the clouds and wings with baby blue paint, let dry and glue the angel on the wings and cloud.
Now I'll show you how it turned out!

I hope you like my tutorial which I edited with HTML tags, using the translator DeepL and the photos I captured with my BLU G5 and edited with GridArt.
Fuente:https://www.pinterest.es/pin/211174976392789/


Now I say goodbye hoping you liked my publication, any questions I will be attentive.
Thank you very much for joining me and supporting me.


