Un gusto saludar a todos mis amigos, en especial a los de esta comunidad, hoy quiero mostrarles un paso a paso de como hacer un rostro, de manera que si sigues cada uno de ellos aunque no sepas dibujar o no seas un experto, puedas obtener un buen resultado.
A pleasure to greet all my friends, especially those of this community, today I want to show you a step by step of how to make a face, so that if you follow each one of them even if you don't know how to draw or you are not an expert, you can get a good result.
COMENCEMOS / Let's start
1
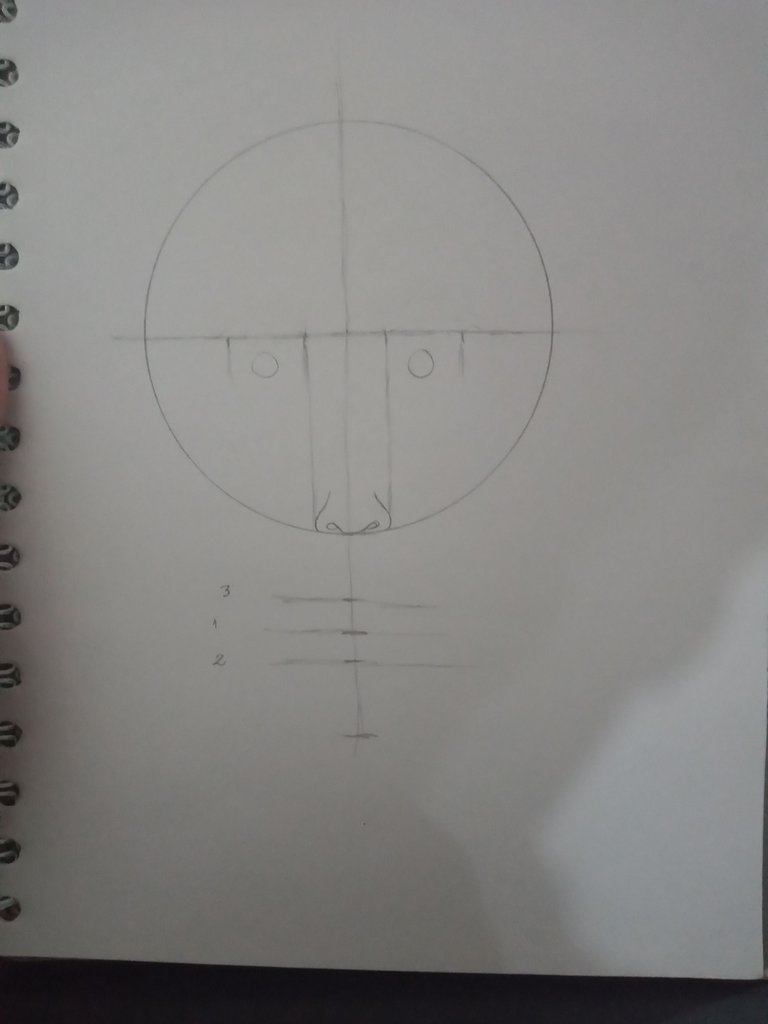
Lo primero que vamos hacer en un circulo, a ese circulo le vamos a trazar dos líneas, una vertical y una horizontal, haciendo una cruz.
La línea vertical debe quedar por fuera, buscando que la medida sea como el de la mitad del circulo.
The first thing we are going to do in a circle, to that circle we are going to draw two lines, one vertical and one horizontal, making a cross.
The vertical line should be on the outside, looking for the measure to be like half of the circle.

2
La línea del medio nos va a ayudar a ubicar los ojos y las cejas.
Para ubicar los ojos, vamos a dividir la línea central en 5 partes iguales, debido a que el espacio entre ojo y ojo, es un ojo. Y el espacio entre el ojo y la sien también hay una medida ojo.
Una vez ubicado los ojos, podremos ubicar también el tamaño de la nariz, la nariz como vieron la vamos a ubicar en la parte posterior del circulo.
The middle line will help us to place the eyes and eyebrows.
To place the eyes, we are going to divide the middle line in 5 equal parts, because the space between eye and eye is an eye. And the space between the eye and the temple is also an eye measurement.
Once the eyes are located, we can also locate the size of the nose, the nose as you saw it we are going to locate it in the back of the circle.
3
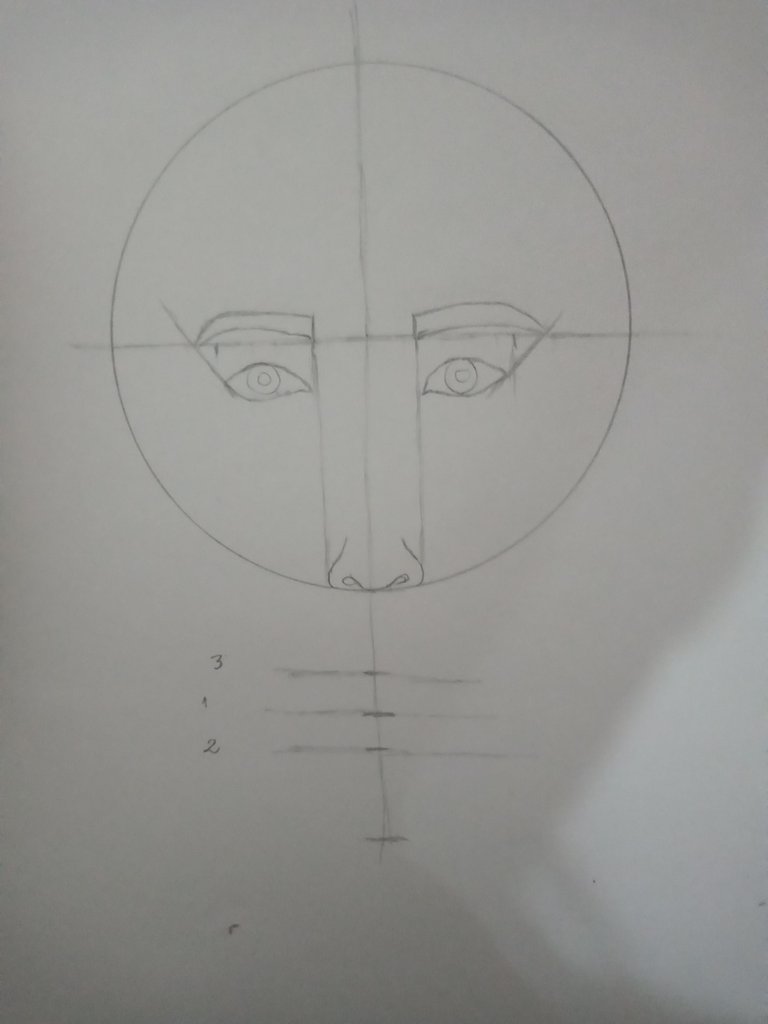
Las cejas las ubicamos arriba de la línea central, y los ojos un poco mas abajo de ella para dejar el espacio del parpado.
Para ubicar el largo de la ceja vamos a trazar una línea diagonal que inicie del lateral de afuera del ojo, hacia arriba.
Las orejas las vamos a ubicar con la medida desde el ojo hasta la nariz
Y para ubicar el cabello vamos a dividir por la minad la parte superior del circulo, esa mitad también la vamos a dividir por la mitad, utilizando como guía, la mitad superior.
The eyebrows are placed above the center line, and the eyes a little below it to leave the space of the eyelid.
To locate the length of the eyebrow we will draw a diagonal line starting from the outside side of the eye, upwards.
4
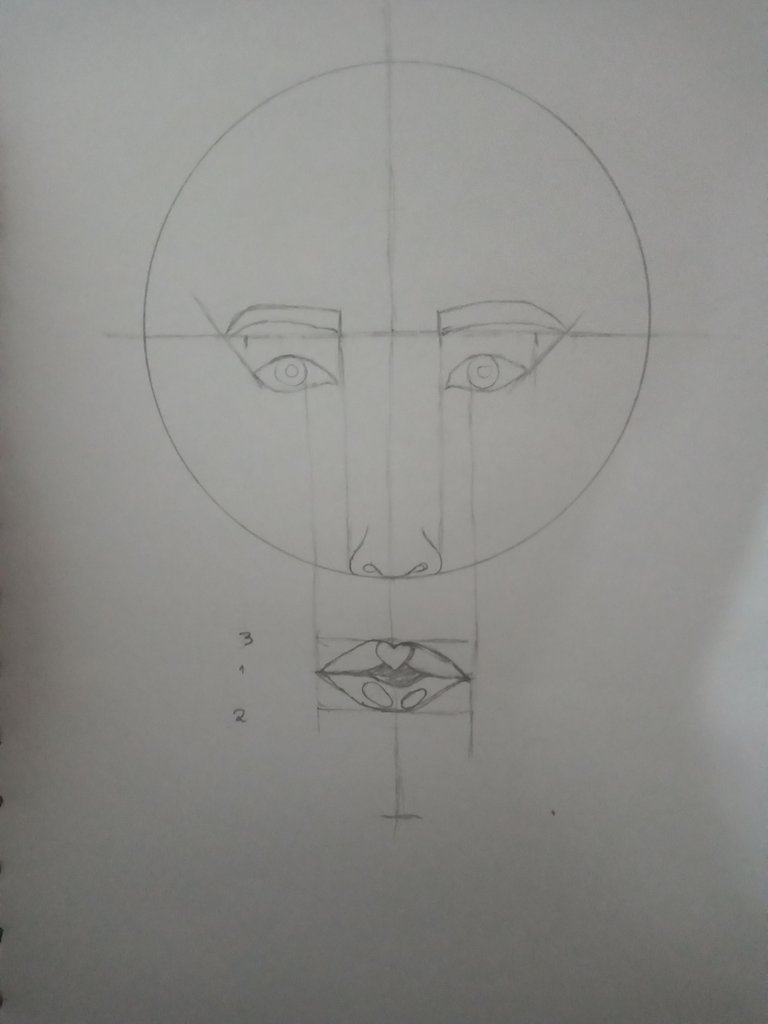
Para ubicar la boca, vamos a dividir en 2 partes iguales la línea que quedó por fuera del circulo, en la parte posterior de él.
Esa línea central será la mitad de la boca.
Para el tamaño de la boca, vamos a usar como guía la ubicación del iris del ojo, hacemos una línea desde el lateral interior hacia abajo, donde se encuentra la línea de la boca.
Lugo vamos a colocar dos líneas más para el labio superior e inferior, que sean del mismo tamaño y ahí daremos la forma del labio colocando un corazón en el labio superior y 2 óvalos diagonales hacia fuera en el labio inferior.
To place the mouth, we are going to divide in 2 equal parts the line that was left outside the circle, at the back of it.
That central line will be half of the mouth.
For the size of the mouth, we will use as a guide the location of the iris of the eye, we make a line from the inner side down, where the line of the mouth is.
Then we are going to place two more lines for the upper and lower lip, which are the same size and there we will give the shape of the lip by placing a heart on the upper lip and 2 ovals diagonally outward on the lower lip.
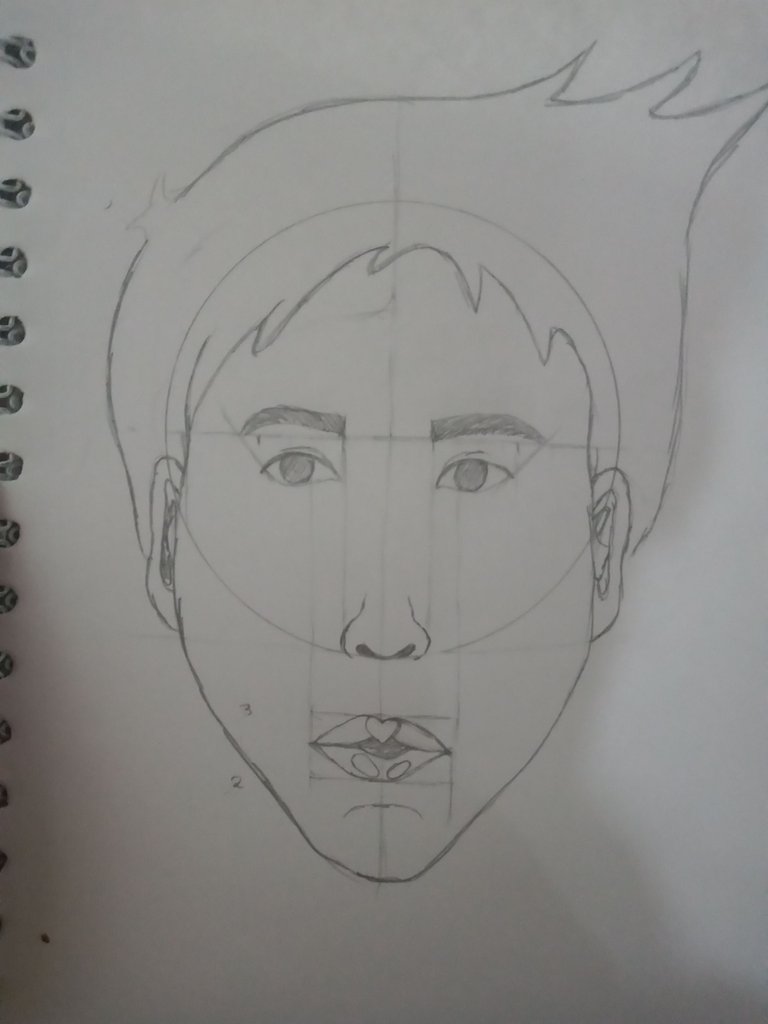
5
Para terminar de formar nuestro retrato, vamos colocar las orejas, quijada y cabello.
La quijada va a quedar ubicada al final de la línea que está fuera del circulo, ahí vamos a dar forma al rostro desde la línea central del circulo hacia abajo.
Tomando en cuenta que los rostros pueden variar, le daremos la forma que deseemos, también podemos alargar o achicar.
To finish forming our portrait, we are going to place the ears, jaw and hair.
The jaw will be located at the end of the line that is outside the circle, there we will shape the face from the central line of the circle downwards.
Taking into account that faces can vary, we will give it the shape we want, we can also lengthen or shorten it.
The ears we are going to place them with the measure from the eye to the nose.
And to place the hair we are going to divide the upper part of the circle in half, that half we are also going to divide it in half, using the upper half as a guide.
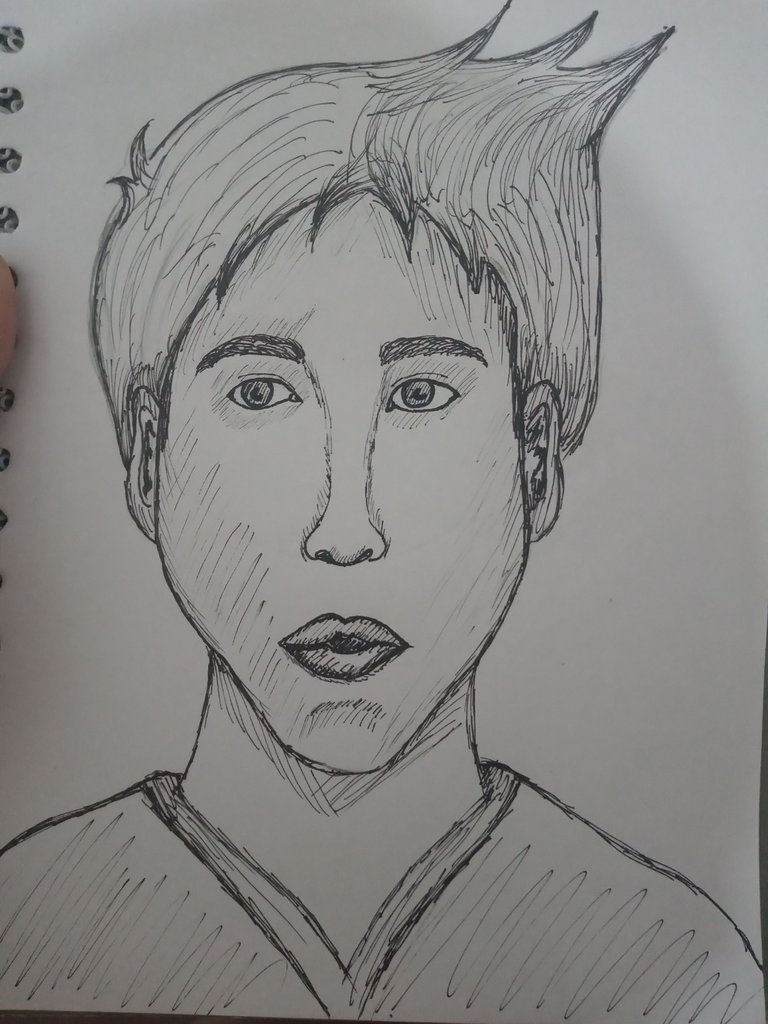
Y listo... / And that's it...
Ya habremos terminado nuestro rostro, luego para darle forma de retrato, trabajé con un estilografo dando un poco de luces y sobras para crear algo de volumen, también ajuste un poco algunas parte y para terminar borre todas las lineas guías.
Now we have finished our face, then to give it the shape of a portrait, I worked with a stylograph giving a little bit of highlights and leftovers to create some volume, I also adjusted some parts and to finish I erased all the guide lines.
Gracias por haberme leido hasta aquí, espero que te pueda ser útil en algún momento.
Thank you for reading this far, I hope it can be useful to you at some point.