Un placer saludar a todos mis amigos de esta comunidad, hoy quiero compartir con ustedes un pequeño paso a paso de algo nuevo que intenté hacer...
Como sabran, hace un tiempo me regalaron una tablet gráfica, pero como soy mamá de un pequeño de 1 año es poco tiempo el que le puedo dedicar a practicar.
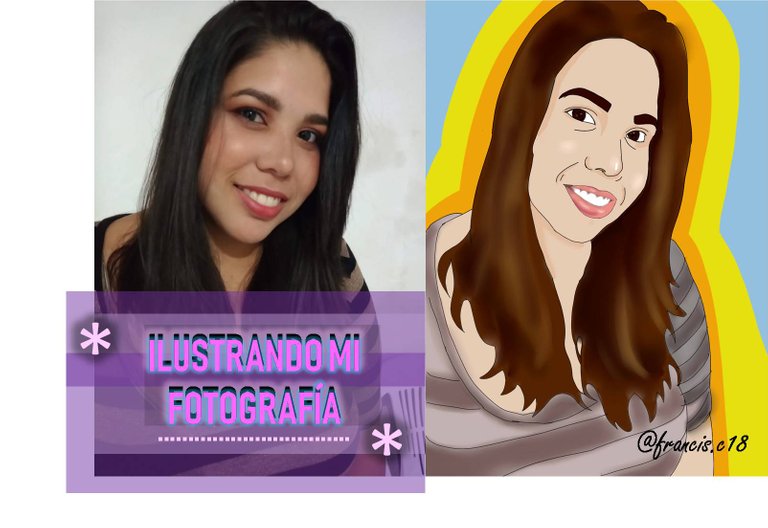
Ayer pude tomarme un buen tiempo y decidí practicar ILUSTRANDO UNA FOTO.
Así que les mostrare como fui haciendo, ya que no soy una experta.
PD. Porsupuesto que acepto sugerencias para seguir aprendiendo.
A pleasure to greet all my friends of this community, today I want to share with you a little step by step of something new that I tried to do...
As you know, some time ago I was given a graphic tablet, but as I'm a mom of a 1 year old little boy, I can't spend much time practicing.
Yesterday I could take some time and I decided to practice ILLUSTRATING A PHOTO.
So I will show you how I was doing, since I am not an expert.
PD. Of course I accept suggestions to keep learning.
COMENCEMOS... / Let's start
1
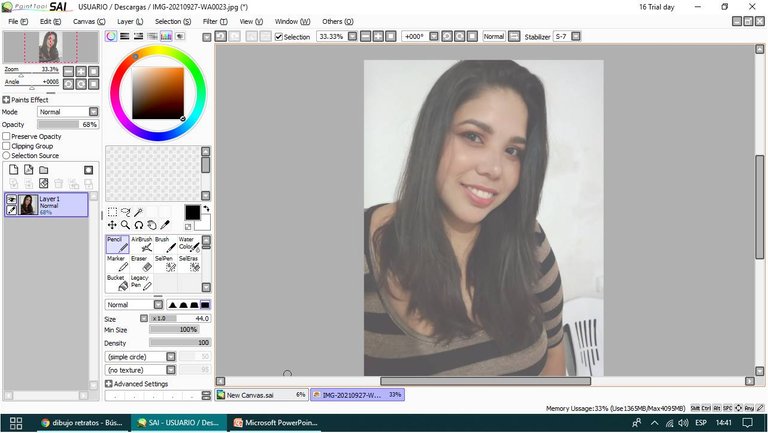
Lo primero que hice fue seleccionar una foto, para comenzar escoji una que no fuera muy complicada. La agregue en el programa que utilizo y le coloque opacidad para poder dibujar sobre ella.
The first thing I did was to select a photo, to start I chose one that wasn't too complicated. I added it in the program I use and put opacity to be able to draw on it.
2
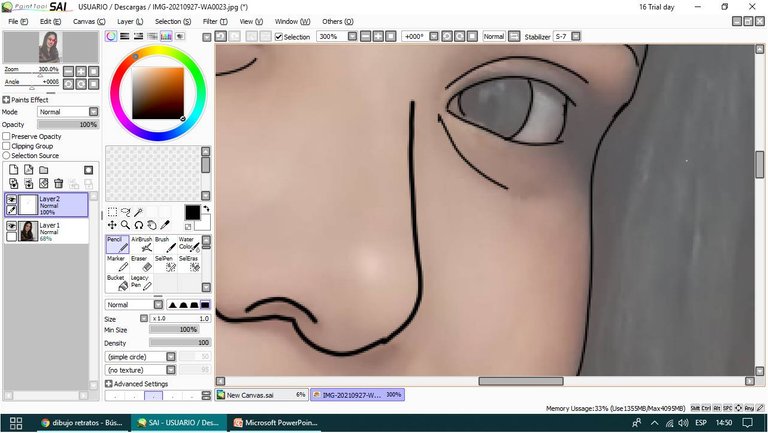
Luego Delinee todo las partes, cabello, ojos, todo...
Then outline all the parts, hair, eyes, everything...
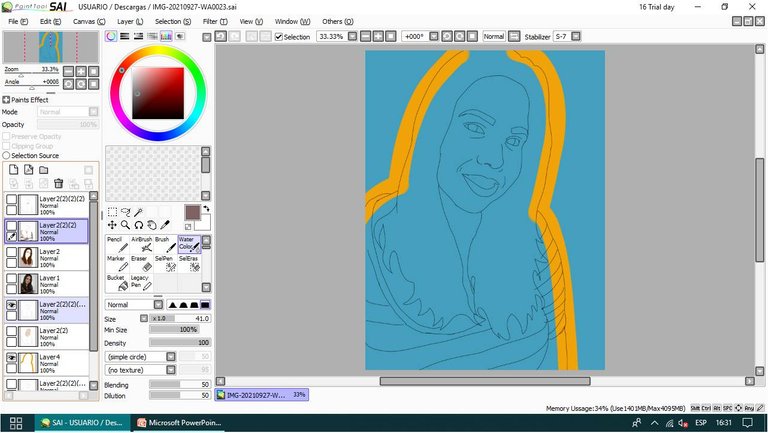
3
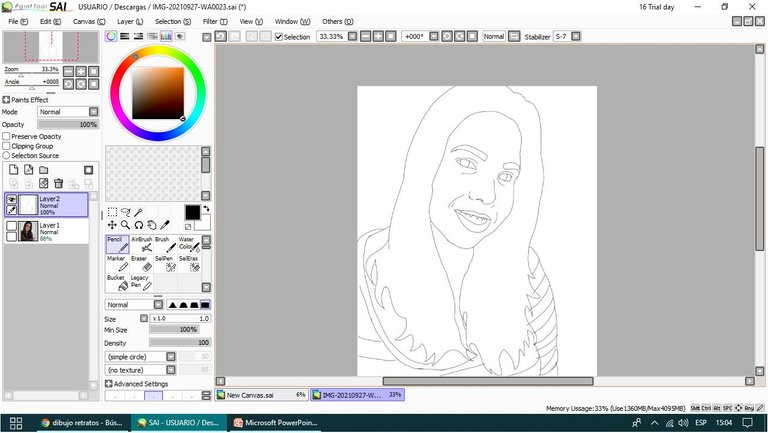
Una vez habiendo terminado, oculte la fotografia y empece a crear capaz nueva para pintar.
Once finished, I hid the picture and started to create a new one to paint.
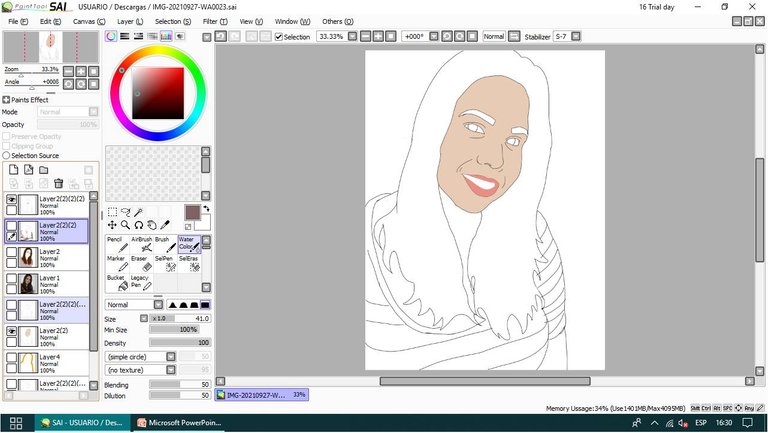
4
Comencé pintando el fondo para tener una idea general de como iba a quedar, luego pinte el rostro, los labios y el cabello.
I started by painting the background to get a general idea of how it was going to look, then painted the face, lips and hair.
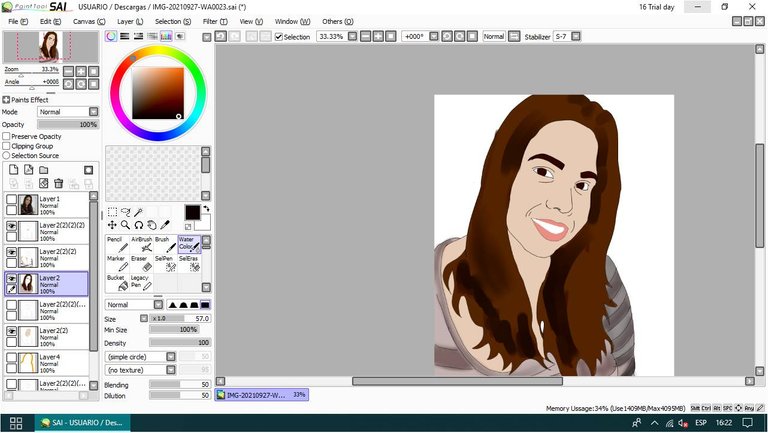
5
Una vez que terminé de dar los colores base, comencé a darle un poco de luces y sombras.
Once I was done with the base colors, I started to add some highlights and shadows.
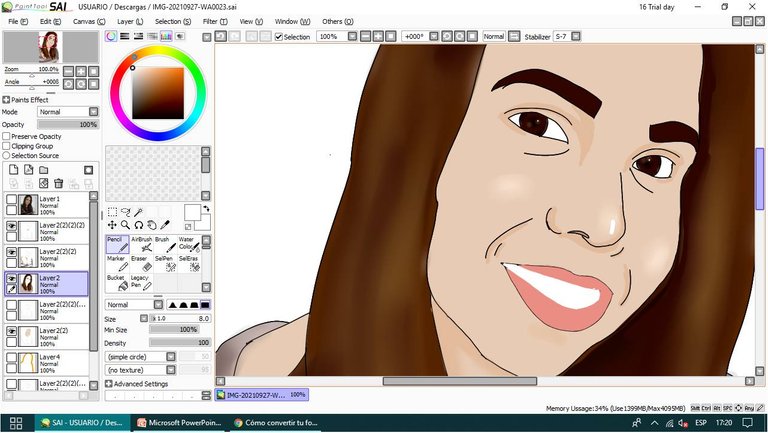
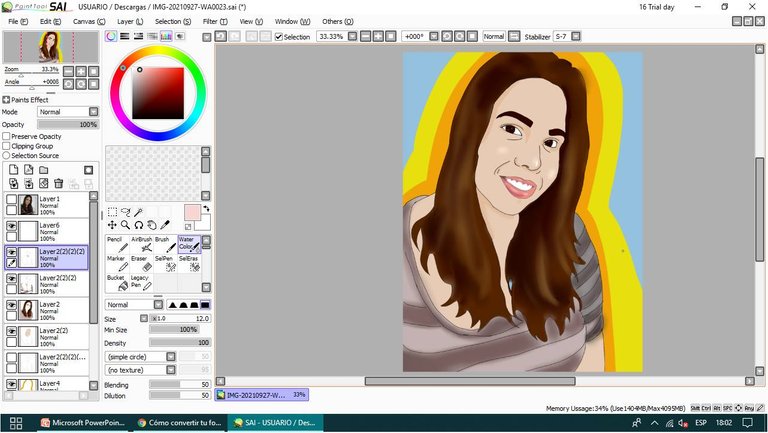
6
Para terminar, le hice todos los pequeños detalles, agregue luz a los ojos, un poco de sombra en el rostro y termine de acomodar el fondo.
To finish, I did all the little details, added light to the eyes, a little shadow on the face and finished the background.
Y LISTOOOO.... / And ready
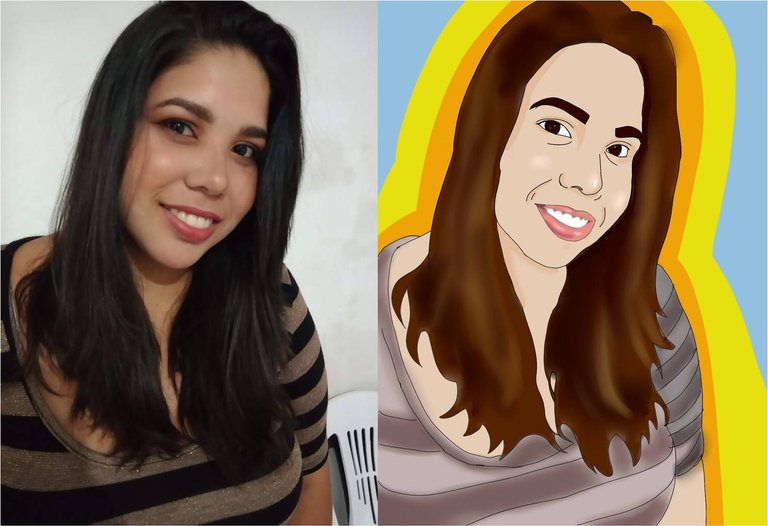
Este fue todo mi proceso, mi paso a paso de como realicé esta ilustracion de una fotografia, espero que les haya gustado y les sirva para alguna ocasión.
This was my whole process, my step by step of how I made this illustration of a photograph, I hope you liked it and that it will be useful for some occasion.
Programa Utilizado Para Diseño digital: PAINT TOOL SAI
Software Used For Digital Design: PAINT TOOL SAI

