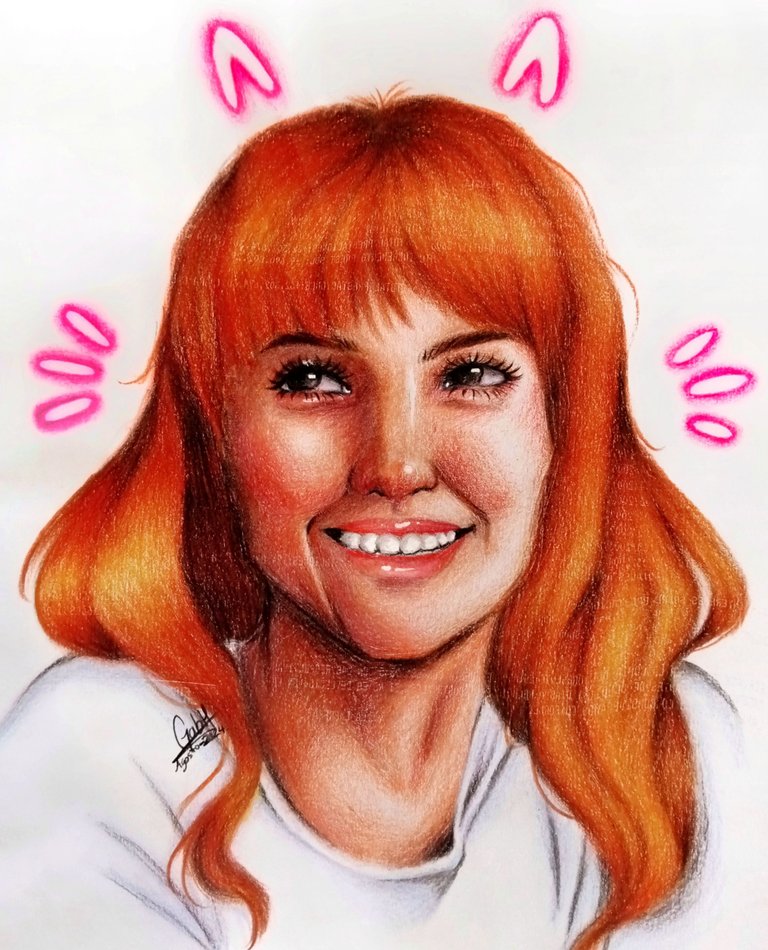
Hola mis amigos creativos en hive! Espero se encuentren muy bien el día de hoy, nuevamente les comparto el proceso de mi último dibujo el cual es un retrato de la cantante principal de la banda Paramore, Hayley Williams la cual realice con colores. Hace un tiempo había realizado un retrato de ella pero como no quede del todo satisfecha quise de nuevo hacer otro para compararlo y ver los cambios y la evolución que he tenido en el dibujo desde hace un año. Espero les guste y los invito a leerme! ❤️✨
Hello my creative friends at hive! I hope you are doing well today, again I share with you the process of my last drawing which is a portrait of the lead singer of the band Paramore, Hayley Williams which I made with colors. Some time ago I had done a portrait of her but as I was not completely satisfied I wanted to do another one to compare it and see the changes and evolution that I have had in the drawing since a year ago. I hope you like it and I invite you to read me! ❤️✨
- Lo que utilice para realizar el dibujo en tradicional en una hoja tipo cartulina tamaño 35 x 28 cm, un lápiz de grafito 2 HB, un borrador, mis colores y un corrector líquido blanco.
- What I used to make the drawing in traditional on a cardboard type sheet size 35 x 28 cm, a graphite pencil 2 HB, an eraser, my colors and a liquid paper (correction pen).

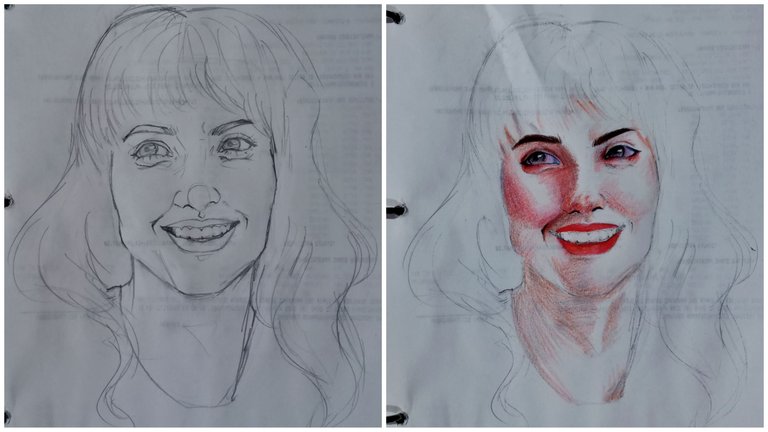
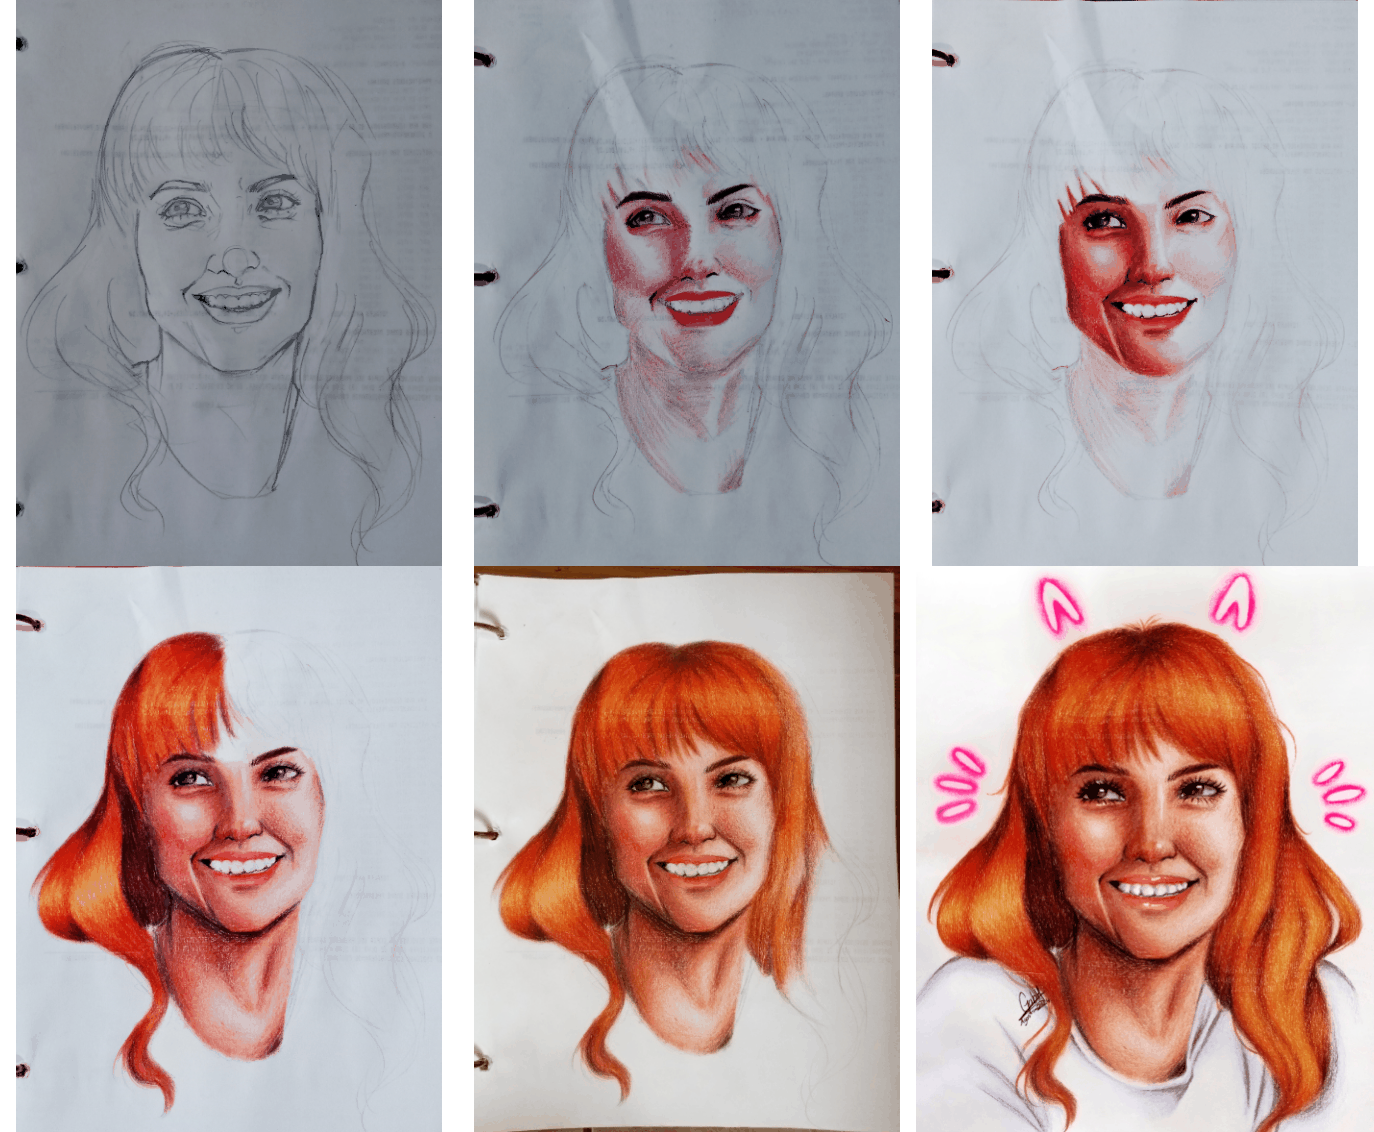
Comencé haciendo el boceto del dibujo usando una imagen de referencia, al tener el boceto terminado use un borrador para quitar todo el grafito de la hoja y luego comencé a agregar los colores para pintar su piel. Fui construyendo el tono de su piel lentamente haciendo capas con diferentes tonos de naranja y beige para poder ir generando el tono principal, para los ojos fui usando azul, rojo y gris y blanco para pintar todo el ojo y para las irises mezcle Lila y gris con negro para oscurecerlo. Continue mezclando rojo y rosado para el rubor de su rostro y también para construir el volumen de sus mejillas y nariz, usé esos mismos colores para pintar sus labios. Mezclando negro, naranja y marrón pinte sus cejas y las detallé.
I started making the sketch of the drawing using a reference image, when I had the sketch finished I used an eraser to remove all the graphite from the sheet and then I started adding the colors to paint her skin. I slowly built up her skin tone by layering different shades of orange and beige to build up the main tone, for the eyes I used blue, red and gray and white to paint the whole eye and for the irises I mixed lilac and gray with black to darken it. I continued mixing red and pink for the blush of her face and also to build the volume of her cheeks and nose, I used those same colors to paint her lips. Mixing black, orange and brown I painted her eyebrows and detailed them.
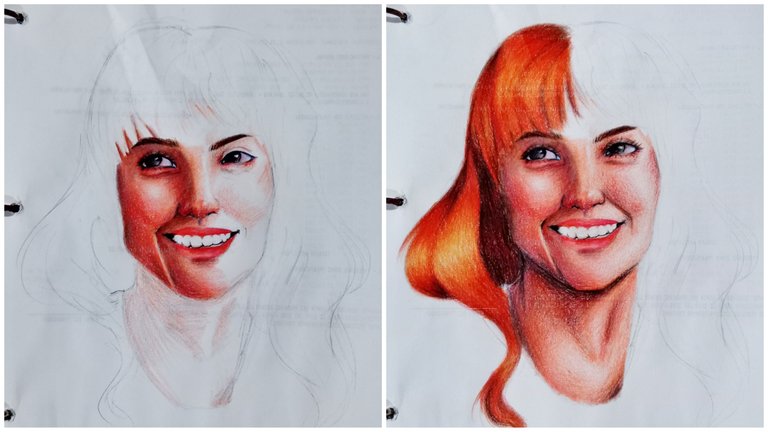
Mezclando varios tonos fue que logré sombrear y pintar el tono de casi todo su rostro y cuello, usando azul como complementario fue que logré hacer que las sombras marrones fueran más naturales en su rostro. Poco a poco fui dándole más detalles a su rostro y agregando más tonos y profundidad. Teniendo casi todo las partes de la piel listas comencé a pintar el cabello y empleé la misma técnica de aplicar capas de colores para poder obtener los tonos que quería, en el caso del cabello fui mezclando diferentes tonos de naranjas, amarillos y marrones para poder crear tanto las partes sombreadas y las partes más iluminadas de el, así como también para hacer todos los pliegues y bucles.
Mixing several tones I was able to shade and paint the tone of almost all her face and neck, using blue as a complementary shade I was able to make the brown shadows more natural on her face. Little by little I was giving more details to her face and adding more tones and depth. Having almost all the skin parts ready I started to paint the hair and I used the same technique of applying layers of colors to get the tones I wanted, in the case of the hair I was mixing different shades of oranges, yellows and browns to create both the shaded parts and the more illuminated parts of it, as well as to make all the folds and loops.

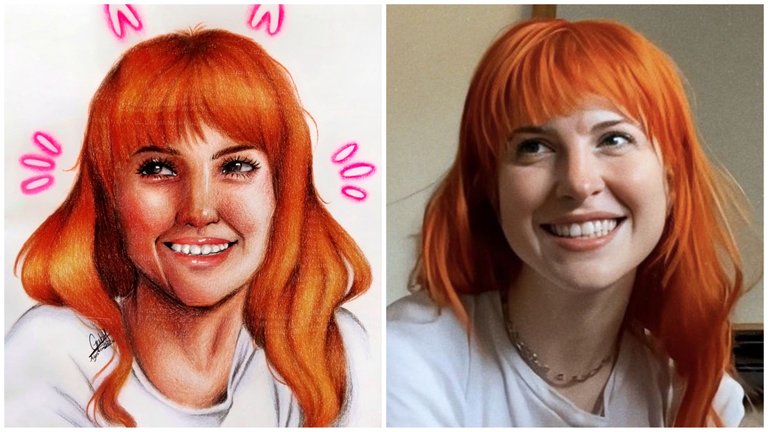
Este es el resultado del dibujo, termine de pintar y detallar el cabello y continue haciendo los últimos detalles como fue pintar parte de su frente, agregar algunos detalles en sus ojos y mejillas, pintar las sombras de su camisa y ya para finalizarlo use el corrector líquido blanco para hacer los brillos de sus ojos, párpados, labios y nariz. Por último quería agregar un toque diferente y no dejar todo el fondo completamente blanco así que usando un color rosado hice unas orejas y bigotes de gato que delinee y sombree para darle un aspecto aparecido al de los filtros de gatos, por último limpie con el borrador alrededor y agregué mi firma. Me encantó hacer este dibujo y fue un proceso sorprendentemente rápido por la inspiración de dibujar y la música que escuchaba en el momento, definitivamente puedo notar muchísimo avance a comparación con mi dibujo del año pasado.❤️✨
This is the result of the drawing, I finished painting and detailing the hair and continued doing the last details like painting part of her forehead, adding some details in her eyes and cheeks, painting the shadows of her shirt and to finish it I used the white liquid paper to make the shines of her eyes, eyelids, lips and nose. Finally I wanted to add a different touch and not leave the whole background completely white so using a pink color I made some cat ears and whiskers that I outlined and shaded to give it a look similar to the cat filters, finally I cleaned with the eraser around and added my signature. I loved doing this drawing and it was a surprisingly fast process because of the inspiration to draw and the music I was listening to at the time, I can definitely notice a lot of progress compared to my drawing from last year.❤️✨

Espero que les haya gustado y gracias por apoyarme siempre! Nos vemos pronto y sigan creando.❤️
I hope you liked it and thanks for always supporting me! See you soon and keep creating! ❤️
Realicé la traducción en
https://www.deepl.com/es/translator
Todas las imágenes son de mi autoría | All the photos are my property
Imágenes editadas con PicsArt y Snapseed | Images edited with PicsArt and Snapseed
