Hola a todos mis creativos lectores! Feliz lunes, espero se encuentren muy bien en el día de hoy, les comparto el proceso de esta pintura de una gran película que recomiendo muchísimo, el Joker interpretado por Joaquin Phoenix, el cual siento que fue uno de los tantos jokers que dejaron una marca en la industria de los cómics y el cine. Espero les guste y los invito a leerme! ❤️✨
Hello to all my creative readers! Happy Monday, I hope you are feeling great today, I share with you the process of this painting of a great movie that I highly recommend, the Joker played by Joaquin Phoenix, which I feel was one of the many jokers that left a mark in the comic book and film industry. I hope you like it and I invite you to read me! ❤️✨

- Lo que utilice para realizar el dibujo en tradicional en una hoja tipo cartulina tamaño 35 x 28 cm, un lápiz de grafito 2 HB y un borrador (corté mi borrador haciendo que las esquinas quedarán en punta así será más fácil borrar espacios pequeños), mis pinturas témperas, mis acuarelas y corrector líquido blanco.
- What I used to make the drawing in traditional on a cardboard type sheet size 35 x 28 cm, a graphite pencil 2 HB and an eraser (I cut my eraser making the corners to be pointed so it will be easier to erase small spaces), my temperas painting, my watercolors and a white liquid corrector.

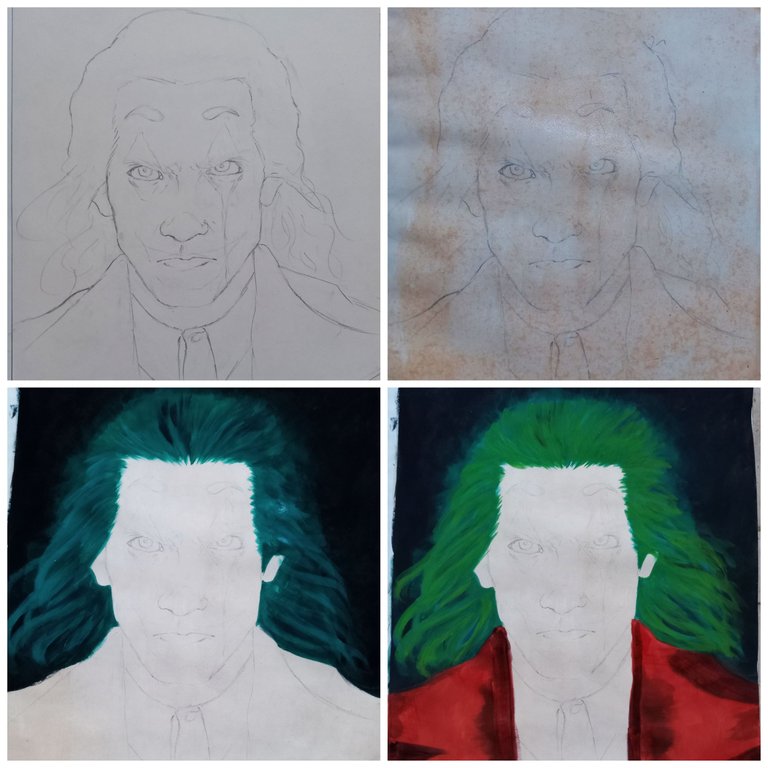
Realice el boceto del rostro en base a mi imagen de referencia de el, luego hice una capa con acuarela naranja en todo el boceto para poder usar mis pinturas témperas y que el color se viera más intenso y no tuviera que usar mucha pintura. Al secarse comencé a mezclar negro y azul oscuro para hacer el fondo, con pintura verde y un poco de azul hice la primera capa del cabello la cuál fui intercalando con un poco de la mezcla del fondo para hacer detalles en el cabello, como el tono del color de cabello no me convencía decidí usar pintura verde con amarillo para tener un tono más cálido y no tan frío, con pintura roja comencé a pintar la chaqueta y mezclandola con un poco verde para crear un tono marrón y usarlo para sombrear la misma chaqueta.
I made the sketch of the face based on my reference image of him, then I made a layer with orange watercolor all over the sketch so I could use my tempera paints and the color would look more intense and I didn't have to use a lot of paint. When it dried I began to mix black and dark blue to make the background, with green paint and a little blue I made the first layer of the hair which I was interspersing with a little of the background mixture to make details in the hair, as the tone of the hair color did not convince me I decided to use green paint with yellow to have a warmer tone and not so cold, with red paint I began to paint the jacket and mixing it with a little green to create a brown tone and use it to shade the same jacket.
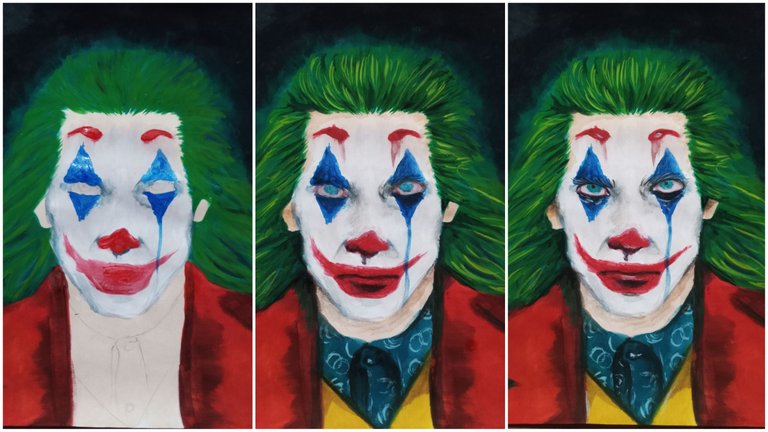
Comencé a pintar el rostro, primero hice una capa de pintura blanca y luego con pintura azul y roja hice los detalles como las cejas pintadas y los labios, la nariz roja y los triángulos en los ojos. Agregando un poco de agua en la pintura arrastre la pintura de las cejas y del ojo derecho para hacer que se viera como si se estuviera cayendo el maquillaje. Mezclando negro con blanco obtuve gris y lo usé para hacer algunas sombras en su rostro, luego con un poco de rojo y blanco pinte sus ojos para que se vieran irritados, con un poco de rojo y verde hice las sombras en sus labios, ya para el resto del traje lo que hice fue mezclar azul y verde hasta obtener un tono turquesa oscuro y pinte la camisa y mezclando amarillo y un poco de rojo hasta obtener un tono amarillo mostaza pinté el chaleco. Para el cabello fui haciendo detalles haciendo los tonos verdes del color base más claros y con más pintura amarilla para hacer los brillos y los detalles de los cabellos sueltos, igualmente para las sombras las cuales hice oscureciendo el color base. Ya al tenerlo casi listo comencé a agregar pequeños detalles como los cabellos de las cejas de color blanco debido a que estos fueron pintados por la pintura blanca de su rostro, oscureci el tono de sus ojos y pinte sus pupilas, agregué algunos brillos con pintura blanca en partes como la nariz y los labios y en los detalles de su camisa.
I started painting the face, first I did a layer of white paint and then with blue and red paint I did the details like the painted eyebrows and lips, the red nose and the triangles on the eyes. Adding a little water in the paint I dragged the paint from the eyebrows and the right eye to make it look like the makeup was falling off. Mixing black with white I got gray and used it to make some shadows on his face, then with a little red and white I painted his eyes to make them look irritated, with a little red and green I made the shadows on his lips, and for the rest of the costume I mixed blue and green until I got a dark turquoise tone and painted the shirt and mixing yellow and a little red until I got a mustard yellow tone I painted the vest. For the hair I made details making the green tones of the base color lighter and with more yellow paint to make the shines and the details of the loose hair, the same for the shadows which I made by darkening the base color. Once he was almost ready I started to add small details like the white eyebrow hairs because they were painted by the white paint of his face, I darkened the tone of his eyes and painted his pupils, I added some glitter with white paint in parts like the nose and lips and in the details of his shirt.
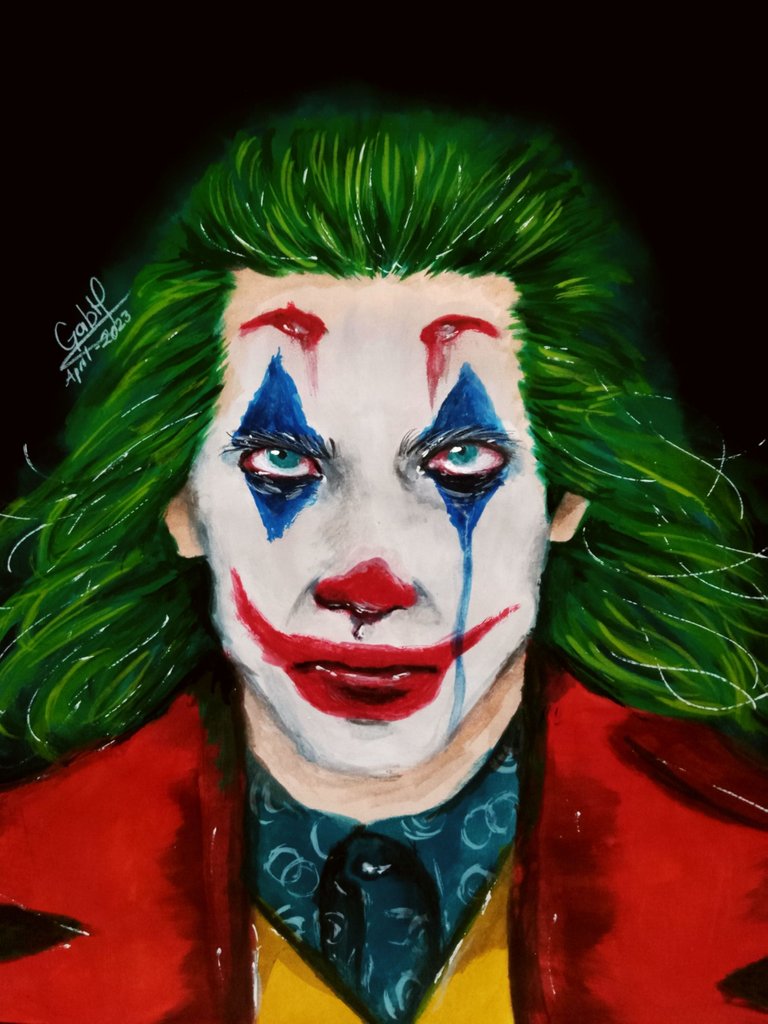
Este es el resultado de la pintura, terminé de agregar detalles con color blanco como en los ojos y en las cejas y con corrector blanco liquido agregué brillos en los ojos, cabello y labios. Este dibujo fue un gran "confía en el proceso" ya que al principio de hacerlo tuve que batallar bastante para conseguir que me saliera bien el boceto del rostro ya que en algunas referencias que tomaba su rostro o salía de lado o de frente pero no me terminaban de convencer, luego al irlo pintando también tuve que confiar en que el resultado sería genial ya que tuve algunas dudas en cuanto a colores y las formas en las que lo pintaba, sin embargo todo tuvo un gran final y el resultado quedó muy bien, sin duda estoy muy emocionada por ver más actualizaciones sobre la secuela de la película en la cuál estará Lady Gaga como Harley Quinn. ❤️✨
This is the result of the painting, I finished adding details with white color as in the eyes and eyebrows and with white liquid concealer I added glitter in the eyes, hair and lips. This drawing was a great "trust the process" because at the beginning I had to struggle a lot to get the right sketch of the face because in some references I took his face either sideways or from the front but I was not convinced, then as I was painting it I also had to trust that the result would be great since I had some doubts about colors and the ways in which I painted it, however everything had a great ending and the result was very good, I'm certainly very excited to see more updates about the sequel of the movie in which Lady Gaga will be as Harley Quinn. ❤️✨

Espero que les haya gustado y gracias por apoyarme siempre! Nos vemos pronto y sigan creando.❤️/ I hope you liked it and thanks for always supporting me! See you soon and keep creating! ❤️
Realicé la traducción en
https://www.deepl.com/es/translator
Todas las imágenes son de mi autoría/ All the photos are my property