Hola amigos de Hive! Espero que estén muy bien, cómo les prometí en mi presentación hoy les compartiré como hacer lencería paso a paso, reciclando y sin goma elástica, es muy fácil y rápido.
Hello friends of Hive! I hope you are very well, as I promised in my presentation today I will share with you how to make lingerie step by step, recycling and without elastic, it is very easy and fast.

Lo materiales que necesitamos son;
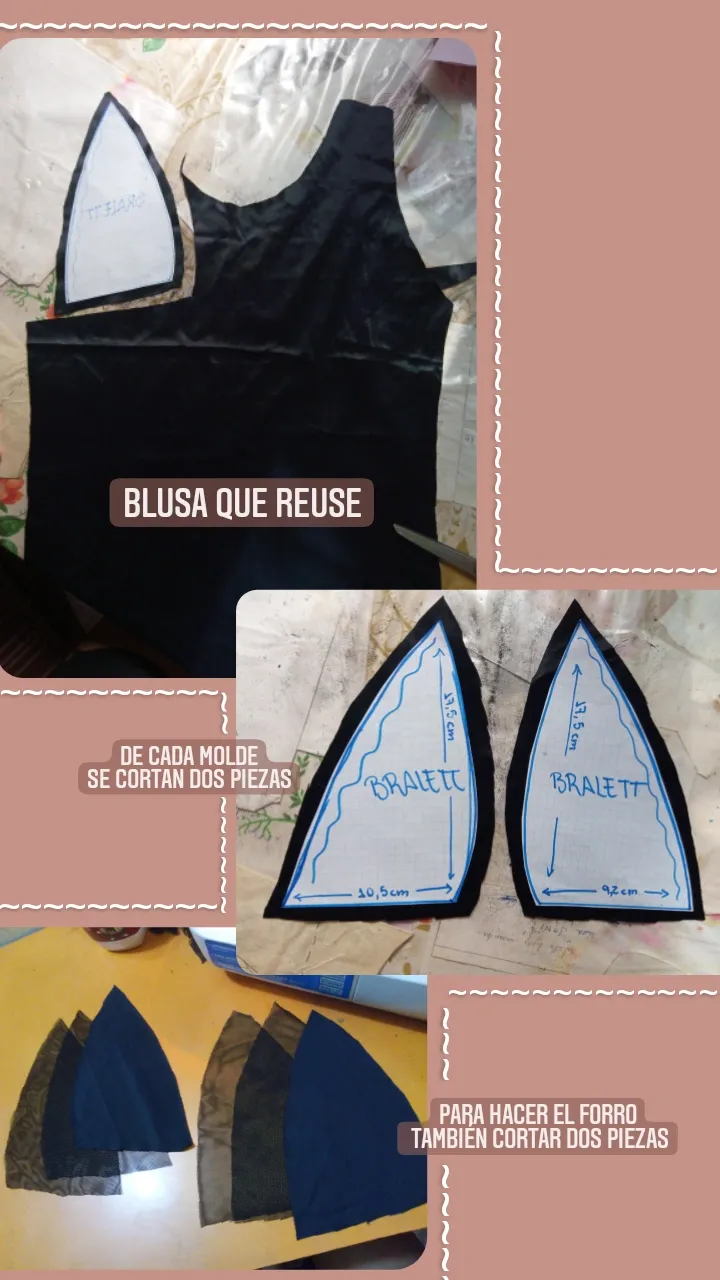
• Los moldes (talla de tu preferencia, en mi caso fue talla S)
• Tela, preferiblemente stress ya que necesitamos que estire, y del color de tu gusto ( yo escogí negro ya que en mi caso quería reciclar una blusa que no usaba)
• Tela de maya stress
• Cinta métrica
• Tijeras
• Alfileres
• Maquina de cocer
• Hilos
The materials we need are;
- The molds (size of your preference, in my case it was size S)
- Fabric, preferably stress since we need it to stretch, and the color of your choice (I chose black since in my case I wanted to recycle a blouse I didn't use).
- Maya stress fabric
- Tape measure
- Scissors
- Pins
- Baking machine
- Threads
Al tener los moldes, comenzaremos con el bralett, en nuestra tela colocaremos los moldes y cortaremos 4 piezas; las dos del lado izquierdo y las dos del lado derecho, haremos lo mismo con la tela de maya para hacerle el forro que llevará por dentro, dejando medio centímetro.
Once we have the molds, we will start with the bralett, we will place the molds on our fabric and we will cut 4 pieces; the two on the left side and the two on the right side, we will do the same with the maya fabric to make the lining that it will have inside, leaving half a centimeter.
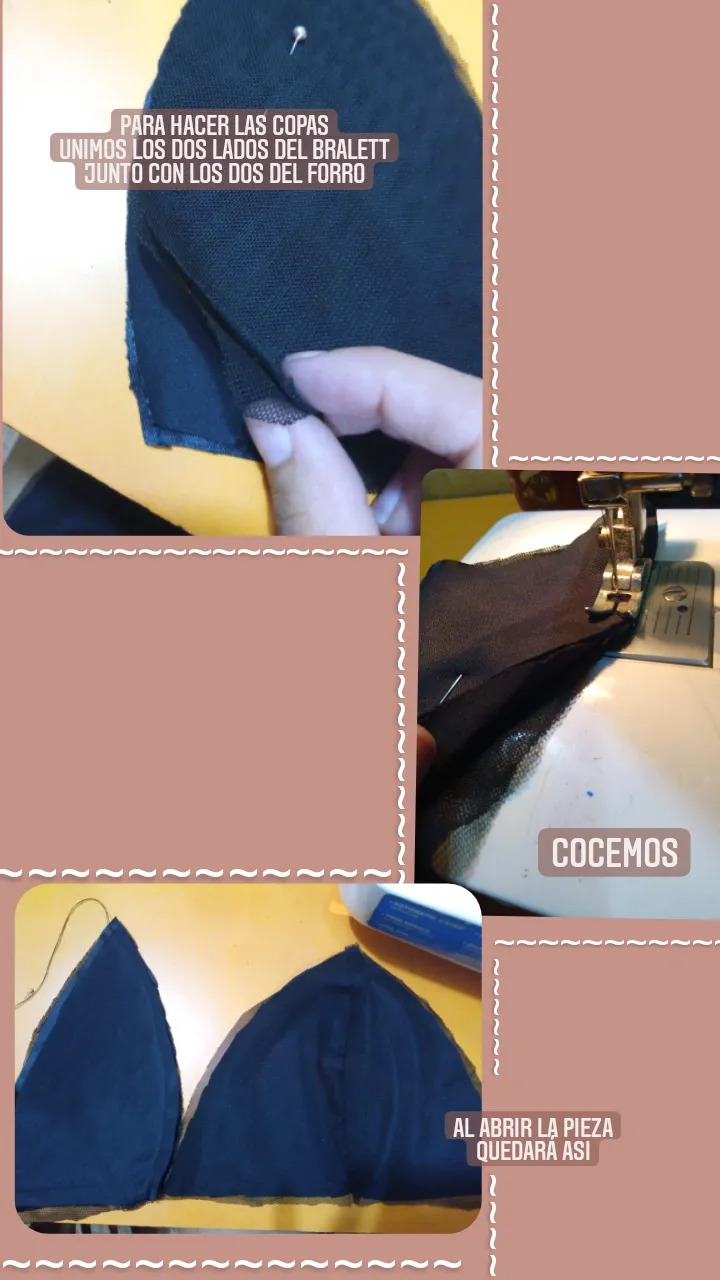
Al tenerlas cortadas unimos las dos piezas de la tela y las dos de la tela de maya (en la foto tenemos la explicación) se hará de ambos lados tanto izquierdo como derecho. Luego de cocer al abrirlo les quedará con la costura oculta del lado de adentro.
Once we have them cut, we join the two pieces of the fabric and the two pieces of the maya fabric (in the photo we have the explanation) it will be done on both left and right sides. After baking, when you open it, the seam will be hidden on the inside.
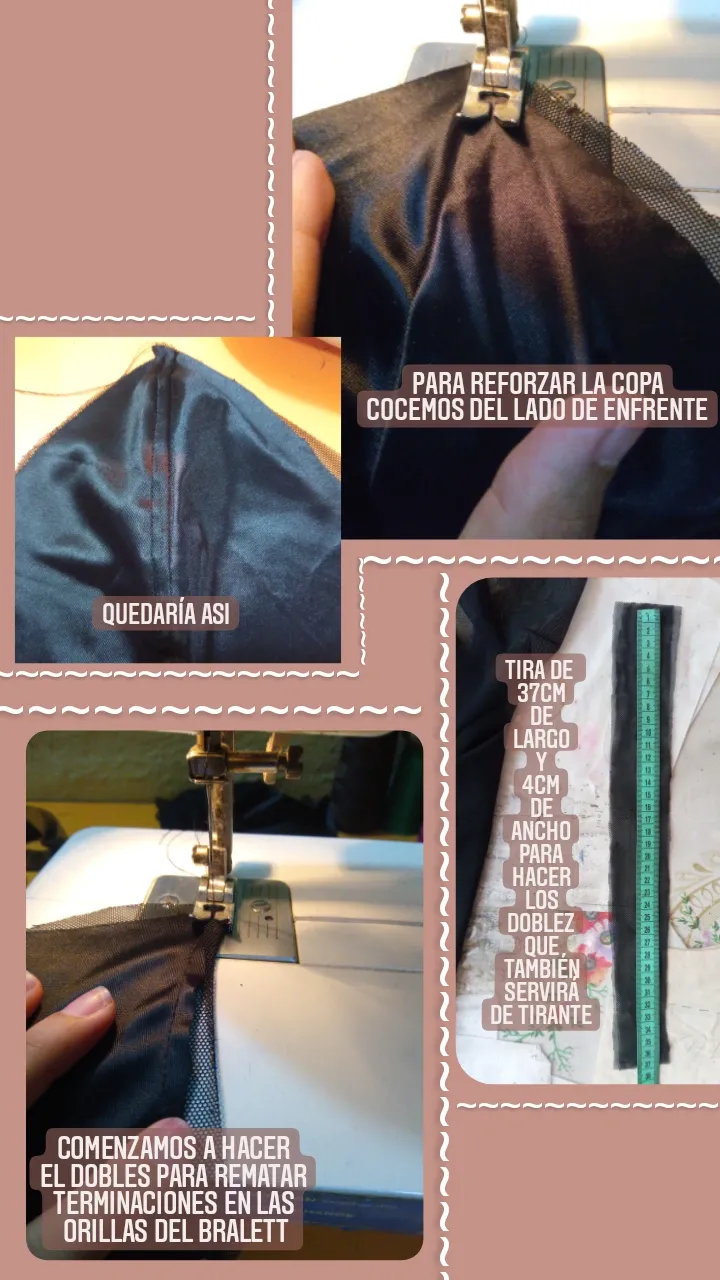
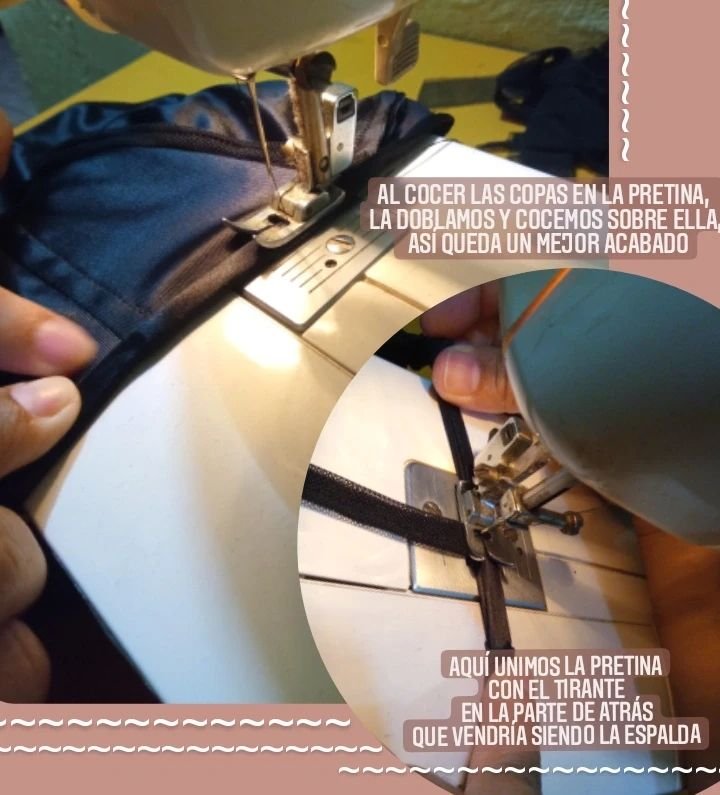
Al cocer los dos lados para darle buena terminación coceremos del lado de enfrente de la copa, quedara con doble costura y el forro estará bien agarrado.
Cortaremos una tira de 37cm de largo y 4 cm de ancho de nuestra tela de maya, para hacerle un dobles en la orilla de nuestras copas, eso le dará un buen acabado (si sobra la tira no importa, la cortas y listo)
When sewing the two sides to give it a good finish, we will sew on the side in front of the cup, it will have a double seam and the lining will have a good grip.
We will cut a strip of 37cm long and 4 cm wide of our maya fabric, to make a double on the edge of our cups, that will give a good finish (if the strip is not important, cut it and ready).
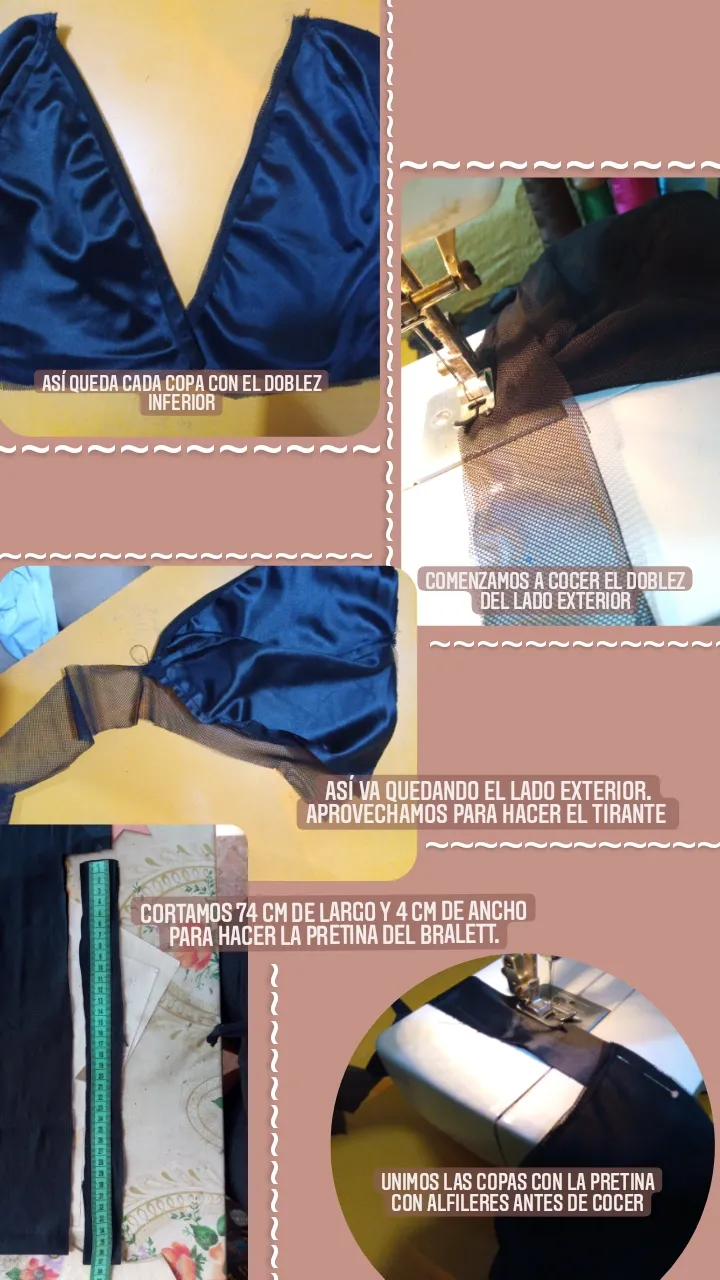
Cortamos otra tira de maya aproximadamente de 40cm de largo para aprovechar de hacer el tirante, claro que depende de el diámetro que tenga cada persona desde la punta de la copa y la parte de la espalda. Al tenerlas ya cortada hacemos el mismo procedimiento del dobles hasta llegar al final de la tira.
Con la cinta métrica te mediras la cintura y dependiendo de cuando sea dejaras 4 cm de más, en mi caso midió 70cm y corte 74cm de largo y 4 cm de ancho; esa será nuestra pretina de nuestro bralett, con los alfileres se unen las copas desde el centro y cocemos.
We cut another strip of maya approximately 40cm long to take advantage of making the strap, of course it depends on the diameter that each person has from the tip of the cup and the part of the back. When you have them already cut, we do the same procedure of the doubles until we reach the end of the strip.
With the measuring tape you will measure your waist and depending on when you will leave 4 cm more, in my case measured 70cm and cut 74cm long and 4 cm wide; that will be our waistband of our bralett, with the pins join the cups from the center and cook.
Al tener las copas unidas con la pretina haremos un doblez y coceremos por encina, al llegar a la parte de la espalda aprovecharemos de cocer la terminación de los tirantes.
When we have the cups joined with the waistband we will make a fold and we will sew by lace, when we get to the back we will take the opportunity to sew the end of the straps.
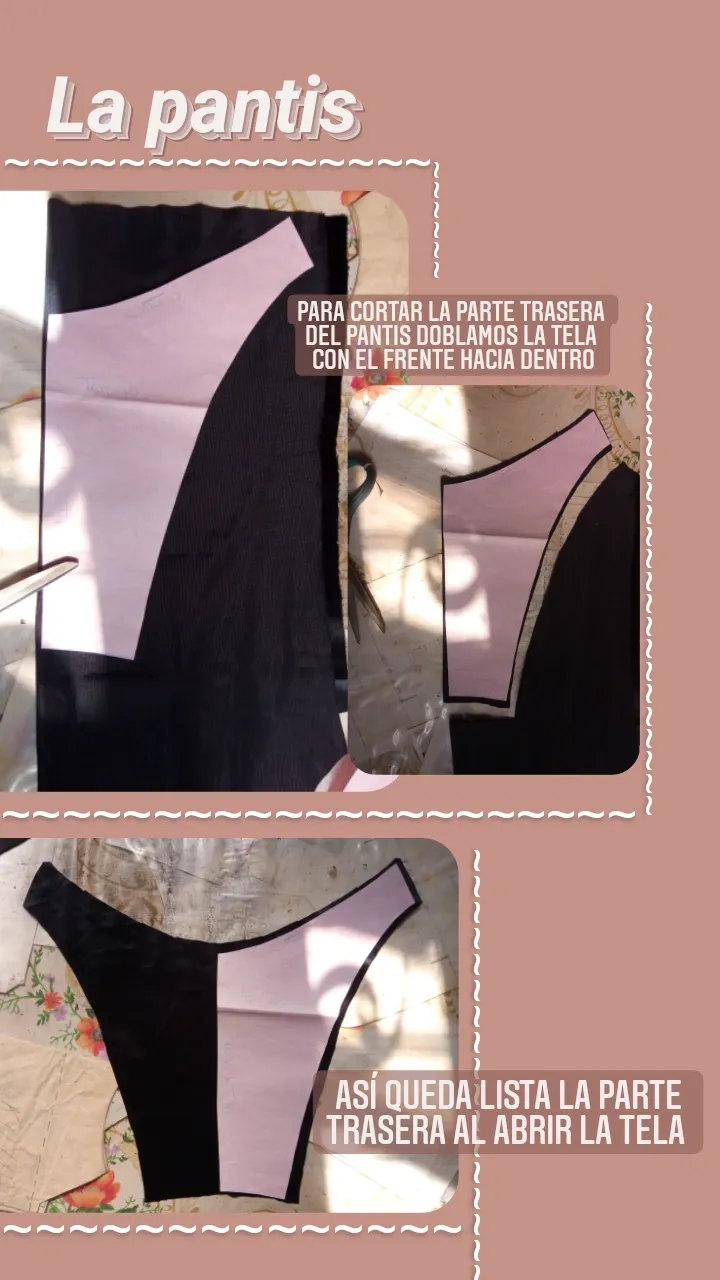
Para la pantis comenzaremos doblando la tela con el frente hacia dentro, colocamos el molde y cortamos, recuerda dejar el medio centímetro.
For the pantyhose start by folding the fabric with the front facing inwards, place the mold and cut, remember to leave half a centimeter.
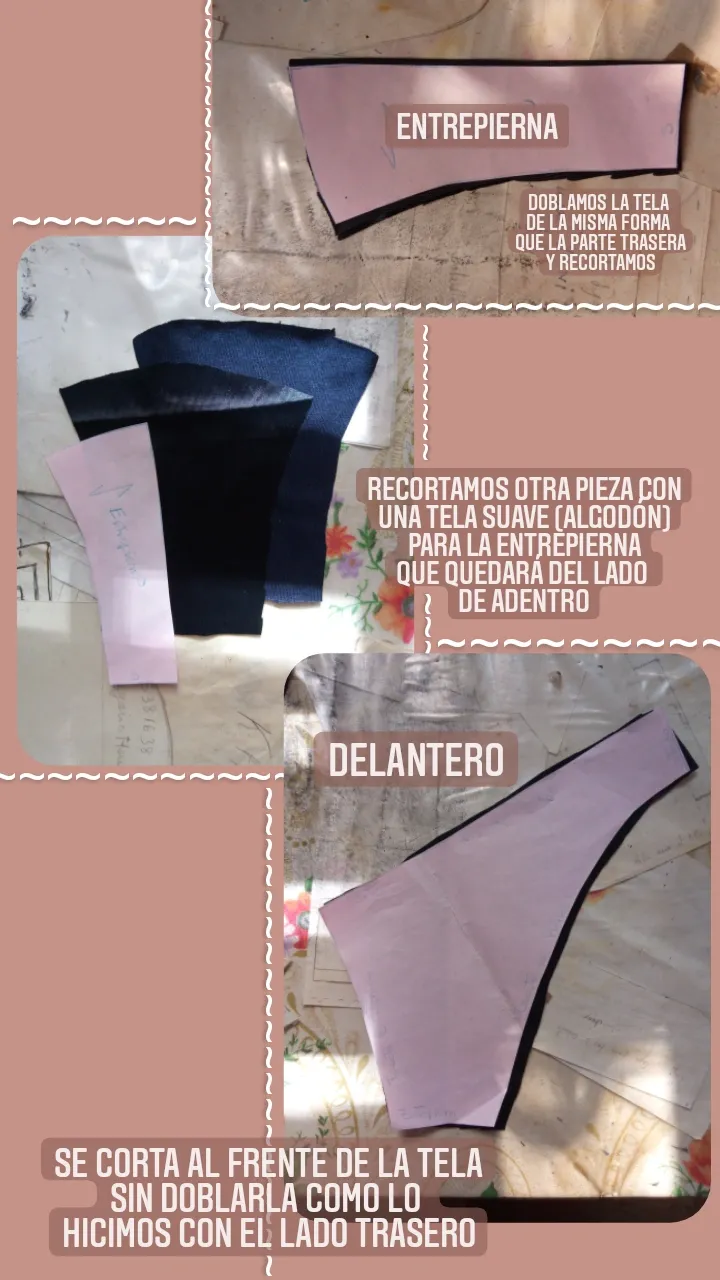
Haremos lo mismo con la parte de la entrepierna, hacemos el mismo procedimiento con una tela suave (como algodón) pieza que quedará del lado de adentro. La parte delantera se cortará en el frente de la tela (sin doblar)
We will do the same with the crotch part, we do the same procedure with a soft fabric (like cotton) piece that will be on the inside. The front part will be cut on the front of the fabric (without folding).
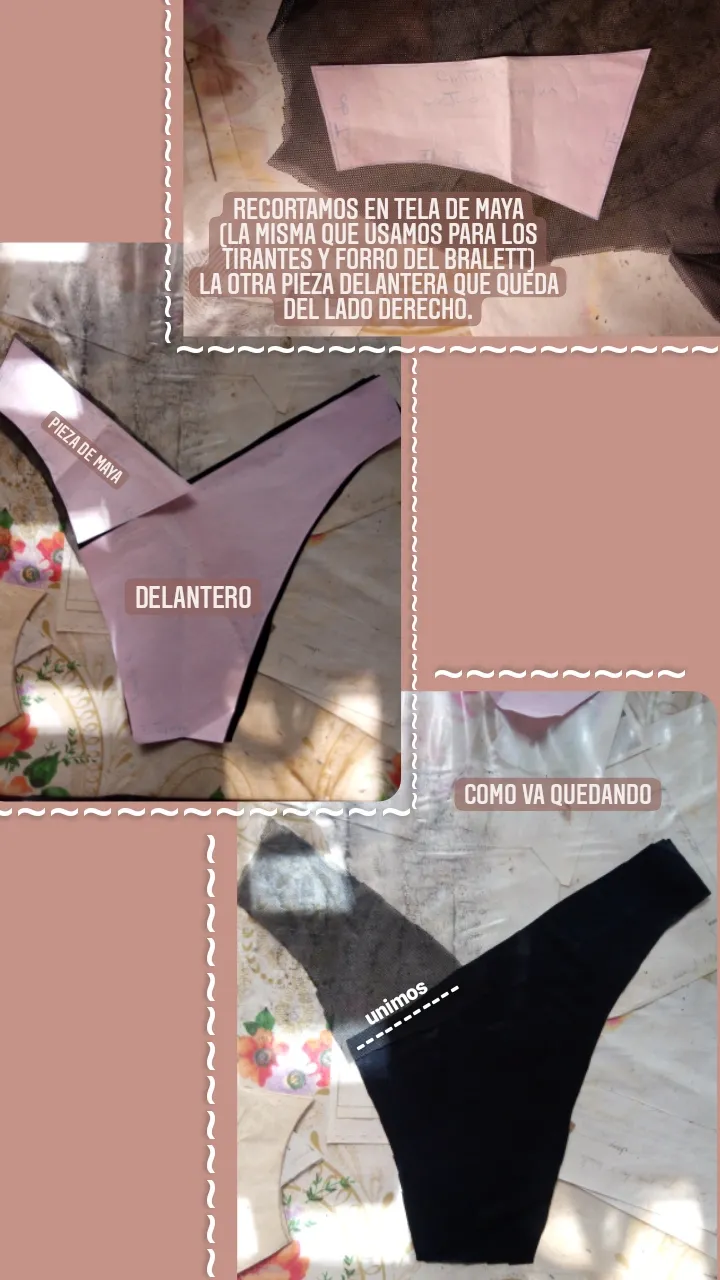
Con la tela de maya cortaremos la pieza delantera del lado derecho, en este punto la pantis comienza a dar forma.
With the maya fabric we will cut the front piece on the right side, at this point the pantyhose begins to shape.
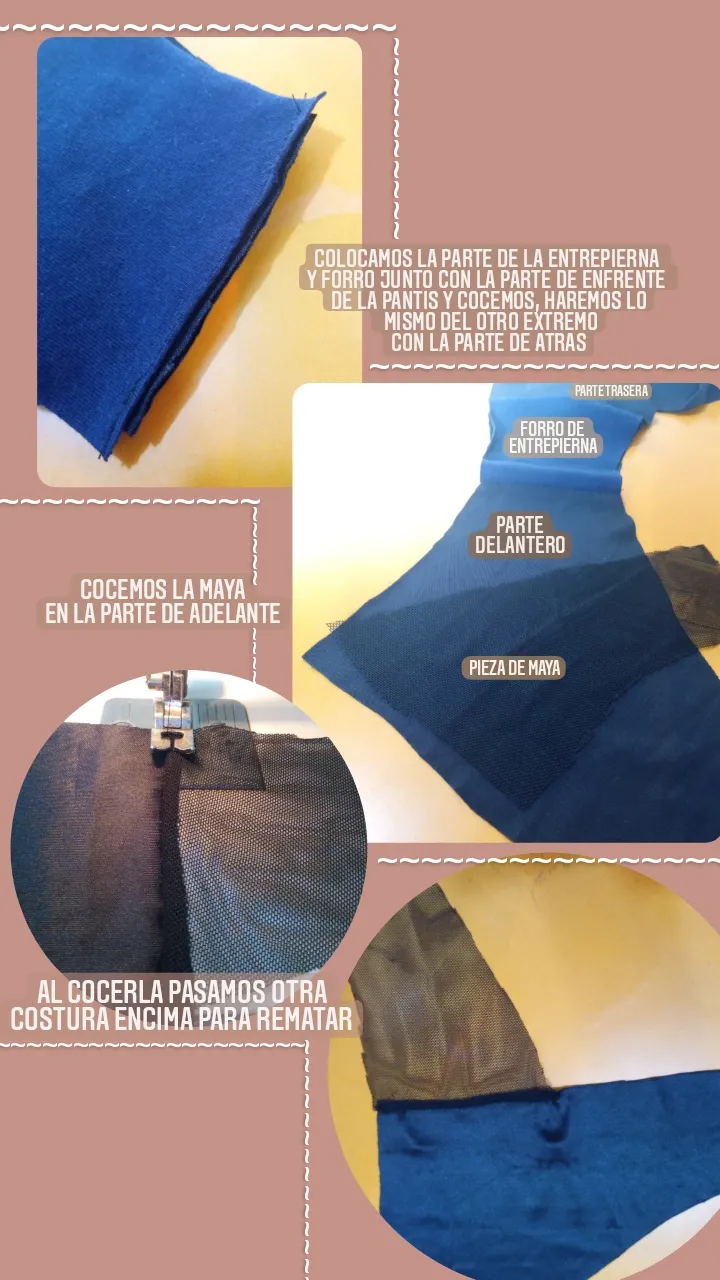
Al tener las piezas cortadas empezamos a unir las dos piezas de la entrepierna (tela negra y la de forro) con el lado de enfrente por un extremo y del otro extremo con el de atrás .
Luego coceremos la pieza delantera junto con la de maya, pasamos otra costura por encima para rematar y queda un mejor acabado.
Once we have the pieces cut we start to join the two pieces of the crotch (black fabric and the lining fabric) with the front side at one end and the other end with the back.
Then we will sew the front piece together with the lining piece, we sew another seam on top to finish it off for a better finish.
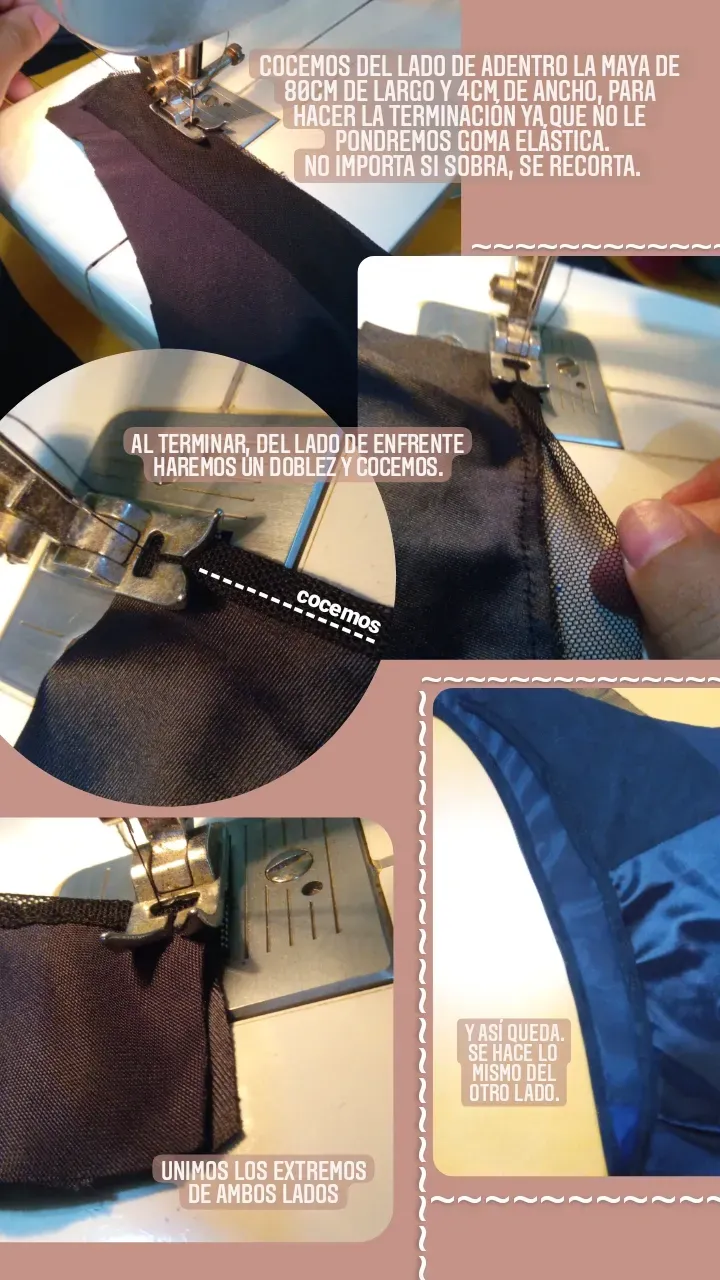
Como no usaremos goma elástica cortaremos de la tela de maya una tira de 80cm de largo y 4 cm de ancho, para hacerle el orillo a la pantis al igual que lo hicimos con el bralett.
Coceremos la maya del lado de adentro de la pantis, al terminar haremos un doblez hacia el frente y cocemos, hagan el mismo procedimiento del otro extremo.
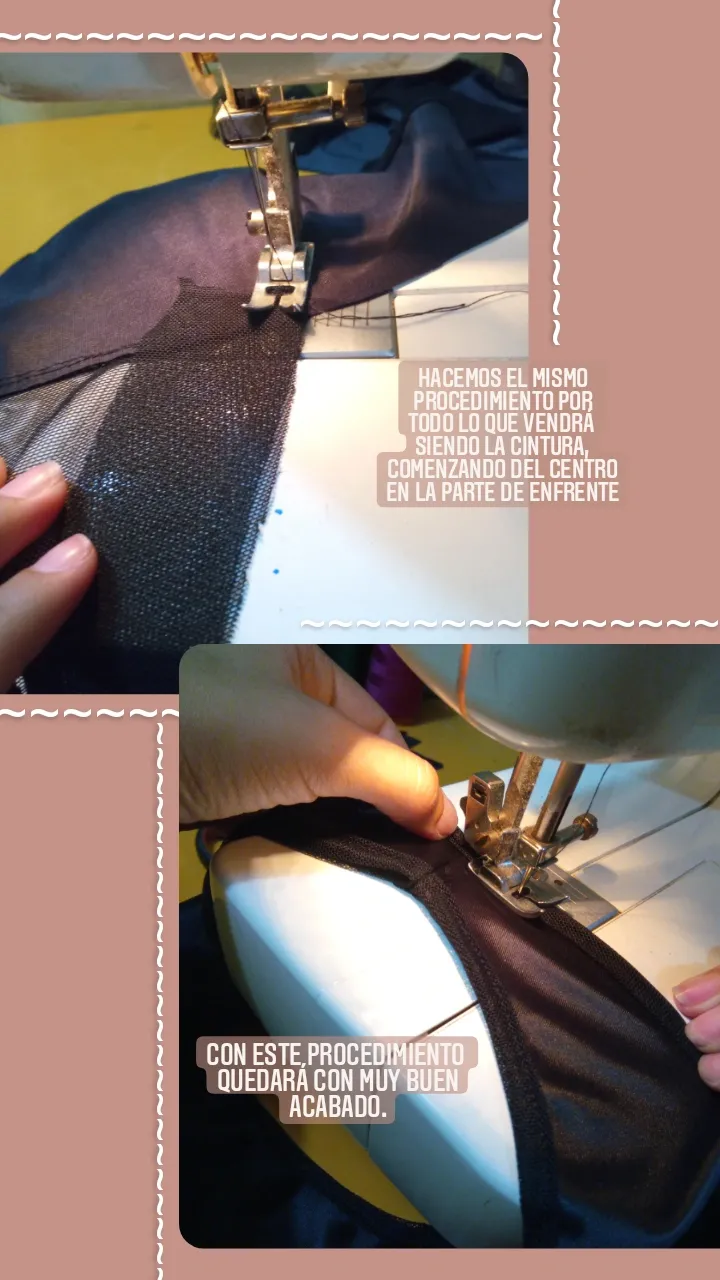
Al terminar, unir ambos lados tanto izquierdo como derecho, luego haz el mismo procedimiento del dobles en la parte de la cintura comenzando por el centro del lado de enfrente.
As we won't use elastic, we will cut a strip of 80cm long and 4 cm wide from the mesh fabric, to make the selvage of the pantyhose as we did with the bralett.
We will sew the inner side of the pantyhose, at the end we will make a fold towards the front and sew, do the same procedure on the other end.
When finished, join both left and right sides together, then do the same procedure for the waist part starting from the center of the front side.
Y listo!
Fácil, rápido y sencillo, al ser principiantes tardarán un poco, pero luego se les hará super fácil.
Pueden hacerlo con goma elástica, o en vez de tela usar un encaje.
And that's it!
Easy, quick and simple, being beginners it will take a little while, but then it will be super easy.
You can do it with elastic, or instead of fabric use a lace.
Estoy muy feliz de poder compartir con ustedes todos mis conocimientos 💕
Saludos! 🙋🏻♀️
I am very happy to be able to share with you all my knowledge 💕.
Greetings! 🙋🏻♀️
Las imágenes son de mi propiedad, fueron tomadas con mi teléfono celular marca UMIDIGI A9 / The images are my property, they were taken with my UMIDIGI A9 cell phone
Translated with www.DeepL.com/Translator (free version)


