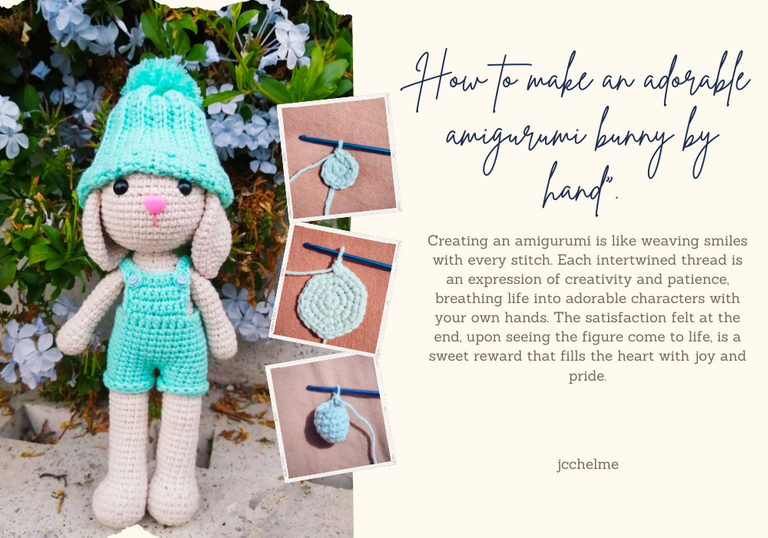
The past weekend was an incredibly gratifying and creative experience for me. From the moment I sat down with my crochet tools and a selection of vibrant colored threads, I knew I was about to embark on an artistic adventure.
On Saturday morning, I woke up with a palpable excitement. I knew I had two whole days ahead to explore my creativity and bring a special project to life. I settled into my favorite corner, where sunlight streamed through the curtains, creating a cozy and inspiring atmosphere.
I began by carefully following the pattern I had chosen. Each stitch was a small achievement, a patient construction of something that would soon become a beautiful Amigurumi. My fingers moved skillfully, weaving and crafting as the Amigurumi started to take shape. As I progressed, I was amazed at how rewarding it was to see each loop of thread contribute to the evolution of my project.
Time seemed to fade away as I lost myself in my work. With each advancement, my project revealed charming details. Bright colors and contrasts came to life, filling me with increasing excitement. My mind was fully immersed in the process, and with each glance at my progress, I felt a step closer to my goal.
Sunday brought a sense of anticipation and finalization. I knew it was time to assemble all the parts and add the finishing touches. With needle and thread, I carefully sewed each detail, ensuring everything was in its place. Watching all the pieces come together was like seeing the final puzzle piece fit perfectly into place.
Finally, as I held the end result in my hands, a deep sense of accomplishment and satisfaction washed over me. I had created something unique and special, a representation of my time, effort, and dedication. Every stitch and color choice had been thoughtfully considered, and the outcome was a testament to my creativity and passion for the art of Amigurumi.
As I gazed at my finished work, I felt happiness and pride. My weekend had been an unforgettable experience of creation and self-discovery, and my Amigurumi had become a tangible symbol of my skill and dedication. Undoubtedly, this weekend of creation has left a lasting imprint on my heart and on my ability as a crochet artist. Next, I will share the process of creating my little bunny.
El pasado fin de semana fue una experiencia increíblemente gratificante y creativa para mí. Desde el momento en que me senté con mis herramientas de crochet y una selección de hilos de colores vibrantes, supe que estaba a punto de embarcarme en una aventura artística.
El sábado por la mañana, me desperté con una emoción palpable. Sabía que tenía dos días enteros por delante para explorar mi creatividad y dar vida a un proyecto especial. Me instalé en mi rincón favorito, donde la luz del sol entraba a través de las cortinas, creando una atmósfera acogedora e inspiradora.
Comencé siguiendo cuidadosamente el patrón que había elegido. Cada punto era un pequeño logro, una construcción paciente de algo que pronto se convertiría en un hermoso Amigurumi. Mis dedos se movían hábilmente, tejiendo y creando a medida que el Amigurumi empezaba a tomar forma. A medida que avanzaba, me sorprendía lo gratificante que era ver cada bucle de hilo contribuir a la evolución de mi proyecto.
El tiempo parecía desvanecerse mientras me perdía en mi trabajo. Con cada avance, mi proyecto revelaba detalles encantadores. Colores brillantes y contrastes cobraban vida, llenándome de emoción creciente. Mi mente estaba completamente inmersa en el proceso y, con cada mirada a mi progreso, me sentía un paso más cerca de mi objetivo.
El domingo trajo una sensación de anticipación y finalización. Sabía que era hora de ensamblar todas las partes y añadir los toques finales. Con aguja e hilo, cosí cuidadosamente cada detalle, asegurándome de que todo estuviera en su lugar. Ver todas las piezas juntas era como ver la última pieza del rompecabezas encajar perfectamente.
Finalmente, al sostener el resultado final en mis manos, una profunda sensación de logro y satisfacción me invadió. Había creado algo único y especial, una representación de mi tiempo, esfuerzo y dedicación. Cada punto y elección de color habían sido considerados minuciosamente, y el resultado era un testimonio de mi creatividad y pasión por el arte del Amigurumi.
Mientras contemplaba mi obra terminada, sentí felicidad y orgullo. Mi fin de semana había sido una experiencia inolvidable de creación y autodescubrimiento, y mi Amigurumi se había convertido en un símbolo tangible de mi habilidad y dedicación. Sin lugar a dudas, este fin de semana de creación ha dejado una impresión duradera en mi corazón y en mi habilidad como artista del crochet. A continuación, compartiré el proceso de creación de mi pequeño conejito.
Materials / Materiales
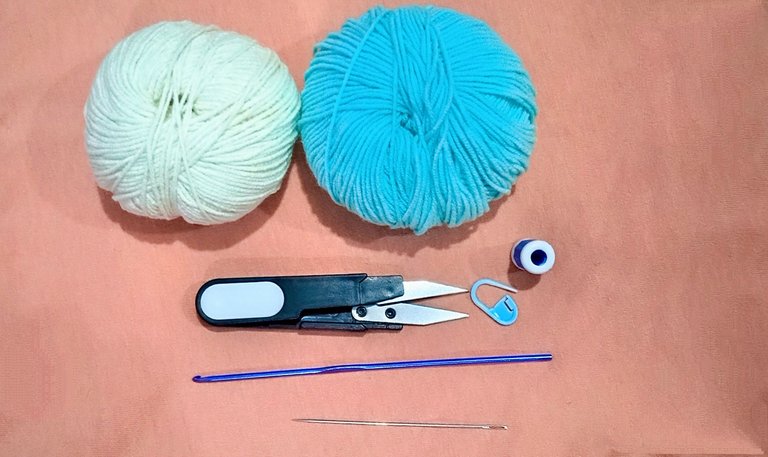
- Thread for Aquamarine green or light blue colored amirugumi
- Thread for cream colored amirugumi
- Stitch marker
- crochet 3 mm
- Scissors
- Needle
- Synthetic cotton
- Hilo para amirugumi de color verde agua o celeste
- Hilo para amirugumi de color crema
- Marcador de puntos
- crochet 3 mm
- crochet 1mm
- Tijeras
- Aguja
- Algodón sintético
Arms / Brazos
|
|
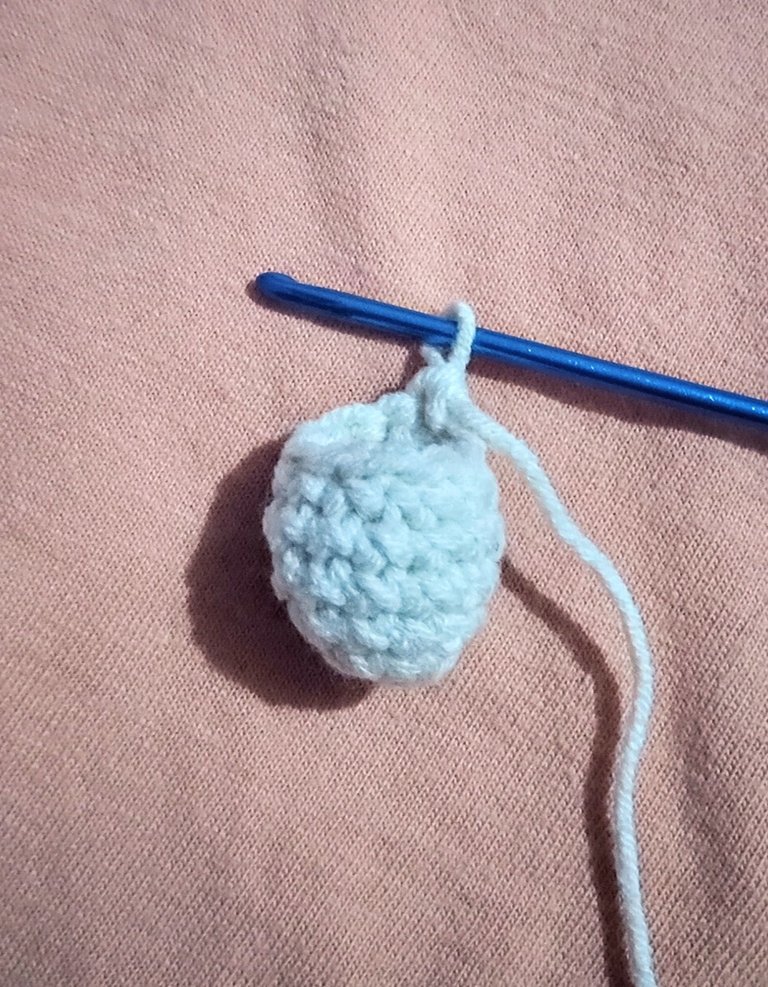
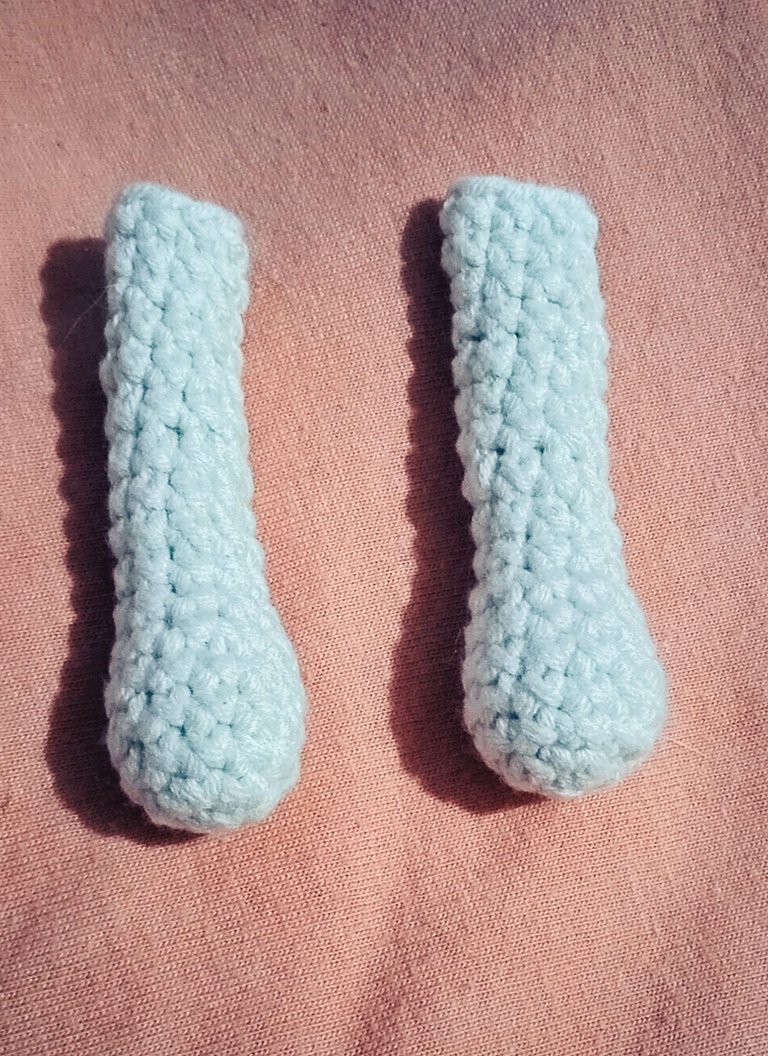
1. I begin by creating a magic ring and crochet 6 single crochets (SC) into it. (6)
2. Now I increase in each stitch to have a total of 12 stitches. (12)
3-6. I continue crocheting 12 single crochets in each round. (12)
7. Next, I work 2 SC, 1 decrease, repeating this pattern a total of 3 times to have 9 stitches. (9)
8-14. Now I crochet 9 single crochets in each round. (9)
After round 7, I stuff the arms firmly.
After round 14, I lightly stuff the arms.
Finally, I cut the yarn and secure the end.
There you go! I've finished making 2 arms for my amigurumi.
1. Comienzo creando un anillo mágico y tejo 6 puntos bajos (PB) dentro de él. (6)
2. Ahora aumento en cada punto para tener un total de 12 puntos. (12)
3-6. Continúo tejiendo 12 puntos bajos en cada vuelta. (12)
7. A continuación, trabajo 2 PB, 1 disminución, repitiendo este patrón un total de 3 veces para tener 9 puntos. (9)
8-14. Ahora tejo 9 puntos bajos en cada vuelta. (9)
Después de la vuelta 7, relleno los brazos firmemente.
Después de la vuelta 14, relleno ligeramente los brazos.
Finalmente, corto el hilo y aseguro el extremo.
¡Listo! He terminado de hacer 2 brazos para mi amigurumi.
Body and Head / Cuerpo y cabeza
|
|
|
|
|

|
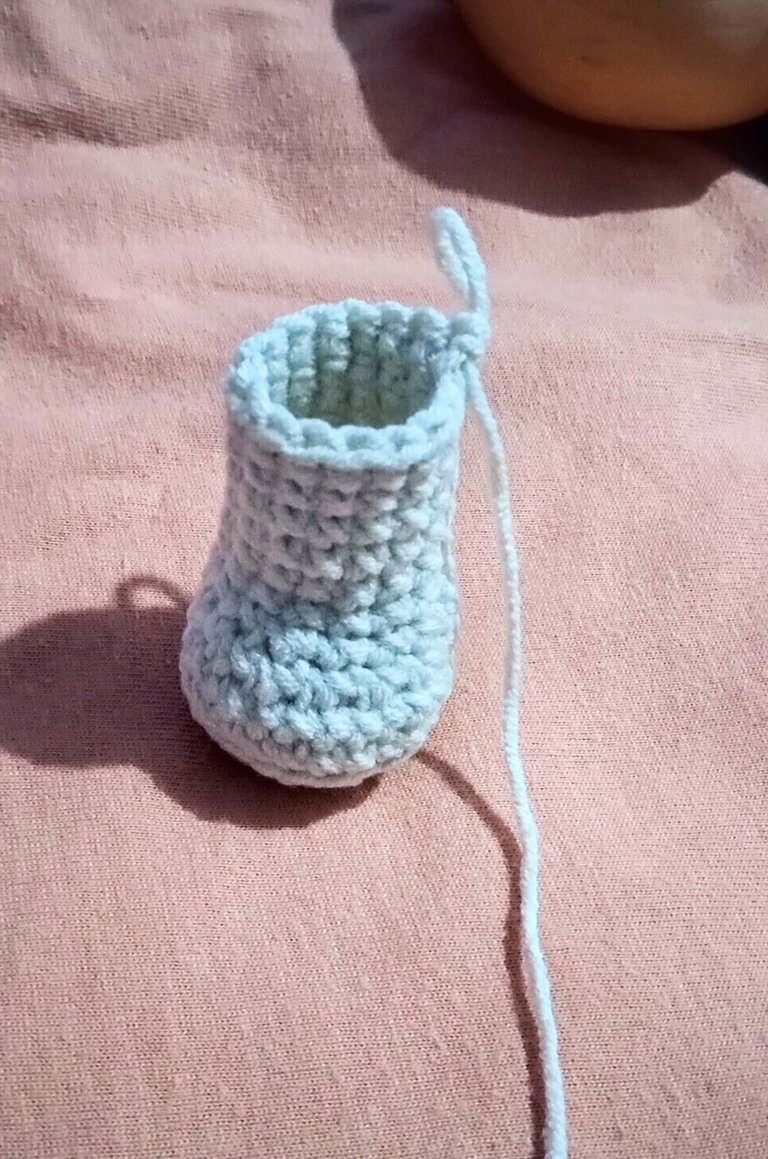
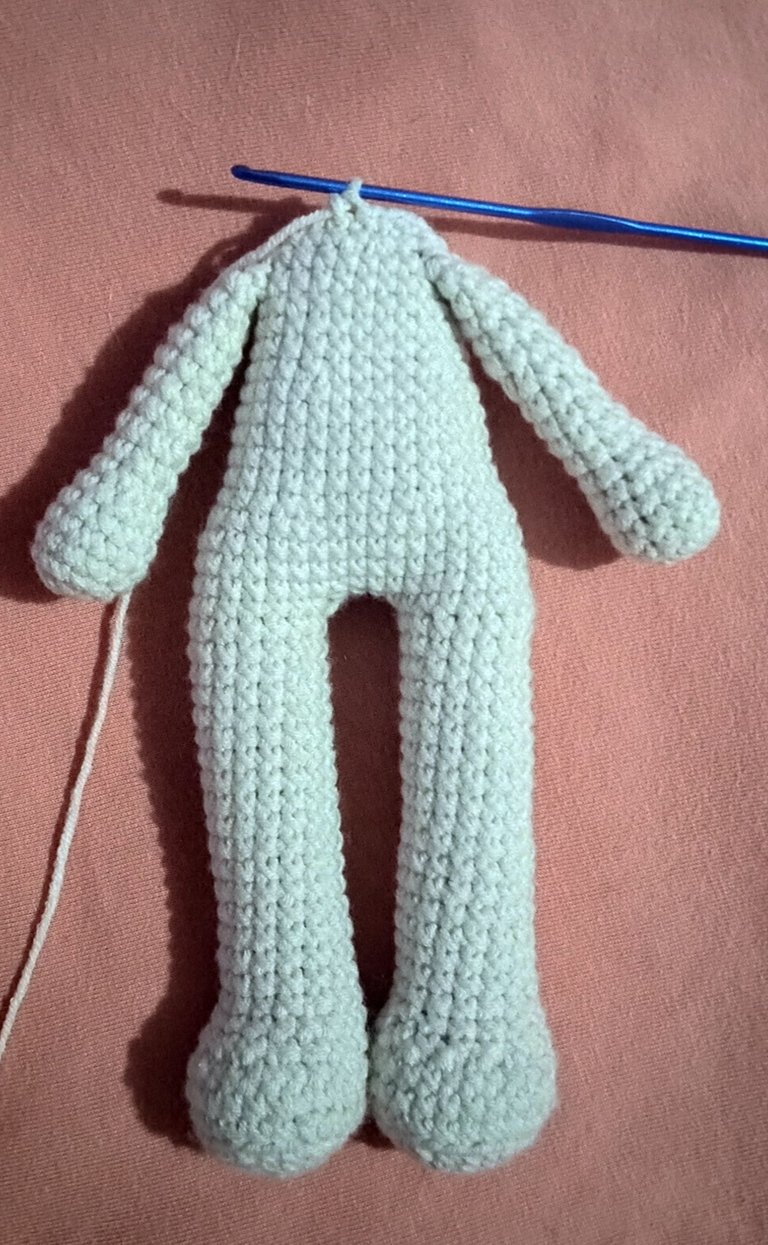
1. Make a magic ring with 6 single crochets (SC).
2. Increase in each stitch (12 SC).
3. Repeat 1 SC, 1 increase six times (18 SC).
4. Repeat 2 SC, 1 increase six times (24 SC).
5. Crochet a single crochet in each stitch for all rounds (24 SC).
6-7. Single crochet in each stitch for all rounds (24 SC).
8. Decrease six times, then crochet 12 single crochets (18 SC).
9. Repeat 4 SC, 1 decrease three times (15 SC).
10-18. Single crochet in each stitch for all rounds (15 SC).
This is leg one, cut the yarn.
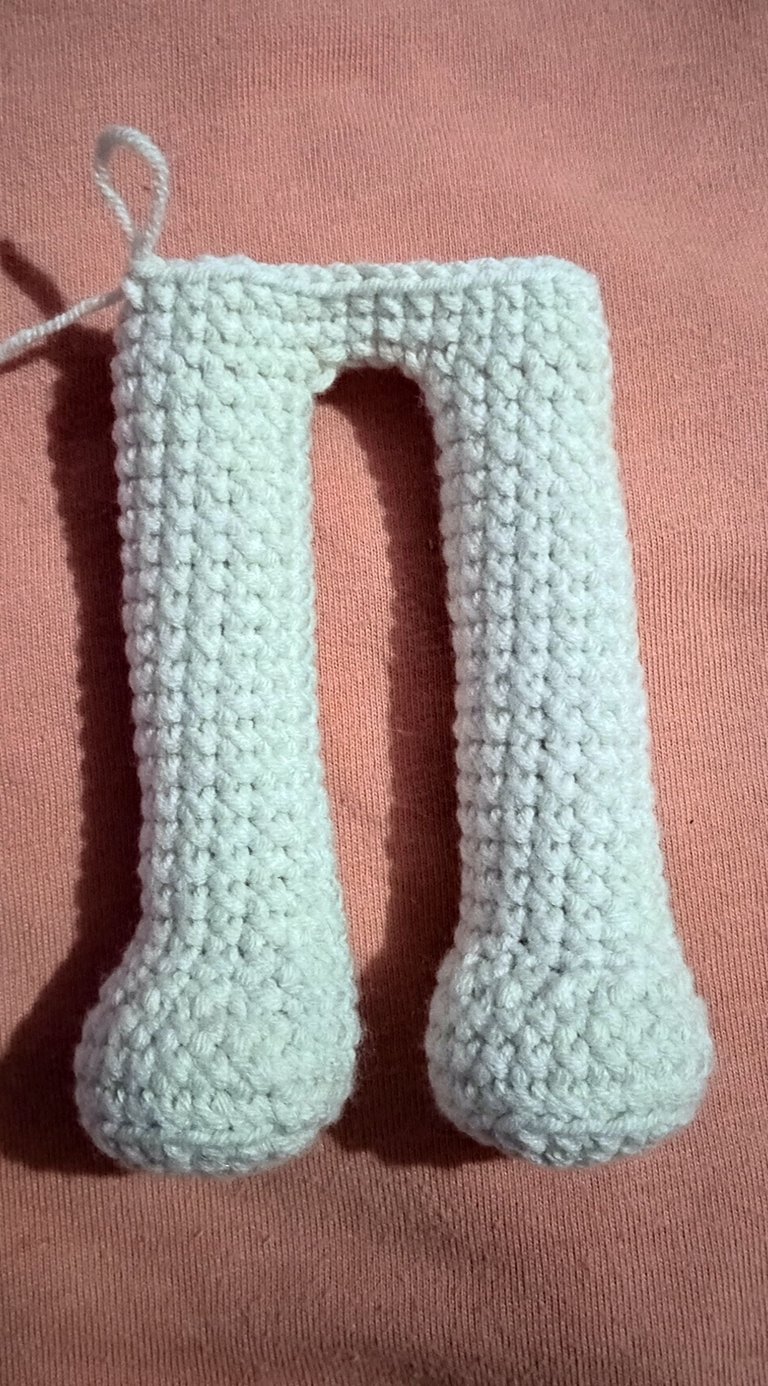
Repeat rounds 1 to 18. DO NOT cut for leg two.
19. Crochet 10 single crochets (leg two), make 3 chains, attach to leg one, crochet 15 single crochets (over leg one), 3 single crochets (over the chains), 5 single crochets (over leg two) (36 SC).
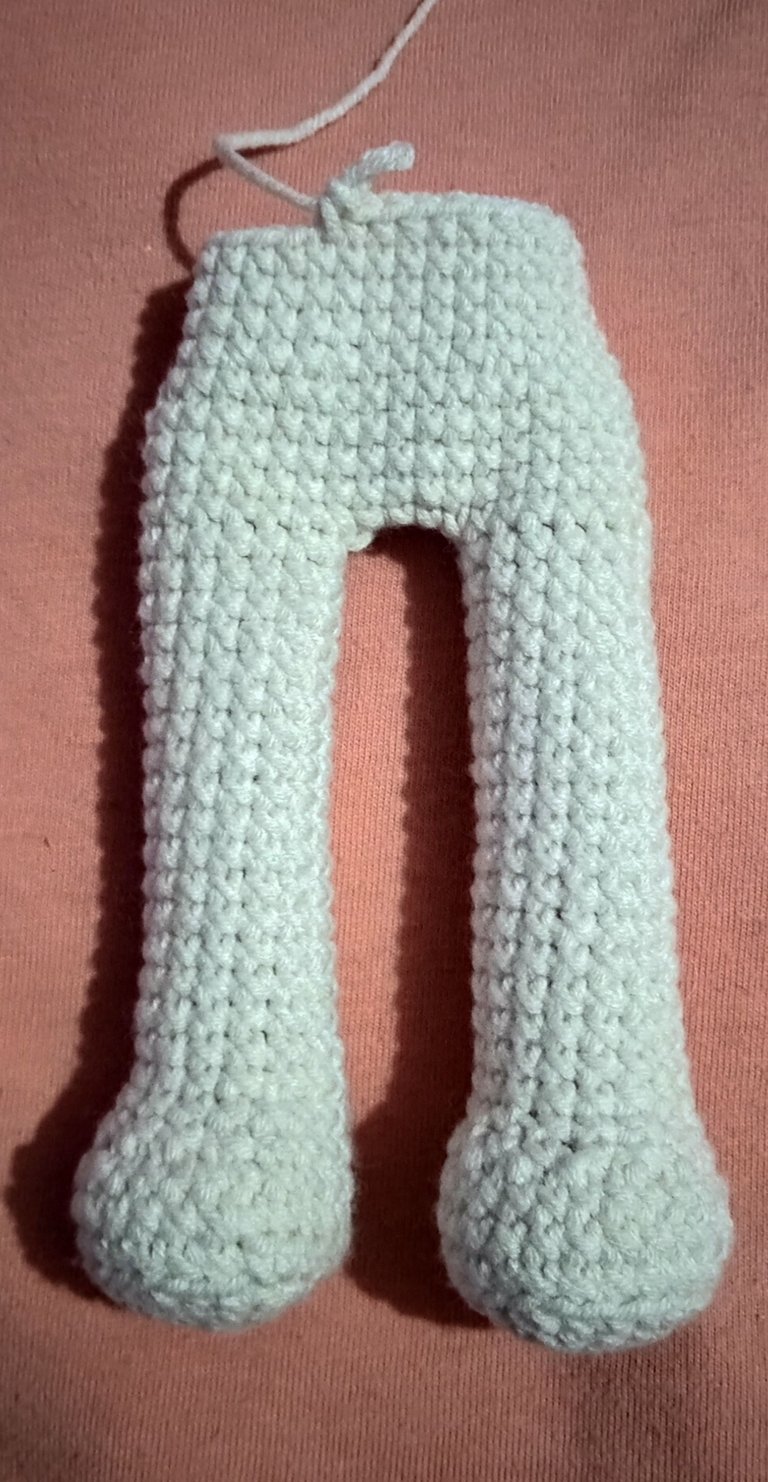
20-22. Single crochet in each stitch for all rounds (36 SC).
23. Repeat 4 SC, 1 decrease six times (30 SC).
24-27. Single crochet in each stitch for all rounds (30 SC).
28. Repeat 3 SC, 1 decrease six times (24 SC).
29-31. Single crochet in each stitch for all rounds (24 SC).
32. Crochet 2 SC, 4 SC (joining an arm), 8 SC, 4 SC (joining another arm), 6 SC (24 SC).
33. Repeat 2 SC, 1 decrease six times (18 SC).
34. Crochet 3 SC, 1 decrease, 1 SC, 2 decreases, 1 SC, 1 decrease, 3 SC, 1 decrease (13 SC).
35. Crochet 5 SC, 1 decrease, 6 SC (12 SC).
36. Single crochet in each stitch for all rounds (12 SC).
37. Make a half double crochet in each stitch (24 SC).
38. Repeat 1 SC, 1 increase twelve times (36 SC).
*39". Repeat 5 SC, 1 increase six times (42 SC).
40. Repeat 6 SC, 1 increase six times (48 SC).
41-51. Single crochet in each stitch for all rounds (48 SC).
52. Repeat 6 SC, 1 decrease six times (42 SC).
53. Crochet 3 SC, 1 decrease, 5 SC, 1 decrease five times, 2 SC (36 SC).
54. Repeat 4 SC, 1 decrease six times (30 SC).
55. Crochet 1 SC, 1 decrease, 3 SC, 1 decrease five times, 2 SC (24 SC).
56. Repeat 2 SC, 1 decrease six times (18 SC).
57. Repeat 1 SC, 1 decrease six times (12 SC).
58. Decrease six times (6 SC).
- Fasten off.
1. Haz un anillo mágico con 6 puntos bajos (PB).
2. Aumenta en cada punto (12 PB).
3. Repite 1 PB, 1 aumento seis veces (18 PB).
4. Repite 2 PB, 1 aumento seis veces (24 PB).
5. Teje un punto bajo en cada punto en todas las vueltas (24 PB).
6-7. Punto bajo en cada punto en todas las vueltas (24 PB).
8. Disminuye seis veces, luego teje 12 puntos bajos (18 PB).
9. Repite 4 PB, 1 disminución tres veces (15 PB).
10-18. Punto bajo en cada punto en todas las vueltas (15 PB).
Esto es la pierna uno, corta el hilo.
Repite las vueltas 1 a 18. NO cortes para la pierna dos.
19. Teje 10 puntos bajos (pierna dos), haz 3 cadenas, únelas a la pierna uno, teje 15 puntos bajos (sobre la pierna uno), 3 puntos bajos (sobre las cadenas), 5 puntos bajos (sobre la pierna dos) (36 PB).
20-22. Punto bajo en cada punto en todas las vueltas (36 PB).
23. Repite 4 PB, 1 disminución* seis veces (30 PB).
24-27. Punto bajo en cada punto en todas las vueltas (30 PB).
28. Repite 3 PB, 1 disminución seis veces (24 PB).
29-31. Punto bajo en cada punto en todas las vueltas (24 PB).
32. Teje 2 PB, 4 PB (uniendo un brazo), 8 PB, 4 PB (uniendo otro brazo), 6 PB (24 PB).
33. Repite 2 PB, 1 disminución seis veces (18 PB).
34. Teje 3 PB, 1 disminución, 1 PB, 2 disminuciones, 1 PB, 1 disminución, 3 PB, 1 disminución (13 PB).
35. Teje 5 PB, 1 disminución, 6 PB (12 PB).
36. Punto bajo en cada punto en todas las vueltas (12 PB).
37. Haz un medio punto alto en cada punto (24 PB).
38. Repite 1 PB, 1 aumento doce veces (36 PB).
39. Repite 5 PB, 1 aumento seis veces (42 PB).
40. Repite 6 PB, 1 aumento seis veces (48 PB).
41-51. Punto bajo en cada punto en todas las vueltas (48 PB).
52. Repite 6 PB, 1 disminución seis veces (42 PB).
53. Teje 3 PB, 1 disminución, 5 PB, 1 disminución cinco veces, 2 PB (36 PB).
54. Repite 4 PB, 1 disminución seis veces (30 PB).
55. Teje 1 PB, 1 disminución, 3 PB, 1 disminución cinco veces, 2 PB (24 PB).
56. Repite 2 PB, 1 disminución seis veces (18 PB).
57. Repite 1 PB, 1 disminución seis veces (12 PB).
58. Disminuye seis veces (6 PB).
- Remata.
ears / Orejas
|
|
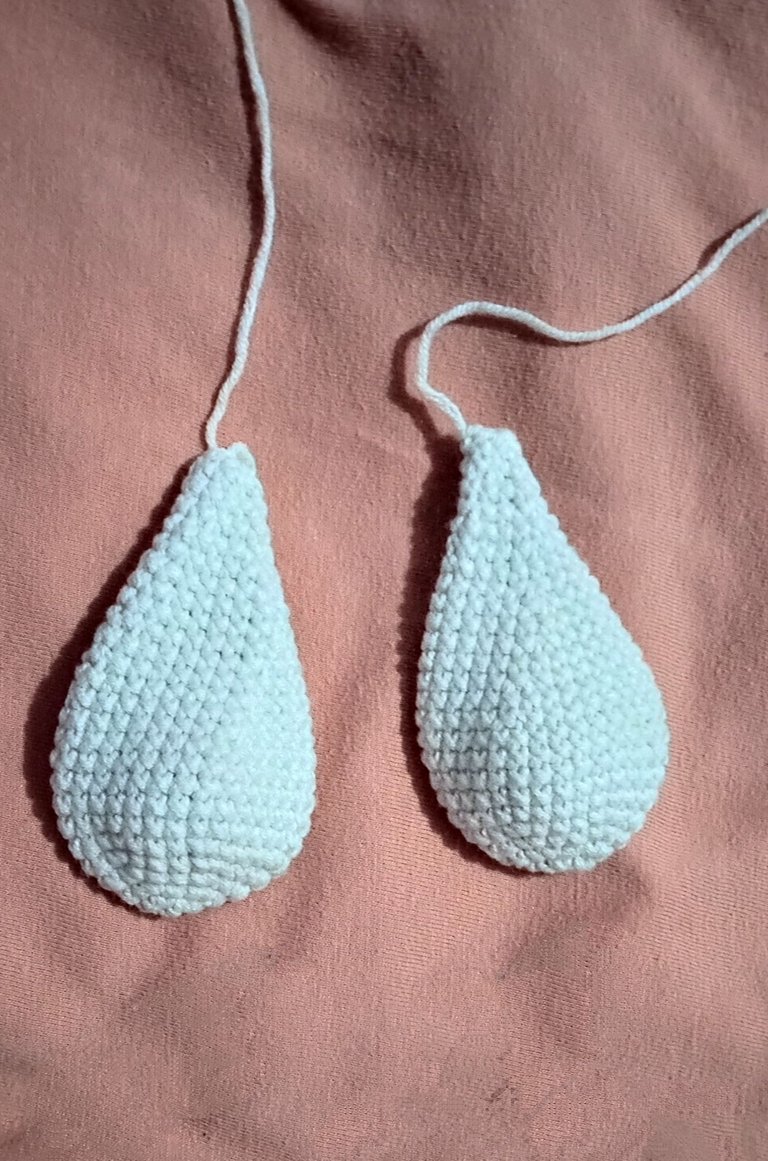
1. Make a magic ring and crochet 6 stitches inside.
2. Make 12 increases to grow the ear (12 SC).
3. Alternate 1 single crochet and 1 increase around (18 SC).
4. Crochet 2 single crochets, then 1 increase in each (24 SC).
5. Crochet 6 rows with single crochets (30 SC per row).
6. Crochet 5 more rows with single crochets (30 SC per row).
7. Crochet 8 single crochets, then 1 decrease x3 (27 SC).
8. Crochet only single crochets (27 SC).
9. Crochet 7 single crochets, then 1 decrease x3 (24 SC).
10. Crochet only single crochets (24 SC).
11. Crochet 6 single crochets, then 1 decrease x3 (21 SC).
12. Crochet only single crochets (21 SC).
13. Crochet 5 single crochets, then 1 decrease x3 (18 SC).
14. Crochet only single crochets (18 SC).
15. Crochet 4 single crochets, then 1 decrease x3 (15 SC).
16. Crochet only single crochets (15 SC).
17. Crochet 3 single crochets, then 1 decrease x3 (12 SC).
*18". Crochet only single crochets (12 SC).
19. Crochet 2 single crochets, then 1 decrease x3 (9 SC).
20. Crochet only single crochets (9 SC).
21. Crochet 1 single crochet, then 1 decrease x3 (6 SC).
22. Crochet only single crochets (6 SC).
1. Hacer un anillo mágico y tejer 6 puntos dentro.
2. Hacer 12 aumentos para crecer la oreja (12 PB).
3. Alternar 1 punto bajo y 1 aumento en toda la vuelta (18 PB).
4. Tejer 2 puntos bajos y luego 1 aumento en cada uno (24 PB).
5. Tejer 6 filas con puntos bajos (30 PB por fila).
- Tejer 5 filas más con puntos bajos (30 PB por fila).
7. Tejer 8 puntos bajos, luego 1 disminución x3 (27 PB).
8. Tejer solo puntos bajos (27 PB).
9. Tejer 7 puntos bajos, luego 1 disminución x3 (24 PB).
10. Tejer solo puntos bajos (24 PB).
11. Tejer 6 puntos bajos, luego 1 disminución x3 (21 PB).
12. Tejer solo puntos bajos (21 PB).
13. Tejer 5 puntos bajos, luego 1 disminución x3 (18 PB).
14. Tejer solo puntos bajos (18 PB).
15. Tejer 4 puntos bajos, luego 1 disminución x3 (15 PB).
16. Tejer solo puntos bajos (15 PB).
17. Tejer 3 puntos bajos, luego 1 disminución x3 (12 PB).
18. Tejer solo puntos bajos (12 PB).
19. Tejer 2 puntos bajos, luego 1 disminución x3 (9 PB).
20. Tejer solo puntos bajos (9 PB).
21. Tejer 1 punto bajo, luego 1 disminución x3 (6 PB).
22. Tejer solo puntos bajos (6 PB).
Beanie / Gorro
|
|
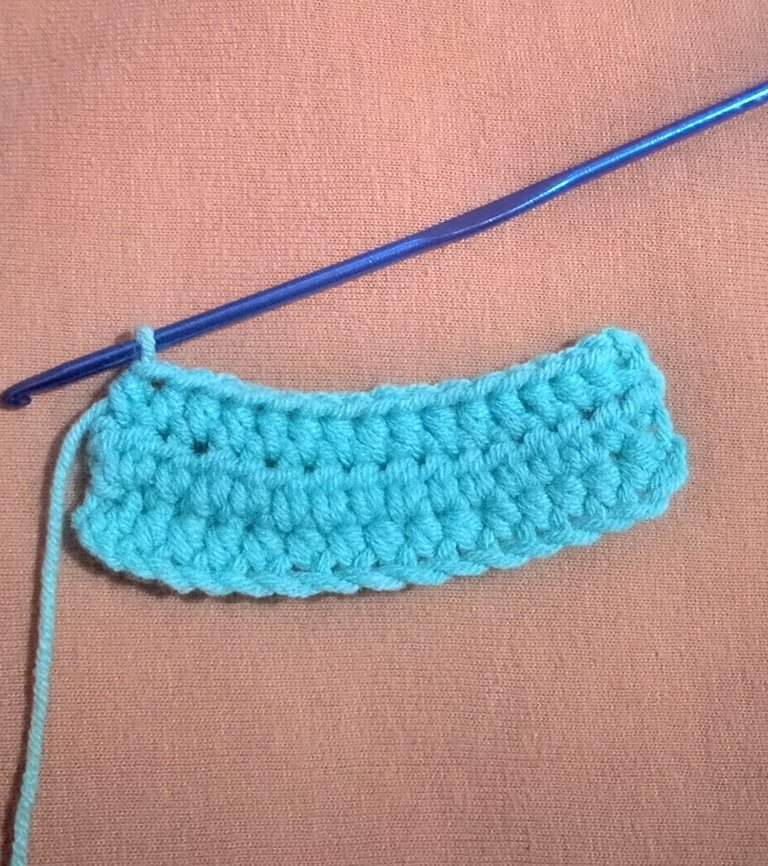
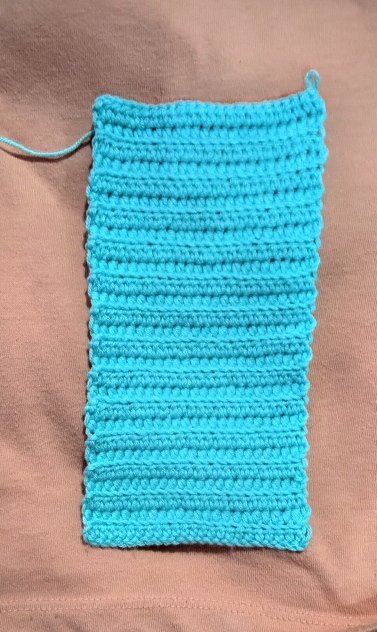
1. Crochet 15 chains using half double crochets.
2. Turn the fabric and continue crocheting half double crochets only through the back loop.
3 to 15. Keep crocheting half double crochets in the same manner.
4. Join the pieces and add a pom-pom.
1. Teje 15 cadenas usando medios puntos altos.
2. Gira el tejido y continúa tejiendo medios puntos altos solo por la hebra de atrás.
3 al 15. Sigue tejiendo medios puntos altos de la misma manera.
4. Uní las piezas y añadí un pompón.
pants / pantalones
|
|
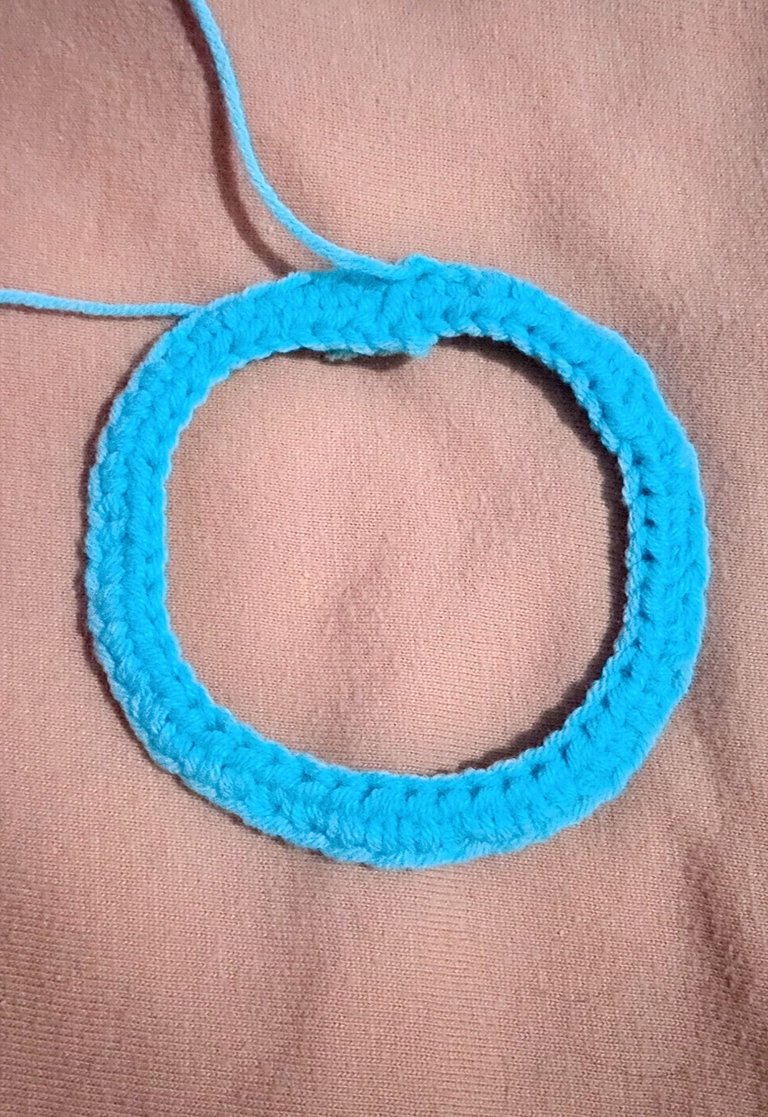
1. First, I crocheted 27 chains.
2. Then, I joined the first and last chain with a single crochet, forming a circle.
3. I crocheted rounds of single crochets until the beginning of the pants reached the length I wanted.
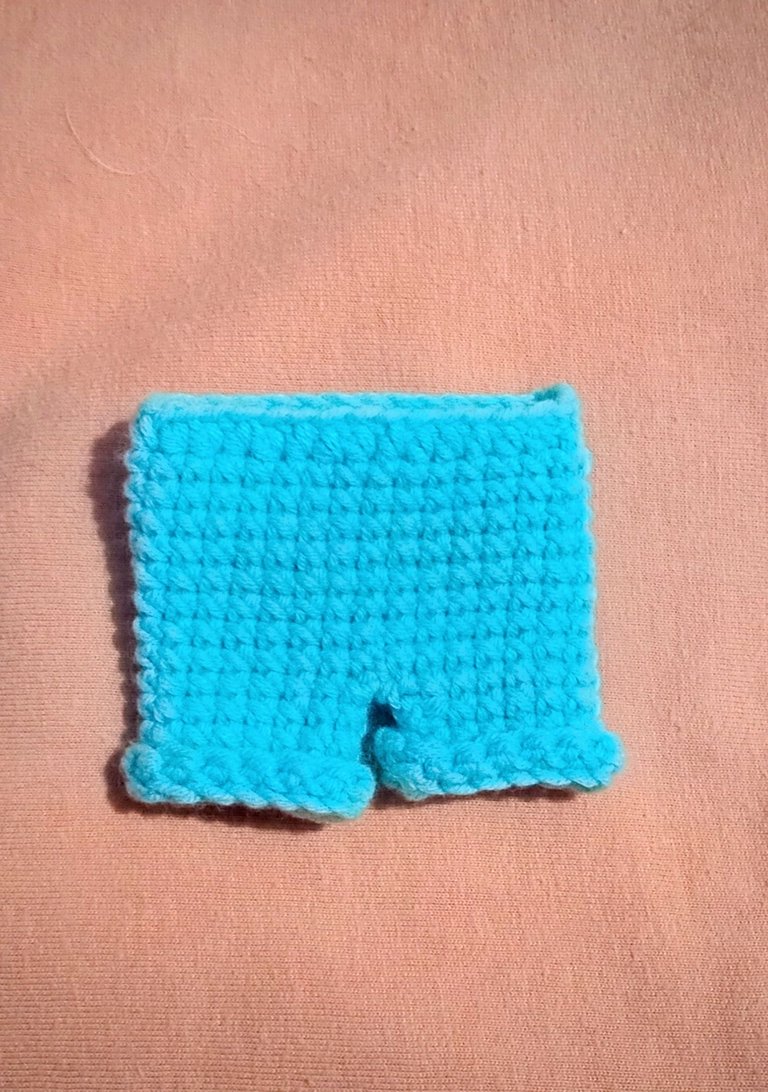
4. I closed one of the legs with a slip stitch and left a strand of yarn.
5. I did the same for the other leg.
6. I joined the two legs with a single crochet in the center.
7. I continued crocheting more rounds of single crochets until the pants were long enough.
8. For the top part (bodice), I crocheted 20 single crochets in a row, then chained 1 and turned the work. I crocheted more single crochets on the way back. I repeated this step several times.
9. For the side straps, I crocheted 15 chains on each side of the bodice and secured with a knot at the end.
1. Primero, tejí 27 cadenas.
2. Luego, uní la primera y la última cadena con un punto bajo, formando un círculo.
3. Tejí vueltas de puntos bajos hasta que el inicio del pantalón tuvo el largo que quería.
4. Cerré una de las piernas con un punto deslizado y dejé un trozo de hilo.
5. Hice lo mismo para la otra pierna.
6. Uní las dos piernas con un punto bajo en el centro.
7. Seguí tejiendo más vueltas de puntos bajos hasta que el pantalón fue lo suficientemente largo.
8. Para la parte de arriba (pechera), tejí 20 puntos bajos corridos, después subí con 1 cadena y di la vuelta al tejido. Tejí más puntos bajos en el regreso. Repetí este paso varias veces.
9. Para las tiras de los lados, tejí 15 cadenas en cada lado de la pechera y aseguré con un nudo al final.
Result / Resultado
|
|
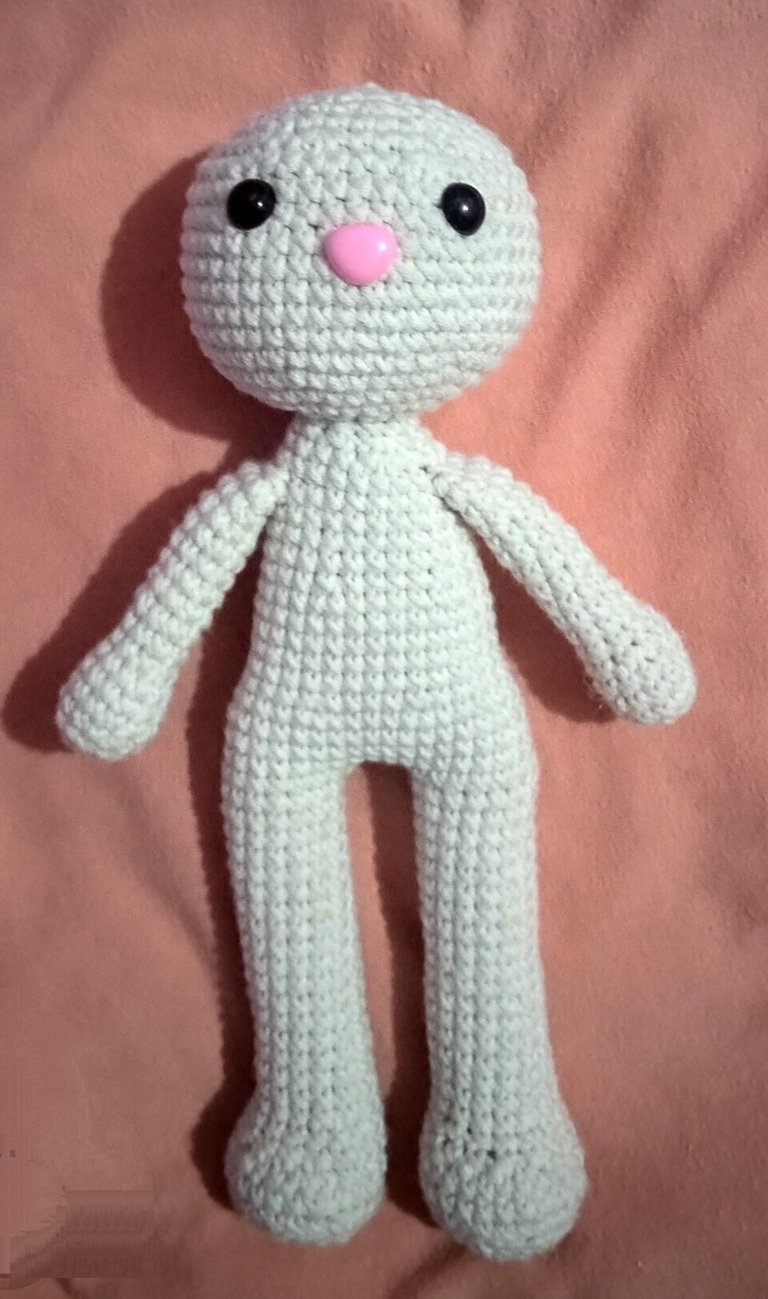
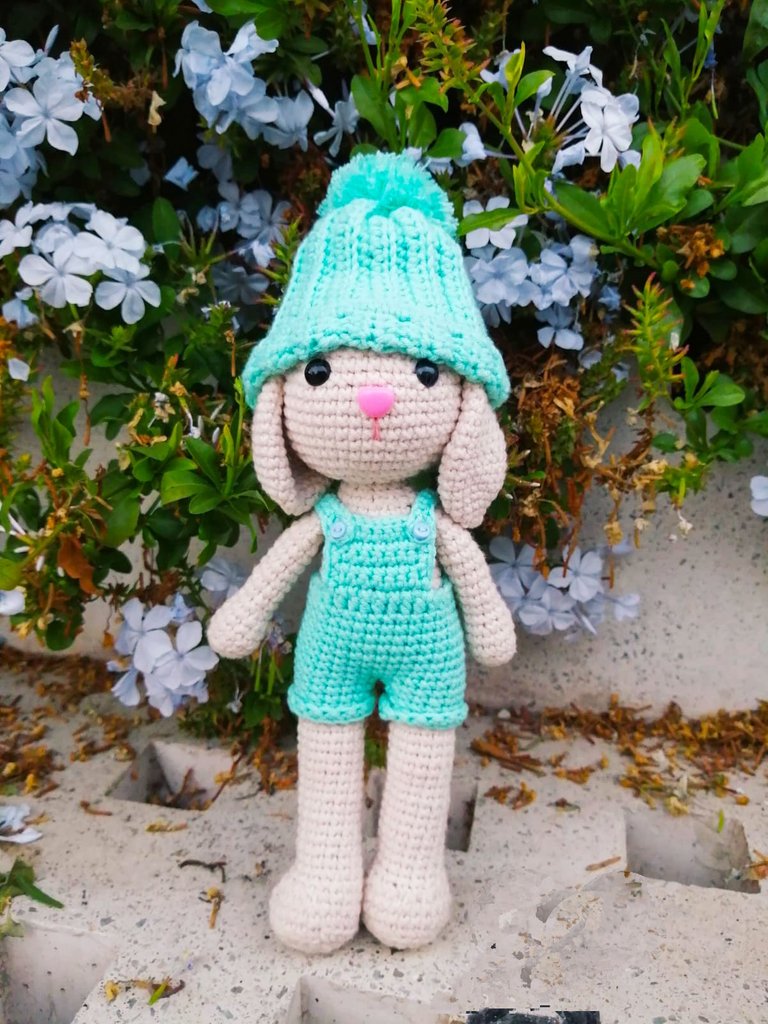
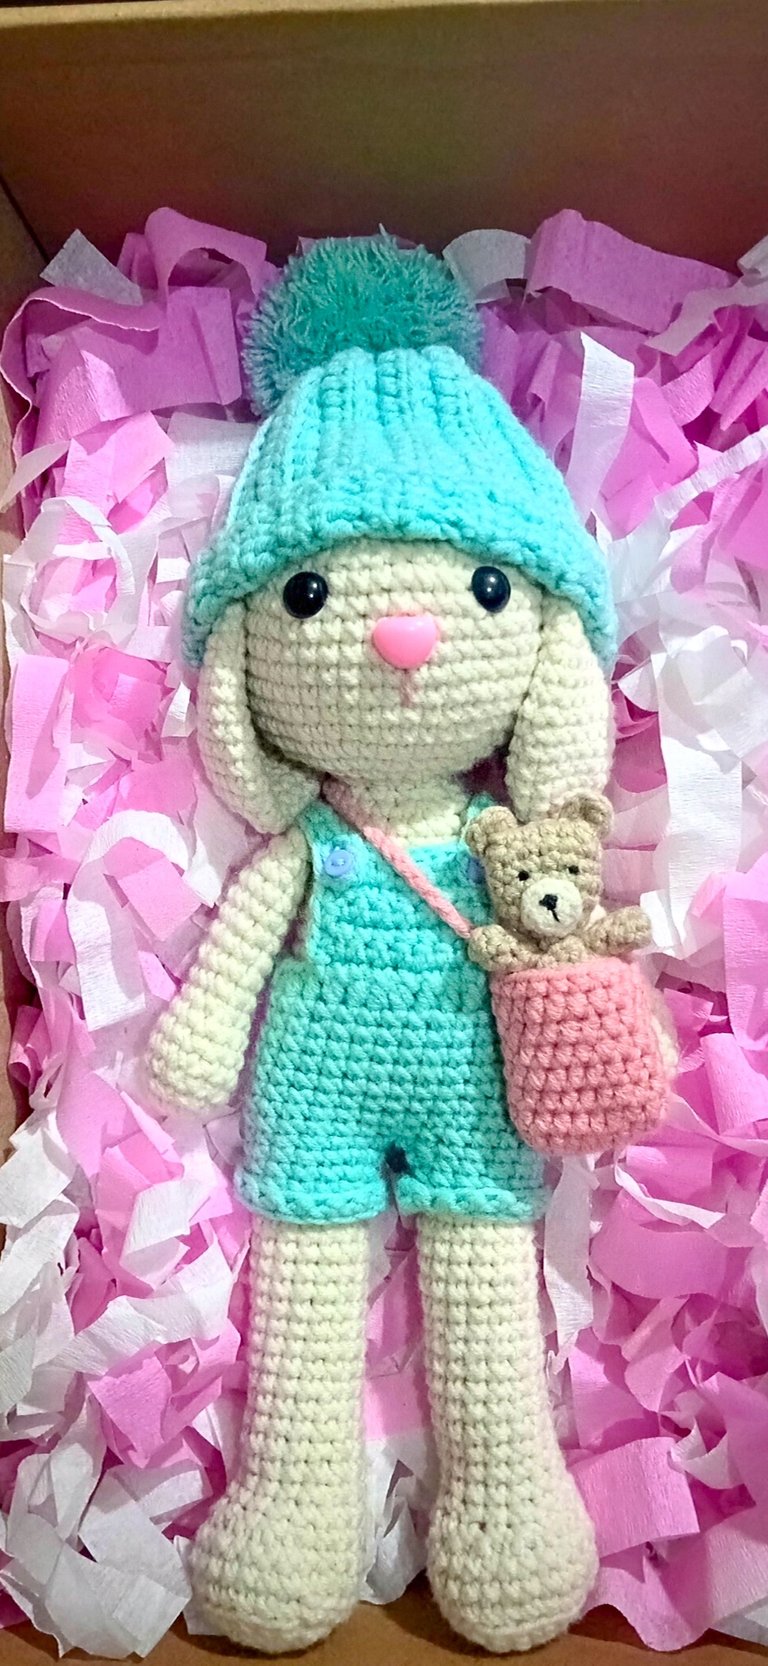
I decided to put my creativity and manual skills into practice. So, with patience and dedication, I made a charming mini amigurumi bear. But I didn't stop there, I also designed a matching crossbody bag, which turned out to be the perfect complement to my adorable creation. The process was rewarding, and the final result left me proud.
I made two amigurumi bunnies, one in sea green and the other in light blue, and I have already gifted them both. That's why the colors in the photos are different.
Decidí poner en práctica mi creatividad y habilidades manuales. Así que, con paciencia y dedicación, hice un encantador mini oso de amigurumi. Pero no me detuve ahí, también diseñé un bolso cruzado a juego, que resultó ser el complemento perfecto para mi adorable creación. El proceso fue gratificante y el resultado final me dejó orgullosa.
Hice dos conejitos amigurumi, uno en verde agua y otro en azul claro, y ya los regalé a ambos. Por eso, los colores en las fotos son diferentes.
