WELCOME TO MY BLOG
Hellooooo, hellooooooo! Greetings and my respects to the jewelry creators. There are just a few days left until the end of the year 2023. A year full of many events, bad, regular, good and excellent. I believe that in 365 days there are many experiences lived and that they help us to continue growing and strengthen ourselves as people. In jewelry, this community that opened a window for us to create accessories and everything that concerns the field of jewelry and costume jewelry, there are many anecdotes and learnings that I have obtained, each of the pieces that I have made have left me with great satisfaction, the recognition and appreciation of all members of the community has been the driving force to continue creating and learning new techniques to improve every day.
This is how I have put into practice techniques such as macramé and wire work to create accessories, the latter being the one that I liked the most and with which I have loved working and making the accessories both for myself and to give as gifts to my family and friends.
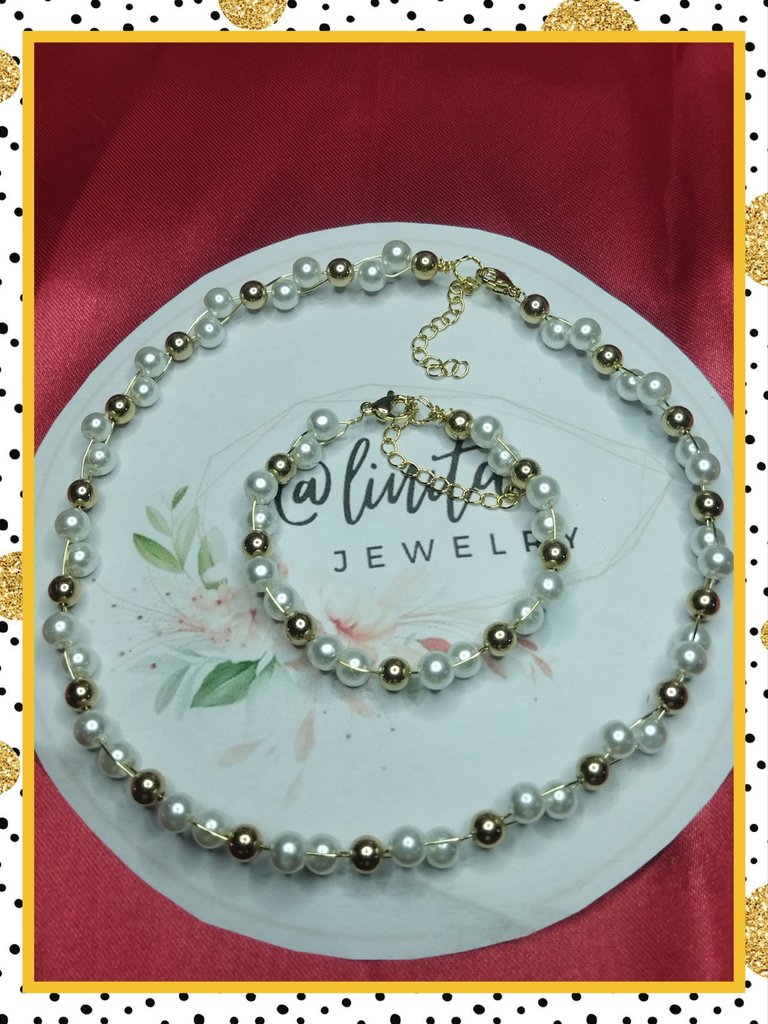
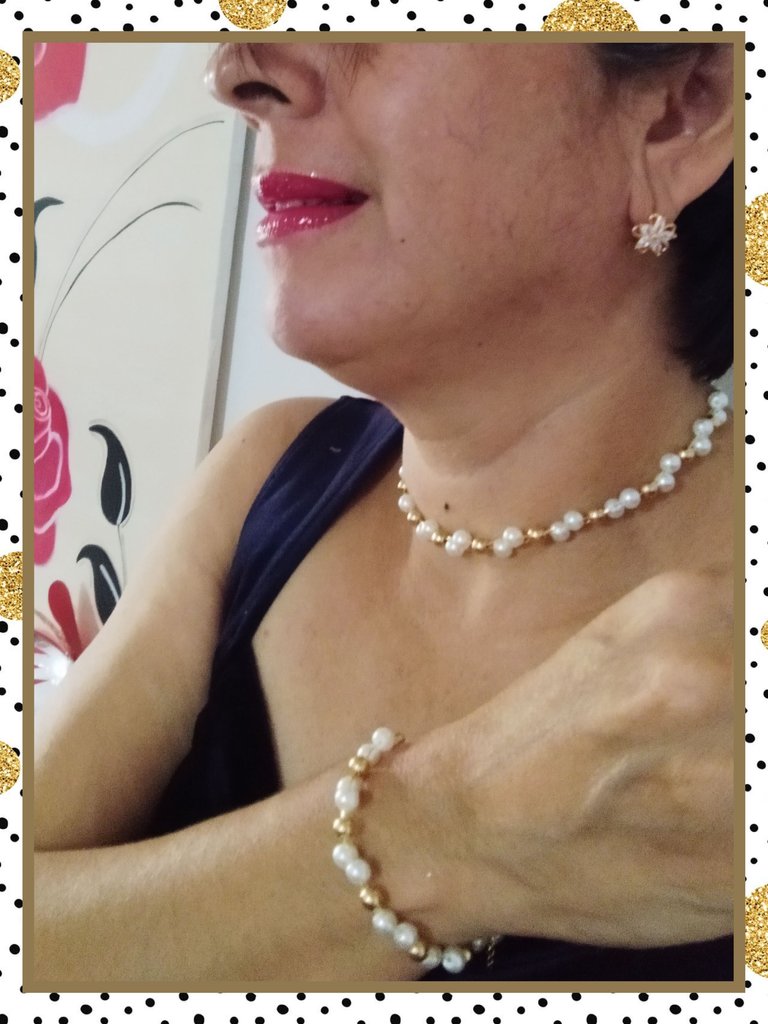
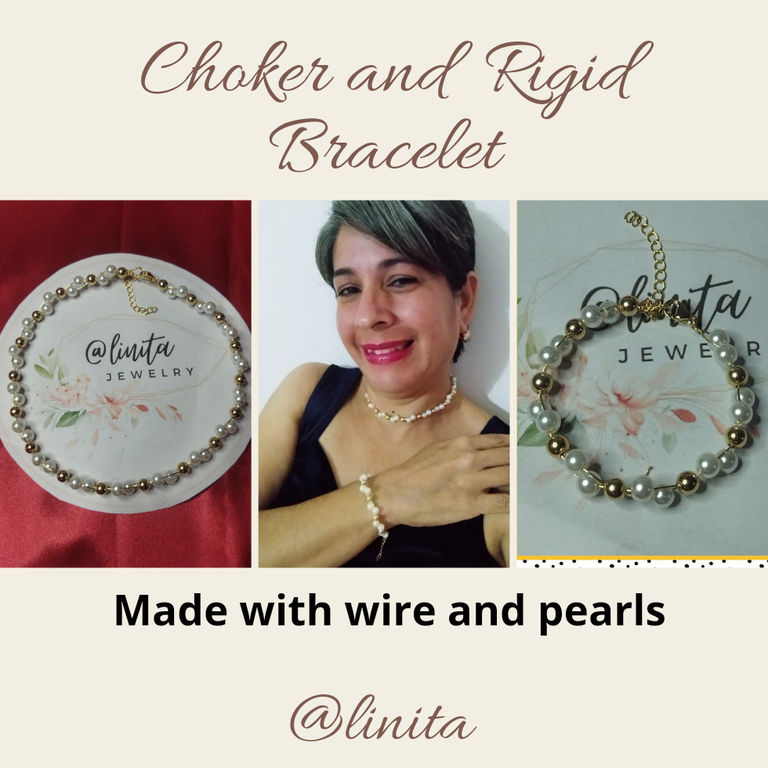
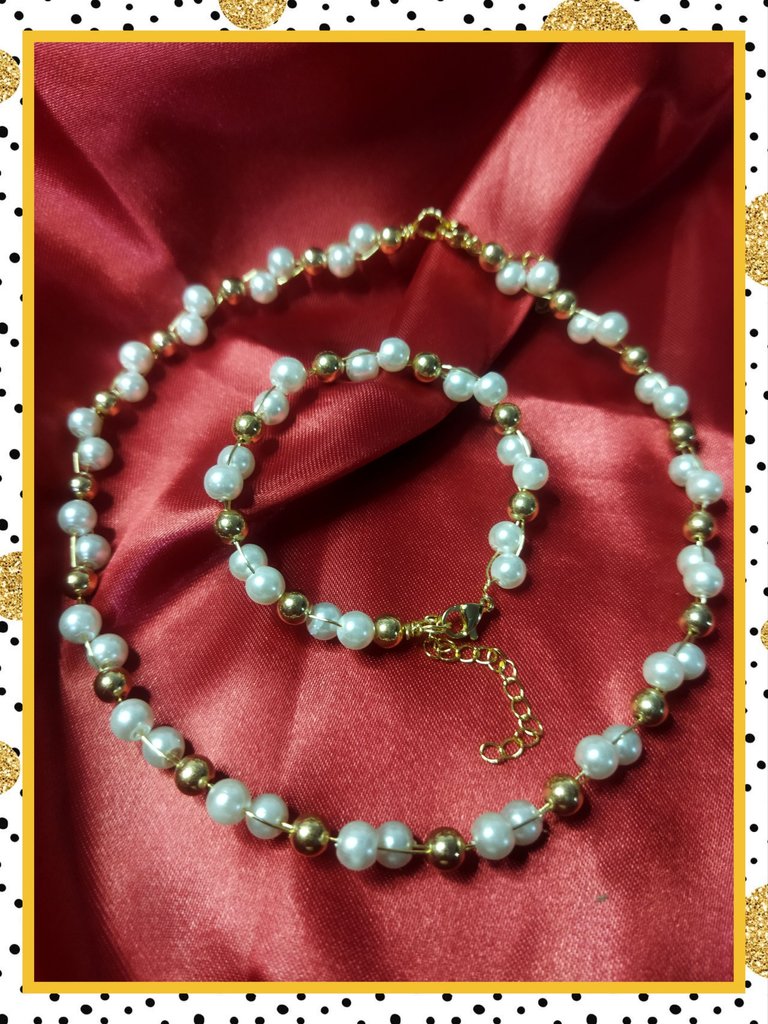
And as expected, to end this year, I made a rigid choker and bracelet set, using wire and pearls. A luxury combination that I'm going to wear on New Year's Eve. Now without further ado, let's start this tutorial.
BIENVENIDOS A MI BLOG
¡Holaaaa, holaaaaa! Saludos y mis respetos a los creadores de bisutería. Ya faltan pocos días para la culminación del año 2023. Un año cargado de muchos acontecimientos, malos, regulares, buenos y excelentes. Creo que en 365 días son muchas las experiencia vividas y que nos ayudan a seguir creciendo y reforzarnos como personas. En jewelry, esta comunidad que nos abrió una ventana para crear accesorios y todo lo que concierne al ramo de la joyería y bisutería, son muchas las anécdotas y aprendizajes que he obtenido, cada una de las piezas que he elaborado me han dejado una gran satisfacción, el reconocimiento y la valoración de todos los miembros de la comunidad ha sido el motor para seguir creando y aprendiendo técnicas nuevas para mejorar cada día.
Es así como he puesto en práctica para la creación de accesorios técnicas como macramé y alambrismo, siendo esta última la que más me ha gustado y con la que me ha encantado trabajar y realizar los accesorios tanto para mi como para obsequiar a mis familiares y amigos.
Y como es de esperar, para finalizar este año, he realizado un juego de gargantilla y pulsera rígidas, utilizando alambre y perlas. Una combinación de lujo que voy a lucir en la noche buena de año nuevo. Ahora sin más, comencemos este tutorial.
MATERIALS
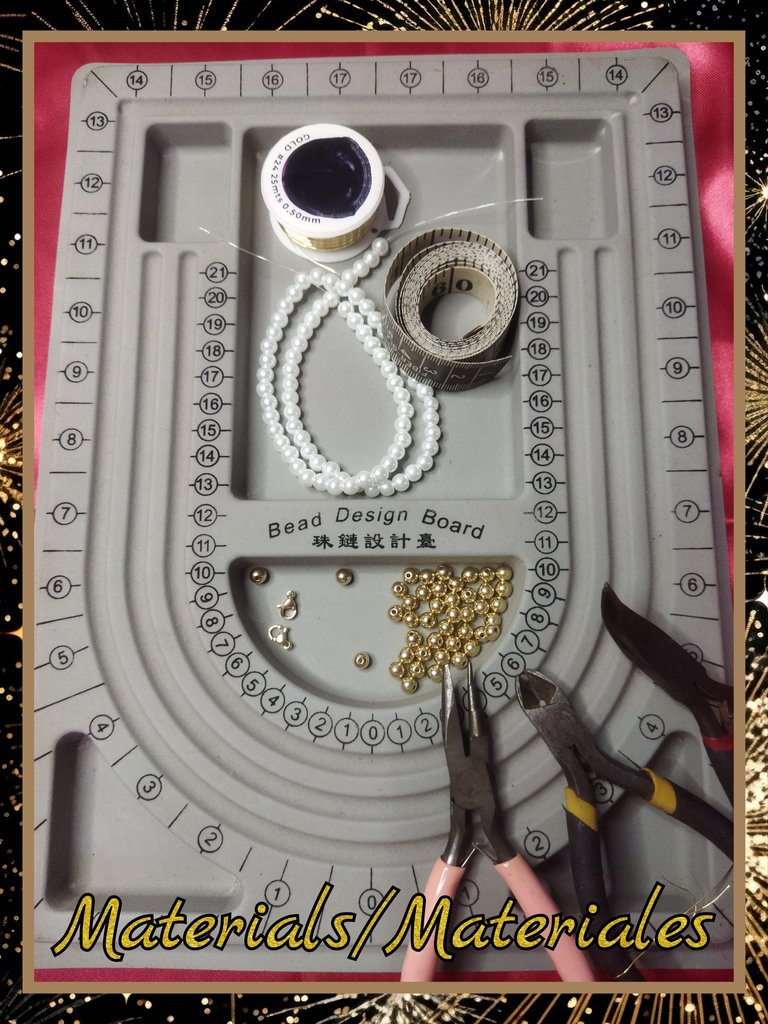
- Wire #24
- 6mm white pearls
- 5 mm pellets
- Parrot beak insurance
- Jewelry tweezers (cutting, flat, curved, conical)
- Measuring tape
- Jewelry table
MATERIALES
- Alambre #24
- Perlas blancas de 6 mmm
- Balines de 5 mm
- Seguros pico de loro
- Pinzas de bisutería (corte, plana, curva, cónica)
- Cinta métrica
- Tabla de bisutería
STEP BY STEP // PASO A PASO
BRACELET
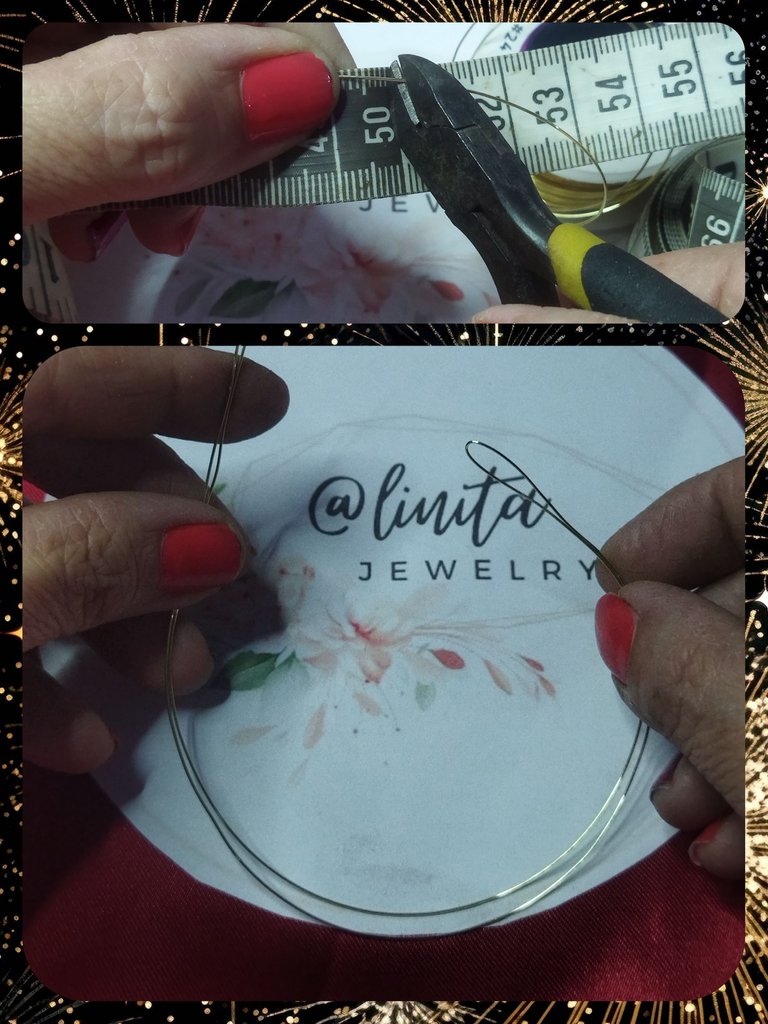
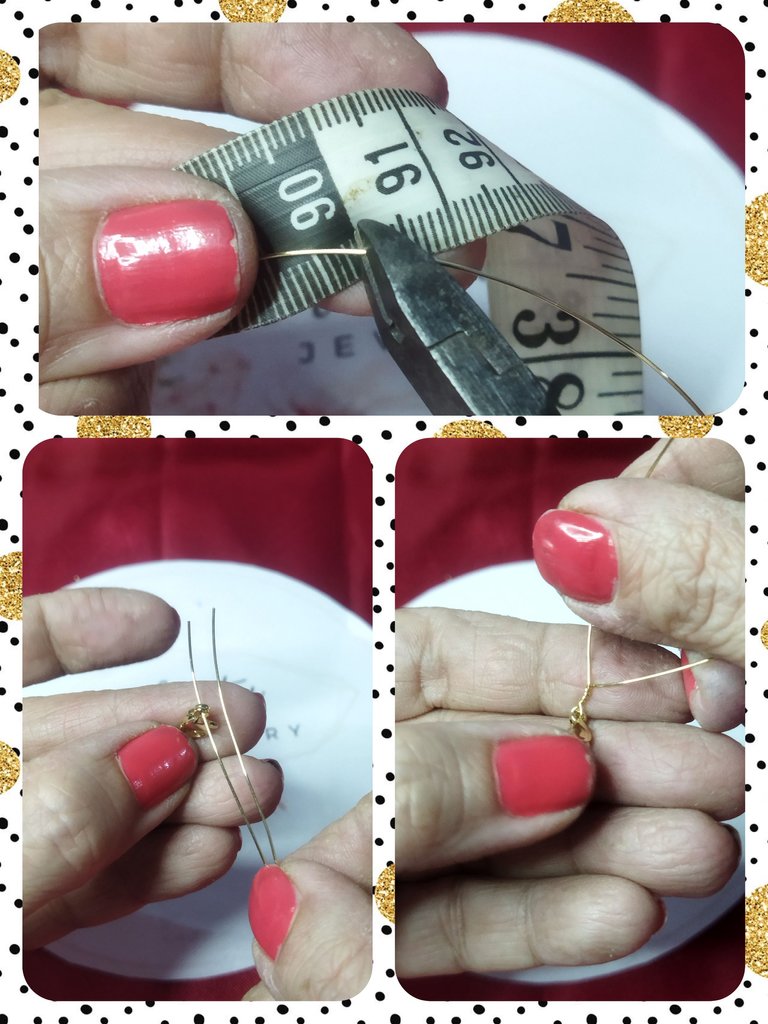
To make the rigid bracelet we are going to use 50 cm of #24 wire and fold it in half.
PULSERA
Para realizar la pulsera rígida vamos a utilizar 50 cm de alambre #24 y lo doblamos por la mitad.
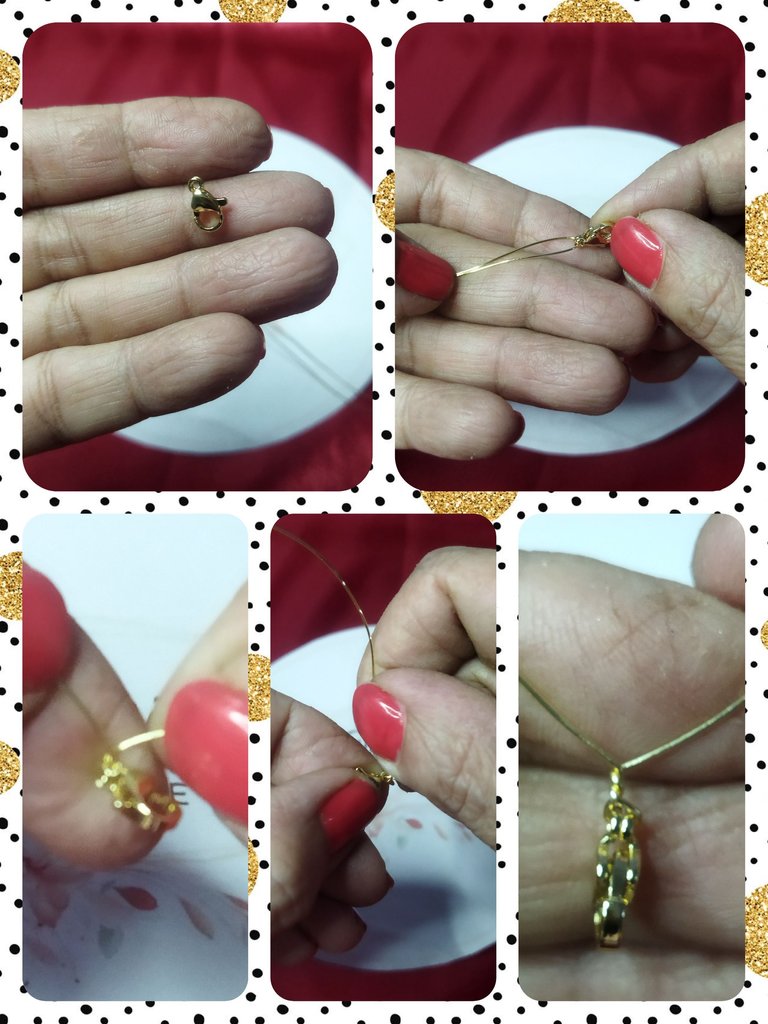
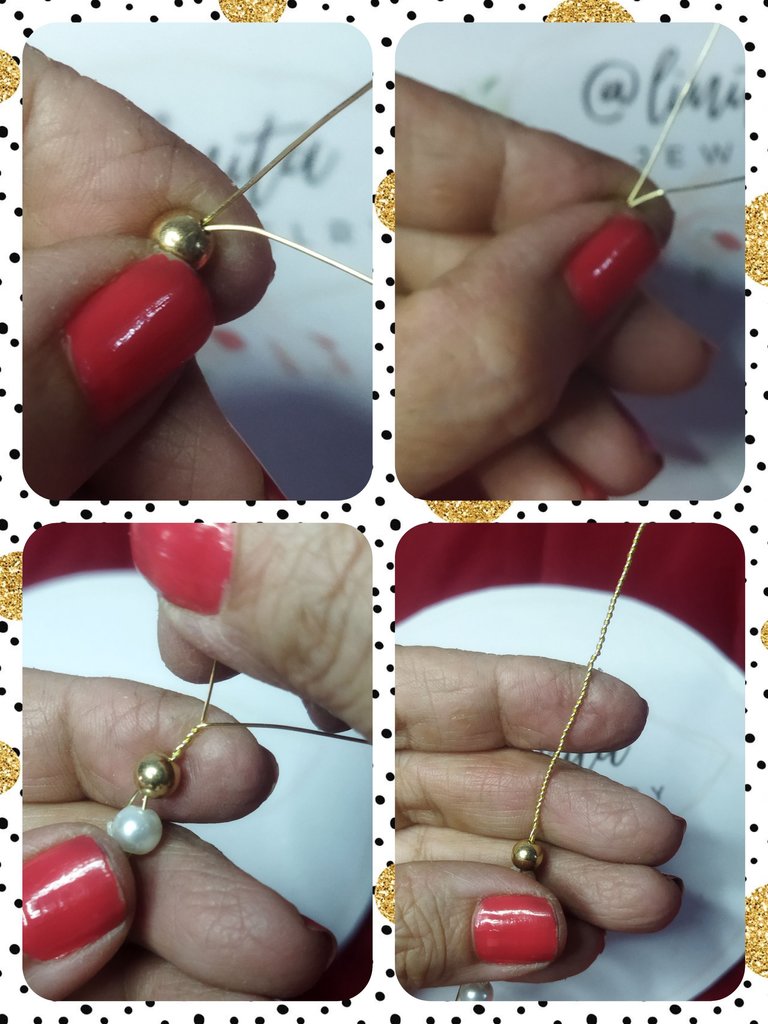
We introduce a secure parrot beak and take it to the center of the fold. Next we make a small 3-turn twist to secure it.
Introducimos un seguro pico de loro y lo llevamos al centro del doblez. Seguidamente realizamos un pequeño entorchado de 3 vueltas para asegurarlo.
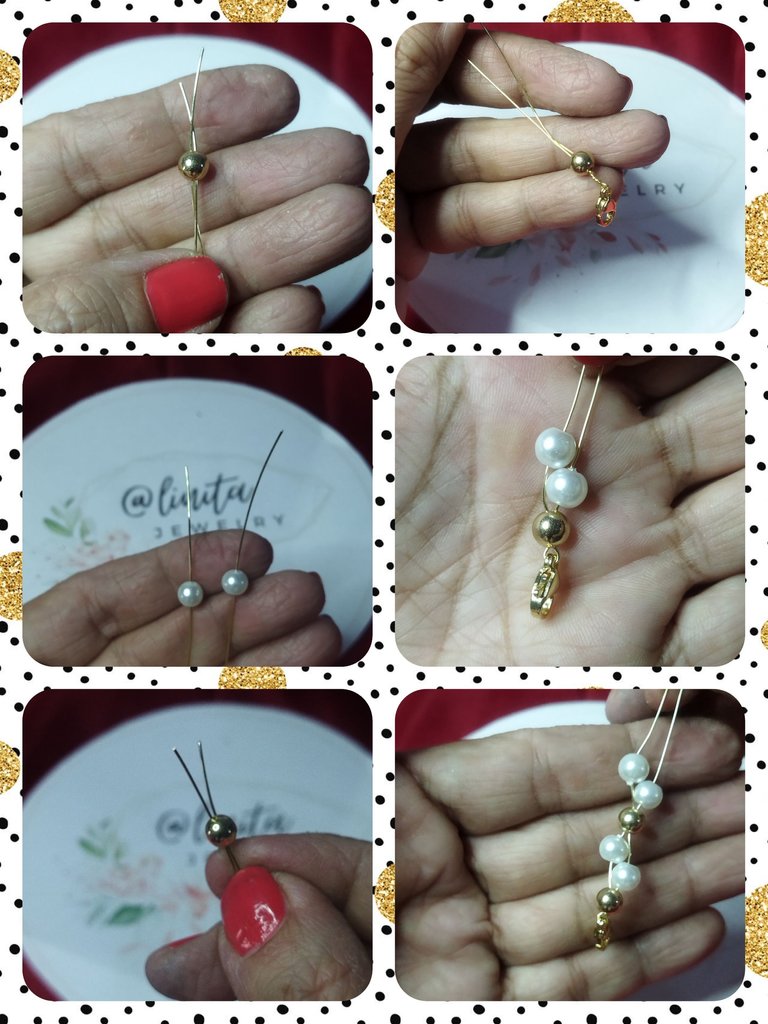
We begin to work the bracelet by inserting 1 6 mm pearl into each of the wires. When we reach the end of the wire we place one on top of the other.
Comenzamos a trabajar la pulsera introduciendo en cada uno de los alambres 1 perla de 6 mm. Al llegar al final del alambre colocamos una encima de la otra.
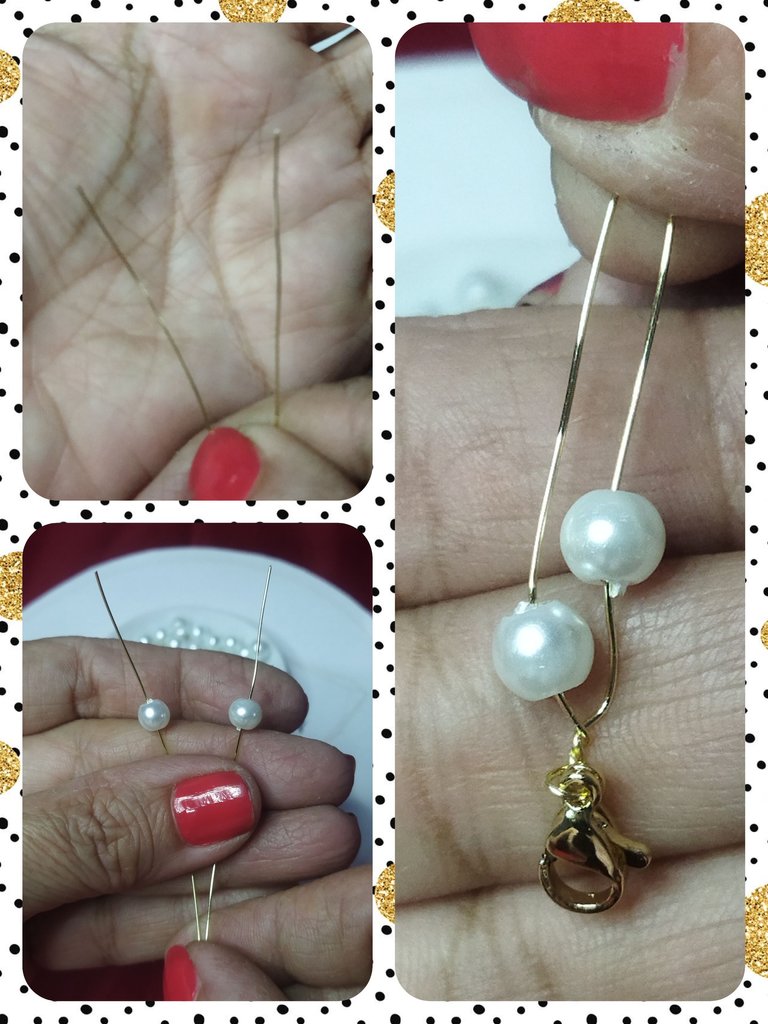
Next we take a 5 mm bead and insert both wires through the middle of the bead, thus closing the two beads.
A continuación tomamos un balín de 5 mm e introducimos ambos alambres por el medio del balín, cerrando así las dos perlas.
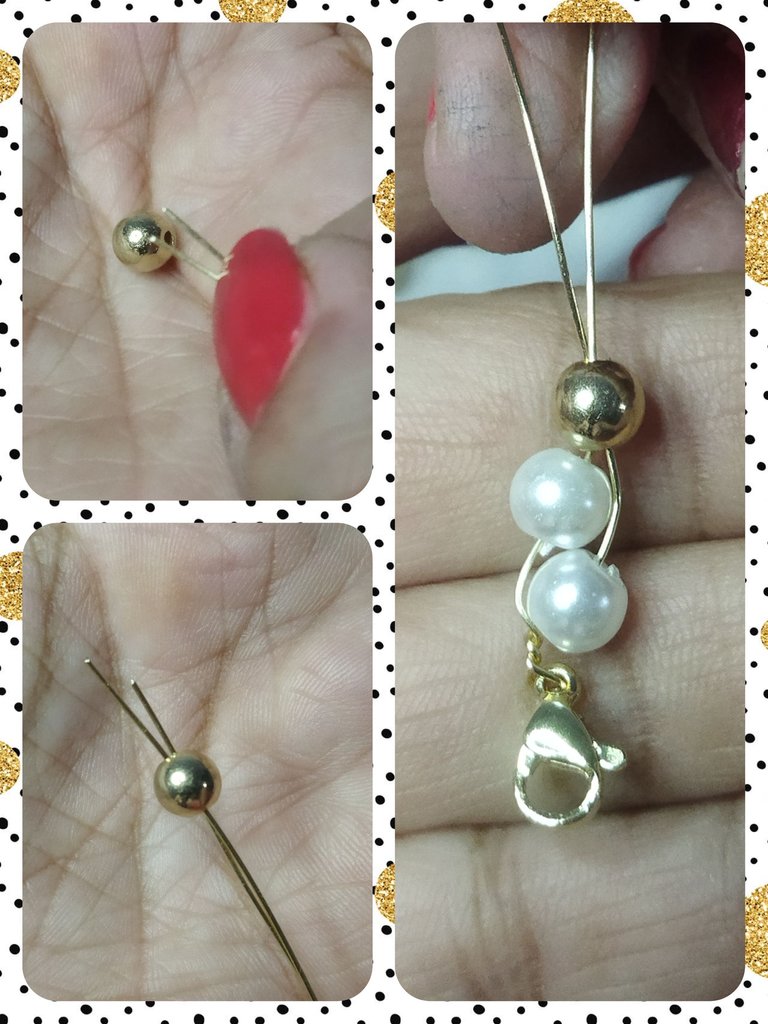
We repeat the previous step again. We take two beads and pass each one through the wires, then a pellet that we will pass through the two wires. This will be the process of the entire bracelet.
Repetimos el paso anterior nuevamente. Tomamos dos perlas y pasamos cada una por los alambres, luego un balín que pasaremos por los dos alambres. Así será el proceso de toda la pulsera.
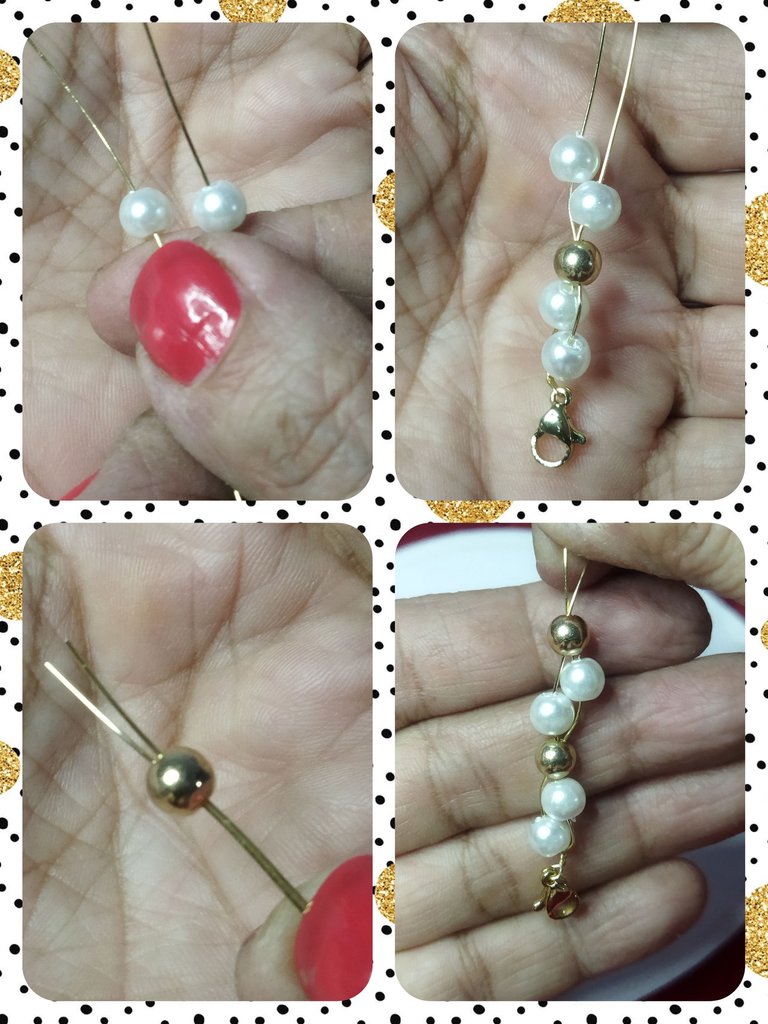
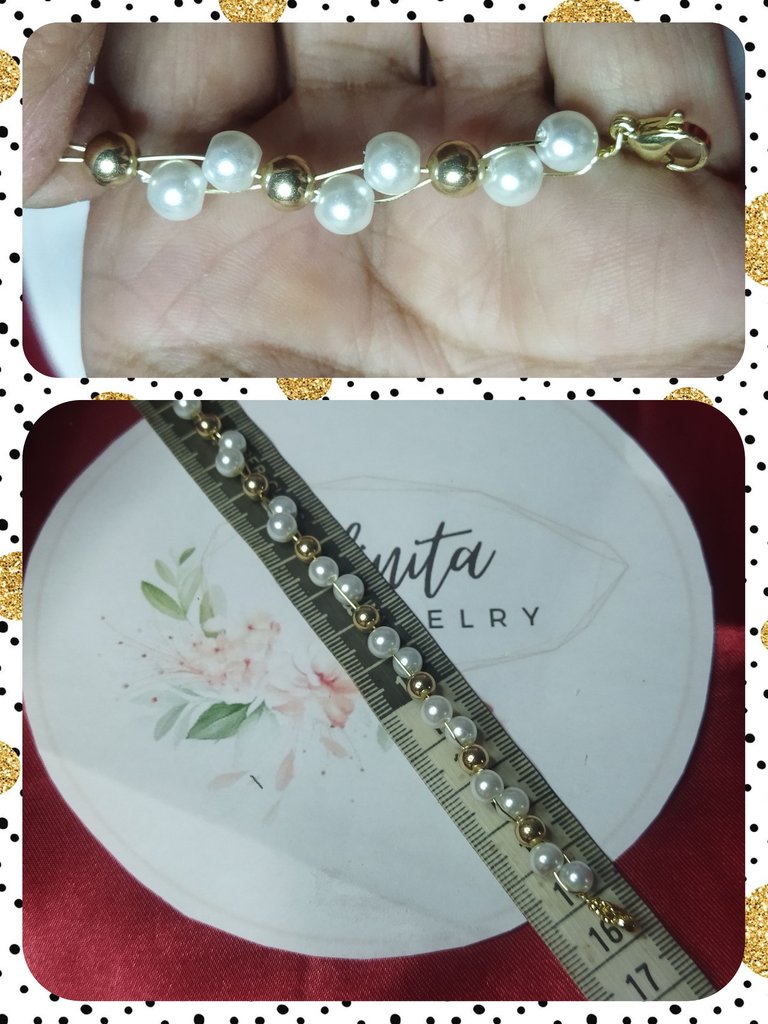
We continue introducing pearls and pellets, without losing the initial order, that is, we will place the pearls in the same position in which we started. One below the left side and the other above the right side or vice versa, depending on how you started, until reaching 16 cm long.
Continuamos introduciendo perlas y balines, sin perder el orden inicial, es decir, las perlas las iremos colocando en la misma posición en que iniciamos. Una abajo del lado izquierdo y la otra arriba del lado derecho o viceversa, según hayas comenzado, hasta alcanzar 16 cm de largo.
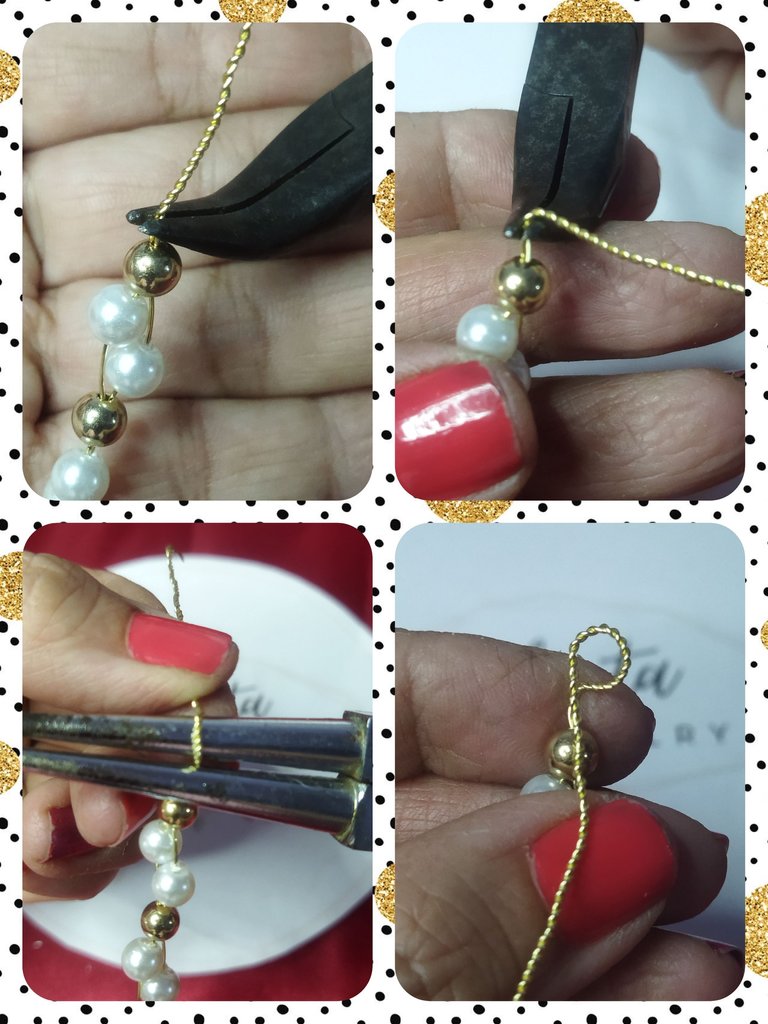
At the end of the pellet, we begin to twist the rest of the wire.
Al final del balín, comenzamos a realizar un entorchado con el resto del alambre.
With the help of the flat tweezers we make a 90º bend and then with the conical tweezers we make a 5 mm ring.
Con la ayuda de la pinza plana realizamos un doblez de 90º y luego con la pinza cónica hacemos un aro de 5 mm.
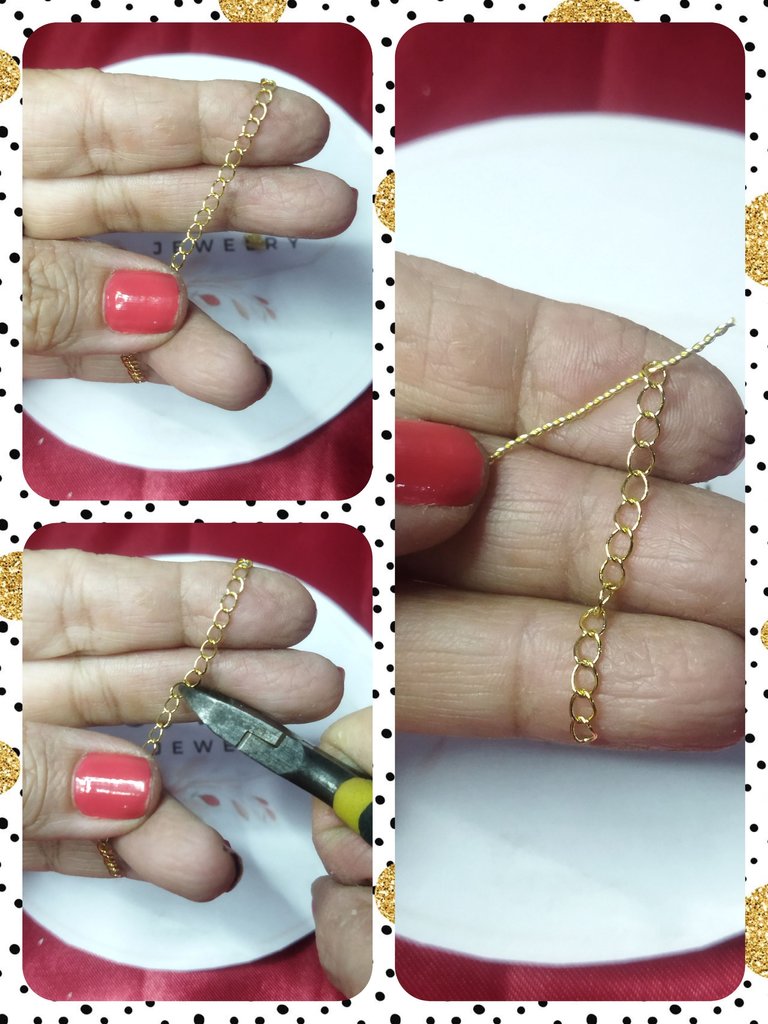
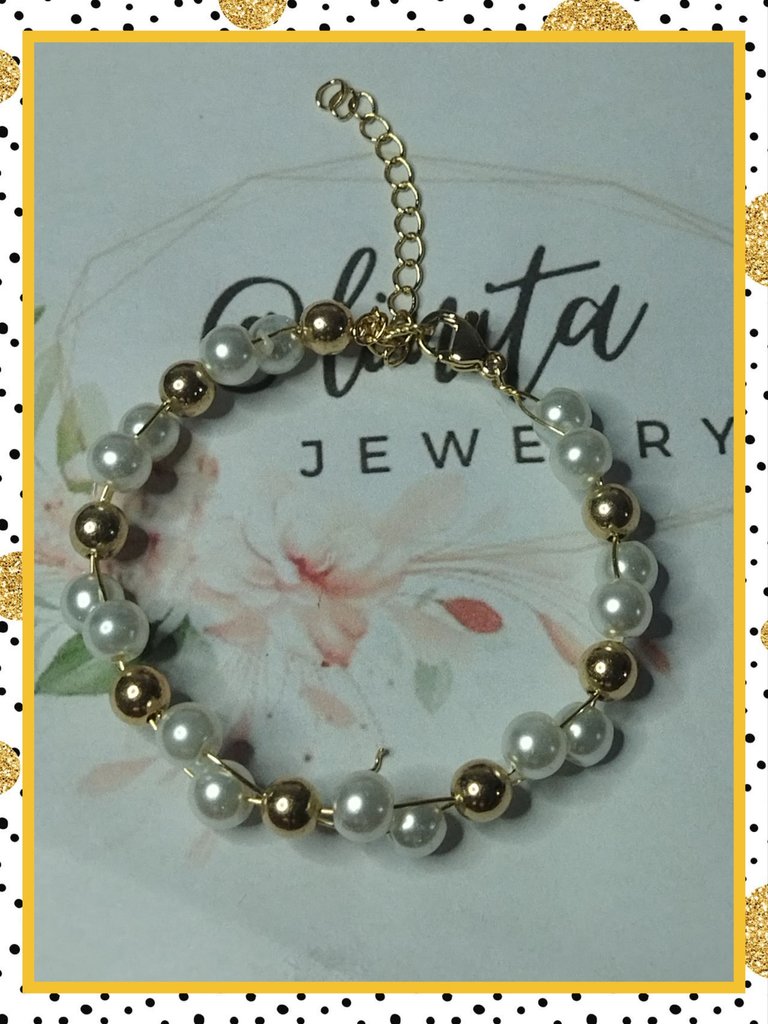
This bracelet measures 17 cm. Made to measure for my wrist but we can lengthen it for a thicker wrist using about 3 cm of chain as an extender and insert it through the ring.
Esta pulsera tiene una medida de 17 cm. Hecha a medida de mi muñeca pero podemos alargar para una muñeca más gruesa utilizando unos 3 cm de cadena como extensor e introducimos por la argolla.
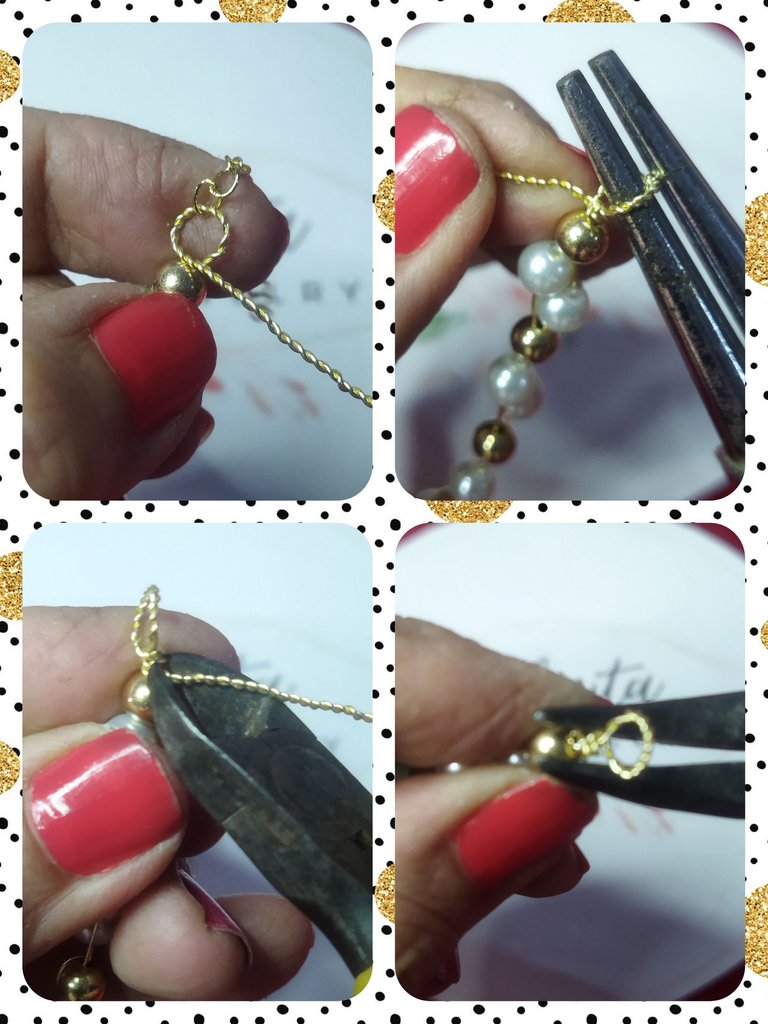
Once again we introduce it through the conical clamp and make a two-turn rosary knot to close the ring. We cut the excess wire and adjust with the flat clamp.
Nuevamente introducimos por la pinza cónica y realizamos un nudo de rosario de dos vueltas para cerrar la argolla. Cortamos el exceso de alambre y ajustamos con la pinza plana.
We close the bracelet and with a cylindrical object according to the size of the bracelet, we mold it.
Cerramos la pulsera y con un objeto cilíndrico acorde al tamaño de la pulsera, moldeamos.
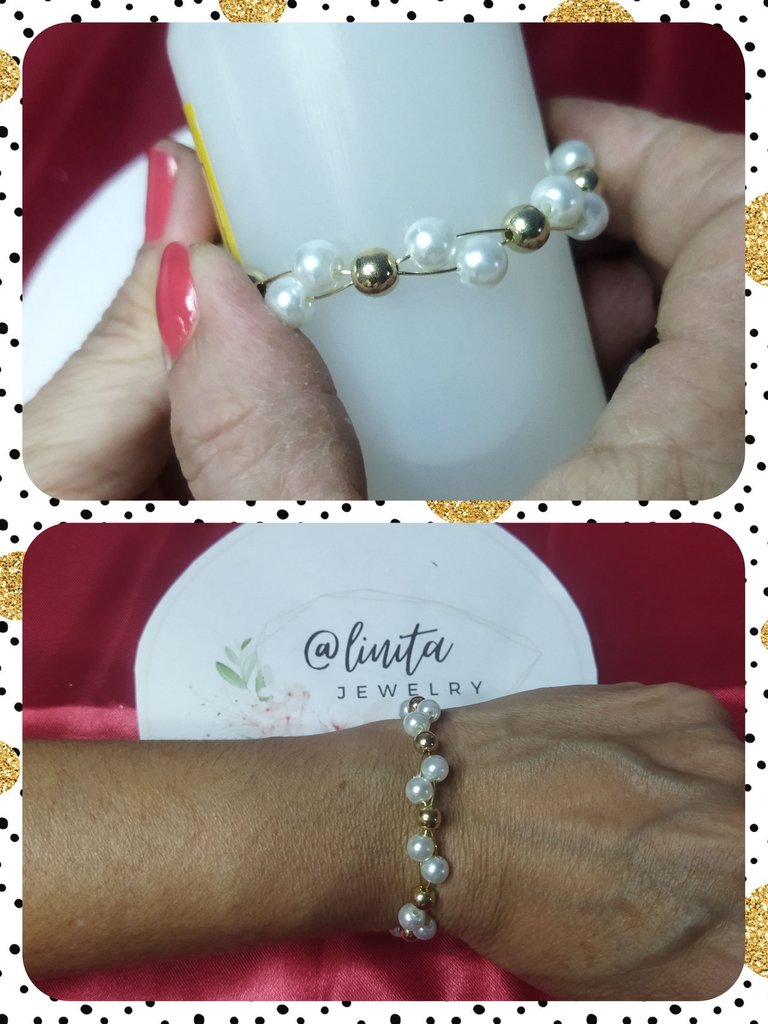
And this is the final result. An elegant and beautiful pearl bracelet.
Y este es el resultado final. Una elegante y preciosa pulsera de perlas.
CHOKER
The making of the necklace is basically the same as the bracelet, with the difference that we are going to make it with 90 cm of #24 wire.
We start by folding the wire in half, insert the secure parrot beak and make a twist of approximately 4 turns.
GARGANTILLA
La realización del collar básicamente es la misma que la pulsera, con la diferencia que vamos a realizarlo con 90 cm de alambre #24.
Iniciamos doblando el alambre por la mitad, introducimos el seguro pico de loro y realizamos un entorchado de 4 vueltas aproximadamente.
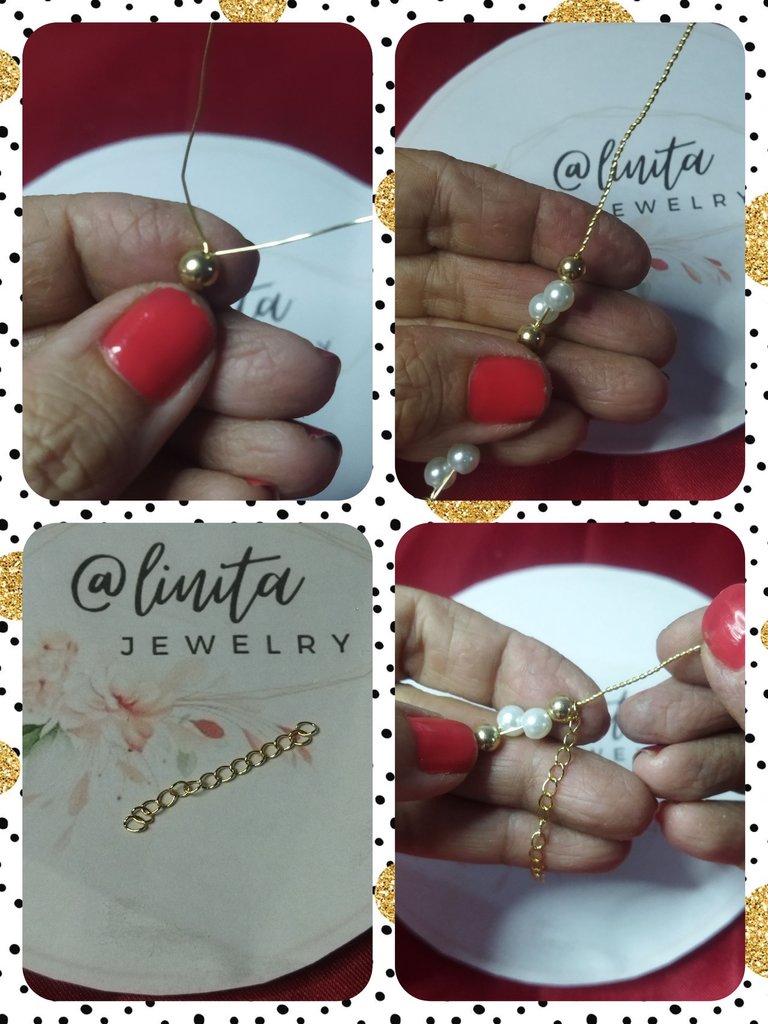
We begin by introducing a 5 mm bead through both wires and then a 6 mm bead through each of the wires, placing one on top of the other and repeating the same as the bracelet.
Comenzamos introduciendo un balín de 5 mm por ambos alambre y luego una perla de 6 mm por cada uno de los alambres, ubicando una encima de la otra y repetimos al igual que la pulsera.
With our tool, the jewelry table, we take the measurement of our necklace, this necklace is a choker type, and it should measure between 36 cm to 38 cm.
Con nuestra herramienta, la tabla de bisutería tomamos la medida de nuestro collar, este collar es tipo choquer, y debe medir entre 36 cm a 38 cm.
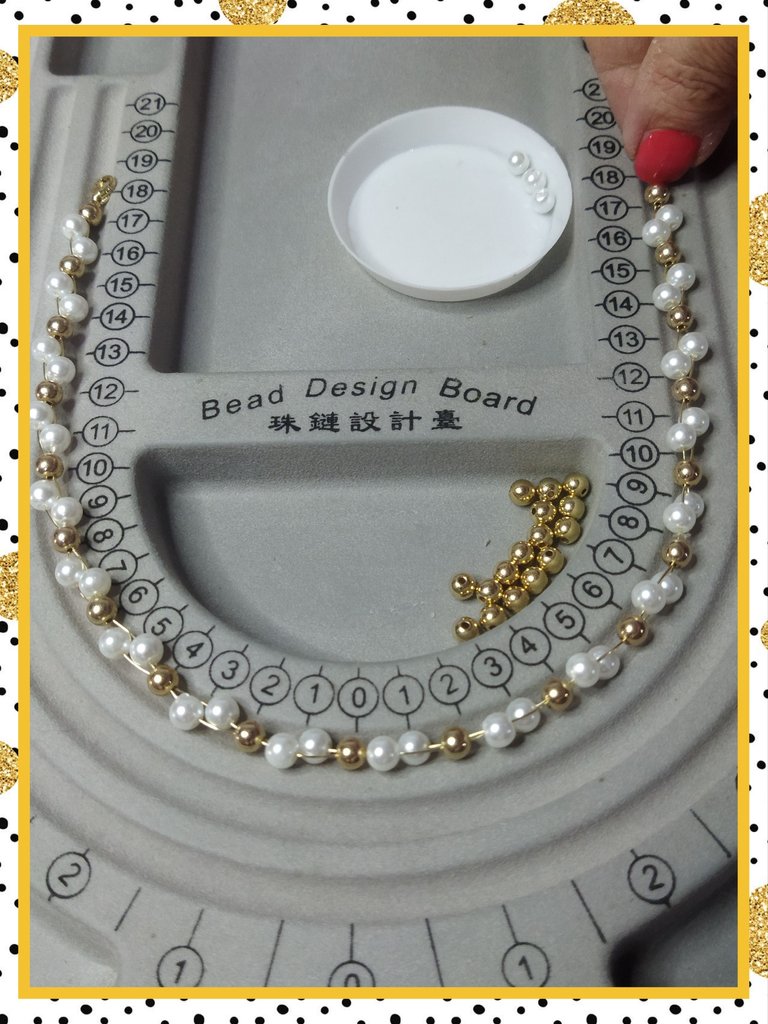
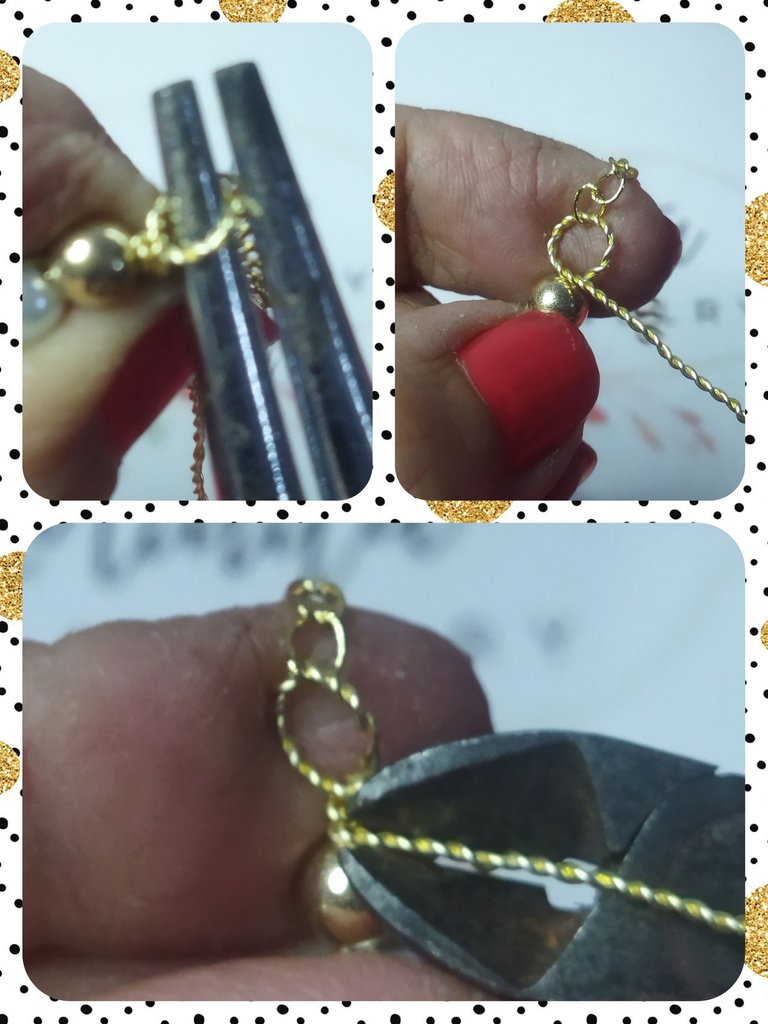
Once the desired measurement is reached, we twist the rest of the wire. We make a 5 cm ring for the closure and introduce 4 cm of extension chain and close with two turns in a rosary knot.
We cut the rest of the wire and polish it with the flat tweezers.
Una vez alcanzada la medida deseada, entorchamos el resto del alambre. Realizamos una argolla de 5 cmm para el cierre e introducimos 4 cm de cadena extensora y cerramos con dos vueltas en nudo de rosario.
Cortamos el resto del alambre y pulimos con la pinza plana.
And this is the final result. A rigid, elegant and beautiful choker.
Y este es el resultado final. Una gargantilla rígida, elegante y preciosa.
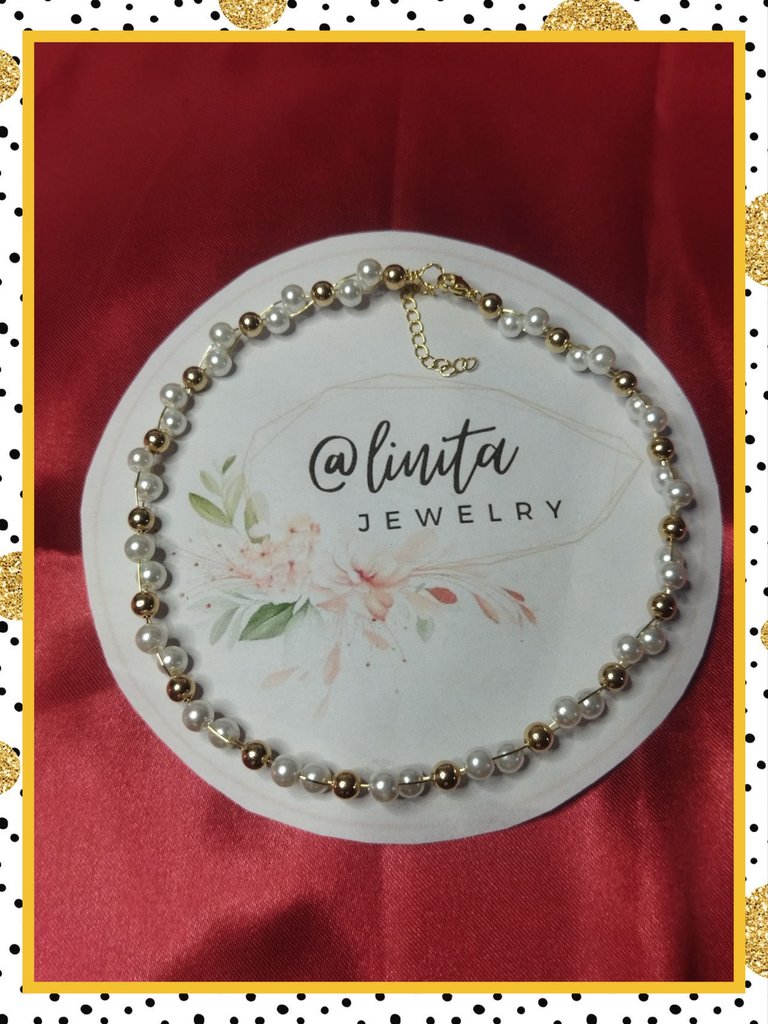
With this beautiful rigid set of choker and bracelet I close this cycle in #Jewelry, hoping that next 2024 will come full of good things for everyone. I wish you with all my heart a prosperous new year and that all the positive energies that I send you through this publication reach everyone. Happy new year.
Con este bellísimo juego rígido de gargantilla y pulsera cierro este ciclo en #Jewelry, esperando que el próximo 2024 venga cargado de cosas buenas para todos. Les deseo de todo corazón un próspero año nuevo y que todas las energías positivas que les envío a través de esta publicación llegue a todos. Feliz Año Nuevo.
