La semana pasada mientras le hacía cariñitos a la bebé de mi amiga, le prometí hacerle y regalarle una pulserita, pues la niña es bien coqueta. A lo que mi amiga me preguntó que por qué no hacía también cadenas.
Me quedé un ratico pensando y mi respuesta fue: "Nunca lo he intentado..." Siento un poquito de temor al trabajar con nylon, pues anteriormente cuando hacía pulseras con ese material, los nudos no me quedaban muy bien y se desataban con facilidad, entonces quedé un poco traumada 😁.
Sin embargo me quedé pensando en las gargantillas y fue entonces cuando intenté probar y hacer una con alambre, siento un poco más de confianza al trabajar con el, ademas que me parece mas flexible y menos fácil de soltar jejeje.
Como siempre este primer ejemplar fue para mi hija 😁, como ella desafía la garantía de los productos puedo ver qué tan resistente es lo que hago jajaja.
Así que sin más dilación les comentaré el paso a paso.
Last week, while I was giving my friend's baby some cuddles, I promised to make and give her a bracelet, because she is very flirtatious. My friend asked me why I didn't also make chains.
I thought about it for a while and my answer was: "I have never tried...". I feel a little bit afraid to work with nylon, because when I used to make bracelets with that material, the knots didn't fit very well and came untied easily, so I was a little bit traumatized 😁.
However I kept thinking about the chokers and that's when I tried to try and make one with wire, I feel a little more confident working with it, plus it seems more flexible and less easy to untie hehehe.
As always this first issue was for my daughter 😁, as she defies the warranty of the products I can see how resistant is what I do hahaha.
So without further ado I will tell you the step by step.
⚪ Mostacilla de colores.
🟡 Perlitas pequeñas.
⚪ Alambre moldeable.
🟡 Trancaderos y argolla.
PROCESO
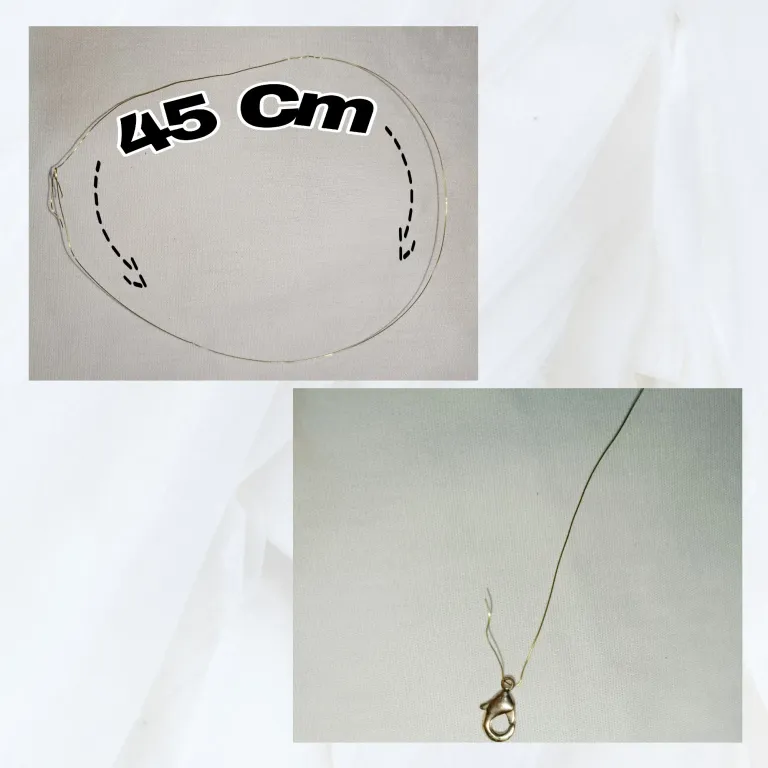
Teniendo en cuenta el ancho del cuello de mi hija, medí 45 centímetros de largo del alambre, quería que quedara más gargantilla o choker, que collar largo.
Una vez medí el largo, le coloqué el Trancadero de un extremo y por lo flexible del alambre fue facil cerrarlo.
⚪ Colored mustard.
🟡 Small beads.
⚪ Moldable wire.
🟡 Trancaderos and ring.
PROCESS
Taking into account the width of my daughter's neck, I measured the length of the wire at 45 centimeters, I wanted it to be more of a choker than a long necklace.
Once I measured the length, I placed the Trancadero at one end and because of the flexibility of the wire it was easy to close it.
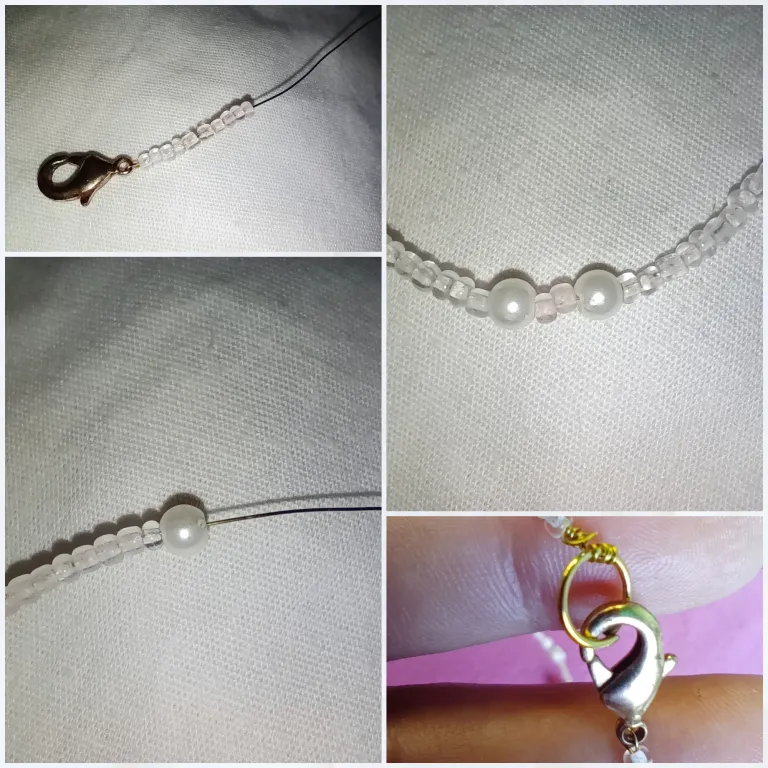
Después de colocar el Trancadero empecé a colocar las Mostacillas. En esta oportunidad le coloqué en color hueso y un salmón muy suavecito, ambos en acabado mate. La diferencia no es muy notable en las fotos, pero si en persona 😁.
Iba alternando entre 5 salmones y 5 color hueso, cada ciertos tramos le colocaba una perlita pequeña para no hacer tan plano el diseño.
Al llegar a la mitad de la gargantilla, coloqué 2 perlas juntas, allí colocaría el dije.
Luego de completar el alambre con las Mostacillas, cerré con una argollita... Pensé que tenía cadenitas para hacer ajustable además de estética la gargantilla pero no tenía 🥹.
After placing the Trancadero I started to place the beads. This time I placed them in bone color and a very soft salmon, both in matte finish. The difference is not very noticeable in the photos, but in person 😁.
I was alternating between 5 salmon and 5 bone color, every few sections I placed a small pearl to not make the design so flat.
When I reached the middle of the choker, I placed 2 beads together, there I would place the pendant.
After completing the wire with the beads, I closed it with a small ring.... I thought I had little chains to make adjustable as well as aesthetic the choker but I didn't 🥹.
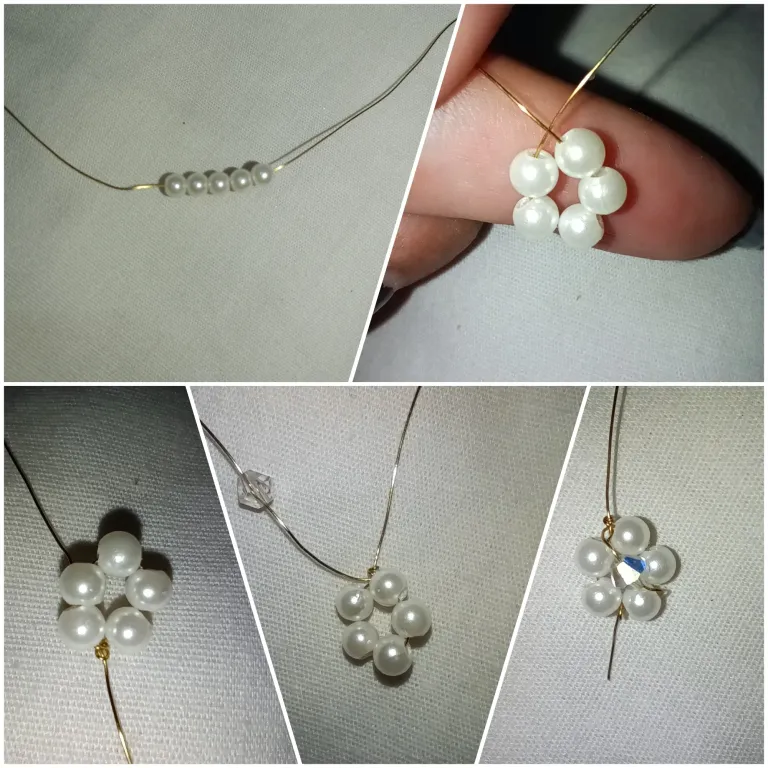
Lo que sigue ahora es hacer el dije para la gargantilla...
Me tomó vários tutoriales aprender una técnica sencilla hasta que por fin encontré una fácil de hacer.
Tome un trozo pequeño de alambre, introduje 5 perlitas, luego formé un círculo con ellas...
Tomé uno de los extremos y lo envolví en el otro extremo. (Sólo le daba vueltas a uno) (Espero estar explicando bien 🙈)
Luego ese extremo al que le di vueltas le coloqué una piedrita de Swarovski y lo pasé por el medio del circulo de las perlitas. Al llegar al otro extremo lo envolví y corté el excedente.
Con el otro extremo de alambre hice el entorchado y la argolla para fijarlo en la gargantilla.
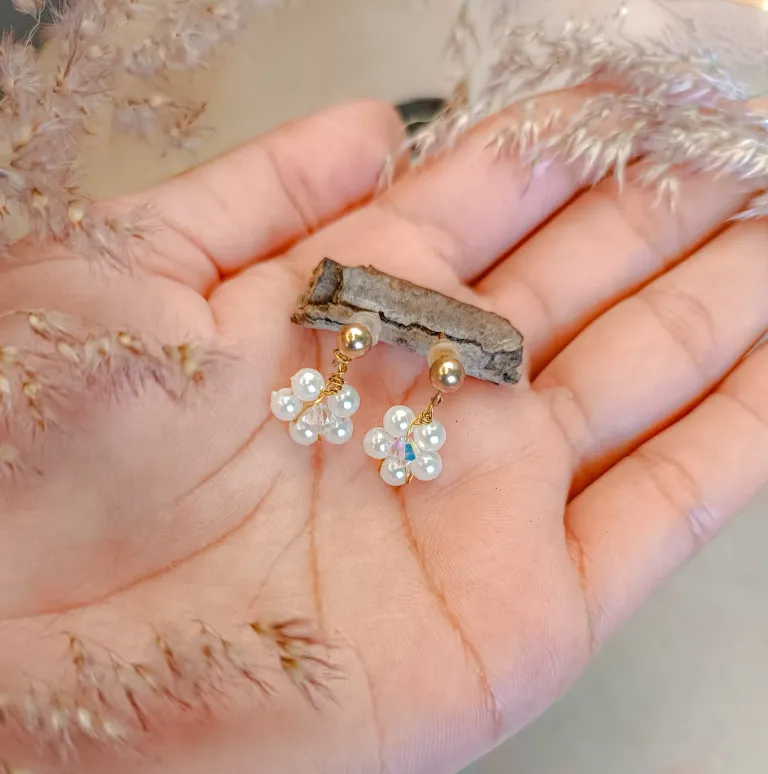
No tenía pensando hacer aretes para esta gargantilla, pero... Quería seguir probando hacer florecitas jejeje.
Repetí el mismo procedimiento con los Zarcillos que con el dije.
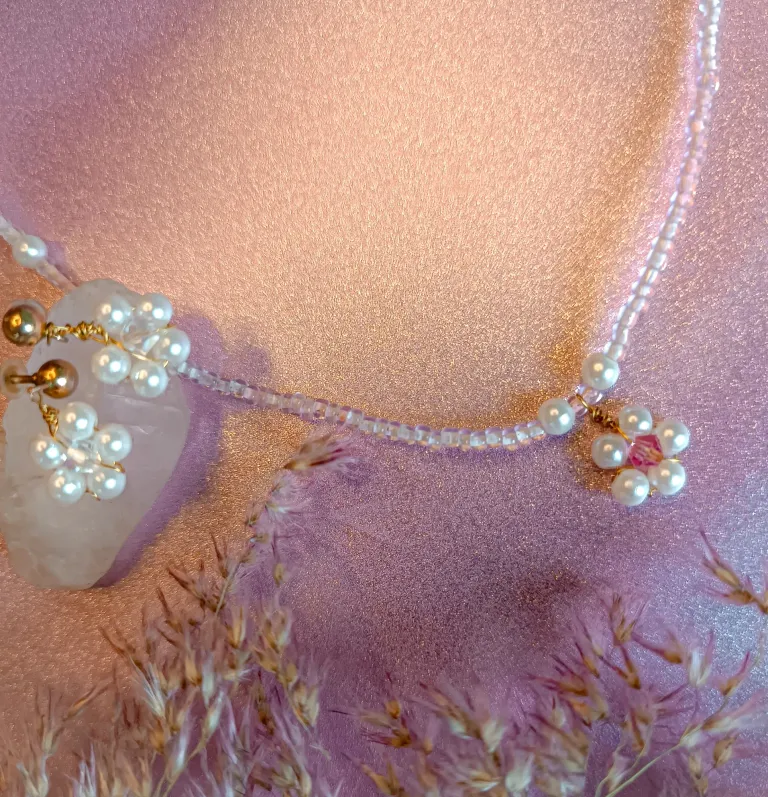
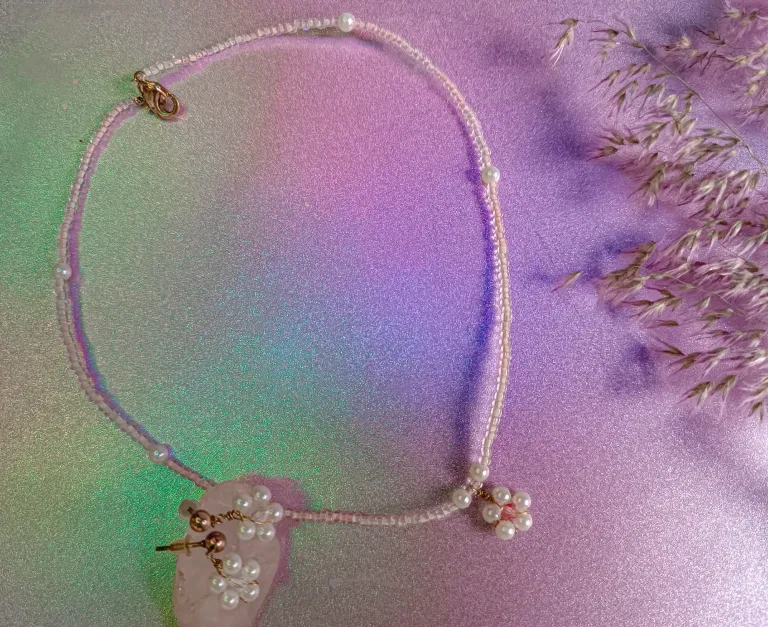
Y finalmente estuvo listo y completo el set.
Next up is to make the charm for the choker....
It took me several tutorials to learn a simple technique until I finally found an easy one to do.
I took a small piece of wire, inserted 5 beads, then formed a circle with them....
I took one of the ends and wrapped it around the other end (I only twirled one) (I hope I'm explaining this right 🙈).
Then that end that I twirled I attached a Swarovski pebble to and ran it through the middle of the circle of beads. When I reached the other end I wrapped it and cut off the excess.
With the other end of the wire, I made the wire wrap and the ring to attach it to the choker.
I wasn't planning to make earrings for this choker, but.... I wanted to keep trying to make little flowers hehehe.
I repeated the same procedure with the earrings as with the pendant.
And finally the set was ready and complete.
RESULTS // RESULTADO
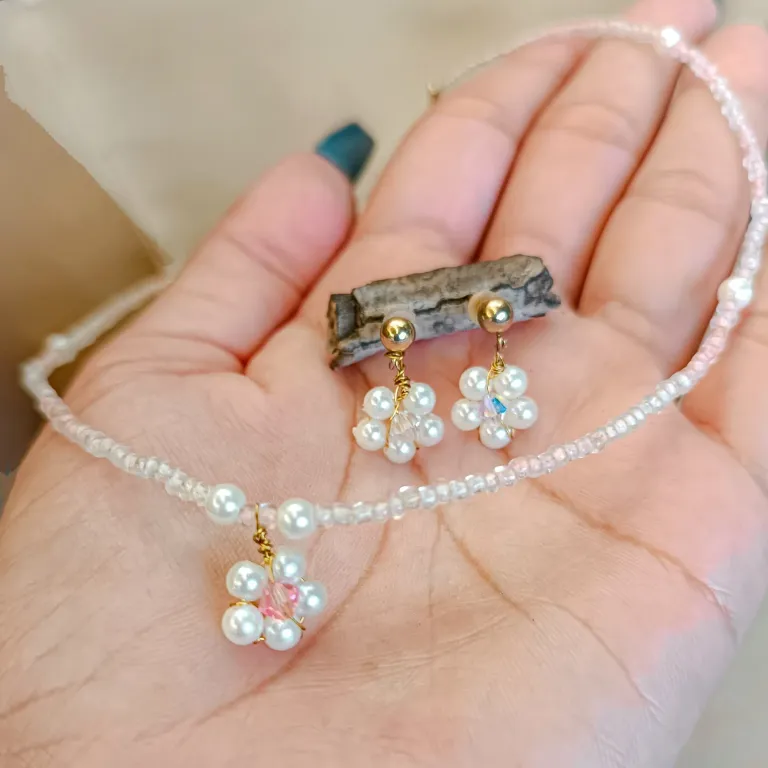
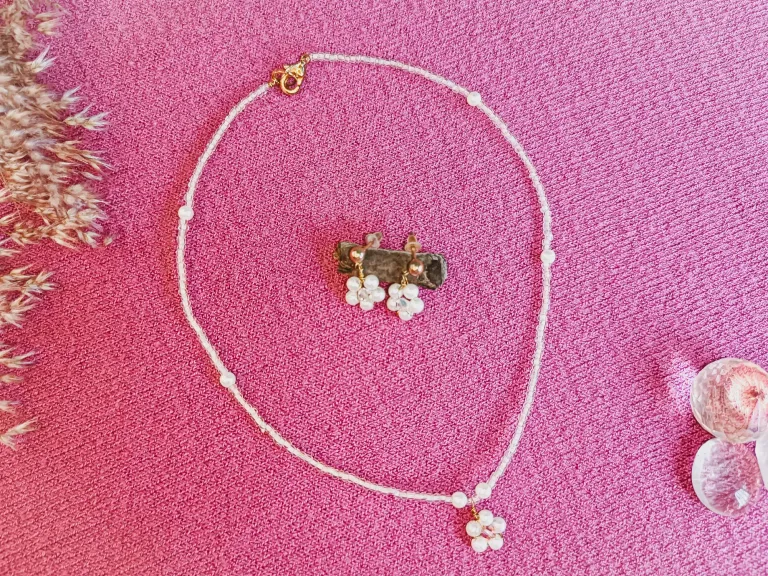
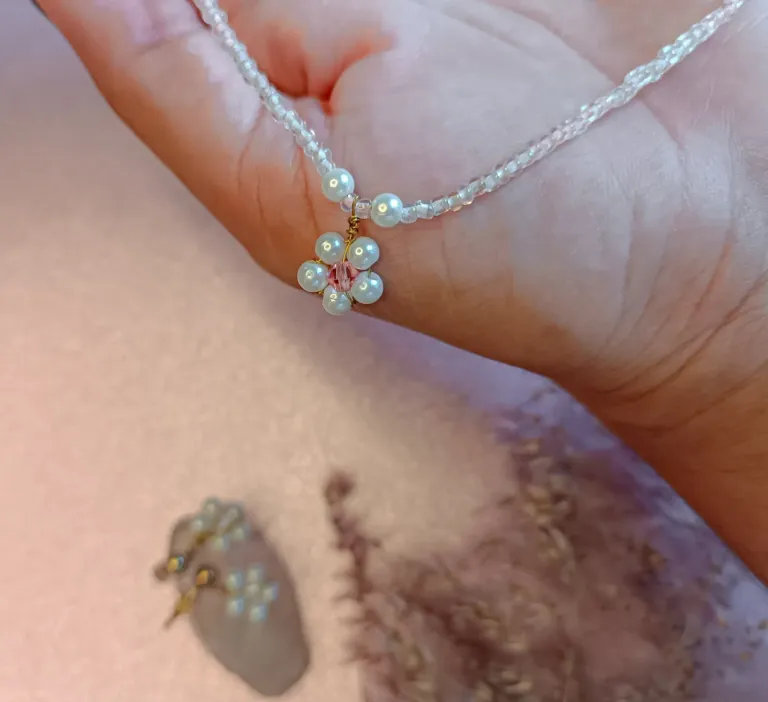
Este set quedó bien Cuchi, delicadito y juvenil. Me gustaría mejorar un poco más en los entorchados... Para eso necesito unas pinzas más finas y unos lentes nuevos 🤣 porque ya no veo bien las cosas chiquitas para pulir los detalles que hacen ver Hermoso al 100% un trabajo.
Me di cuenta de ese fallo porque la cámara me mostró en grande el trabajo, con mis ojos solitos no me di cuenta 🥹😁.
Sin embargo, como es para mí hija... Me siento tranquila. Al hacerlo para la venta trataré de que quede mejor.
Espero les haya Sido útil este pequeño tutorial, me despido con cariño hasta un próximo post!✨
This set was good Cuchi, delicate and youthful. I'd like to improve a little more on the threading.... For that I need finer tweezers and new lenses 🤣 because I can no longer see the little things well to polish the details that make a work look 100% beautiful.
I noticed that flaw because the camera showed me big on the work, with my eyes alone I didn't notice 🥹😁.
However, since it is for my daughter..... I feel calm. In making it for sale I will try to make it look better.
I hope this little tutorial has been useful, I bid you a fond farewell until the next post!✨
For the best experience view this post on Liketu

