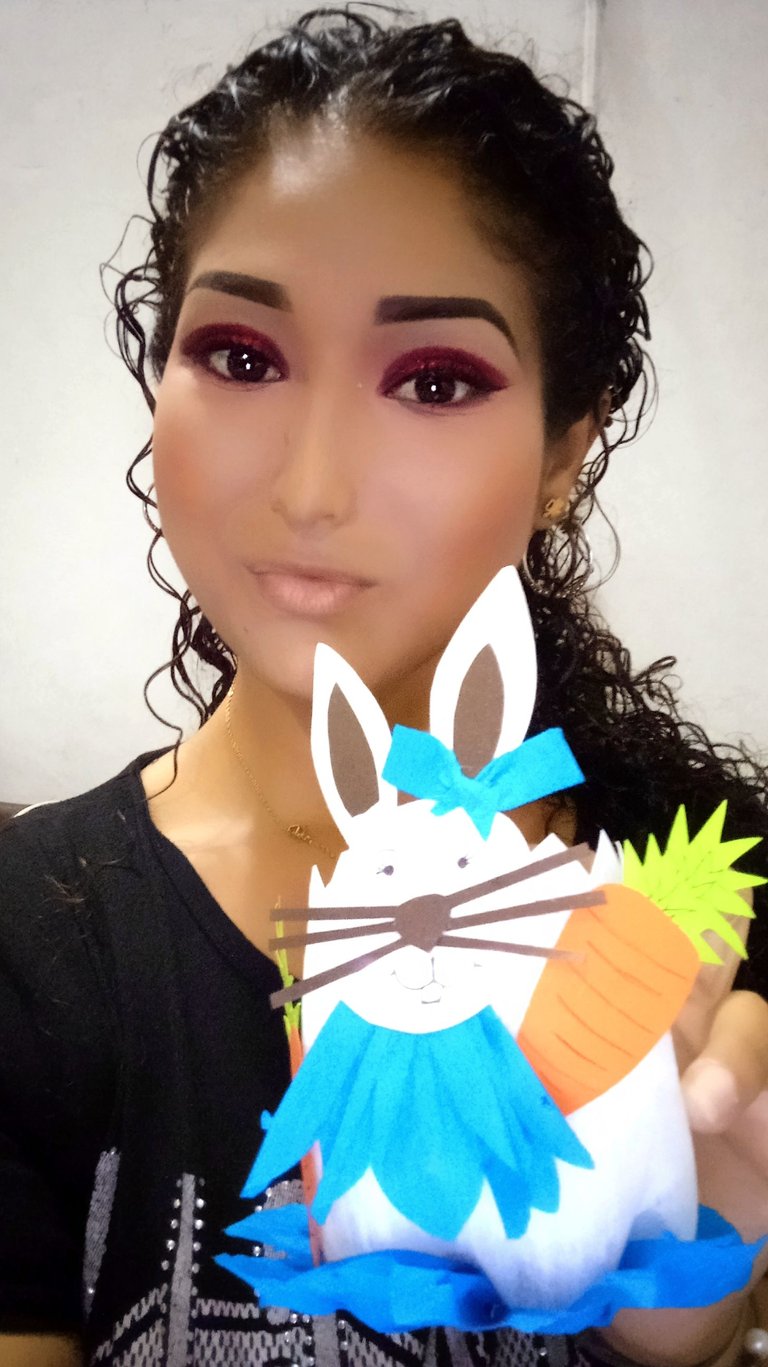
Hello dear friends of this great digital platform called Hive Blog, receive a warm greeting from me, especially the Hive Diy Community, where we are encouraged to stimulate creativity by making beautiful crafts with recycled materials.
Although I already have experience making crafts, this is the first time I upload a post dedicated to this hobby. This time I bring you a Tutorial on how to make a cute Brush Holder with a beautiful motif of a very feminine bunny, ideal for organizing pencils and brushes, or in my case, makeup brushes, all in a few simple steps, with very little material and it will only take you a few minutes to make it. I hope you like it, let's start with the elaboration.
Hola apreciados amigos de esta grandiosa plataforma digital llamada Hive Blog, reciban un cordial saludo de mi parte, especialmente la Comunidad de Hive Diy, donde se nos anima a estimular la creatividad elaborando lindas manualidades con materiales reciclados.
Aunque ya tengo experiencia realizando manualidades, es la primera vez que subo un post dedicado a este hobbie. En esta oportunidad les traigo un Tutorial de como realizar un lindo Porta Brochas con un hermoso motivo de conejita muy femenino, ideal para organizar lápices y pinceles, o en mi caso, las brochas de maquillaje, todo en unos simples pasos, con muy poco material y además solo te tomará unos pocos minutos realizarlo. Espero les guste, empecemos con la elaboración.
✂️Materials we are going to need:
🖌️A plastic soda container.
🖌️White cold paint ( or whatever you have on hand).
🖌️Bench, orange, and brown construction paper.
🖌️Crepe paper (I used blue but you can use whatever color you have).
🖌️Liquid silicone.
🖌️Pencil.
🖌️Scissors.
🖌️An exacto.
✂️Materiales que vamos a necesitar:
🖌️Un envase de refresco de plástico.
🖌️Pintura al frío blanca ( o la que tengan a la mano)
🖌️Cartulina banca, naranja, y marrón
🖌️Papel Creepe (yo use azul pero pueden usar el color que tengan)
🖌️Silicón líquido.
🖌️Lápiz.
🖌️Tijeras.
🖌️Un exacto.

✂️STEP BY STEP✂️ /// ✂️PASO A PASO✂️
🖌️Step 1.
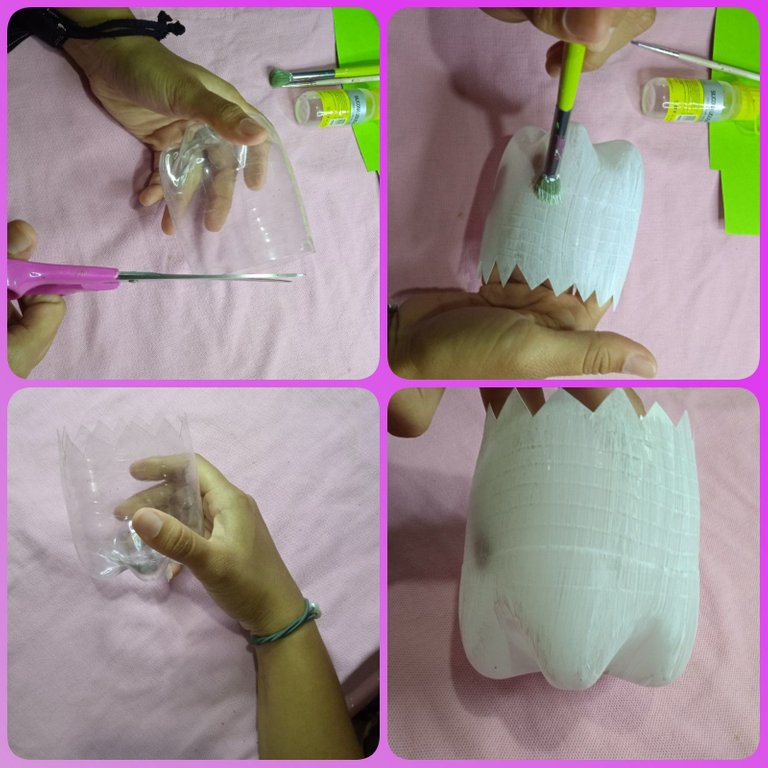
The first thing I did was to cut the plastic container to the height of 15 cm, then cut eo edge with the scissors and giving it a spiky shape. The next thing I did was to paint the container with white paint, you can use the color you like or whatever you have at hand, remember that the idea is to use what you have at home.
🖌️Paso 1
Lo primero que hice fue cortar el envase de plástico a la altura de 15 cm, luego corte eo borde con la tijeras y dandole una forma de puntas. Lo siguiente que hice fue pintar el envase con oa la pintura blanca, tu puedes usar el color que más te guste o el que tengas a la mano, recuerda que la idea es usar lo que tengas en casa.
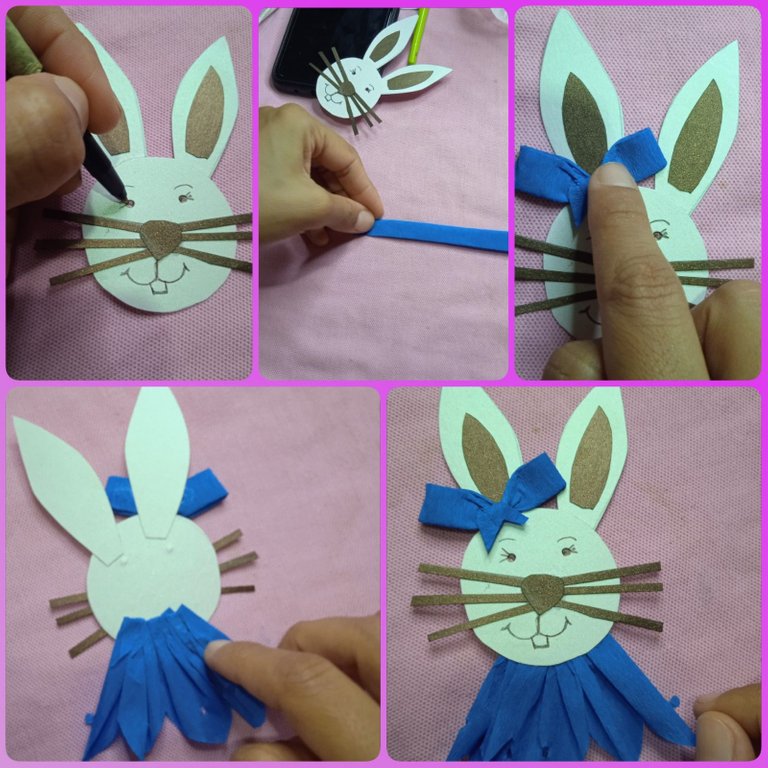
🖌️Step 2.
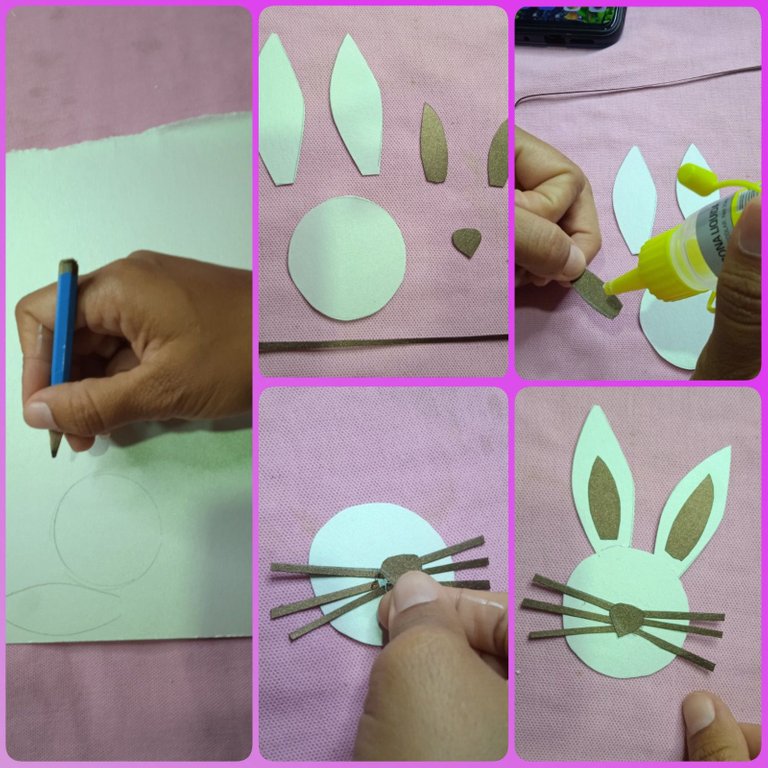
Take the white cardboard and with a mold I cut out the shapes to make the bunny, a circle and 2 little ears, then with the brown cardboard I cut out the whiskers, the inside of the ears and the nose of the bunny. Now with the liquid silicone I proceed to glue the parts to shape the bunny.
🖌️Paso 2
Tome el la cartulina blanca y con un molde saque las formas para hacer la conejita, un círculo y 2 orejitas, luego con la cartulina marron recorté los bigotes, el interior de las orejas y la nariz de la conejita. Ahora con el silicón liquido procedo a pegar las partes para darle forma a la conejita.
🖌️Step 3
After gluing the parts, we paint the bunny's eyes and mouth. Then we continue with the dress and the bow that we will make with Creepe paper, you know, you can use the color you like.
🖌️Paso 3
Después de pegar las partes, pintamos los ojitos y la boca de la conejita. Luego seguimos con el vestido y el lazo que lo haremos con el papel Creepe, ya saben, pueden usar el color que mas les guste.
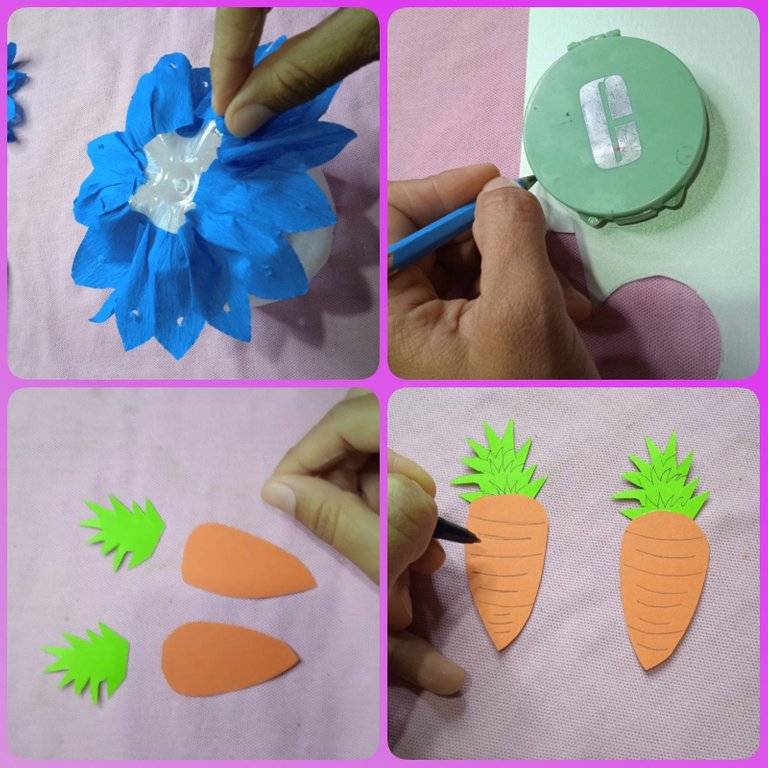
🖌️Step 4
To decorate the brush holder we glue crepe paper on the bottom. With a circle mold we cut what will be the base of the brush holder. With the orange and green cardboard cut out 2 shapes of carrots and their leaves, then glue and paint them, they will also be part of the decoration of the container.
🖌️Paso 4
Para adornar el porta brochas en la parte de abajo le pegamos papel crepe. Con un molde de circulo cortamos lo que sera la base del porta brochas. Con la cartulina naranja y verde recorte 2 formas de zanahorias y sus hojas, luego las pegue y pinte, están tambien seran parte del adorno del envase.
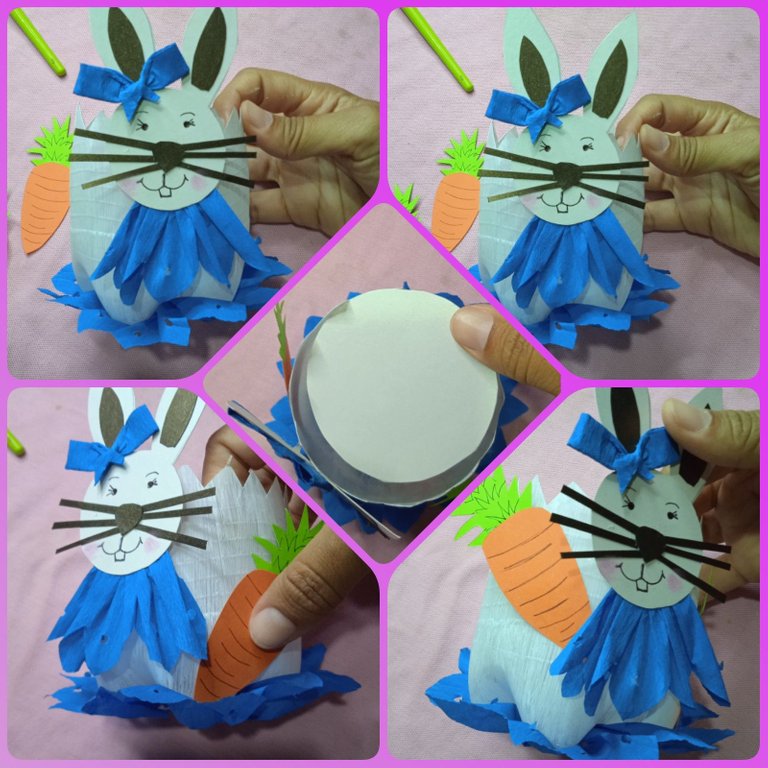
🖌️Step 5
To finish with the elaboration of this cute Brush Holder, I glued to the container, the bunny, the carrots and the base that goes inside, and we are done.
🖌️Paso 5
Para finalizar con la elaboración de este lindo Porta Brochas, pegué al envase, la conejita, las zanahorias y la base que va en el interior, y ya hemos terminado.
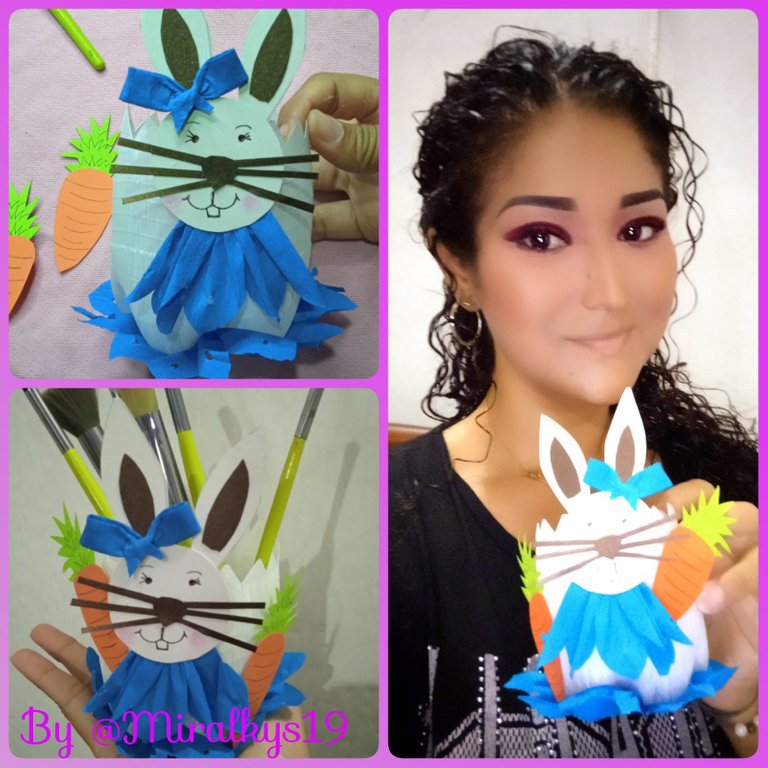
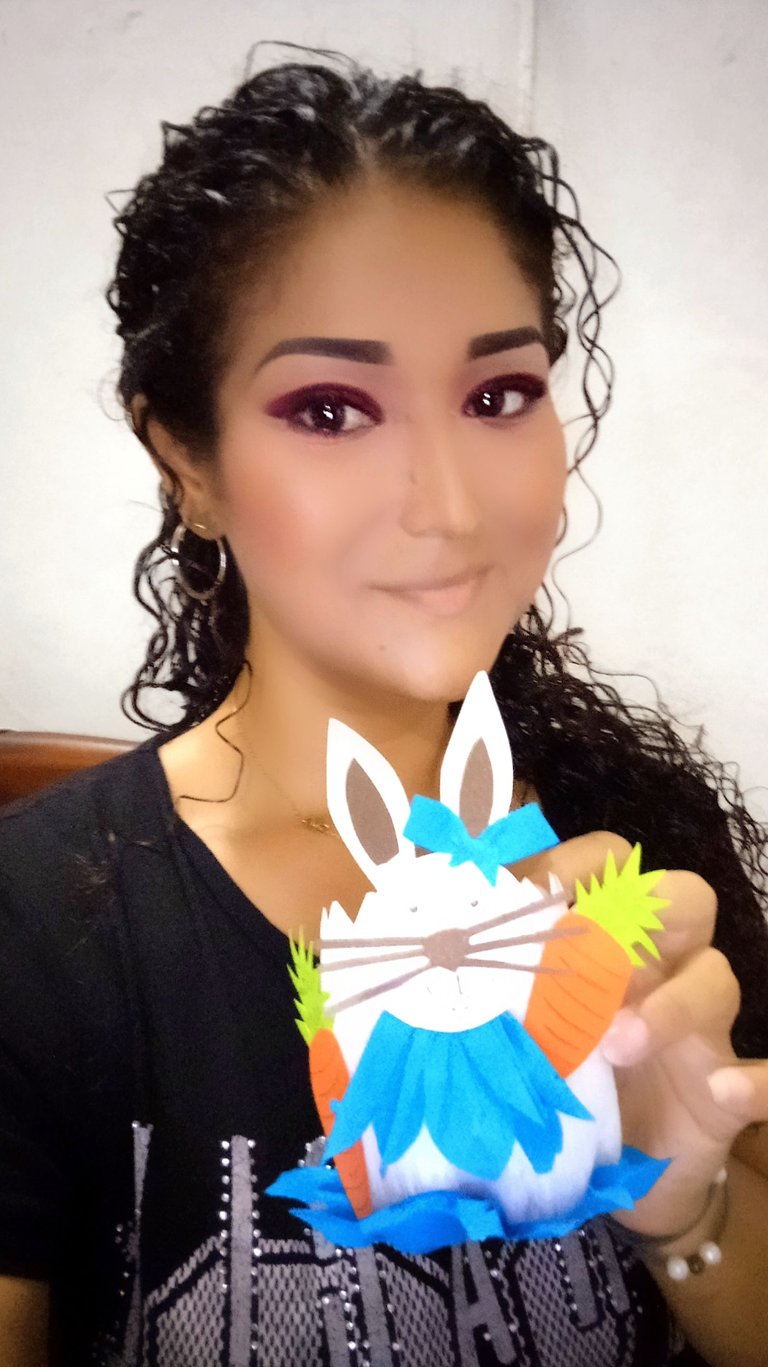
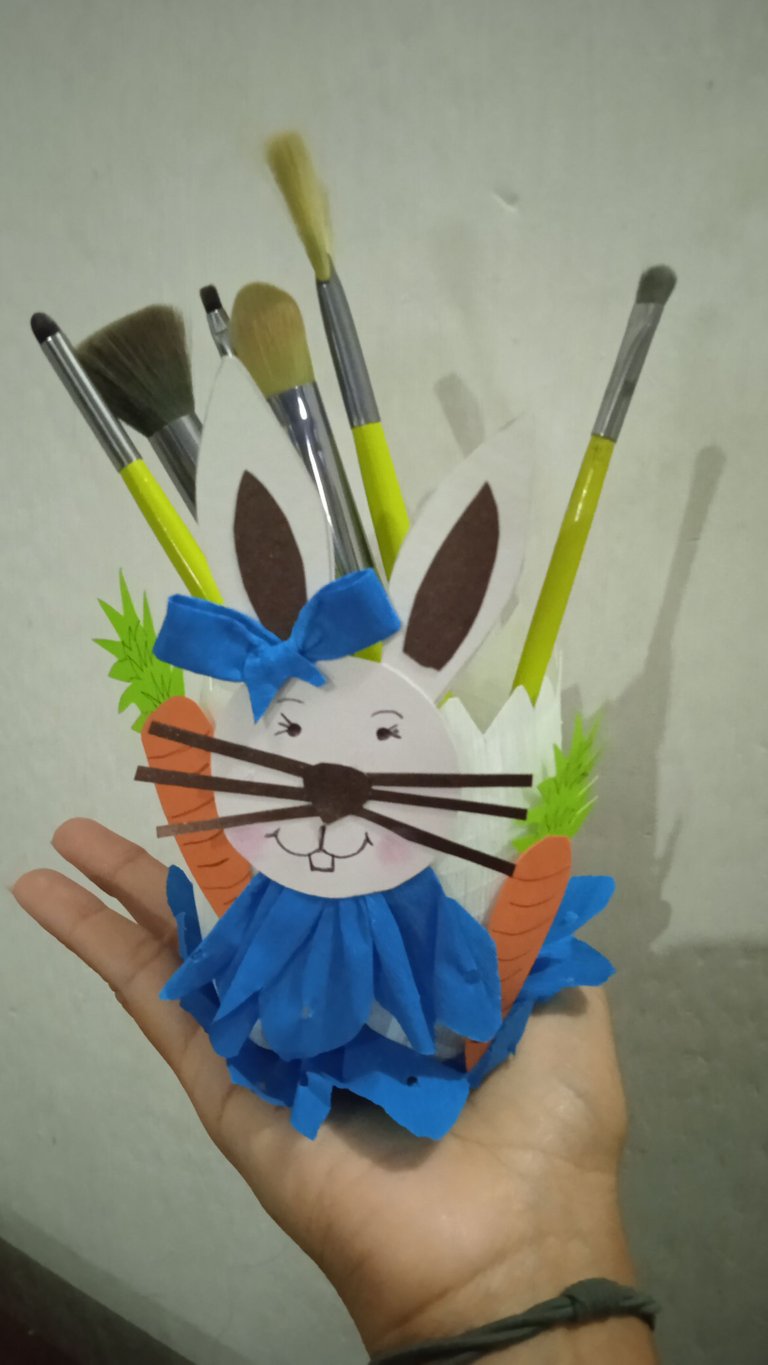
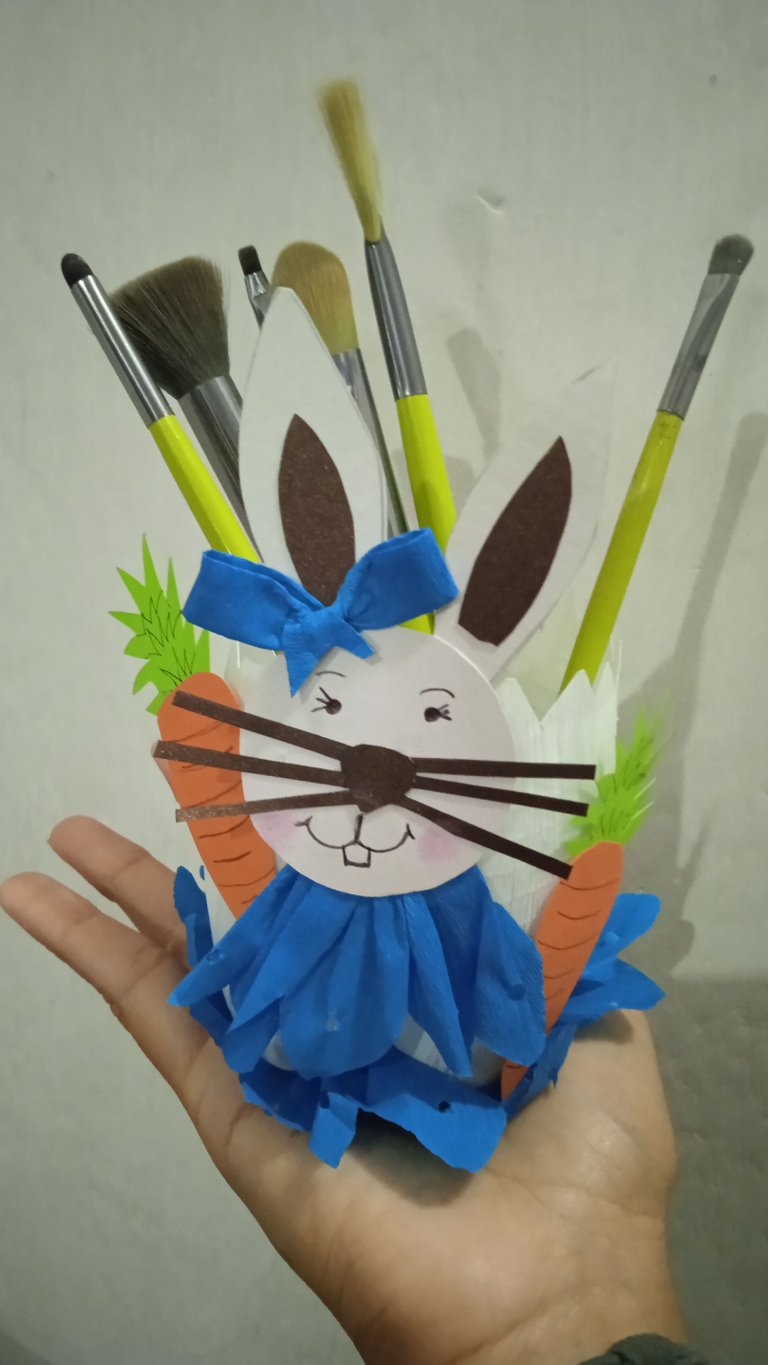
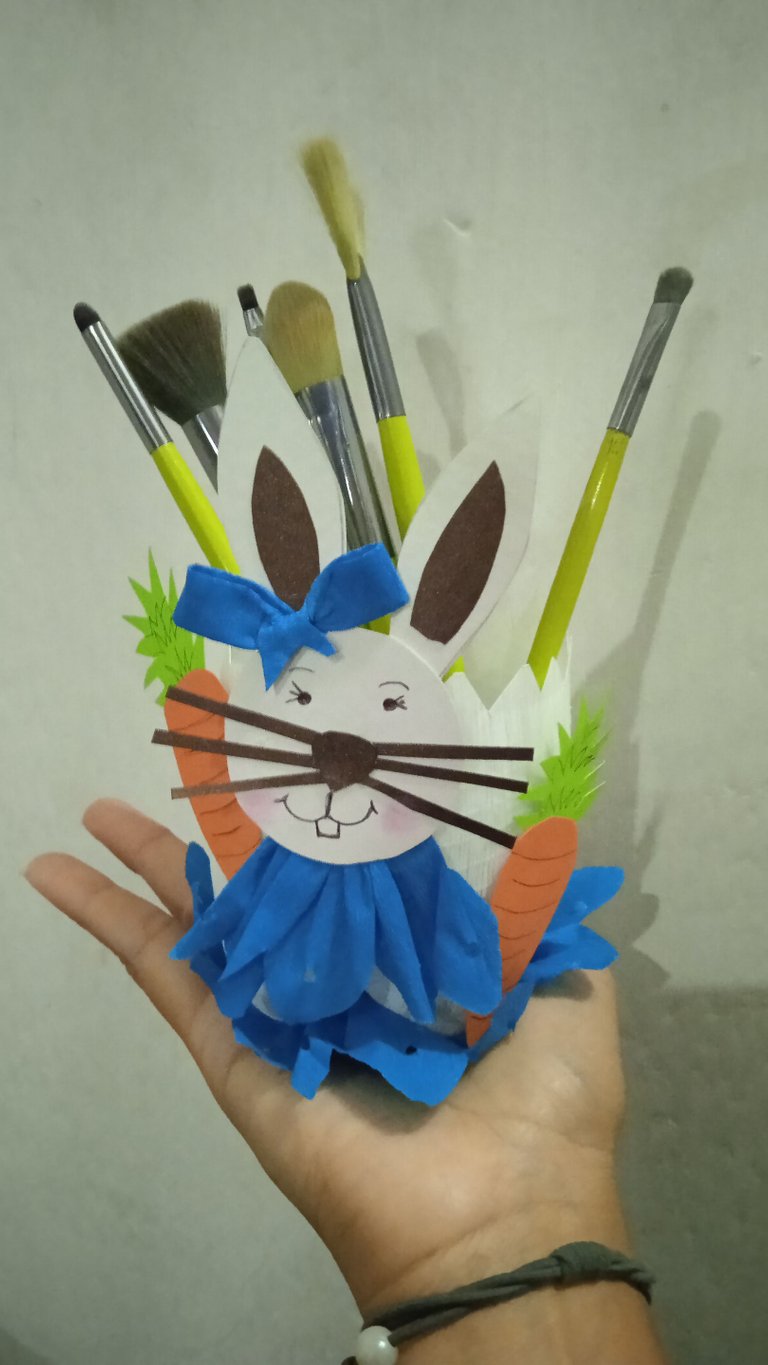
This is the final result, this practical decorated container that can be used to store pencils, costume jewelry or makeup brushes, which is the use I am going to give it.
I hope you liked it and you can make it, as you can see it is super simple and quick to make, plus it will be very useful to organize your pencils and brushes.
Este es el resultado final, así quedo este practico envase adornado que puede ser utilizado para guardar lápices, bisutería o Brochas de Maquillaje, que es el uso que yo le voy a dar.
Espero que les haya gustado y puedan realizarlo, como ven es super sencillo, y rapido de elaborar, además te servirá de mucho para organizar tus lápices y brochas.
Well my dear friends, once again thank you for visiting my blog and for the support you give me through your votes and comments. I hope I can continue to bring you more craft posts like this one. I say goodbye until a next opportunity, you are loved beautiful 🤗💖.
Bueno mis queridos amigos, una vez mas Gracias por visitar mi Blog y por el apoyo que me dan a través de sus votos y comentarios. Espero poder seguir trayendoles más post de manualidades como éste. Me despido hasta una próxima oportunidad, se les quiere bonito 🤗💖
Translator DeepL. / Traductor DeepL.
The photos were taken with my Xiaomi Redmi 9C phone and are for the exclusive use of Hive Blog.
/// Las fotos fueron tomadas con mi teléfono Xiaomi Redmi 9C y son de uso exclusivo para Hive Blog.