In part 1 of this "$0 to $10 crypto challenge" (now $0 to $100) blog series I used the Coinbase learn program to earn $10 in one day, by simply learning about blue-chip crypto tokens. Now, for part 2 we'll be learning how to setup a Metamask wallet on the Polygon Blockchain! Other than reading time, the whole process should take you about 3 minutes.
For today's lesson you don't need to have completed part 1, however it is suggested for better learning. In part 3 we'll be using the funds we earned in part 1, and moving them to Metamask. From there we will be able to start learning about DeFi, and generating a yield from assets that we already own.
Now let's jump in to today's lesson!
Why Take Self-Custody of Your Crypto?
Taking self-custody of your crypto assets can be nerve racking at first, however, it is a necessary step to learn the true utility of different cryptocurrencies. Until you move them to your own private wallet, the tokens Coinbase gave you in part 1 of this series are technically still owned by Coinbase. As the old crypto ad-age goes, "not your keys, not your coins". This is the similar to how banks operate. Though it's not widely known, once you deposit your money into a bank it's technically no longer your money.
Leaving your assets on an exchange like Coinbase, which is centralized, can result in the assets being lost should the exchange suffer from a hack or liquidity crunch, like the recent FTX crisis.
So, even though the thought of losing your wallet keys and thus the access to your crypto, can be scary, at least you're the one in the driver's seat.
How to Create a Metamask Wallet
This tutorial will teach you how to create a metamask walet. Metamask is a self-custody wallet that works as a browser extenson and a great next step for new blockchain users wishing to move funds from a centralized exchange.
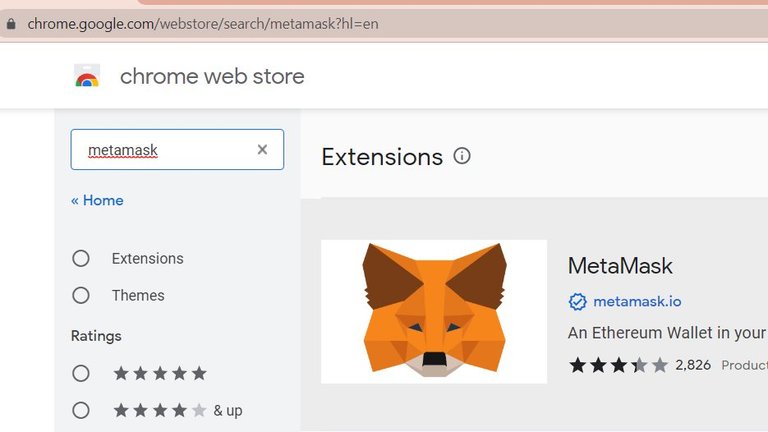
To download the extension, go to the Chrome Web Store and search for "Metamask".

Click on the "Add to Chrome" option.
Once the extension has been installed in your browser, you'll see an orange fox icon in the top right corner of your browser. You may need to pin the extension to the browser to see it, in some cases.
The next part will require you to save sensitive information.
Once you are ready with a pen and paper, or whatever you'll use to save the information, click on the fox icon. This will open Metamask.
The first time you open Metamask you'll be asked to create a wallet (or import your keys if you already have one), which will include choosing a password. This password is different from the "seed phrase" you'll get in the next step, but still very sensitive information that you should not share with anyone.
The next step will show you your seed phrase. A seed phrase is a series of 12 words that can be used to restore your wallet should you forget the password you just created, or should you decide to add your wallet to another device or browser. It is highly important that you never give someone access to your seed phrase! Save your seed phrase somewhere safe and secure.
If someone gets access to your seed phrase they will have access to your entire account. The same can not be said for your password, which can be different on each device or browser, but will still grant access to your account once you've imported your seed phrase. Hopefully by now you've grasped the importance of your seed phrase. DON'T SHARE IT! DON'T LOSE IT!
After you save your seed phrase somewhere, continue by clicking the button reading "I've copied it somewhere safe" (or whatever it may have changed to). This will take you to your Metamask dashboard - essentially the home screen of your wallet.
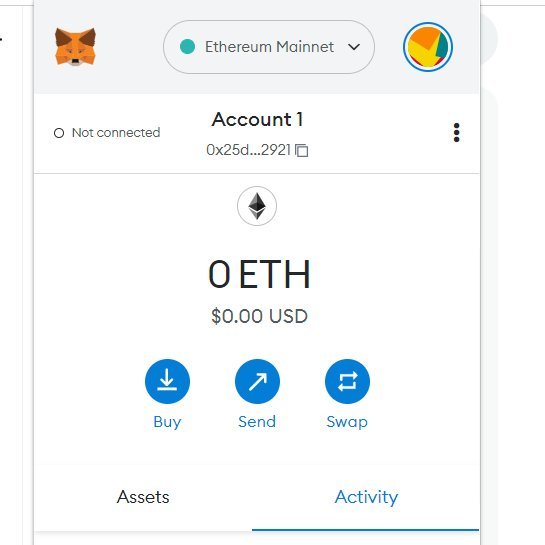
At this point you've successfully created a Metamask wallet on the Ethereum blockchain!
How To Add Polygon Blockchain To Metamask Wallet
If you're following along with my $0 to $100 Crypto Challenge, I'm using the Polygon blockchain for the next steps in the series. To add Polygon visit Chainlist.org and search for Polygon. Click on the "add to Metamask button, which will trigger a Metmask popup asking if you want to approve adding Polygon to your wallet's networks list. Click the "approve" button at the bottom of the popup and Polygon will be added to your list of networks.
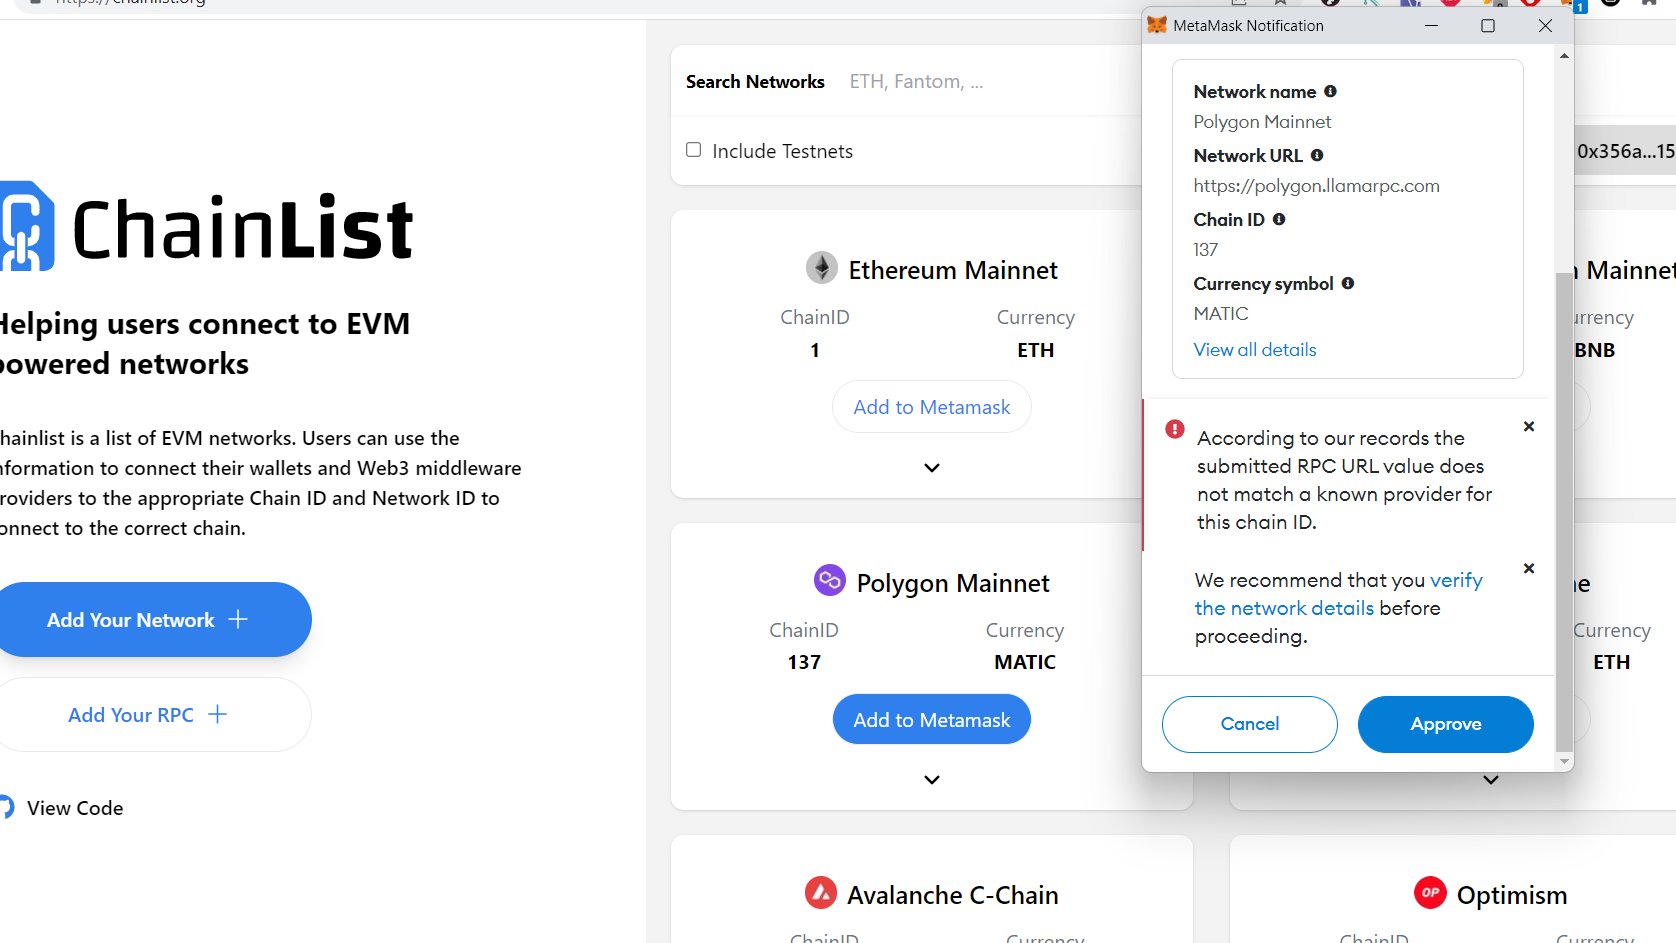
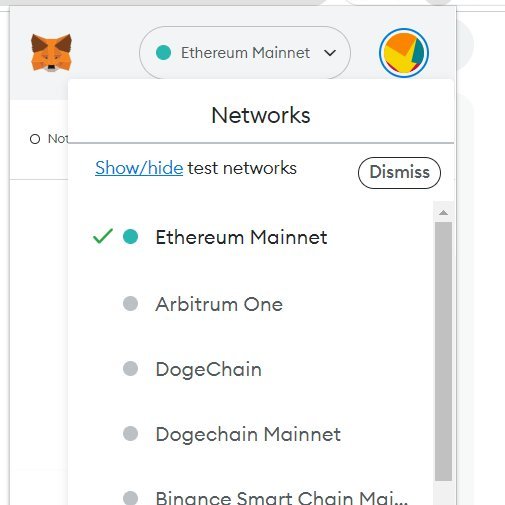
To switch between blockchain networks, for example switching between Polygon or Ethereum, click the dropdown at the top center of your metamask wallet and select the network you want to switch to. In the image you'll notice I've added many more blockchains other than just Polygon.
Now, you're all set! You should be able to create a Metamask wallet and add different blockchains to it.
Click here to view Part 1 of our $0 to $10 Crypto Challenge where we earned $10 from Coinbase, which can now be sent to a Metamask wallet.
Posted Using LeoFinance Beta