Captura de Pantalla

Saludos y presentación:
Saludos #Linuxeros, miembros de la comunidad de #Linux&SoftwareLibre, y saludos atoda la comunidad de #Linux en #Hive y @linux-software, bienvenidos a un nuevo post de #ViernesDeEscritorio, 10 de enero del 2025.
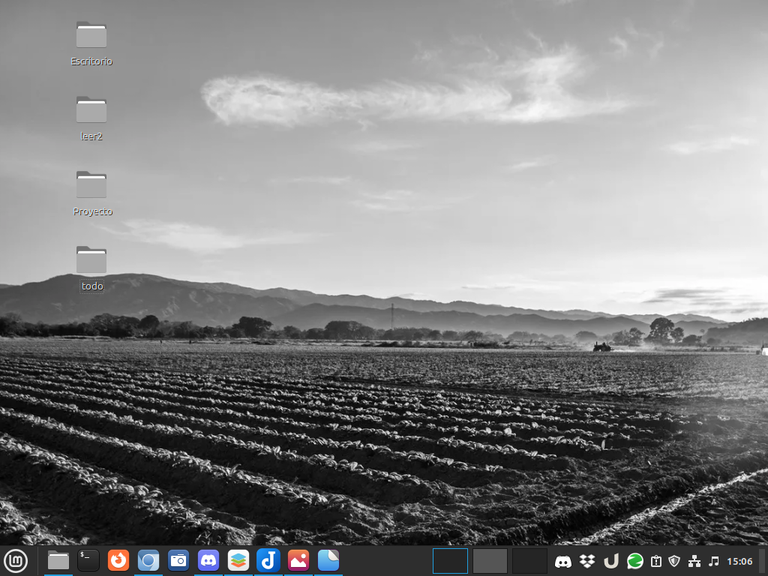
Yo sigo usando mi apreciado Linux Mint 22 "Wilma", con escritorio Cinnamon, la única diferencia que hago en esta presentación del escritorio hoy, es que esta vez no coloqué ninguna aplicación, ni abrí la terminal, ya que quería mostrar la foto que tengo como fondo de pantalla.
Esa foto cuando la vi, me recordó una imagen icónica de la película “Las Uvas de la Ira”, pero la gran diferencia, es que esta imagen es de territorio venezolano. Específicamente de Montalban en el Estado Carabobo, y esta tomado por el compañero de #hive, @jlinaresp, quien tiene un grupo de excelentes fotos, las cuales recomiendo ver a todos los amantes de la fotografía.
Cómo colocar y cómo quitar la protección de lectura a una memoria USB:
Cuando nosotros tenemos datos importantes en una memoria USB y los queremos proteger, podemos colocar en esa memoria el atributo de solo lectura a través de la terminal. Eso lo se hacer el #Linux y cómo comenté, eso se suele hacer para proteger los datos. Y cuando hacemos ese procedimiento, para respaldar los datos, podemos tener acceso y ver los datos de la memoria, pero no podemos ni modificar los datos, ni podemos, hacer el formateo de la memoria.
Colocando la protección de lectura a una memoria USB:
- Lo primero que debemos hacer es conectar la memoria USB, y después de conectarla, debemos encontrar el nombre del dispositivo usando el comando “lsblk” o el comando “fdisk -l”

Captura de Pantalla
- Ahora que sabemos que nuestro dispositivo es “/dev/sdc1. Vamos a desmontar la nidad y para hacerlo usamos el siguiente comando “sudo umount /dev/sdc1” y al hacerlo nos va a solicitar la clave de root y la colocamos.

Captura de Pantalla
- Ahora cambiamos los permisos y ponemos nuestra memoria USB solo para lectura, con el siguiente comando, “ sudo hdparm -r1 /dev/sdc1”

Captura de Pantalla
- Así colocamos nuestra USB, con permisos para solo lectura, y de esa forma ano se podrán ni borrar, ni formatear, ni escribir, ni copiar, nada en la USB.

Captura de Pantalla
- Para volver a colocar la USB normal y quitarle la protección de lectura, usaremos el siguiente comando, “sudo hdparm -r0 /dev/sdc1” y al hacerlo, la terminal mostrará el número (0) y el estado del perimsos contra lectura en “off”.

Captura de Pantalla
Puntos a tomar en cuenta:
No todas las USB, soportan esta función. Así que si vas a poner un dispositivo como solo lectura y probar, has un respaldo del contenido antes de hacer la prueba del formateo del dispositivo. También puedes probar intentando copiar o colocar archivos en la USB, y te aparecerá un mensaje como el siguiente.
Por último, y esto es para los usuarios de Windows, es muy probable, que un usuario de Windows, pueda recibir un virus troyano dentro de una USB y esta quede en modo de lectura. En muchas ocasiones, se puede salvar con la unidad usando este método, quitando la protección de lectura rescatando los archivos y eliminando el troyano. Ver reconocimiento del troyano en la imagen.

Captura de Pantalla
Pero también hay ocasiones en que el troyano, u otra condición, daña el harvard de la USB y a la misma, no se le puede quitar la protección de lectura. Pero en #Lunux, por lo menos podremos ver su contenido, y sin temor a que se dañe, nuestro sistema.
Muchas gracias por leerme, y espero que esta información sea de ayuda para muchos de los lectores.


To read English
To read English

Screenshot

Greetings and introduction:
Greetings #Linuxeros, members of the #Linux&Softwarefree community, and greetings to the entire #Linux community at #Hive and @linux-software, welcome to a new post of #Fridaysdescritorio, January 10, 2025.
I'm still using my beloved Linux Mint 22 "Wilma", with Cinnamon desktop, the only difference I make in this presentation of the desktop today, is that this time I didn't place any application, nor did I open the terminal, since I wanted to show the photo I have as wallpaper.
When I saw that photo, it reminded me of an iconic image from the movie "The Grapes of Wrath”, but the big difference is that this image is from Venezuelan territory. Specifically of Montalban in the State of Carabobo, and it is taken by the #hive colleague, @jlinaresp, who has a group of excellent photos, which I recommend to all photography lovers to see.
How to attach and how to remove the read protection to a USB stick:
When we have important data on a USB stick and we want to protect it, we can place the read-only attribute on that memory through the terminal. I know that's what #Linux does and as I commented, that's usually done to protect data. And when we do that procedure, to backup the data, we can access and view the data in the memory, but we can't modify the data, nor can we do the formatting of the memory.
Attaching the read protection to a USB stick:
- The first thing we need to do is connect the USB stick, and after connecting it, we need to find the device name using the “lsblk" command or the “fdisk -l” command

Screenshot
- Now that we know that our device is “/dev/sdc1. We are going to unmount the nity and to do so we use the following command "sudo umount/dev/sdc1" and when doing so it will ask us for the root key and we place it.

Screenshot
- Now we change the permissions and put our USB stick just for reading, with the following command, "sudo hdparm -r1/dev/sdc1”

Screenshot
- This is how we place our USB, with read-only permissions, and in that way you will not be able to delete, format, write, copy, anything on the USB.

Screenshot
- To replace the normal USB and remove the read protection, we will use the following command, "sudo hdparm -r0/dev/sdc1" and when doing so, the terminal will show the number (0) and the status of the perimsos against reading in “off”.

Screenshot
Points to take into account:
Not all USB devices support this function. So if you are going to put a device as read-only and test, make a backup of the content before doing the device formatting test. You can also try trying to copy or place files on the USB, and you will get a message like the following.
Finally, and this is for Windows users, it is very likely that a Windows user can receive a Trojan virus inside a USB and it remains in reading mode. In many cases, you can save with the drive using this method, removing the read protection by rescuing the files and removing the Trojan. See recognition of the Trojan in the image.

Screenshot
But there are also occasions when the Trojan, or another condition, damages the harvard of the USB and the same, the read protection cannot be removed. But in #Lunux, at least we will be able to see its content, and without fear of damage to our system.
Thank you very much for reading me, and I hope this information will be of help to many of the readers.


