FULL VERSION ESPAÑOL


Hola bella Comunidad de #DIYHub. Tiempo sin compartir con ustedes. Este año espero hacerlo un poco más seguido ya que tengo algunos proyectos pendientes que me gustaría compartir con ustedes. Hoy les traigo un post especial dedicado a uno de mis peluditos. Dado que no cuento con altos recursos económicos para adquirir 3 pecheras y sacar a pasear a mi manada, decidí hacerlas yo misma y hoy les traigo el proceso completo de la que fabriqué para Yara la Ladrona de Corazones

𝐌𝐚𝐭𝐞𝐫𝐢𝐚𝐥𝐞𝐬 𝐚 𝐔𝐭𝐢𝐥𝐢𝐳𝐚𝐫
- Tijera
- Pedazos de tela de tu preferencia (No medí el tamaño de lo que usé).
- Hilo de coser
- Aros de llaveros viejos
- Cierre mágico (dos pedacitos).
- Aguja de coser

𝐋𝐚 𝐏𝐞𝐜𝐡𝐞𝐫𝐚 𝐝𝐞 𝐘𝐚𝐫𝐚
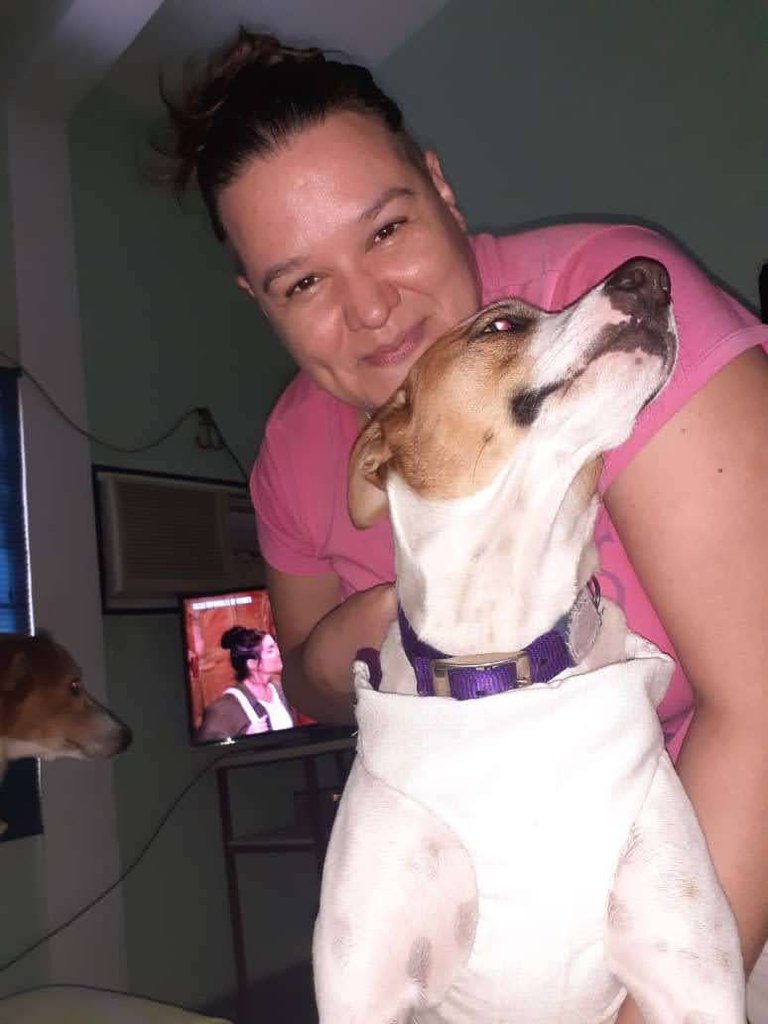
Bien, como tenía retazos de tela guardada por allí me puse a buscar tutoriales por YouTube de cómo hacerles una pechera a mis perritos. Ya había hecho unas anteriormente para mis Poodles pero lamentablemente esa tela se pudrió y aparte de tamaño no le quedaba a ninguno de mis perritos, así que tuve que empezar de cero y aquí les comparto el proceso:
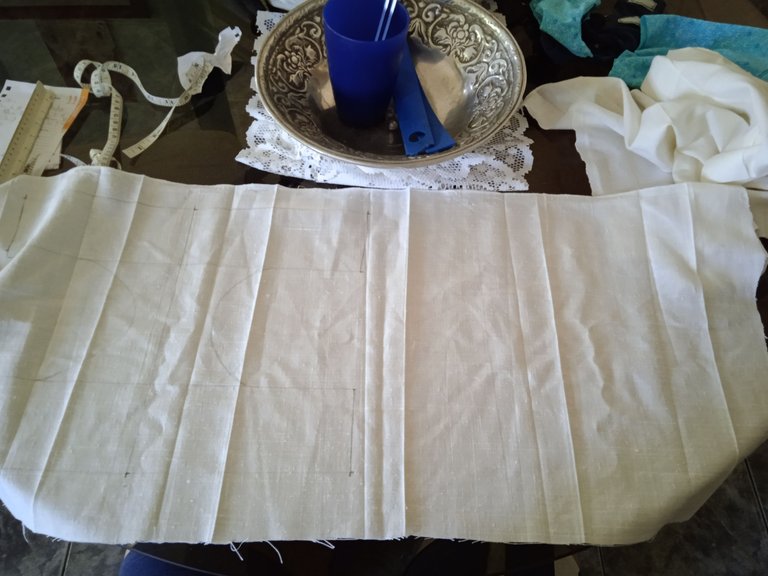
Lo primero que hice fue dibujar con un lápiz en un pedazo de tela rectangular, una letra I grande tomando en cuenta unas "medidas" previas que le tomé a Yara para que supuestamente le quedara justa y cómoda. Dichas medidas al final no me sirvieron y pues en un punto tuve que improvisar. Sigan leyendo para que vean donde fue.
Nótese que dejé un lado casi del mismo ancho a un lado. Esto lo hice para no dibujar dos veces la letra I, sino que sólo doblaba la tela y ya tenía 2 en 1. Hice esto para reforzar la letra I que quería hacer y de esta manera durara más tiempo.
 | 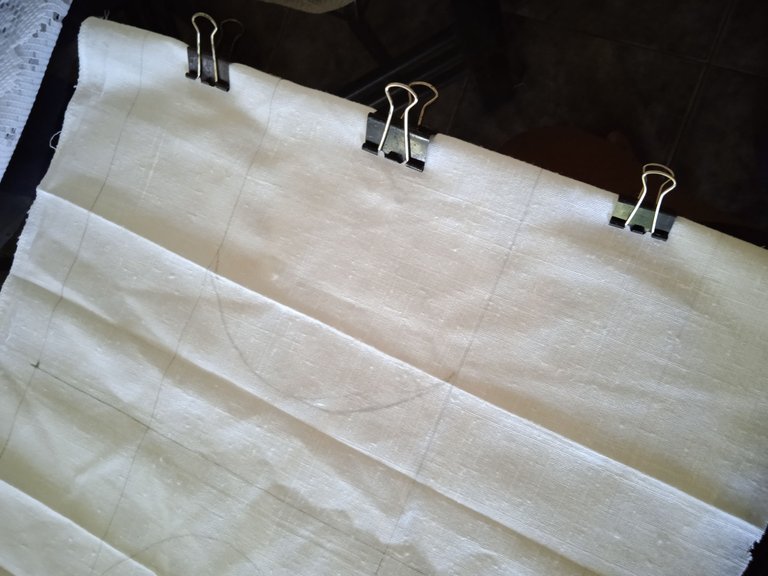 |
|---|---|
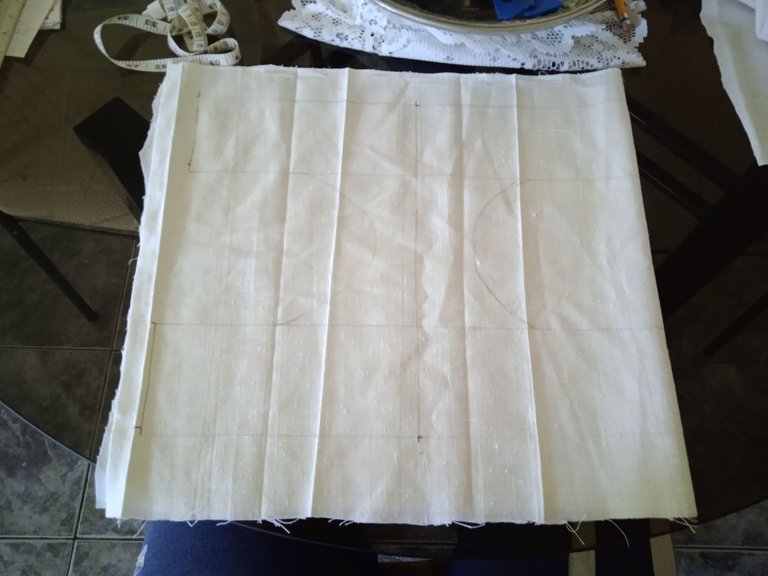
| Aquí lo que hice fue doblar la tela para hacer la letra I doble y coserla de manera más sencilla | Para asegurar que la tela no se me moviera ni corriera, tomé unos ganchos para sostenerla y recortar el excedente que no iba a utilizar |
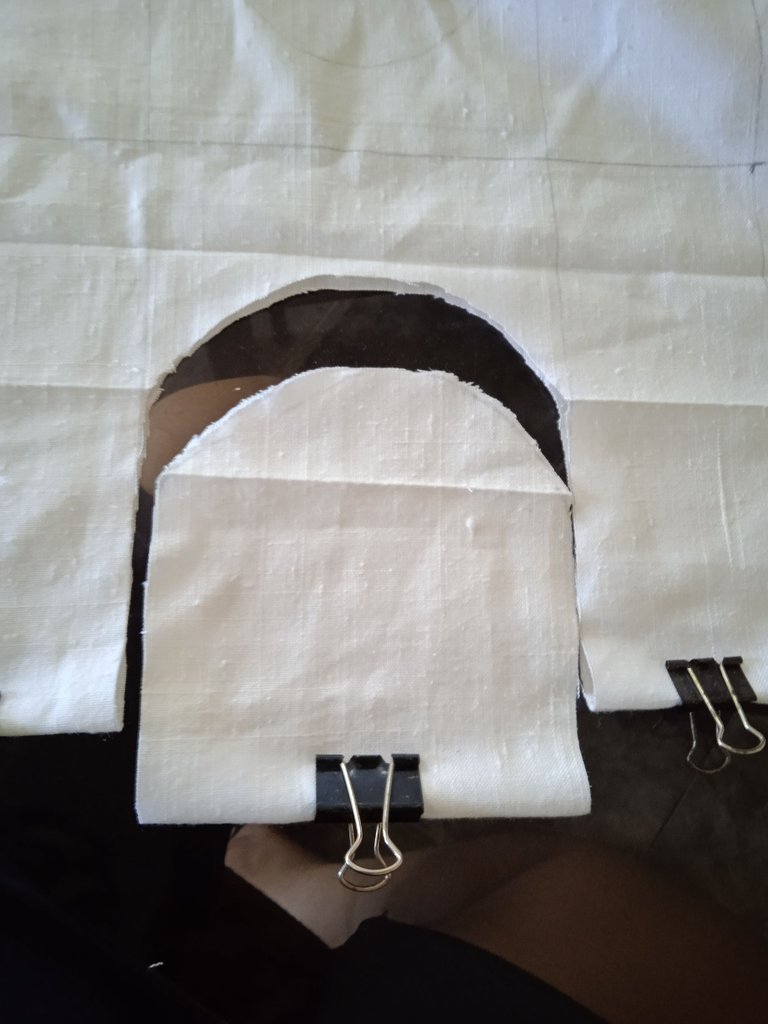 | 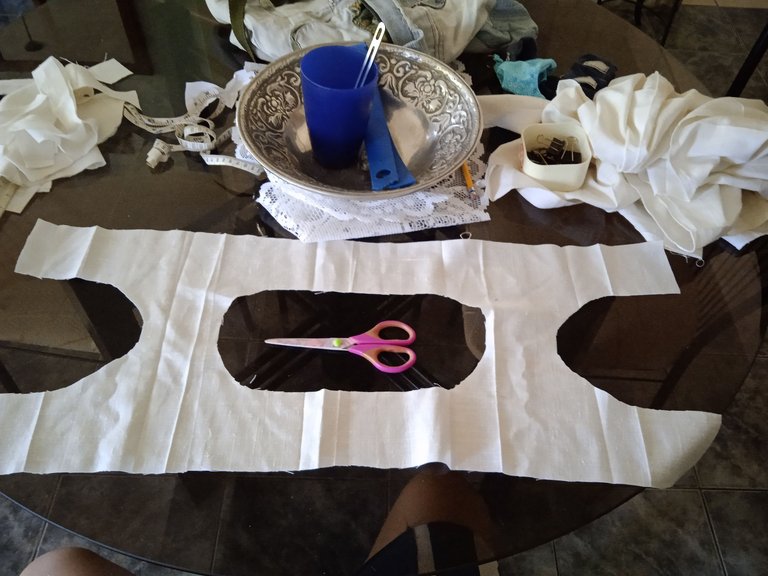 |
Recorté lo mejor que pude hasta formar la letra I o también la figura que se ve en la foto superior. Luego me dispuse a tomar otro retaso de tela de un pantalón morado que tenía por allí para hacer el siguiente paso. Pensé desde un principio en usar este color porque el collar de Yara también es morado y así andaría toda Coquette y Combinada.
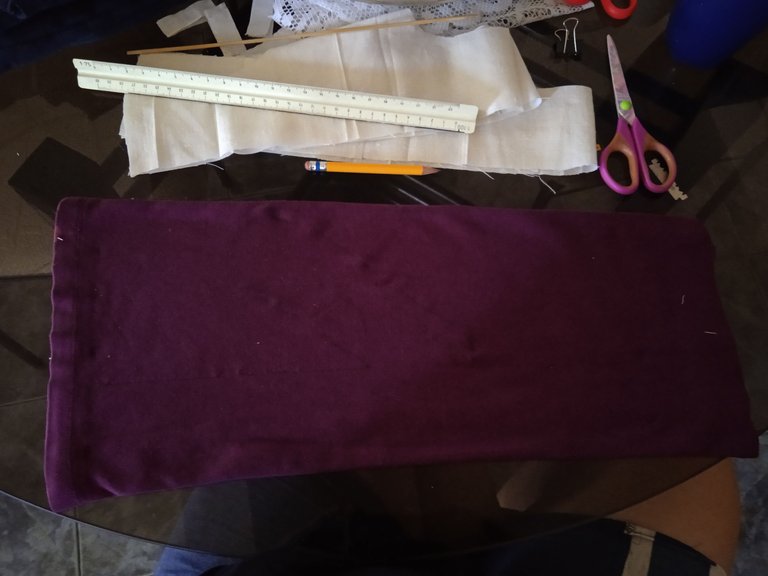
Con esta tela de color púrpura dibujé con lápiz una letra Y curveada. En la foto de arriba se nota un poquito dicha figura. Aquí hice ese dibujo al ojo por ciento y tomando en cuenta las medidas que le había tomado a Yara anteriormente. Al recortar dicha tela quedó el siguiente resultado:

Cabe destacar que para cada letra Y recortada utilicé la misma técnica de la I con la tela anterior, es decir doble tela en ambas. Una bota para cada Y. Ya luego procedí a cocer los bordes de las letras de manera individual hasta obtener 3 partes que pensaba armar de la siguiente manera:
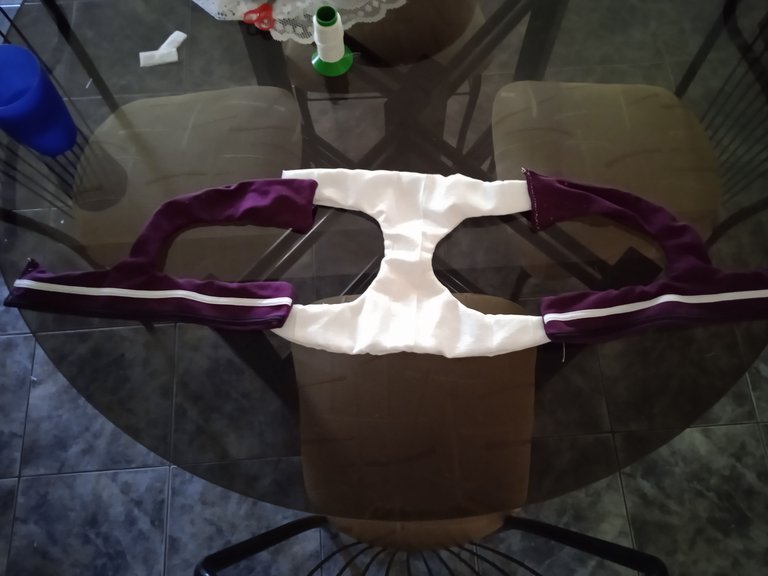
Ya para el siguiente paso sólo debía unir las puntas que junté en la foto superior para tener casi lista la pechera. El resultado luego de unir todo quedó así:
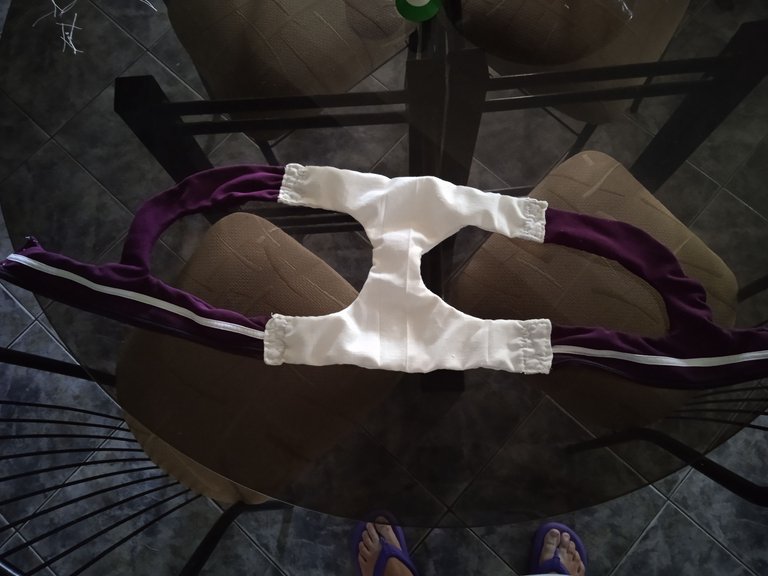
En este punto yo estaba super emocionada porque ya daba por terminado el proceso más tedioso de todos. Luego de esto me dispuse a coser y armar las arandelas que servirían para sostener la correa y asegurar así a Yara sin problemas.
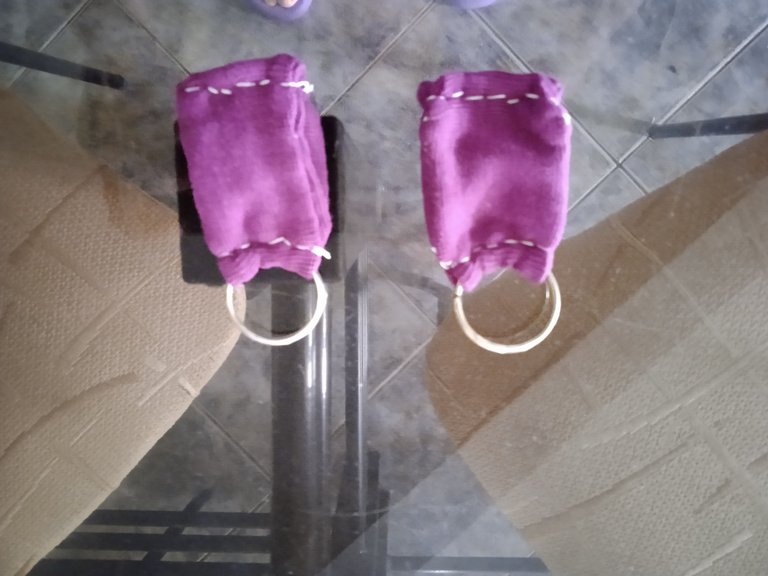
Para este paso usé nuevamente 2 tiras de tela doble color morado para seguir haciendo juego y 2 aros de esos que traen los llaveros. Cosí el borde el aro para que no se moviera y también el final de la tela para darle estabilidad.
Ya sólo me faltaba coser entonces estos aritos con el cierre mágico para dar por terminada la pechera, pero al medirle la misma a Yara para ver en qué parte iba a pegar el cierre mágico, ¿qué creen que pasó? le quedó inmensa 🤣 y las medidas que le tomé supuestamente a ella al final no sirvieron, hice mal mis cálculos y quedó para un perro del tamaño de un Rottweiler.
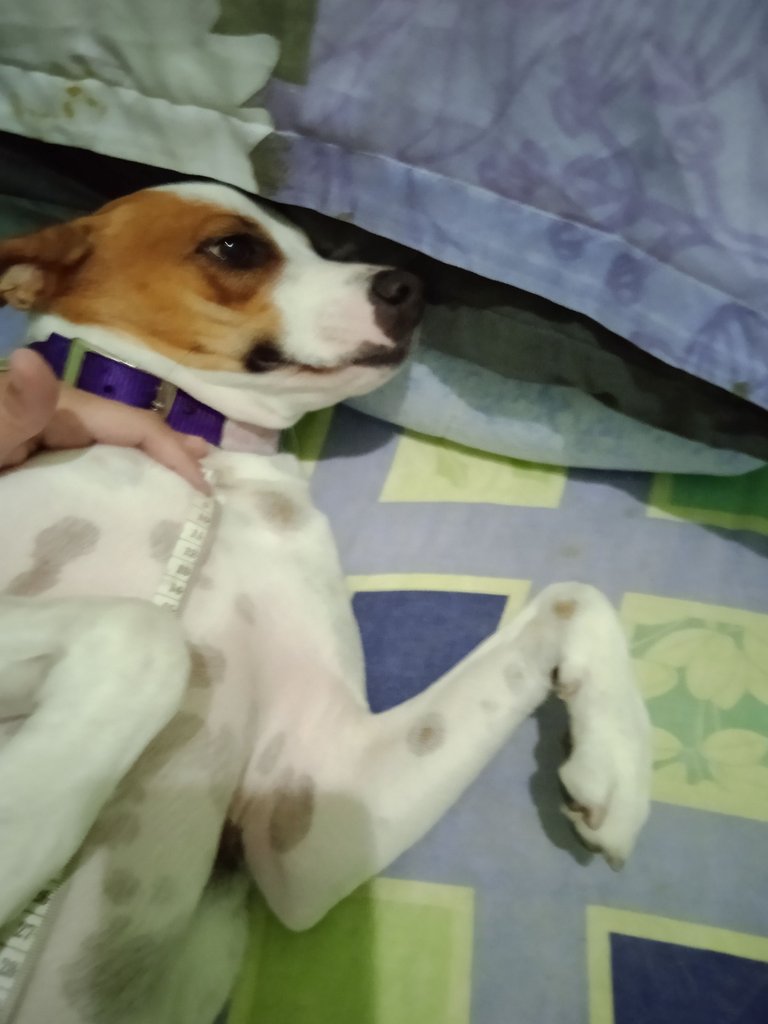
Y es que Yara está gordita, de ahí que quiero sacarla a caminar pero me da cosita hacerlo y tirarle del collar cada vez que paseamos. Ella empieza a toser y se emociona tanto que jala muy fuerte la correa hasta que sea ahoga ella misma.
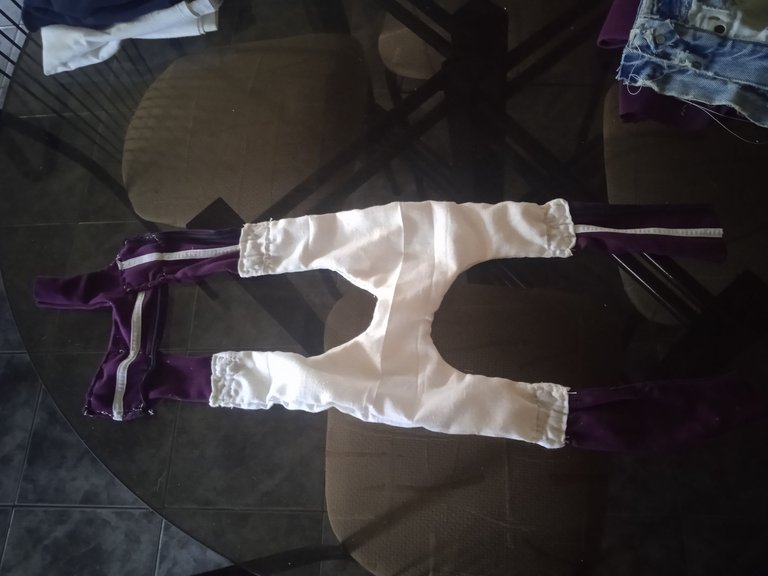
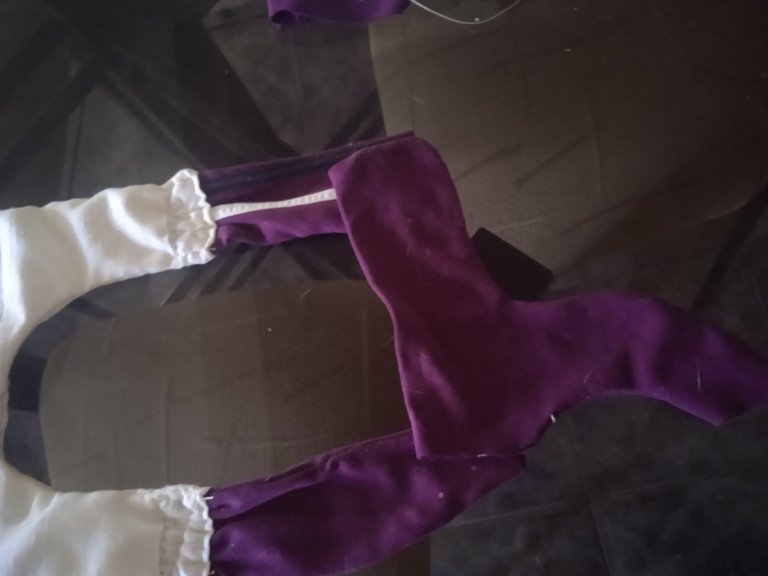
Por eso le quise hacer esta pechera y al ver que le quedó super grande tuve que improvisar y recortar parte de las Y para no perder el trabajo que ya había hecho. Así que aquí continúo la modificación:
 |  |
|---|
Todo esto lo hice al ojo por ciento y pues olvidé tomarle fotos al recorte que hice de las Y pero básicamente allí se ve hasta dónde lo recorté. El restante de cada Y lo pegué de manera paralela a la I y de manera inversa en cada lado, lo que hizo que quedara de la siguiente manera:
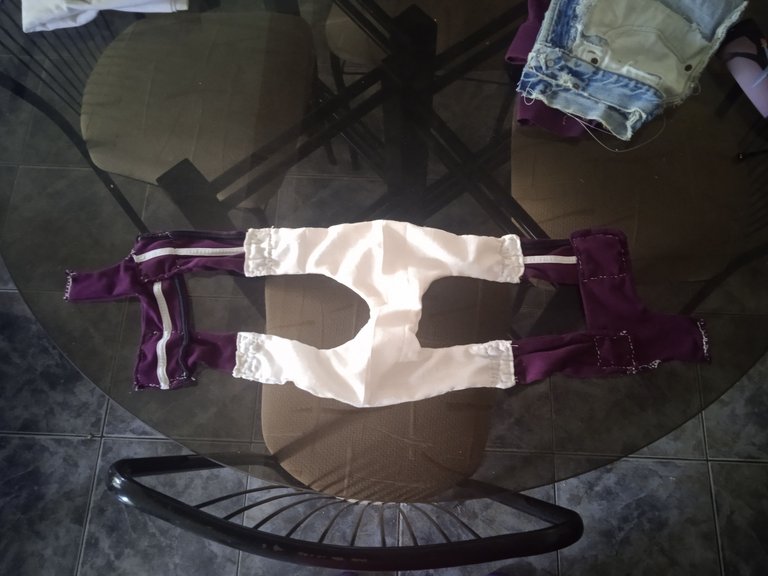
Una vez unido todo nuevamente, lo que quedaba era medirlo en Yara para saber dónde iba a pegar el cierre mágico y los aros para la correa. El resultado luego de ensamblar todo fue el siguiente:
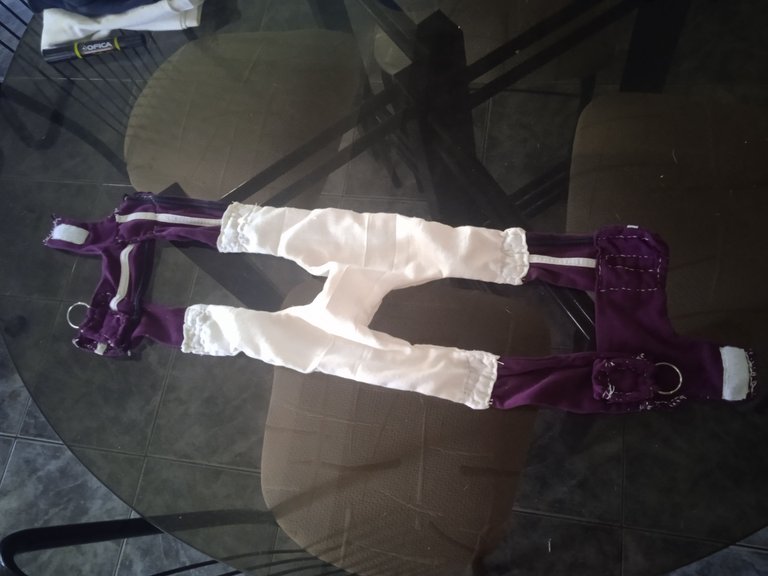
No quedó del todo perfecto, tampoco era lo quería hacer pero en vista de que me fallaron las medidas me vi obligada a improvisar y eso fue lo que salió. Pasé 3 días pensando cómo arreglarlo sin tener que perder un día de trabajo invertido y aunque le queda un poquito grande a Yara en la parte de adelante, cumple su funcionalidad para sacarla a pasear sin problemas. Aquí está el resultado final:
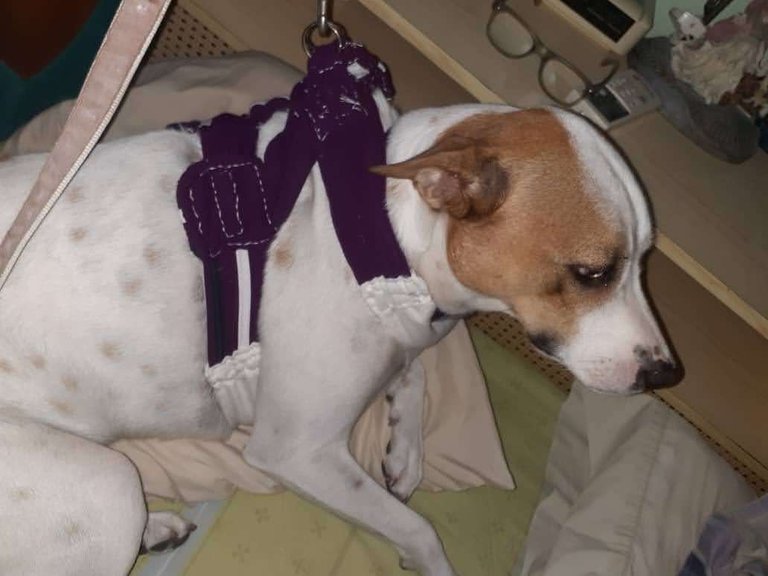
Bueno, hasta aquí mi post, espero que les haya gustado el proceso de esta peculiar pechera. Estoy pendiente de hacerle una a Drako y ya Pegui tiene la suya. Para la de él sí pienso seguir los primeros pasos de este post. ¿A ustedes les gustaría ver el paso a paso para la de Drako? Los leo en los comentarios! feliz tarde a todos! 🧡


English

Hello beautiful #DIYHub Community. It's been a while since I've shared it with you. I hope to do it a little more often this year as I have some pending projects I would like to share with you. Today I bring you a special post dedicated to one of my little furries. Since I don't have the financial resources to buy 3 breastplates and take my pack out for a walk, I decided to make them myself and today I bring you the complete process of the one I made for Yara the Thief of Hearts.

𝐌𝐚𝐭𝐞𝐫𝐢𝐚𝐥𝐬 𝐭𝐨 𝐔𝐬𝐞
- Scissors
- Pieces of cloth of your choice (I didn't measure the size of what I used).
- Sewing thread
- Old keychain rings
- Magic clasp (two small pieces).
- Sewing needle

𝐇𝐚𝐫𝐧𝐞𝐬𝐬 𝐟𝐨𝐫 𝐘𝐚𝐫𝐚

Well, as I had scraps of fabric saved over there I started looking for tutorials on YouTube on how to make a breastplate for my dogs. I had already made some for my Poodles but unfortunately, that fabric rotted, and besides the size it didn't fit any of my dogs, so I had to start from scratch and here I share the process:

The first thing I did was draw a large letter I with a pencil on a rectangular piece of fabric, taking into account some previous “measurements” that I took from Yara so that it would fit her correctly and comfortably. Those measurements didn't work for me, and I had to improvise at one point. Read on to see where it went.
Note that I left one side almost equal in width to one side. I did this so I wouldn't draw the letter I twice, but just folded the fabric and I already had 2 in 1. I did this to reinforce the letter I wanted to make so it would last longer.
 |  |
|---|---|
| Here what I did was to fold the fabric to make the letter I double and sew it more simply. | To make sure the fabric wouldn't move or run, I took some hooks to hold it and trim the excess I wasn't going to use. |
 |  |
I cut out the best I could until I formed the letter I or the figure you see in the photo above. Then I took another scrap of fabric from the purple pants I had lying around to do the next step. I thought from the beginning to use this color because Yara's necklace is also purple and this way she would be all Coquette and Combined.

With this purple fabric I drew a curved letter Y with a pencil. In the photo above you can see a little bit of this figure. Here I made this drawing by eye and taking into account the measurements I had taken Yara previously. When I cut out the fabric, the result was as follows:

It should be noted that for each letter Y cut out I used the same technique as for the I with the previous fabric, i.e. double fabric on both. One boot for each Y. Then I proceeded to stitch the edges of the letters individually until I obtained 3 parts that I planned to assemble as follows:

Now for the next step I only had to join the ends that I put together in the photo above to have the breastplate almost ready. The result after joining everything together looked like this:

At this point, I was super excited because the most tedious process of all was over. After this, I set out to sew and assemble the grommets that would serve to hold the strap and secure Yara without any problems.

For this step, I used again 2 strips of double purple fabric to continue matching and 2 of those rings that come with the key chains. I sewed the edge of the hoop so it wouldn't move and also the end of the fabric to give it stability.
I only needed to sew these little rings with the magic clasp to finish the breastplate, but when I measured Yara to see where I was going to stick the magic clasp, what do you think happened? It was huge for her 🤣 and the measurements I supposedly took from her in the end didn't work, I did my calculations wrong and it was too big for a dog the size of a Rottweiler.

And Yara is chubby, so I want to take her for a walk but I'm afraid to do it and pull her by the collar every time we go for a walk. She starts coughing and gets so excited that she pulls so hard on the leash that she chokes herself.
That's why I wanted to make this breastplate and when I saw that it was too big I had to improvise and cut part of the Y's so as not to lose the work I had already done. So here I continue the modification:
 |  |
|---|
I did all this by eye and I forgot to take pictures of the Y's I cut out, but you can see where I cut it. The rest of each Y I glued parallel to the I and inversely on each side, which made it look like this:

Once everything was put together again, what was left was to measure it in Yara to know where I was going to glue the magic clasp and the rings for the strap. The result after assembling everything was as follows:

It wasn't quite perfect, it wasn't what I wanted to do but since the measurements failed me I was forced to improvise and that's what came out. I spent 3 days thinking about how to fix it without having to waste a day of work and although it fits Yara a little big in the front part, it fulfills its functionality to take her out for a walk without problems. Here is the final result:

Well, this is my post, I hope you liked the process of this peculiar breastplate. I'm still waiting to make one for Drako and Pegui has already made his. For this I plan to follow the first steps of this post, would you like to see the step-by-step for Drako's? I read you in the comments! Happy afternoon everyone! 🧡


| 𝐄𝐥𝐞𝐦𝐞𝐧𝐭𝐬 (𝐄𝐥𝐞𝐦𝐞𝐧𝐭𝐨𝐬) | 𝐓𝐨𝐨𝐥𝐬 (𝐇𝐞𝐫𝐫𝐚𝐦𝐢𝐞𝐧𝐭𝐚𝐬) |
|---|---|
| Photos used throughout the post are from my gallery (Las Fotos Utilizadas a lo largo del Post son de mi galería) | Redmi Note 9A Phone Camera (Cámara del Teléfono Redmi Note 9A) |
| Content and Original Text of my Authorship (Contenido y Texto Original de mi Autoría) | DeepL |
| CANVA | |
| Grammarly |


