So I spent some time setting up a spk claim node last week, with no prior experience of ever having done anything like this, and extremely minimal coding experience.
Honestly before this i'd really only used a terminal to play around with learning some Python code (a mission since abandoned) and I've never had a server before or used a terminal to talk to said server, which is what getting this node running was all about.
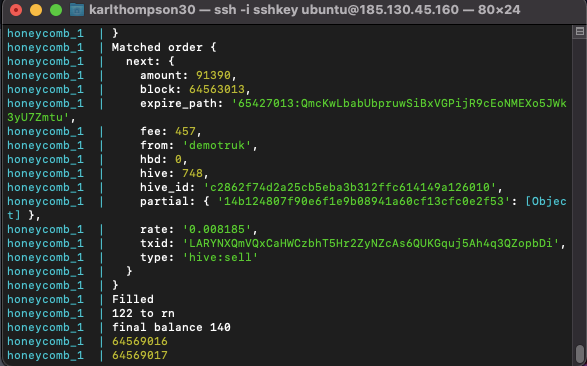
After about a day of tinkering about with a terminal on Friday I finally got my node up and running on Saturday afternoon, and LOOK - it's doing something...!

Firstly a big thanks to....
Given that I'm a bit clueless about all things terminal, code, and server, I relied heavily on a couple of people in Discord to help me out - @markegiles (I set him as a beneficiary on this post) was really helpful during the mid-stages of the process and @disregardfiat helped out too.
Setting up a Spk Node the general process and what you need...
- A Hive account with 100HP
- A registered domain name
- Buy some server space via Privex (if you're following the instructions I followed). This is covered very well in the video below.
- You need to use 'terminal' (on either Linux/ Mac or Windows) to log into and set up your node on your Privex server.
- Follow the TWO sets of instructions below (I'm not going to reinvent the wheel here) - Read/ watch both and then use MAINLY the guide here... https://vue.dlux.io/docs/#/new-node - you need BOTH I think but that guide is more through and seems more up to date.
- Make sure you've got the Dlux Discord open for any questions - they helped me out a lot, or drop me a line all of this is fresh for the next couple of weeks or so!
Instructions to follow and in what order if you want to set up your own spk node..
- Firstly WATCH this video walkthrough here by @disregardfiat with time stamps. Do this to give yourself an idea about the whole process.
- For the actual installation of everything I recommend this guide here which is the most thorough and user friendly IMO.
You actually probably need BOTH these guides to do a successful install....because neither of them cover everything in sufficient detail if you're a total newbie to all of this!
For example the video goes through the process of how to buy a server with Privex and get that set up (i.e. specs and what countries to NOT have it base in!)
BUT the video doesn't mention that you need to have a domain name registered separately or change the DNS configurations before anything will work, but this is covered in the other guide!
My own 'MY FIRST NODE' experience and things to watch out for!
This isn't a comprehensive guide, just things to watch out for....
Pre-node set up prep...
Setting up the Hive account was fine, I'm very familiar with this, I opted for the name 'revise.spk'
Buying the Privex server was easy - the cheapest option with the minimal specs for the spk node wasn't available so I had to go with a larger spec one for $10 a month - paid for with Hive (Privex is Hive friendly!) - the only things you really need to pay attention to are the username and especially the IP address (IPFS4 not 6 if you've got the two options like me!)
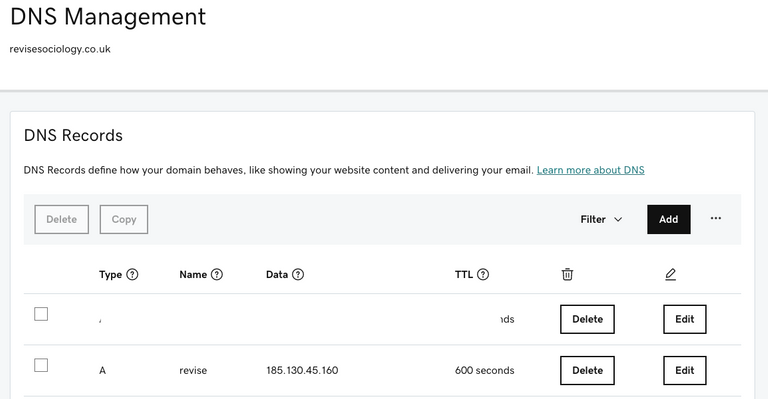
With the domain name I already had one registered with Godaddy and so just used that - it works!
You need to navigate to the DNS settings and add new record entering in these details...

- 'Data' above is the IP address of your Privex server (if you're using privex).
- name is just anything you want, but you have to specify this in some of the set up stages below....
Next open up terminal and log in to your server and update various files then reboot - stages 4 and 5 on 'get server' at these instructions.... https://vue.dlux.io/docs/#/new-node
I found all of the above straightforward...
Docker Deploy.
Once you've got all of the above ready you're good to set up yer node via terminal
Basically now you work through the instructions from here.... this is where I started to get a bit stuck...
All of the cloning when fine but then I got here...
T ype touch .env && nano .env to edit the node attributes
Type the following into the text editor:
account="hiveaccount"
active=5JactivePrivateKey
msowner=5KadditionalPrivateKey
mspublic=STMpublickey
domain=https://api.yourdomain.com
The first two above are obvious.
The msowner and mspublic threw me - these are basically a key pair you make up yourself using the Hive Account creation tool, but without creating the account - you're using the tool just to create some nice encryption I think
The domain also threw me, but for me it ended up being (the whole last line...
domain=https://api.revise.revisesociology.uk
Because when I configured the DNS previously I'd named the added DNS 'revise'
There's no way I could have figured this out without help in Discord!
After this there's two more steps which are easy...
- docker compose build
- docker compose up
These start your node up....
Assuming you're not setting up multiple nodes....
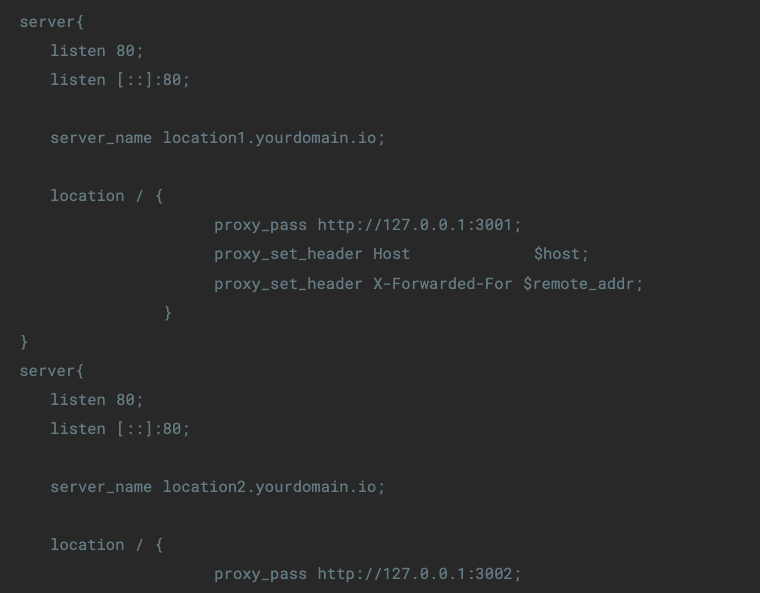
The next step is the Nginx set up...
Nginx set up
NB with the video this threw me as DisregardFiat does this in parallel with other things and he lost me a bit.
Although something else I learned from this process is that setting up a server isn't linear, things may not work until you do everything, the order (of the large chunks) matters less.
With this a quirk was that you might have to split what's one line of code in the instructions into two to get things to work...
- cd /etc/nginx/sites-available
Then
- sudo nano default
And then you need to DELETE everything (all the code) in the sub domain (i think it's what it's called) that opens up and paste in the next chunk of code...

And follow the instructions which tell you change the server name to your domain name.
NB if you only have one node - you only need paste in the first chunk of code!
Then follow the instructions until the end....
Your spknode should now be running!!!
Setting up a Node - final thoughts
In retrospect the whole process seems a lot easier than it was.
I was also lucky to have one on one assistance in Discord when I needed it.
And I do have a little basic code experience which helped, but not much!


