Una de las cosas que más disfruto en la vida es el hacer manualidades, o mejor dicho, crear, porque pensándolo bien la cosa no se limita simplemente a las manualidades, sino el poder echar a volar mi imaginación, y plasmarlo, ya sea en algún objeto decorativo para mi casa, en mejorar algún ambiente, realizar una comida fuera de lo común, y por supuesto las manualidades.
Es por eso que cuando pensé en emprender no hubo dudas de por dónde sería el camino, y los arreglos con dulces y globos forman parte del servicio que ofrecemos, y hoy quiero compartir con ustedes la elaboración de un arreglo con chocolates y globo burbuja, que no solo puedo utilizar para mi emprendimiento, sino que me puede servir para quedar súper bien si me invitan para un cumple o a mis niños, ya que es un regalo muy llamativo y lindo.
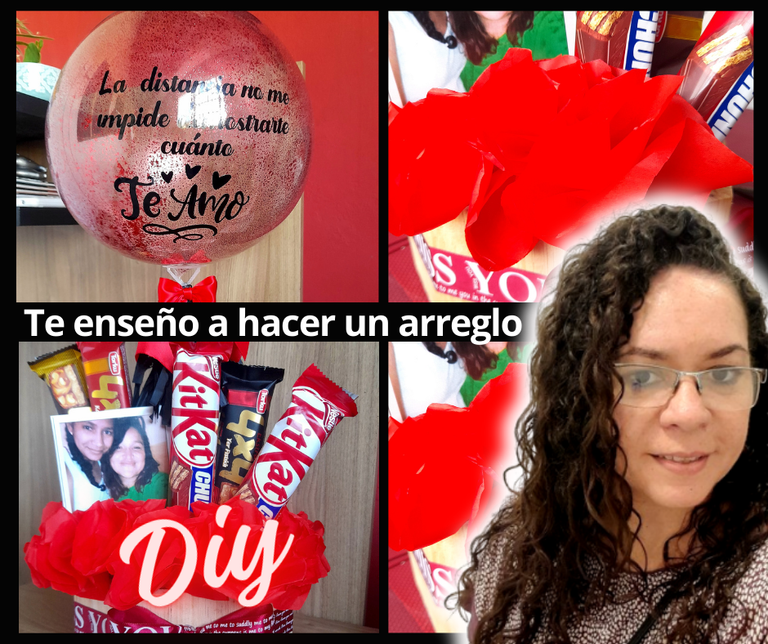
En el caso de este arreglo en particular, se realizó por temas de trabajo, ya que este fue un pedido para una sorpresa de cumpleaños, y como ven es un arreglo bien llamativo pero bastante sencillo de realizar, y por aquí les comparto los materiales y el paso a paso.
Materiales
Caja de madera
Cinta de tela
Anime
Palitos de altura/brocheta
Papel de seda
Chocolates
Globo
Silicón en barra
Pistola de silicón
Tijera
Cortador
Procedimiento
Lo primero que haremos es armar nuestra base de trabajo que es este caso es una cajita de pino. Ustedes en casa, pueden usar cualquier material que les guste o les resulte más accesible. En mi caso para nuestro emprendimiento decidimos usar cajitas de madera, ya que consideramos que lucen más lindas y mejor presentadas, además no son costosas.
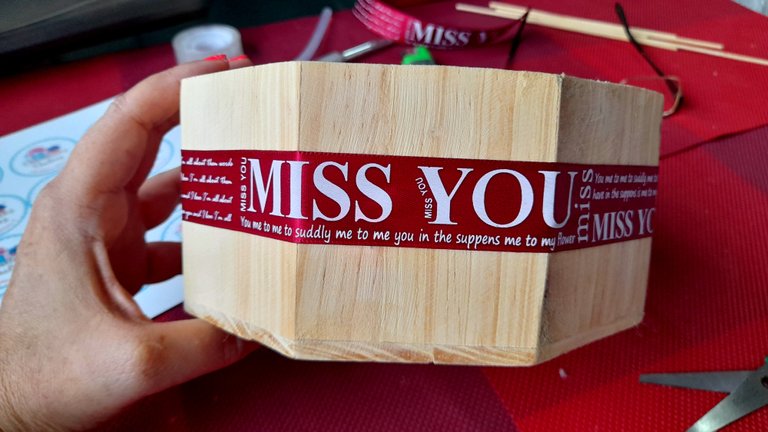
Para la decoración de esta cajita decidí trabajar con cintas y alejarme un poco de las etiquetas elaboradas en 3D, así que simplemente coloqué la cinta al rededor de la cajita, justo en el centro, y la fijé con silicón en varios puntos, y finalicé con un lazo.


El siguiente paso es crear el soporte para los chocolates y el globo. En mi caso yo utilizo un anime bien comprimido para que los palitos queden mucho más firmes, y lo que hago es cortar varias piezas del mismo tamaño y las voy fijando con silicón, una en la cajita, y luego, una encima de otra hasta tener una buena base para trabajar con la seguridad de que todo esté bien fijado.


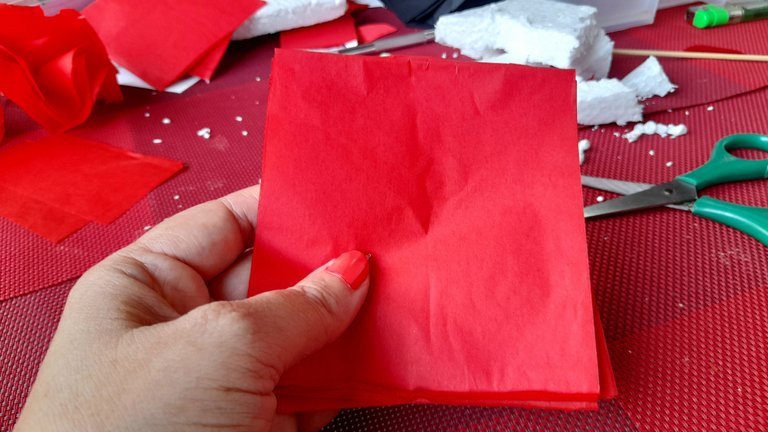
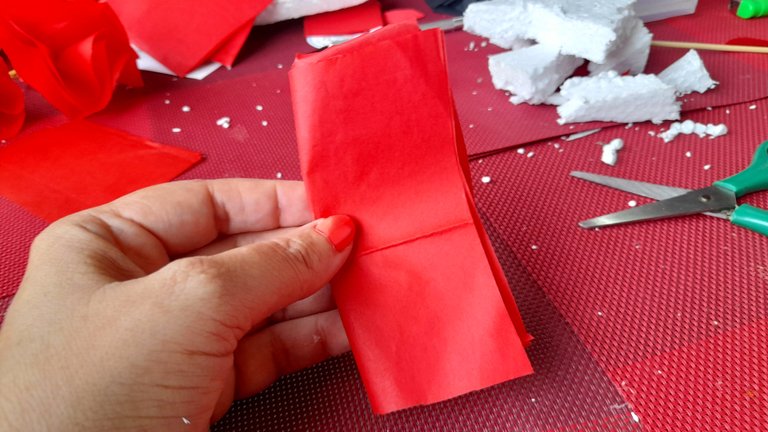
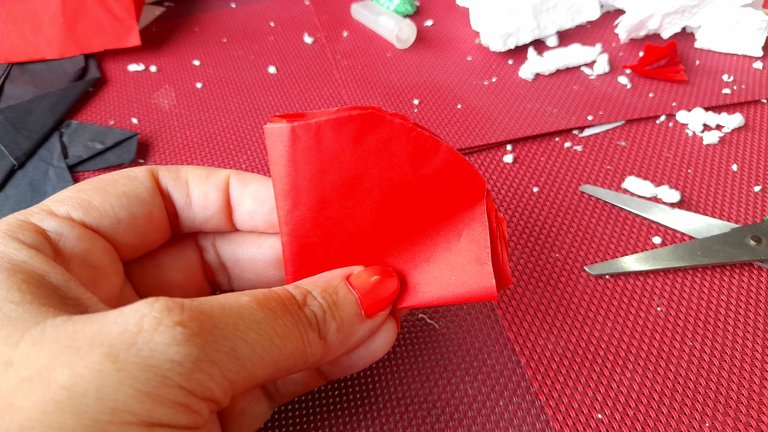
Para continuar, lo siguiente es crear los pompones en papel de seda, y en esta ocasión quise darle forma de rosas, lo que es realmente sencillo. Solo recortamos cuadrados en papel de seda (yo utilizo tres para cada pompón), los colocamos uno sobre el otro, y doblamos en dos partes para luego recortar las puntas, dando forma de semicírculo.
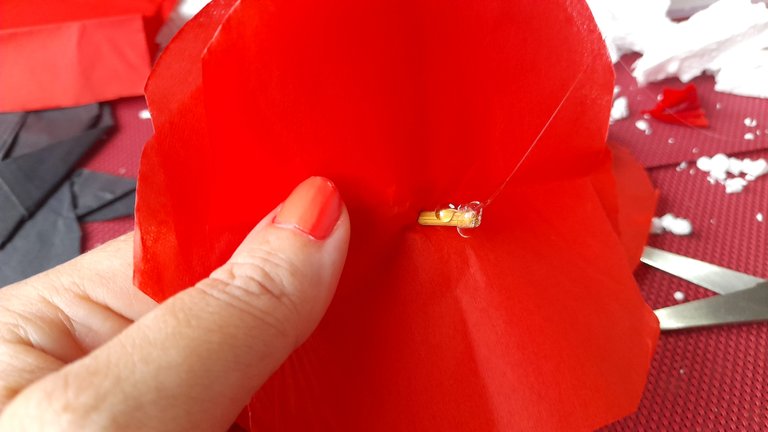
Lo que sigue es cortar un palito de altura, de 10 cms aproximadamente y lo pasamos justo en medio de nuestro papel de seda, dejando sobresalir solo un poco en medio del papel y agregamos un buen punto de silicón caliente, para luego cerrar la flor, presionando con nuestras manos hasta fijar muy bien. De esta manera garantizamos que mantenga su forma.
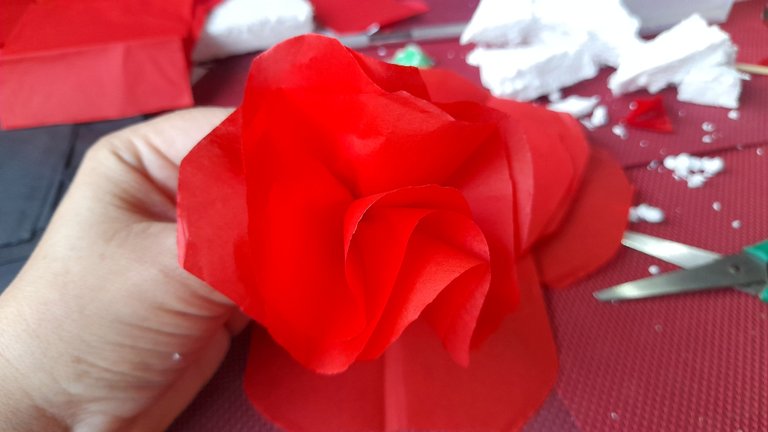
Luego, con ayuda de nuestras manos, le damos forma a nuestra flor. Haremos la cantidad que necesitemos para cubrir completamente todo el anime.

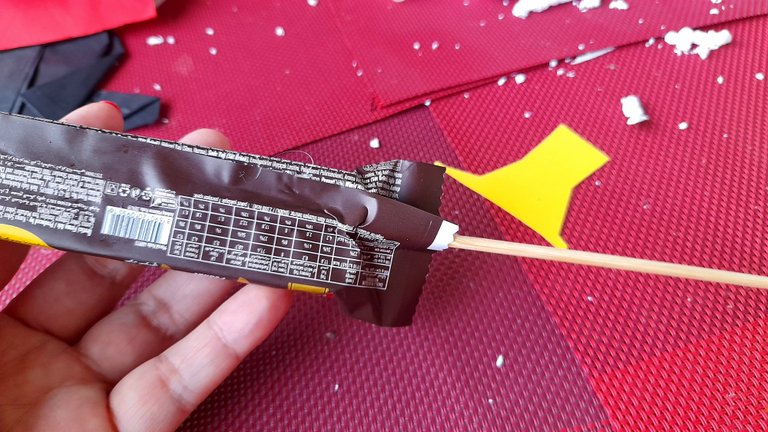
El siguiente paso es pegar los palitos de altura o brochetas a los chocolates o dulces que va a llevar nuestro arreglo, y para esto levantamos la pestaña trasera del empaque del chocolate, agregamos el silicón y fijamos el palito de altura. De esta forma no solo queda más firme, sino que el palito queda oculto y tenemos un trabajo mucho más prolijo.
Ya con esto solo nos queda el armado. En mi caso, yo ubico primero el globo, que en esta ocasión fue un globo tipo burbuja con sticker personalizado, pero podemos usar cualquiera de nuestra elección, incluso varios.
Una vez fijado el globo en su lugar, ubico loa chocolates, fotos o toppers que lleva el arreglo, y finalmente los pompones de papel de seda que van a cubrir y rellenar todos los espacios vacíos, y de esta manera, super sencilla, tenemos un lindo arreglo para regalar en cualquier ocasión.

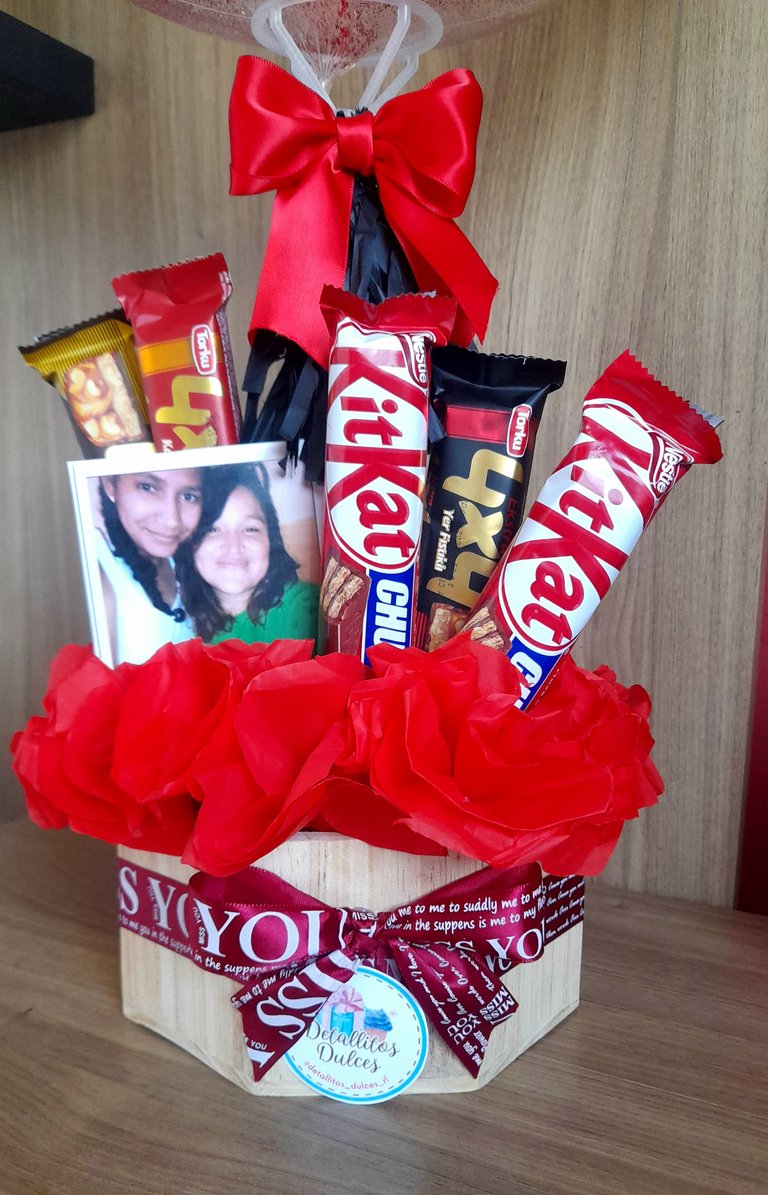
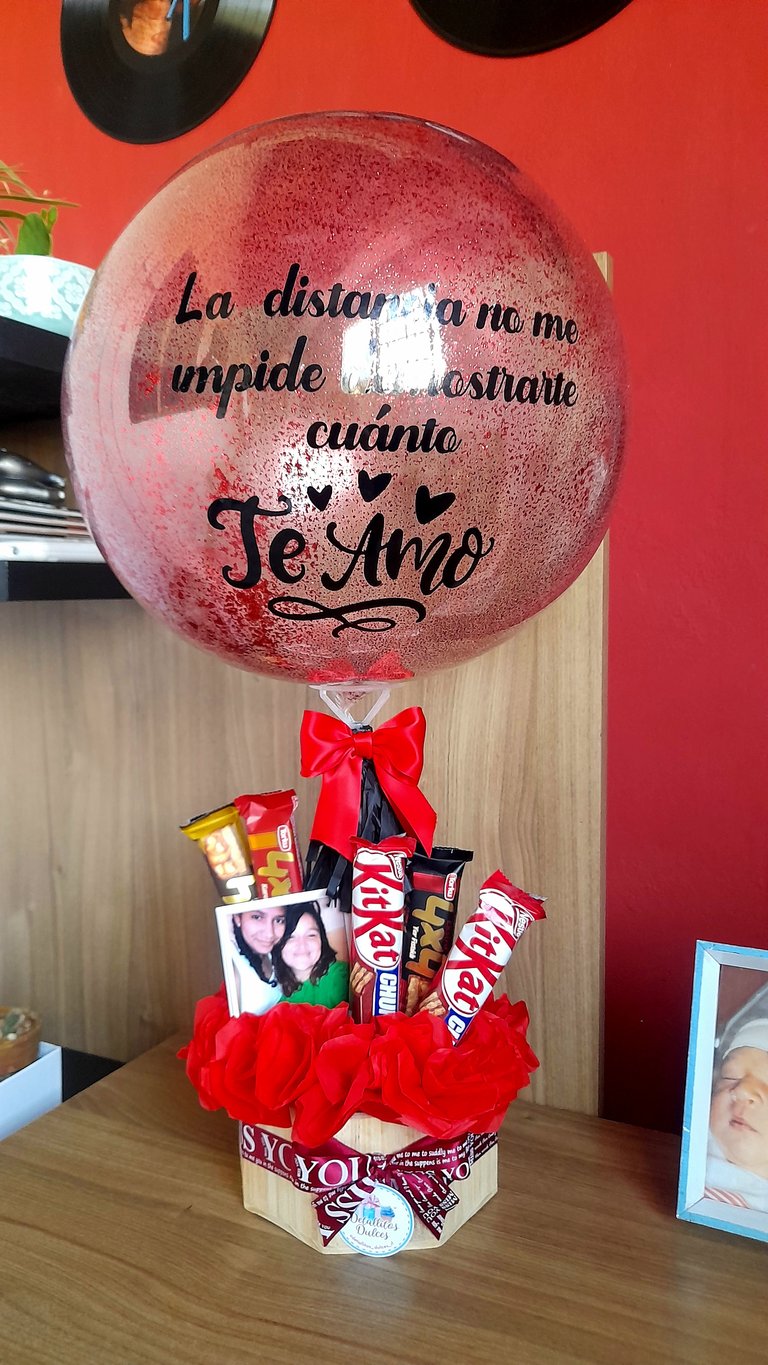
Como ven, aunque parecen muchos pasos es algo bastante sencillo, y si no tenemos mucha creatividad, siempre podemos encontrar en la web un sin fin de ideas para trabajar, y por aquí, les comparto la mía, esperando les pueda servir de guía, ya sea para consentir a sus seres queridos o para emprender.

One of the things I enjoy most in life is making crafts, or better said, create, because thinking about it, it is not limited simply to crafts, but to be able to let my imagination fly, and capture it, either in a decorative object for my house, to improve some environment, to make a meal out of the ordinary, and of course the crafts.
That's why when I thought about entrepreneurship there was no doubt about where the path would be, and the arrangements with candy and balloons are part of the service we offer, and today I want to share with you the development of an arrangement with chocolates and balloon bubble, which not only I can use for my business, but I can serve to look great if I am invited for a birthday or my children, as it is a very striking and cute gift.
In the case of this particular arrangement, it was made for work reasons, since this was a request for a birthday surprise, and as you can see it is a very striking arrangement but quite simple to make, and here I share with you the materials and the step by step.
Materials
Wooden box
Fabric ribbon
Anime
Sticks of height/brochette
Tissue paper
Chocolates
Balloon
Silicone stick
Silicone gun
Scissors
CutterProcedure
The first thing we will do is to assemble our work base, which in this case is a small pine box. At home, you can use any material you like or you find more accessible. In my case, for our project we decided to use wooden boxes, since we consider that they look nicer and better presented, besides they are not expensive.
For the decoration of this box I decided to work with ribbons and move away a little from the 3D labels, so I simply placed the ribbon around the box, right in the center, and fixed it with silicone at several points, and finished with a bow.
The next step is to create the support for the chocolates and the balloon. In my case I use an anime well compressed so that the sticks are much firmer, and what I do is cut several pieces of the same size and I fix them with silicone, one in the box, and then one on top of the other until I have a good base to work with the security that everything is well fixed.
The next step was to create the pompoms in tissue paper, and this time I wanted to shape them into roses, which is really easy. We just cut out squares in tissue paper (I use three for each pompom), place them one on top of the other, and fold in two parts and then cut off the ends, giving a semicircle shape.
The next step is to cut a stick about 10 cm high and pass it right in the middle of our tissue paper, leaving just a little bit in the middle of the paper and add a good dot of hot silicone, and then close the flower, pressing with our hands to fix it very well. In this way we guarantee that it will keep its shape.
Then, with the help of our hands, we shape our flower. We will make as much as we need to completely cover the entire anime.
The next step is to glue the height sticks or skewers to the chocolates or candies that our arrangement will carry, and for this we lift the back tab of the chocolate packaging, add the silicone and fix the height stick. In this way, not only is it firmer, but the stick is hidden and we have a much neater job.
Now we only have to assemble it. In my case, I place the balloon first, which in this case was a bubble balloon with a personalized sticker, but we can use any of our choice, even several.
Once the balloon is fixed in place, I place the chocolates, photos or toppers that the arrangement has, and finally the tissue paper pompoms that will cover and fill all the empty spaces, and in this super simple way, we have a nice arrangement to give as a gift on any occasion.
As you can see, although it seems like a lot of steps, it is quite simple, and if we do not have much creativity, we can always find on the web endless ideas to work with, and here, I share mine, hoping it can serve as a guide, either to pamper your loved ones or to undertake.
