Greetings,
Dear friends, I'm here with a new delivery and to share with you part of the process of restoring a hydraulic steering box of your car.
For those who read me and do not know the steering box is the main or most complex part of the steering system of the car, it is the one that is coupled to the steering wheel and receives our orders for the car to turn.

The steering boxes have improved and innovated over the years and technology, the three most popular types of steering in cars are the mechanical steering, is a steering system where there is no help or assistance, ie, the weight of the wheels is transmitted to the steering wheel and becomes quite hard for the user, usually this system is obsolete but if there are some vehicles that still bring this system as is the case of the Chevrolet spark.
The next system is called hydraulic steering, is the same principle of the mechanical system only that a steering pump is added to the engine accessories and this pump is responsible for circulating oil to the box to reduce our effort on the steering wheel. This system is the most common today in automobiles, but requires more maintenance, the steering box has a number of seals and stoppers for the oil to circulate through the internal part.
There is also a third model and it is the electric steering, this also works as the mechanical steering only that the assistant to smooth or facilitate the steering wheel.
The steering boxes have improved and innovated over the years and technology, the three most popular types of steering in cars are the mechanical steering, is a steering system where there is no help or assistance, ie, the weight of the wheels is transmitted to the steering wheel and becomes quite hard for the user, usually this system is obsolete but if there are some vehicles that still bring this system as is the case of the Chevrolet spark.
The next system is called hydraulic steering, it is the same principle of the mechanical system only that a steering pump is added to the engine accessories and this pump is responsible for circulating oil to the box to reduce our effort on the steering wheel. This system is the most common today in automobiles, but it requires more maintenance, the steering box has a number of seals and stoppers for the oil to circulate through the internal part. There is also a third model and is the electric steering, this also works like the mechanical steering only that the assistant to smooth or facilitate the handling is an electric motor so we stop subtracting powerful to the engine of the car with the hydraulic pump, this model is seen in more modern cars, in my personal case I have seen it in the Toyota Previa.
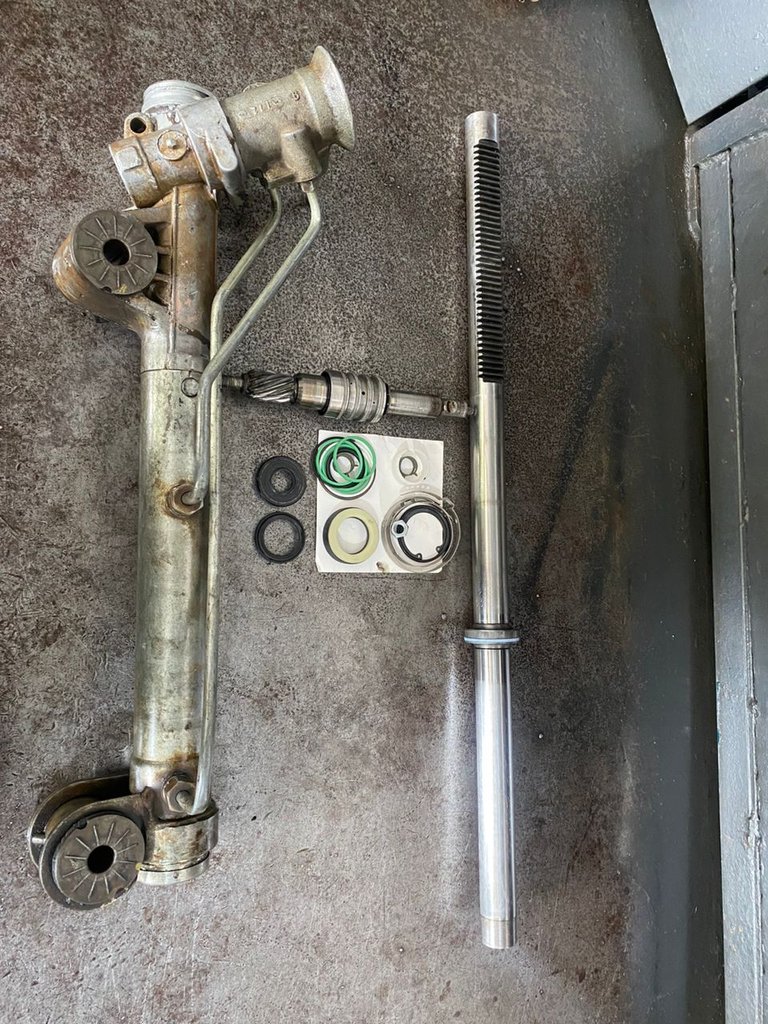
In this opportunity I had to replace the seals and packing kit to a hydraulic steering box, usually this is done corrective maintenance when we begin to observe oil leaks and often if there is failure of an internal seal can leak pressure and make the steering hard or the wheels turn abnormally.

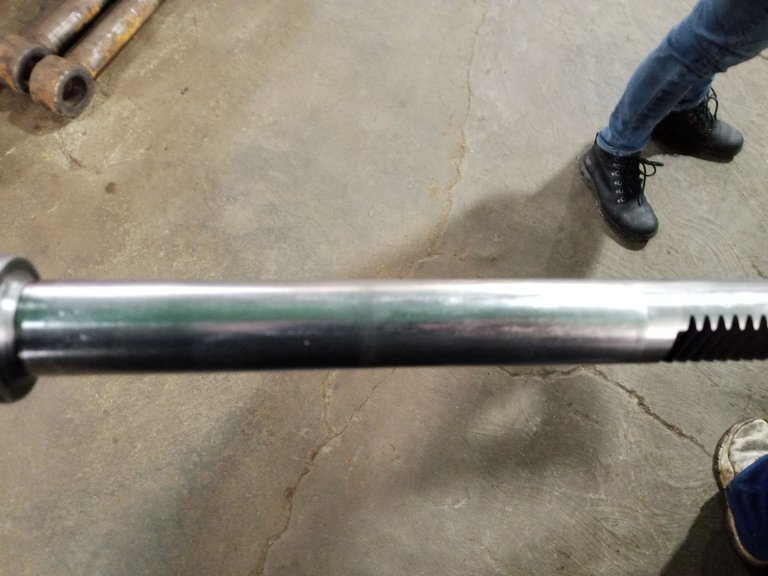
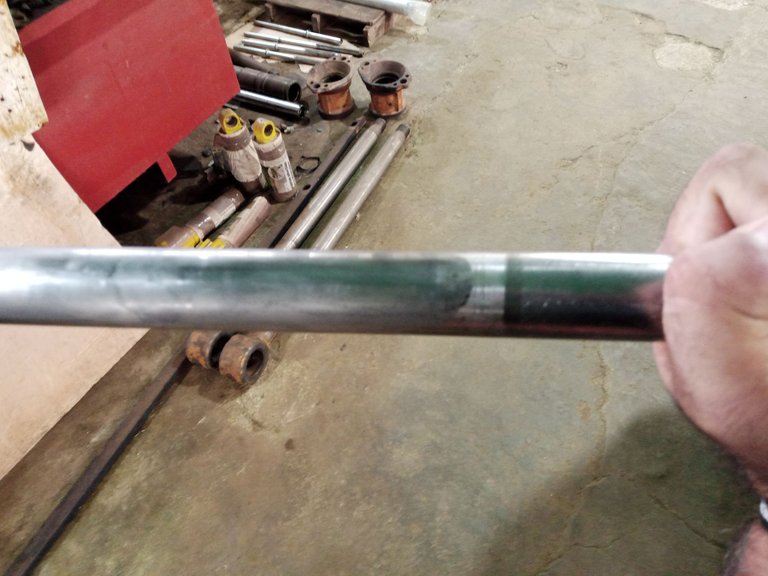
This box was disassembled by presenting oil cans, despite coming from another workshop where apparently had replaced the seal kit, when disassembled we noticed that the steering rod, which should always be mirror type chrome mechanics applied coarse sandpaper leaving many pores in the bar, in addition to this we noticed a shadow that apparently had as a welding point which was then lowered with a Dremel.


Because of all these things described the kit that was installed did not work, when we took the bar to the machining and chrome shop we realized that the bar had been affected in almost all of the parts.
The metallic and chrome work of the bar had a cost of $ 95 plus $ 65 that cost the seals kit, this labor has a cost of $ 150, it is a very tedious work of which I could document very little.
The first thing we must be careful with is the release of the steering wheel because if the car has an airbag and we leave the steering wheel an incorrect turn will turn more to one side and the strap that triggers the airbag will break.
Then we must disassemble the steering terminals, the ball joints, disconnect the oil flow hoses and finally we disassemble the box; if the car is small many times we must disassemble some bases of the engine and the bridge.
In the video you can see how the lathe operator verifies that the bar is straight and takes advantage of the lathe to polish the parts that are not chromed and rust.
The invitation is to support and enjoy the video, any questions and suggestions I am attentive in the comments.
Thank you for your support and God bless you greatly, the video and photos are taken with my cell phone Infinix Hot 10 i, for video editing was used the app capcut.
SPANISH
Saludos,
Queridos amigos, paso por aquí con una nueva entrega y a compartirles parte del proceso de restauración de un cajetín de dirección hidráulica de tu automóvil.
Para quienes me leen y no saben el cajetín de dirección es la parte principal o más compleja del sistema de dirección del auto, es quien se acopla al volante y recibe nuestras órdenes para que el auto gire.
Los cajetines de dirección han mejorado e innovado con los años y la tecnología, los tres tipos de dirección más conocida en los autos son la dirección mecánica, es un sistema de dirección donde no hay ningún tipo de ayuda o de asistencia, es decir, el peso de las ruedas se transmite al volante y se torna bastante dura para el usuario, por lo general ya este sistema es obsoleto pero si hay algunos vehículos que aún traen este sistema como es el caso del Chevrolet spark.
El siguiente sistema se llama dirección hidráulica, es el mismo principio del sistema mecánico solo que se agrega una bomba de dirección a los accesorios del motor y está bomba se encarga de circular aceite hasta el cajetín para disminuir nuestro esfuerzo en el volante. Este sistema es el más común hoy en día en los automóviles, pero requiere de más mantenimiento, el cajetín de dirección lleva una cantidad de sellos y estoperas para que el aceite circule por la parte interna.
También existe un tercer modelo y es la dirección electrica, este también funciona como la dirección mecánica solo que el asistente para suavizar o facilitar el manejo es un motor eléctrico así que dejamos de restar potente al motor del auto con la bomba hidráulica, este modelo se ve en autos más modernos, en mi caso personal lo he visto en la Toyota Previa.
En esta oportunidad me tocó reemplazar el kit de sellos y estoperas a un cajetín de dirección hidráulica, por lo general este se le hace mantenimiento correctivo cuando empezamos a observar fugas de aceite y muchas veces si hay falla de algún sello interno puede la presión fugar y hacer la dirección dura o que las ruedas giren de forma anormal.

Este cajetín fue desmontado por presentar botes de aceite, a pesar de venir de otro taller donde aparentemente le habían reemplazo el kit de sellos, al desarmar notamos que la barra de dirección, la que debe ser siempre cromada tipo espejo los mecánicos le aplicaron lija gruesa dejando muchos poros en la barra, adicional a esto notamos una sombra que al parecer tenía como un punto de soldadura que luego fue rebajado con un Dremel.


Por toda esas cosas descritas el kit que instalaron no sirvió, al llevar la barra al taller de mecanizado y cromado nos dimos cuenta que la barra había Sido afectada en casi 3 décimas, dos décimas más y se tenía que comprar un cajetín nuevo.
El trabajo de metalizado y cromado de la barra tuvo un costo de 95$ más 65$ que costó el kit de sellos, está mano de obra tiene un costo de 150$, es un trabajo bastante tedioso del cual pude documentar muy poco.
Lo primero con lo que debemos ser prudentes es con la liberación del volante ya que si el auto tiene bolsa de aire y dejamos el volante una vuelta incorrecta girará más hacia uno de los lados y el fleje que dispara la bolsa de aire se romperá.
Luego debemos desmontar los terminales de dirección, las rotulas, desconectar las mangueras de flujo de aceite y por último desmontamos el cajetín; si el auto es pequeño muchas veces debemos desmontar algunas bases del motor y el puente.
En el vídeo pueden observar como el tornero se encarga de verificar que la barra está derecha y aprovecha el torno para pulir las partes que no van cromadas y se oxidan.
La invitación es para que apoyen y disfruten del vídeo, cualquier duda y sugerencia estoy atento en los comentarios.
Gracias por su apoyo y que Dios les bendiga grandemente, el vídeo y las fotos son tomadas con mi celular Infinix Hot 10 i, para la edición del vídeo se utilizó la app capcut.
▶️ 3Speak


