Good afternoon my creative Hive Diy family! Happy and blessed Friday to everyone, we are entering the weekend and the body knows it ha, ha, ha, ha. I hope you are super well, happy, healthy, quite creative and of course, productive in the day to day, to continue inspiring and guiding with our handmade arts to the community.♡
La tarde de hoy, les traigo un excelente tutorial paso a paso de como hacer en casa Lazos, pero no los típicos lazos de cinta, que sin duda, son hermosos, solo que muchas veces no tenemos los materiales a la mano. En cambio, les tengo estos lazos de papel o cartulina, hechos en casa en simples pasos, cosa que nos toma solo unos cuantos minutos de nuestro tiempo, estos nos funcionan para complementar regalos, porque un lazo le da un toque especial y en este caso diferente a nuestros regalos, además puede tener otras utilidades.
This afternoon, I bring you an excellent step-by-step tutorial on how to make Bows at home, but not the typical ribbon bows, which without a doubt, are beautiful, we just don't often have the materials at hand. Instead, I have these paper or cardboard bows, homemade in simple steps, which takes only a few minutes of our time, these work to complement gifts, because a bow gives a special touch and in this case different to our gifts, and can also have other utilities.
A continuación empiezo con los materiales y seguimos con el paso a paso.✨
Next I start with the materials and we go through the step by step.✨
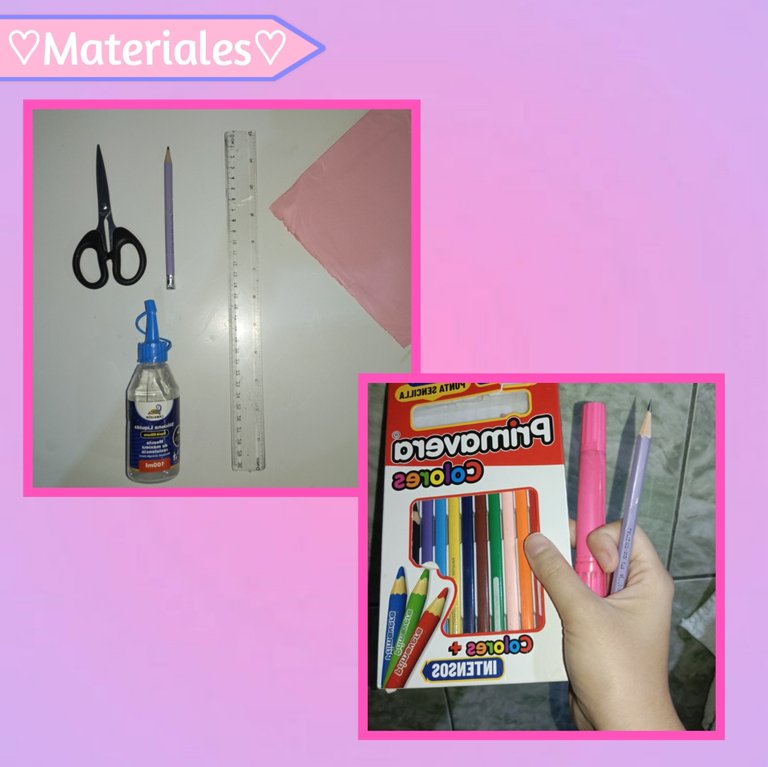
♡💜💗Materials💗💜♡
- Papel o cartulina
- Colores/marcadores
- Silicón
- Regla
- Tijeras
- Lápiz
- Paper or cardboard
- Colours/markers
- Silicone
- Ruler
- Scissors
- Pencil
♡🩷🪻Step by Step🪻🩷♡
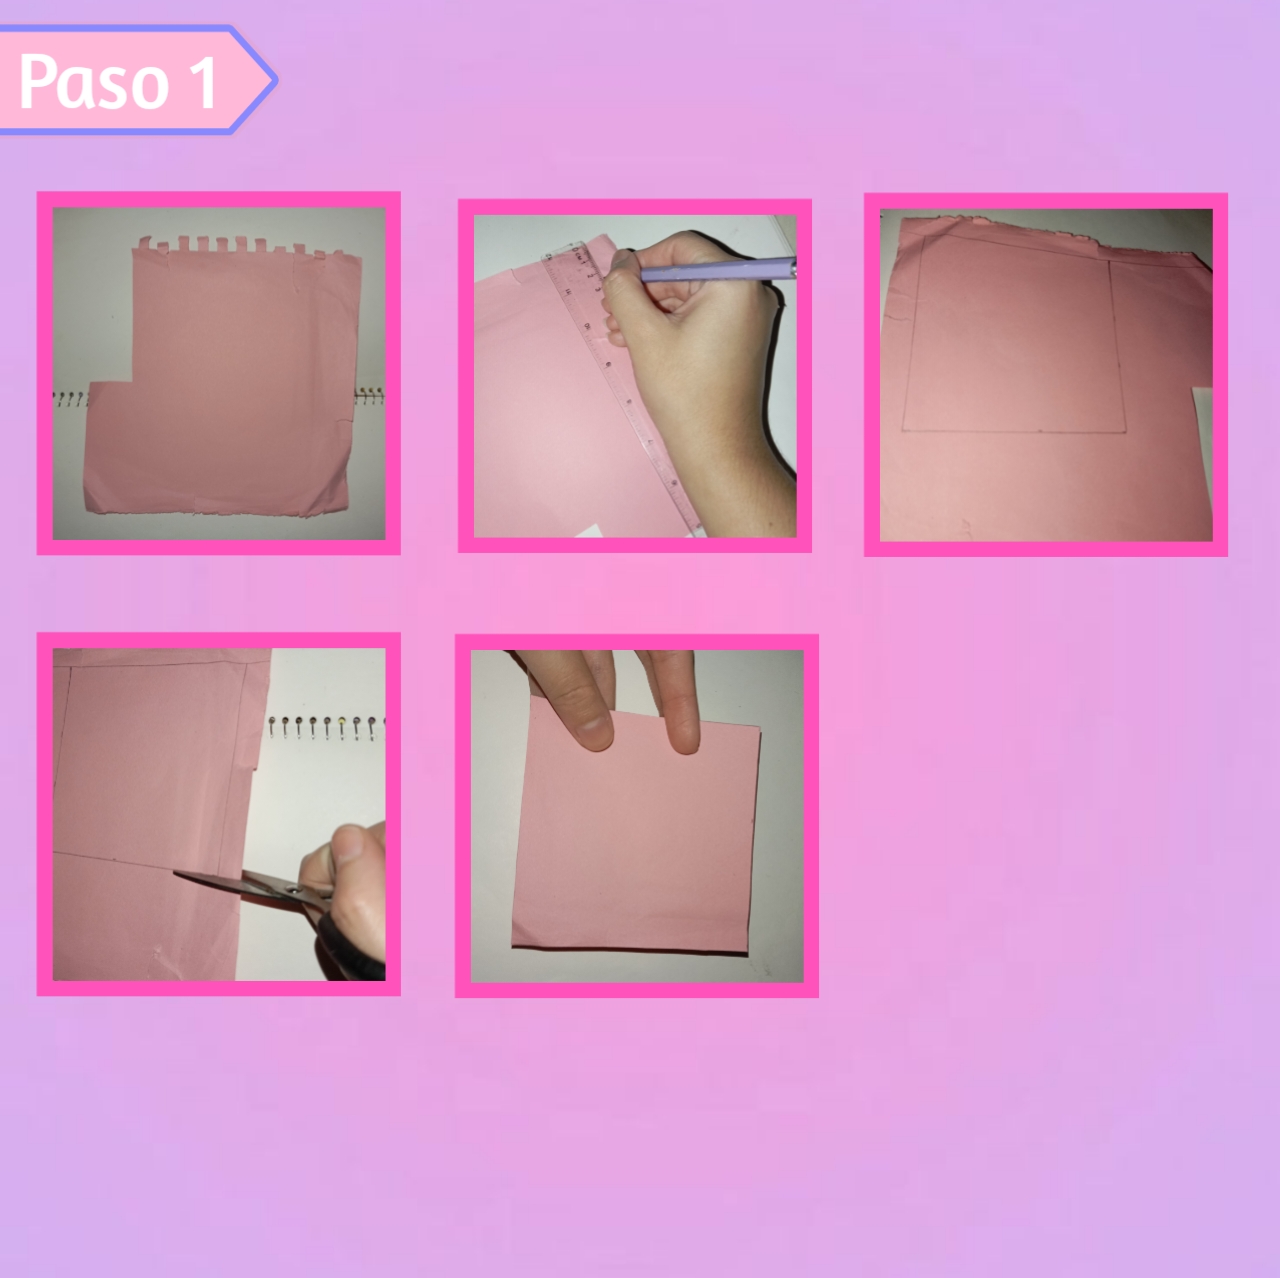
Paso 1:
Step 1:
Comenzaremos tomando una cartulina o en su defecto, un trozo mediano de cartulina (como este que tenía), así con ayuda de una regla y un lápiz, vamos a marcar un cuadrado de la medida de nuestra preferencia, depende el uso que le queramos dar. Continuamos tomando una tijera y recortando cuidadosamente la pieza, hasta obtener nuestro cuadrado.
We will start by taking a piece of cardboard or, failing that, a medium-sized piece of cardboard (like this one I had), and with the help of a ruler and a pencil, we will mark a square of the size of our preference, depending on the use we want to give it. We continue by taking a pair of scissors and carefully cutting out the piece, until we get our square.
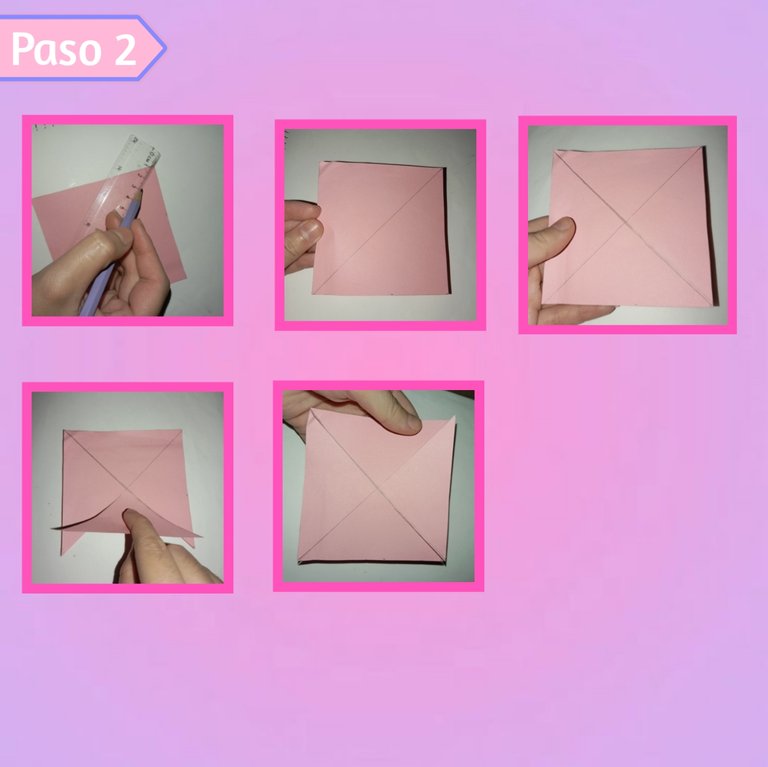
Paso 2:
Step 2:
Proseguimos, tomando nuestras regla y posicionando está sobre nuestro cuadrado en forma diagonal, de esquina a esquina, así trazaremos la línea con el lápiz y haremos otra línea igual con las otras esquinas, haciendo una "X". Ahora, con la tijera haremos un corte recto siguiendo la primera línea, pero no llegaremos al final, sino como 1cm antes, así con cada una, en total cuatro.
We continue, taking our ruler and placing it on our square diagonally, from corner to corner, we will draw the line with the pencil and we will make another line with the other corners, making an "X". Now, with the scissors we will make a straight cut following the first line, but we will not reach the end, but about 1cm before, so with each one, in total four.
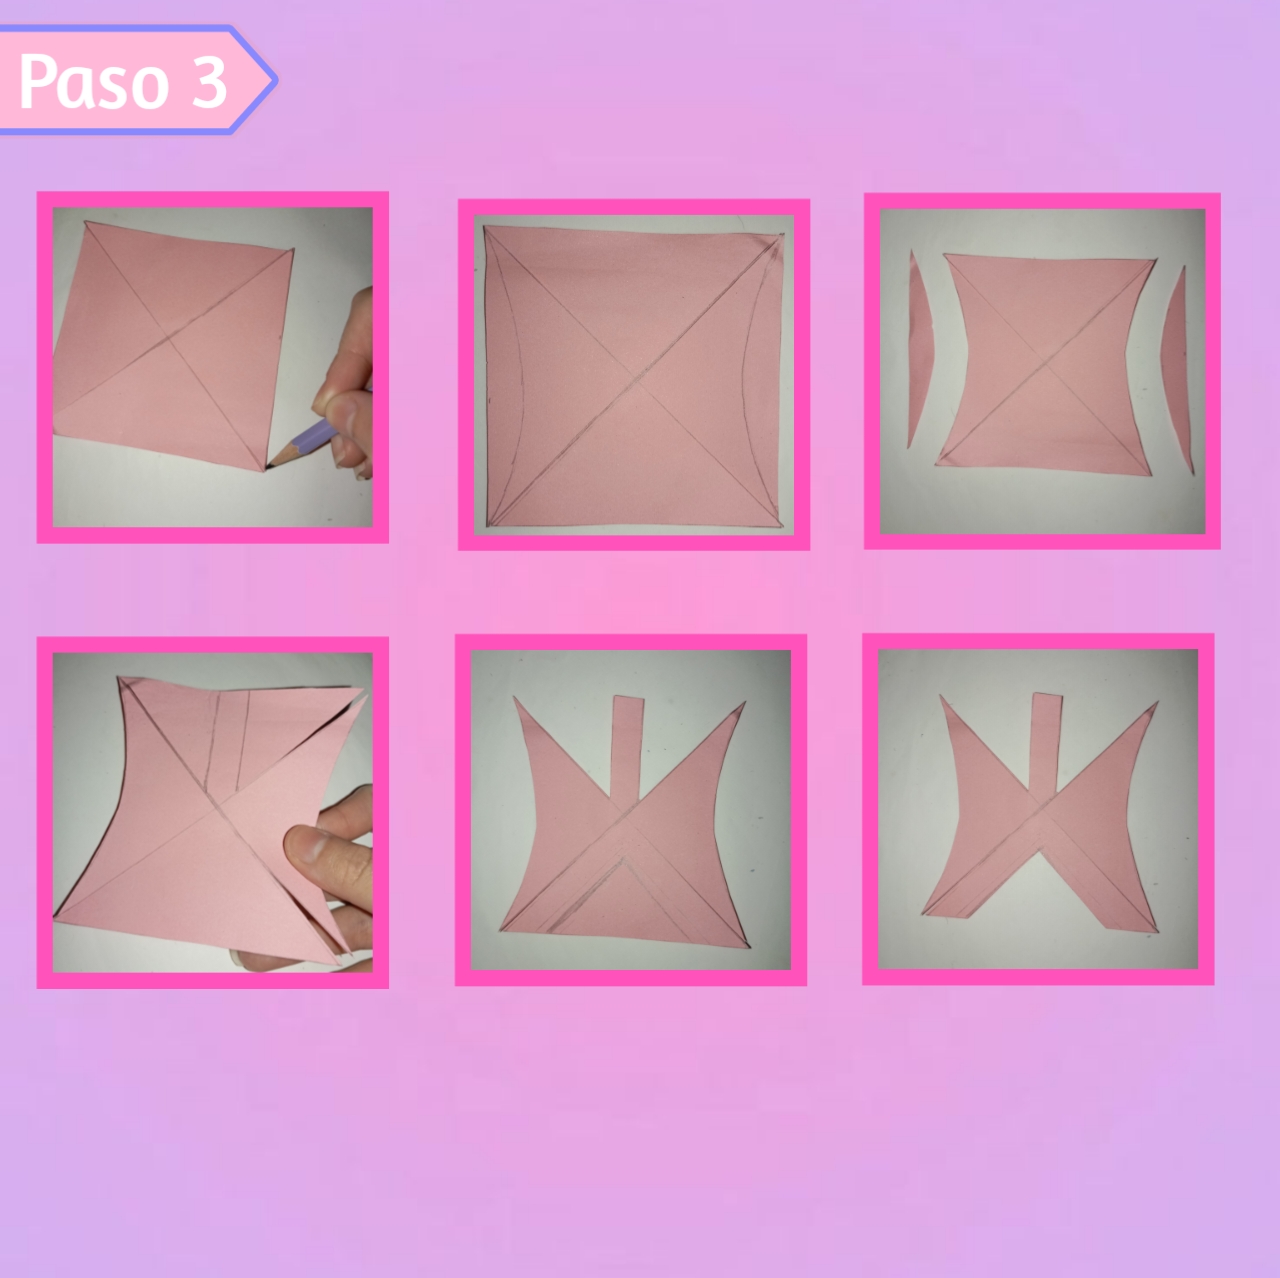
Paso 3:
Step 3:
Seguimos con la pieza anterior, vamos a posicionar un lápiz en una esquina de un mini triángulo de la figura y desde esa punta hacia el otro extremo del mismo triángulo, es decir, frente con frente, haremos una curva, igualmente con el otro lado, en frente, como pueden ver. Ahora trabajando en los dos mini triángulos restantes (arriba y abajo), en el de arriba marcaremos una linea de 1 cm de grosor, por todo el largo y recortaremos, en el de abajo marcaremos un triángulo y también recortamos.
We continue with the previous piece, we are going to position a pencil in a corner of a mini triangle of the figure and from that point towards the other end of the same triangle, that is to say, front to front, we will make a curve, likewise with the other side, in front, as you can see. Now working on the two remaining mini triangles (top and bottom), on the top one we will mark a line 1 cm thick, along the whole length and cut it out, on the bottom one we will mark a triangle and also cut it out.
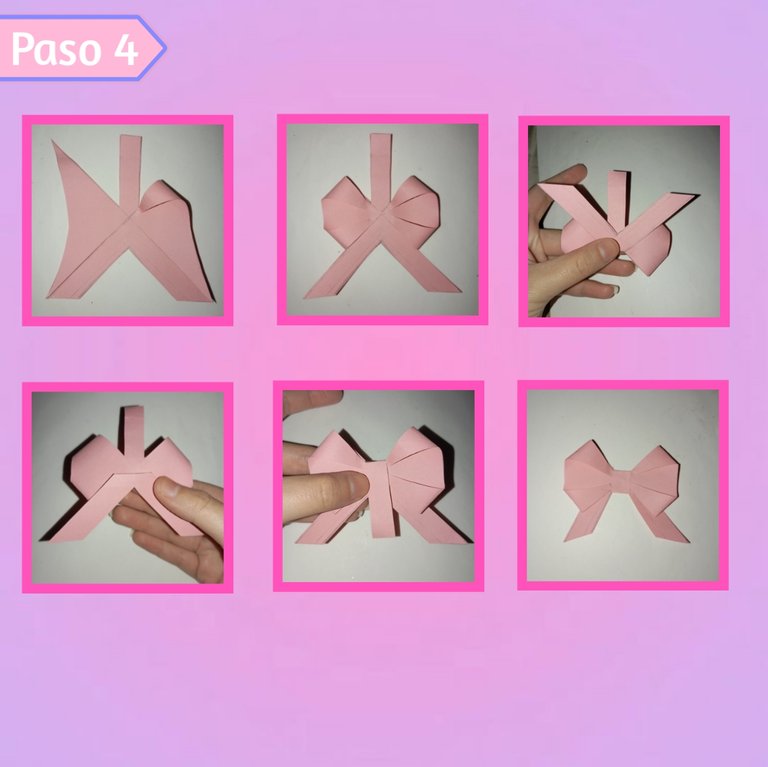
Paso 4:
Step 4:
A continuación, tomamos la esquina de un lado, le agregamos una pequeña cantidad de silicón en la punta y la llevamos al centro, pegando muy bien, así con las cuatro puntas de los dos lados. En este punto, vamos a dar la vuelta del lazo, así doblaremos dos veces la parte que guinda del lazo y pegaremos un poco más arriba, también la linea de 1 cm más o menos la bajamos pasando por en frente del lazo, pegando atrás y recortando el excedente.
Next, we take the corner of one side, add a small amount of silicone to the tip and bring it to the centre, gluing it very well, like this with the four tips of the two sides. At this point, we will turn the ribbon around, so we will fold twice the rounded part of the ribbon and glue a little bit more on top, also the line of 1 cm or so we will lower it passing in front of the ribbon, gluing at the back and trimming the excess.
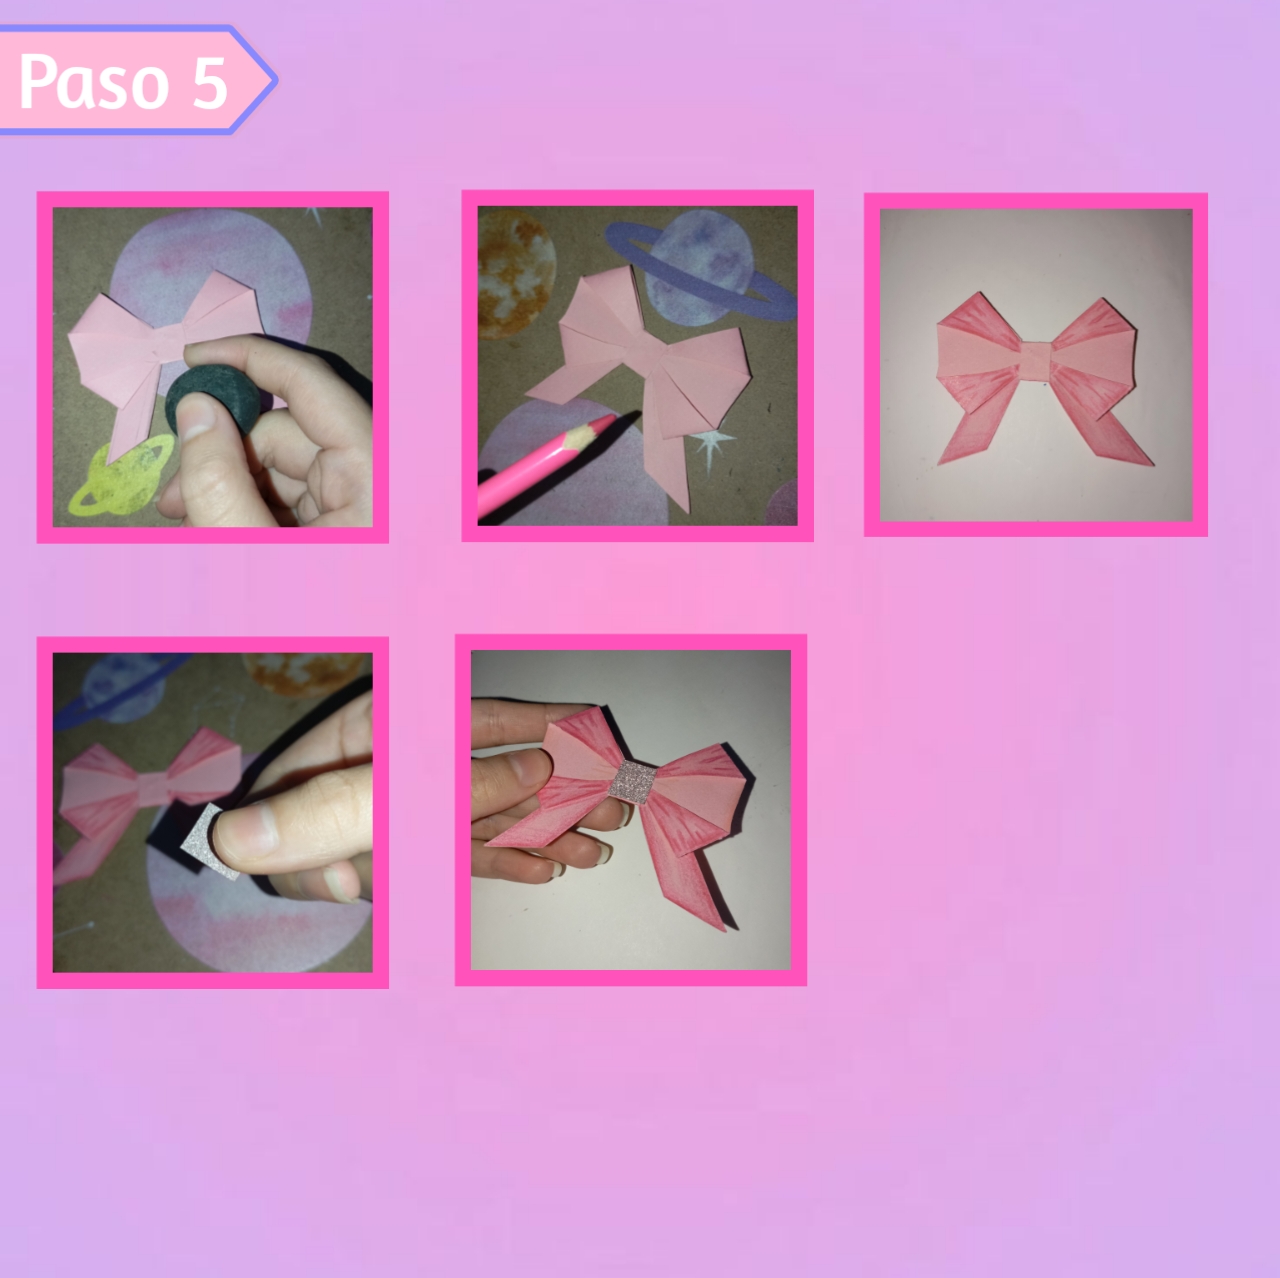
Paso 5:
Step 5:
Para finalizar agregamos pequeños detalles, así primero borre el trazo del lápiz, después con un color más fuerte que el de la cartulina del lazo difumine los bordes y agregué profundidad con unos detalles en todo el lazo. Por último recorte un pequeño rectángulo en cartulina rosa micro escarchada, le agregué silicón en la parte de atrás y pegue en el centro del lazo y quedó espectacular.
To finish we added small details, so first I erased the pencil line, then with a stronger colour than the cardboard of the bow I blurred the edges and added depth with some details all over the bow. Finally I cut out a small rectangle in pink micro frosted cardboard, added silicone on the back and glued it in the centre of the bow and it looked spectacular.
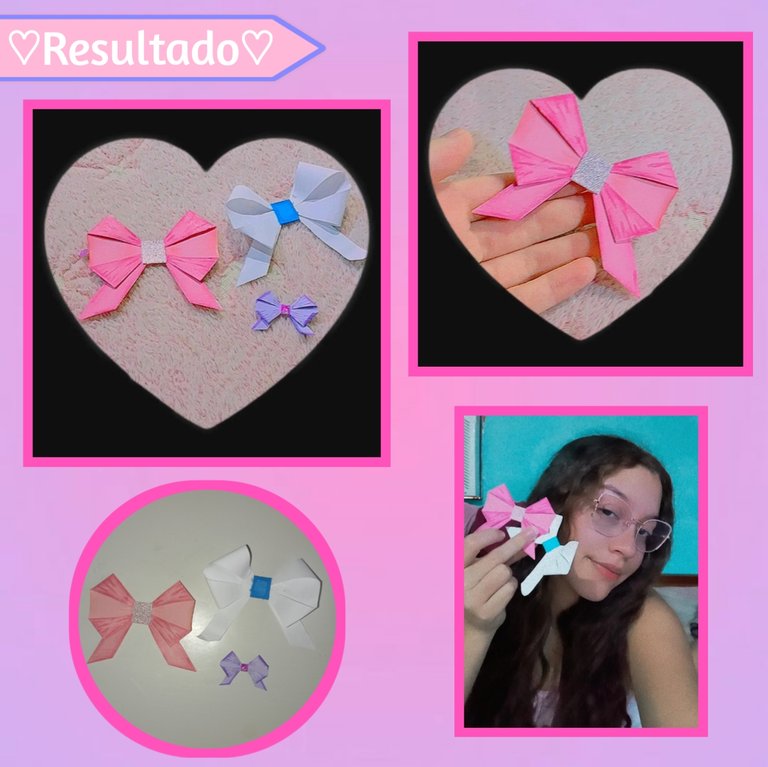
De está forma es como en pocos pasos, puedes realizar estos hermosos y tiernos lazos, que resultan indispensables para añadir a nuestros regalos, los podemos hacer fácilmente. Además son personalizados, podemos jugar con los tamaños, colores y diseños, ideal para impulsar nuestra creatividad y decorar el lazo con una temática en específico, nos sirve para mantener juego con el regalo, yo hice otros dos, para que vean que también se puede con papel y en diferentes tamaños, es una idea versátil y fácil.🪻✨
This is how in just a few steps, you can make these beautiful and tender bows, which are indispensable to add to our gifts, we can make them easily. They are also personalized, we can play with sizes, colours and designs, ideal to boost our creativity and decorate the bow with a specific theme, it serves to keep game with the gift, I made two others, so you can see that you can also with paper and in different sizes, it is a versatile and easy idea.🪻✨
Así, llegamos al final de el DIY de hoy, espero lo hayan disfrutado y les sea de gran utilidad en cualquier momento, guarden este tutorial, los puede sacar de un apuro. Compartan y comenten si es de su agrado, les agradezco todo el apoyo y el amor de siempre, gracias por llegar hasta el final mi gente creativa.✨💜
So, we come to the end of today's DIY, I hope you enjoyed it and it will be useful at any time, save this tutorial, it can get you out of a hurry. Share and comment if you like it, thank you for all the support and love, thanks for making it to the end my creative people.✨💜
💜💗¡Gracias por leer y acompañarme un día más! Abrazos y besos💗💜
💜💗Thank you for reading and joining me one more day! Hugs and kisses💗💜
Photos of my authorship taken from my Xiaomi Redmi 13C phone, edited in the free version of Canva and PixelLab.✨

