https://inleo.io/threads/view/supiconvees-md/re-leothreads-38fqh446v
Good day, Esteemed.
Welcome to another class of my photo – retouching tutorial.
This time I am going to clean up a female photo (Face).
I am going to summarize what we just did on previous picture.
I will bring in some downloaded images
I will copy it and paste it on my WINDOWS PAINT application. So that I can save it as JPEG. Though I can still do that directly on my Photoshop.
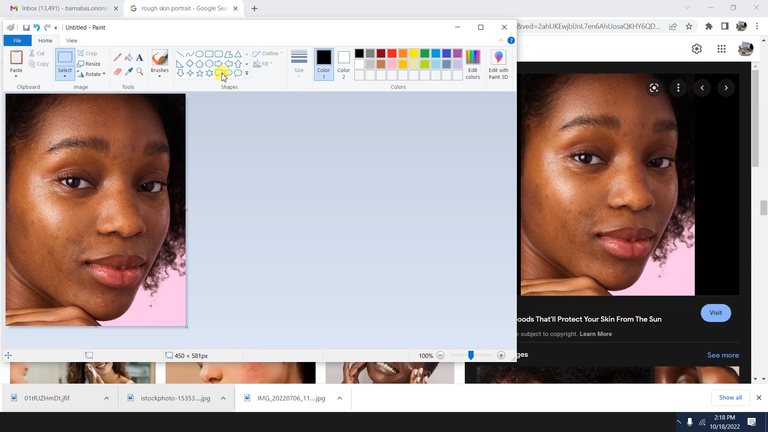
I will save it with the name “ROUGH FACE”
I will drag and drop it in the Photoshop
You can see the rough face.
I quickly double click this. And duplicate that layer as I press (CTRL + J).
I come over apply the GAUSSIAN BLUR effect on that top layer. And effect some adjustment and click okay.
I will duplicate the first layer again with the (CTRL + J). Then Un-solo it (Hide the visibility of that layer.
I am going to create a layer mask and press the CTRL + I to inverse.
I will use my brush effect on the area of my interests.
As the BACKGROUND is showing black, I need to switch it to the FOREGROUND which is white, so that my brush can be effective. If I leave it at this black it will not have any effect.
When you use the brush, try to follow the curves of the face.
Your tracing skills make you an artist.
Let me switch the Foreground to white and work on this edge. So that I can preserve that depth. Switch to Black to clean it off. Then switch it to white again to take it close. So for the lips, it is okay.
I will reduce the opacity of the eyes. Then the lips. I don't want to make it over-blur.
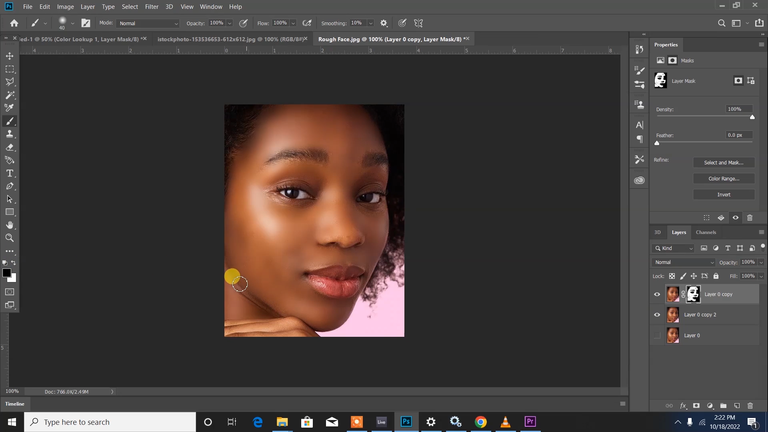
This is what I have done on the face. But to make it look natural, I will reduce it not to make it too blurry and you can see that some of the areas of the face are treated. Then you can observe some black spots, those black spots are areas where you can just apply some retouching by switching to White.
Another way you can retouch that area is to use the PATCH TOOL.
So you can see that I when I applied this, it smoothens the face. But I see some black spots. And I need to treat them. What do I need to do I need to make use of my PATCH TOOL.
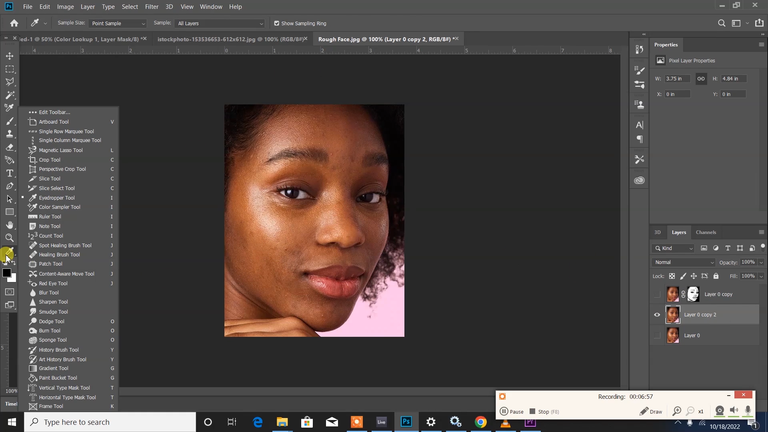
I look for the tool. You see these three spots. It contains hidden tools.
Make sure you first drag this so that it clips to the edge and drag these tools out. We have a lot of tools here.
But I am going to use my patch tool. I click on my PATCH TOOL.
Hold the spots and drag it to a clean space that has a similar texture.
Many photo editors use this style to fix their spotty images. And it depends on some special cases. You can do some practice.
If you need an in-depth tutorial, let me know.
I need to tune the skin. Then I will duplicate this layer.
Go to the Filter, then Camera Raw.
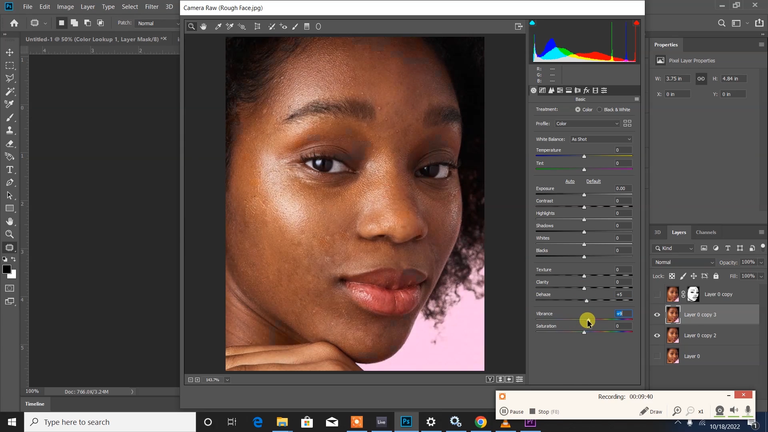
You can click on VIBRANT reduce the Vibrancy and CLARITY reduce the clarity then you have a clean smooth face.
Remember, When you reduce the clarity it will affect the details when you increase the clarity it increase the details. But it will affect the details once you reduce it.
You must create a mask for that layer which is similar to this upper layers then
I will come to this eye section. Take your eraser and clean it so that the eye will be Sharp
There are different methods you can use to retouch your skin.
I choose these methods you can see that those spots on the face are not visible. Because we have corrected some of those errors.
For more tutorials drop your requests so that I know the tutorial to make up for you, in my coming video
When are through with your design. Save your picture or design from the Photoshop format to JPEG or PNG.
STEPS
File => Save As => File Name (Input the File name of your choice) => Save as type (Select JPEG or PNG ) => Click Save.
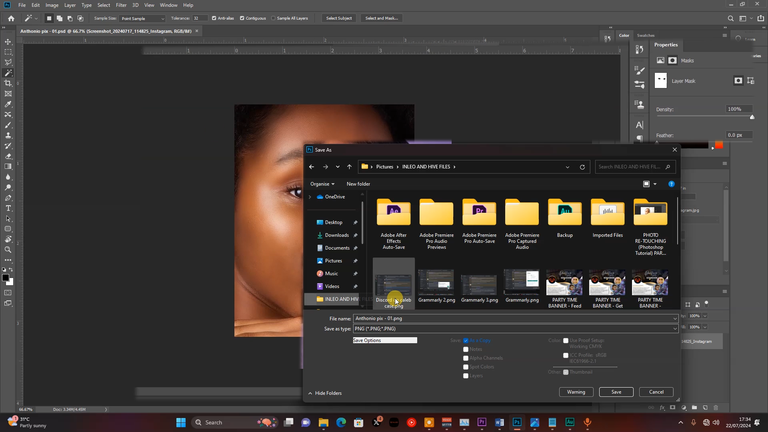
You are done.
Thanks for your time with me in this tutorial. More are still coming.
Posted Using InLeo Alpha