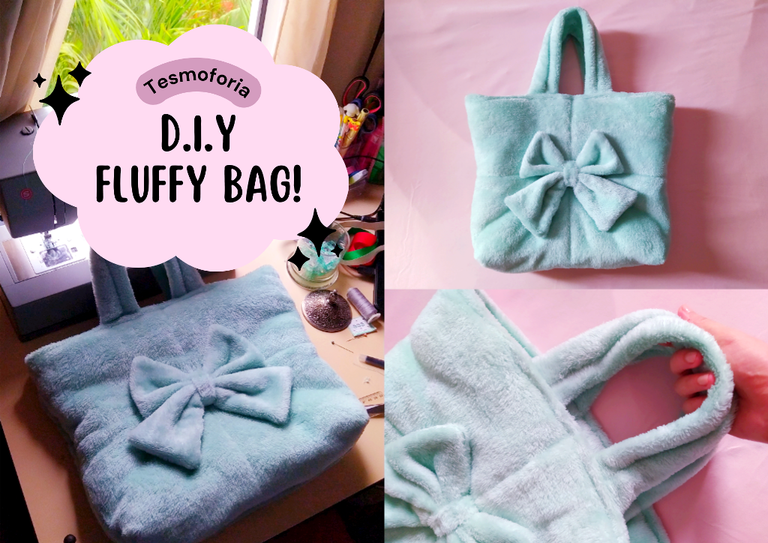
✦ See this fluffy tote bag? Very mindful, very demure, very soft - Collage & Edition in FotoJet-Canva, photos by @Tesmoforia ✦

🇪🇸 ~ ¿Sabes lo que es un "Tote Bag Puff"?, son bolsos tote pero a diferencia del modelo tradicional hecho con tela de rustica de lienzo, un "puffer tote bag" esta diseñado con tela suave y relleno acolchado.
Hace muchas semanas que he esperado este momento, de poder sentarme con calma a estudiar este concepto de bolso y poder diseñar mi propio "Tote Bag Puff" (っ ˘ω˘ς)
🇺🇸 ~ Do you know what a "Tote Bag Puff" is?, they are tote bags but unlike the traditional model made with rustic canvas fabric, a "puffer tote bag" is designed with soft fabric and quilted padding.
I have been waiting for this moment for many weeks, to be able to sit down calmly to study this bag concept and be able to design my own "Tote Bag Puff" (っ ˘ω˘ς)

¡Acompáñame si quieres aprender cómo elaborar este diseño de bolso!, pero sobre todo:
👉 ✨ Vamos juntos a descubrir los detalles importantes a tener en cuenta para obtener el mejor resultado posible ✨ 👈
Join me if you want to learn how to craft this bag design! But mostly:
👉 ✨ Let's together discover the important details to keep in mind to get the best possible result ✨ 👈

« 𝕋 𝕆 𝕆 𝕃 𝕊 • 𝔸 ℕ 𝔻 • 𝕄 𝔸 𝕋 𝔼 ℝ 𝕀 𝔸 𝕃 𝕊 »

 |
|---|
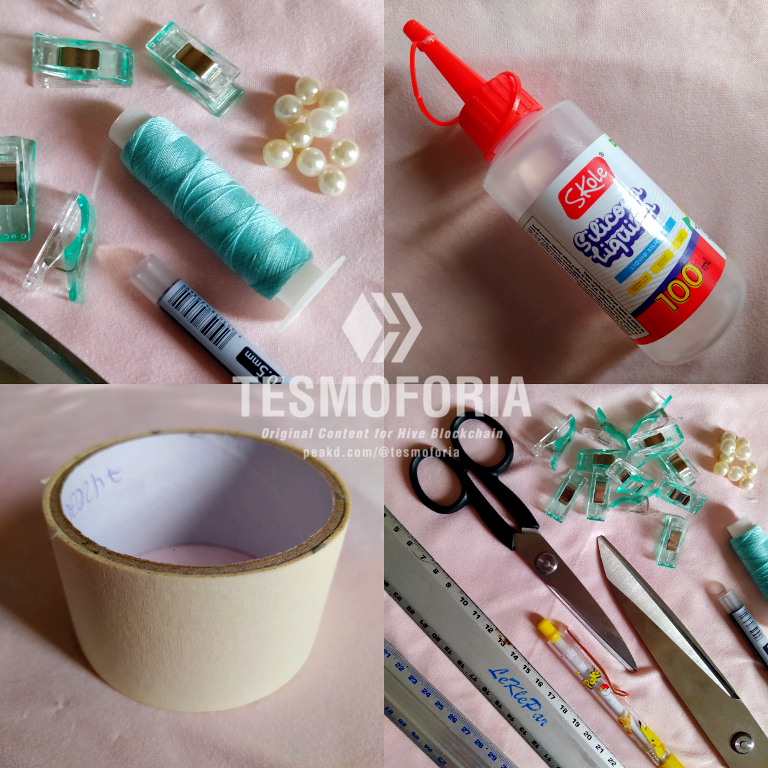
| 🇪🇸 ✦ Las herramientas y materiales que necesitas para elaborar este proyecto son: Tela afelpada (puede ser tela de cobija o tela de peluche), alfileres, pinzas para tela, aguja regular, cinta adhesiva gruesa, regla de distintos tamaños, tijeras, bolígrafo, marcador fino, hilo del mismo color de la tela, entre tela acolchado, máquina de coser, tela de reciclaje de jean, pegamento silicón frío, 2 broches de metal. |
| 🇺🇸 ✦ The tools and materials you need to make this project are: Fluffy fabric (can be blanket fabric or plush fabric), pins, fabric clips, regular needle, thick adhesive tape, ruler of different sizes, scissors, pen, fine marker, thread of the same color as the fabric, quilted fabric, sewing machine, recycled jean fabric, cold silicone glue, 2 metal snaps. |
• ℙ ℝ 𝕆 𝕐 𝔼 ℂ 𝕋 𝕆 •
« 𝐒𝐭𝐞𝐩 𝐛𝐲 𝐒𝐭𝐞𝐩 𝐓𝐮𝐭𝐨𝐫𝐢𝐚𝐥: "𝐇𝐨𝐰 𝐭𝐨 𝐜𝐫𝐞𝐚𝐭𝐞 𝐚 𝐅𝐥𝐮𝐟𝐟𝐲 𝐁𝐚𝐠?" »

 |  |
|---|---|
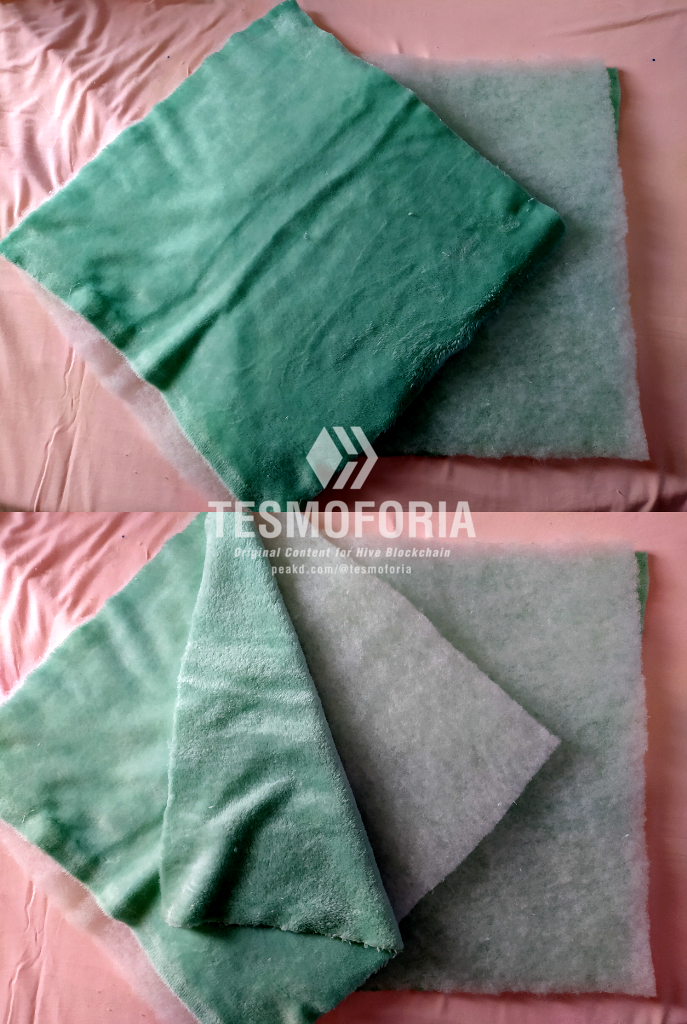 | 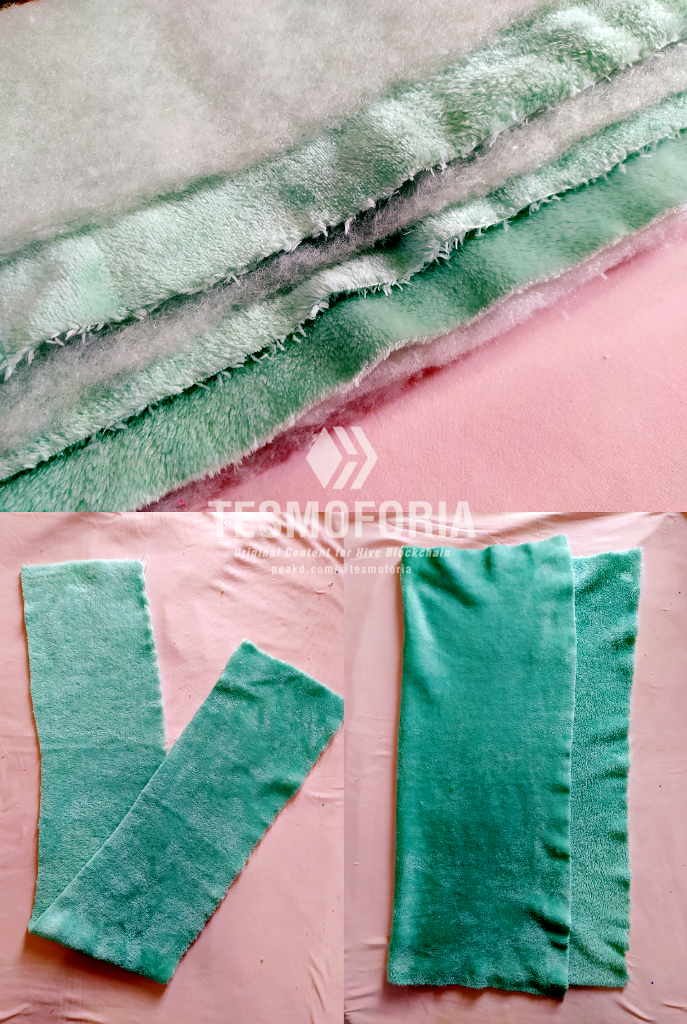 |

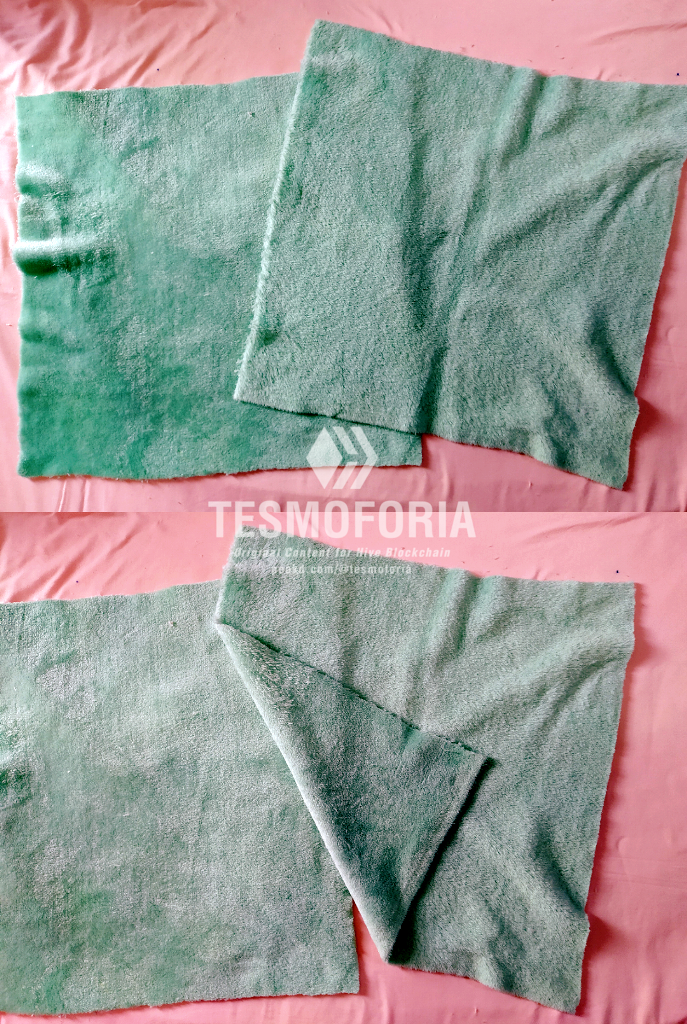
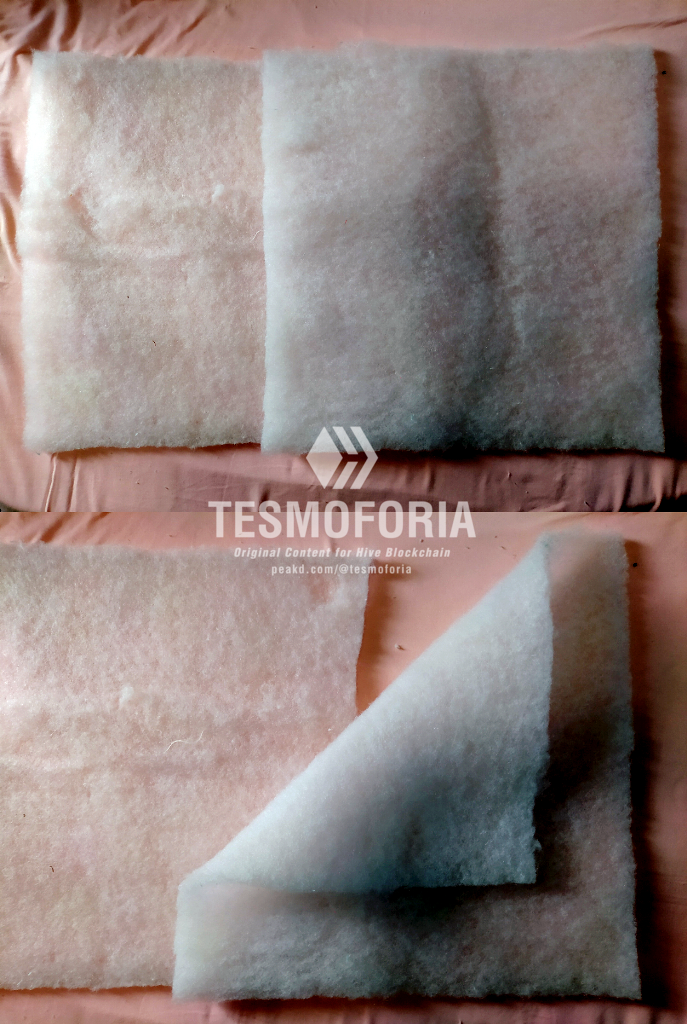
【 PASO 1 】 Extiende la tela esponjosa y la entre tela de relleno en una superficie limpia y lisa, y recorta 2 cuadrados de cada tipo de tela que midan 45 cm x 45 cm. A continuación, recorta 2 rectángulos de 47 cm x 15 cm, y para el lazo decorativo, recorta 1 pieza de 20 cm x 20 cm, 1 pieza de 27 cm x 20 cm, y una pieza final de 21 cm x 4 cm.
【 STEP 1 】 Extend the fluffy fabric and the interfacing fabric on a clean, smooth surface, and cut out 2 squares of each type of fabric measuring 45 cm x 45 cm. Next, cut out 2 rectangles measuring 47 cm x 15 cm, and for the decorative bow, cut out **1 piece measuring 20 cm x 20 cm, 1 piece measuring 27 cm x 20 cm, and a final piece measuring 21 cm x 4 cm.

 |  |
|---|
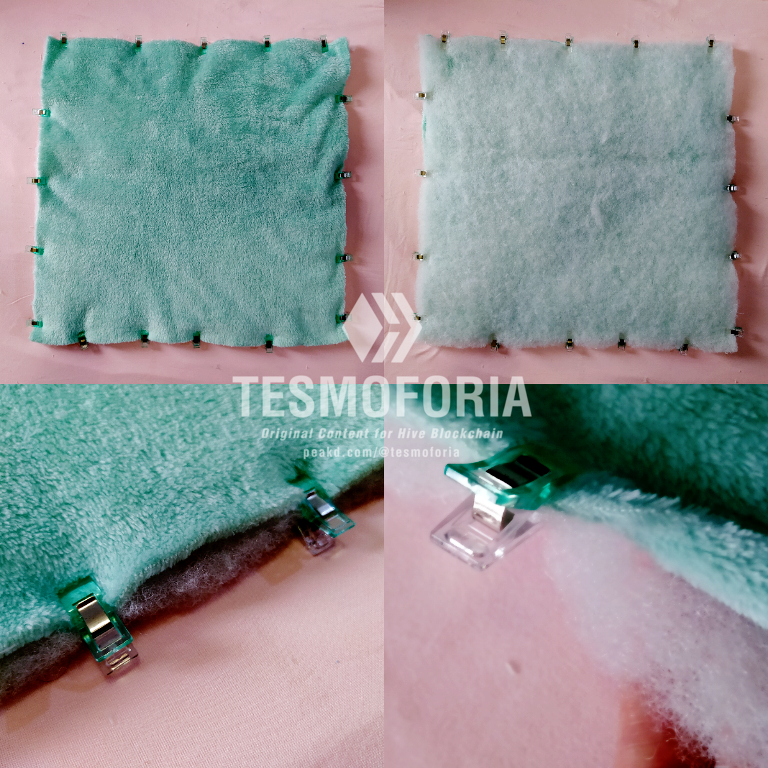
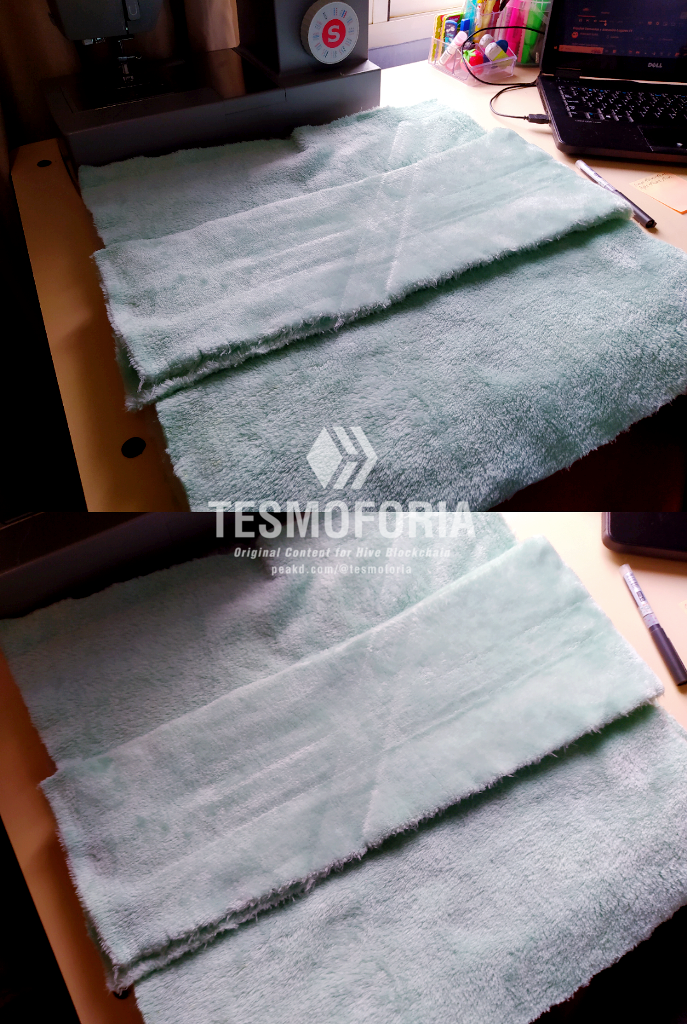
✦ Make sure all the pieces are well aligned, take your time, don't rush ✦
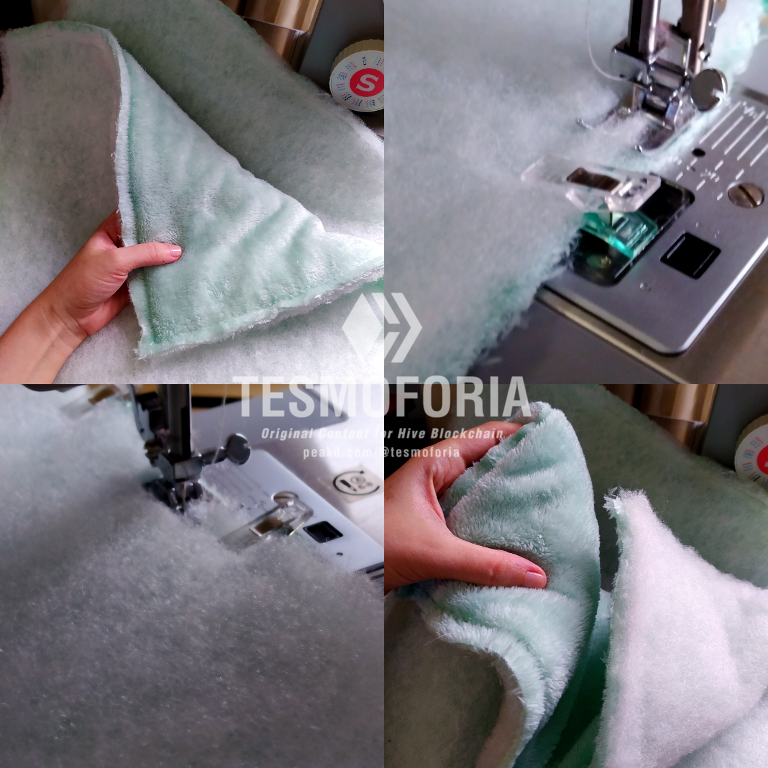
✦ Sew slowly to avoid entanglement of the interlining fiber in the sewing machine foot ✦
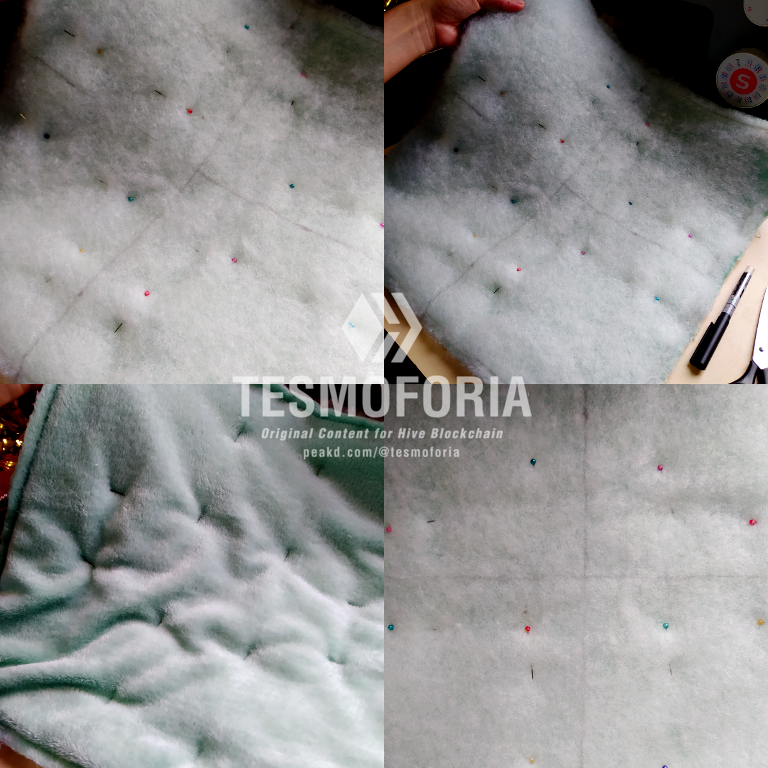
✦ Don't be shy with the number of pins! ✦
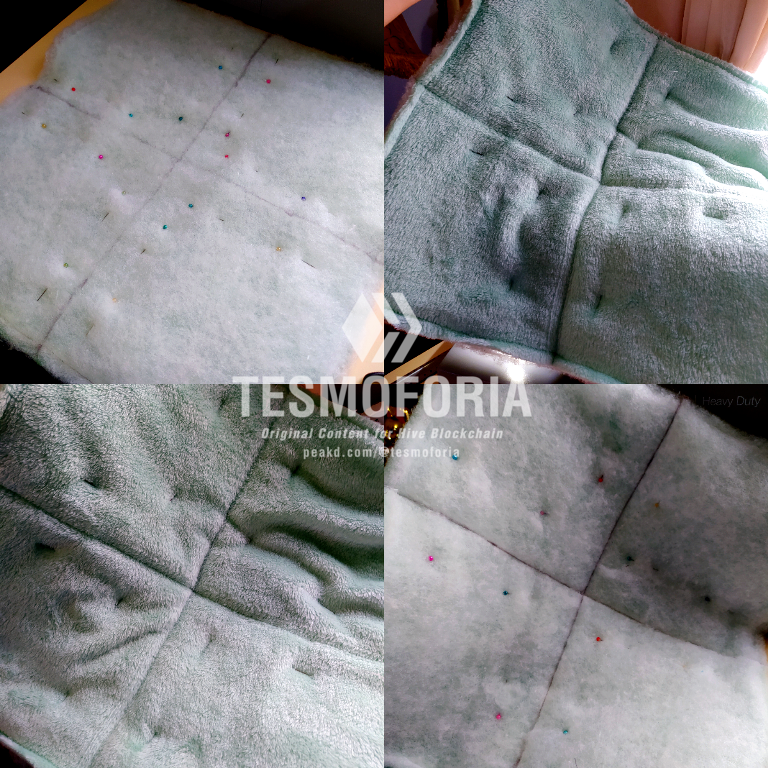
✦ Pass the fine tip marker quickly, do not press the tip, the ink may go through the interliner and stain the fabric of the bag ✦

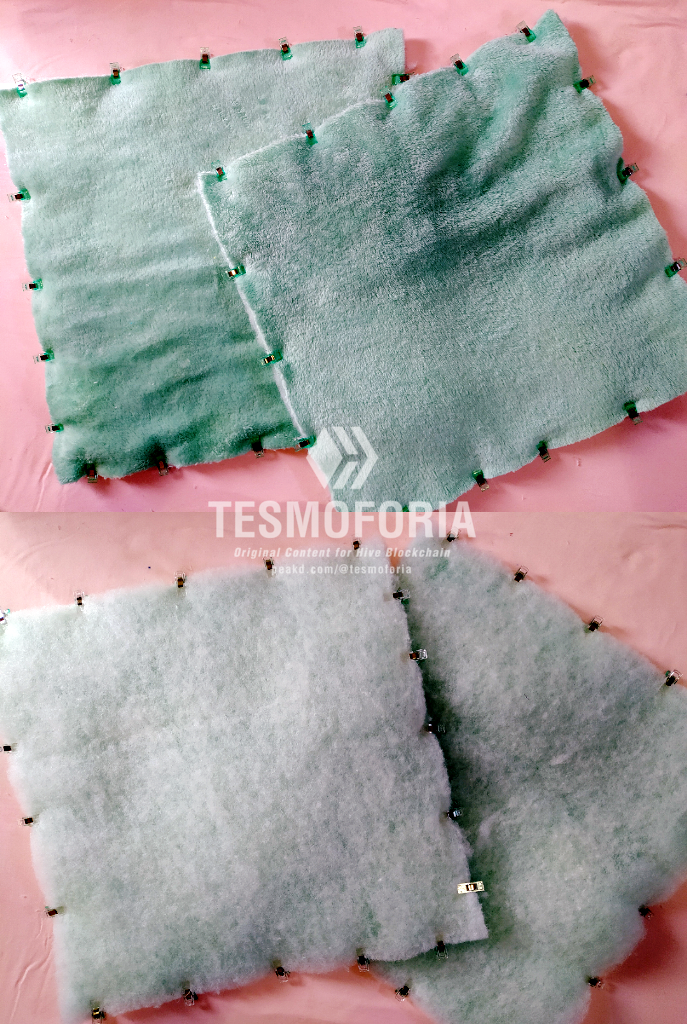
【 PASO 2 】 Alínea 1 rectángulo de tela felpuda con 1 rectángulo de entre tela (guata) y sujeta ambas piezas con las pinzas de costura, lleva a la máquina de coser y cose los 4 lados con puntada N° 3 o 4. Repite este paso con la siguiente pieza de tela y de entre tela.
【 STEP 2 】 Line up 1 rectangle of plush fabric with 1 rectangle of interfacing (wadding) and fasten both pieces with the sewing clamps, take to the sewing machine and sew all 4 sides with stitch #3 or 4. Repeat this step with the next piece of fabric and interfacing.
Dibuja una cruz centrada en los rectángulos de tela (del lado de la entre tela), y coloca varios alfileres para evitar que la tela se mueva cuando pases una costura recta sobre las líneas de la cruz.
Draw a cross centered on the fabric rectangles (on the interfacing side), and place several pins to prevent the fabric from moving when you pass a straight seam over the lines of the cross.

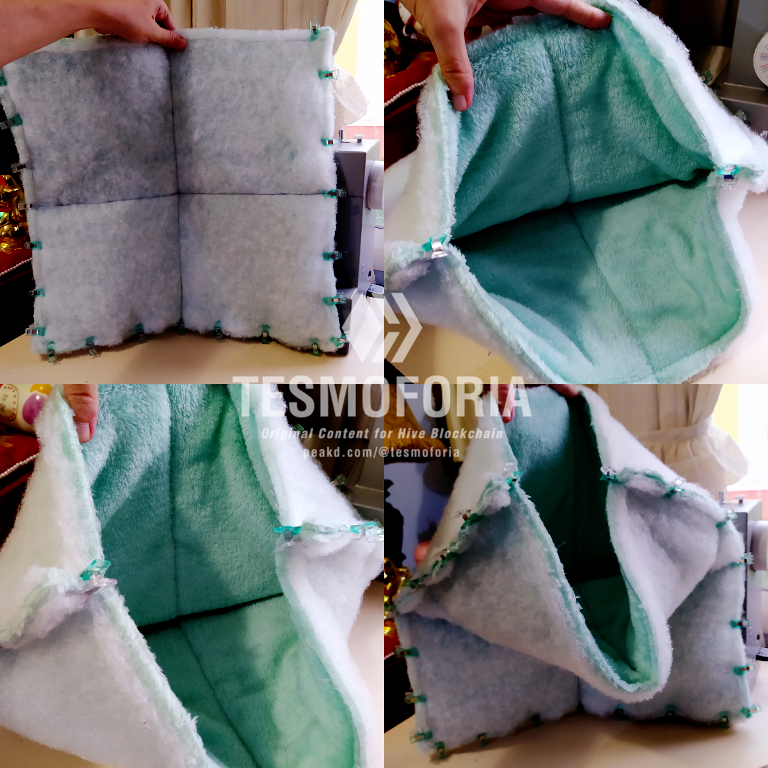
✦ The cross lines are not only decorative and safety lines, but also guide lines for joining the walls of the bag ✦
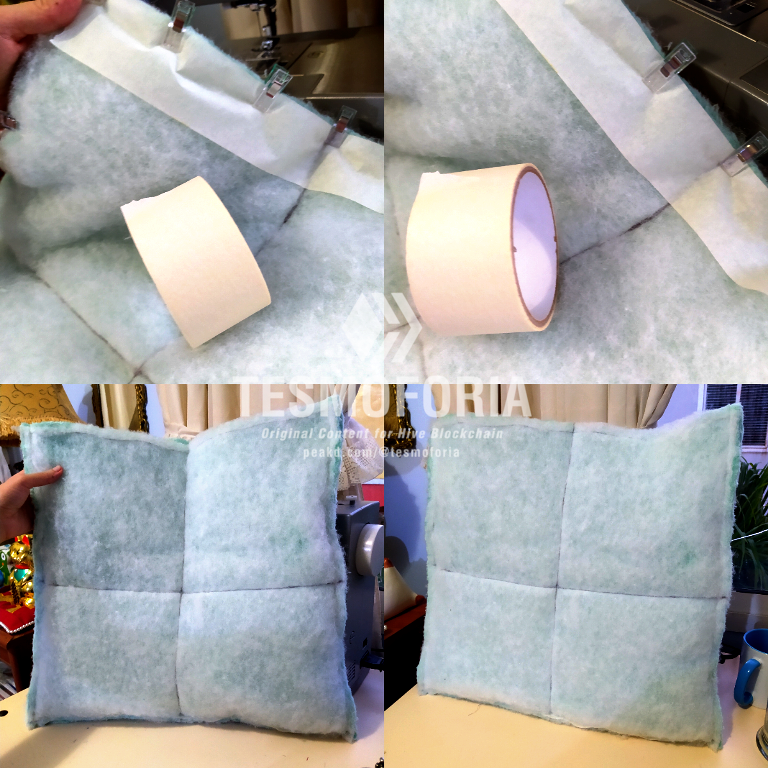
✦ If you have trouble getting the fabric through the sewing machine foot, place some tape on the side of the bag that will be in contact with the sewing machine teeth ✦
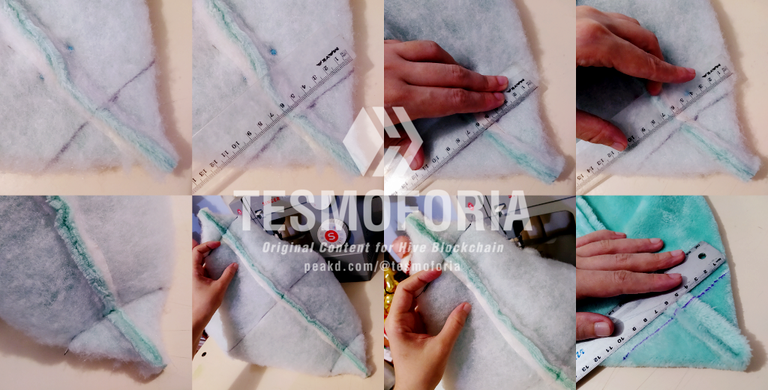
✦ Mark triangular tabs on what will be the bottom of the bag and do the same with the rectangle of fabric that will be the lining. Sew on the sewing machine and trim the excess ✦
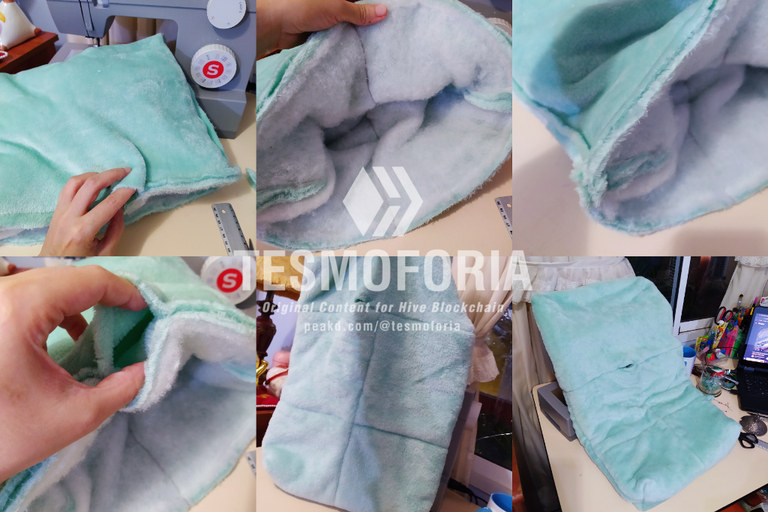
✦ Align the main body of the bag with the lining, and sew all the way around leaving a 6 cm opening so that you can turn the whole thing inside out ✦
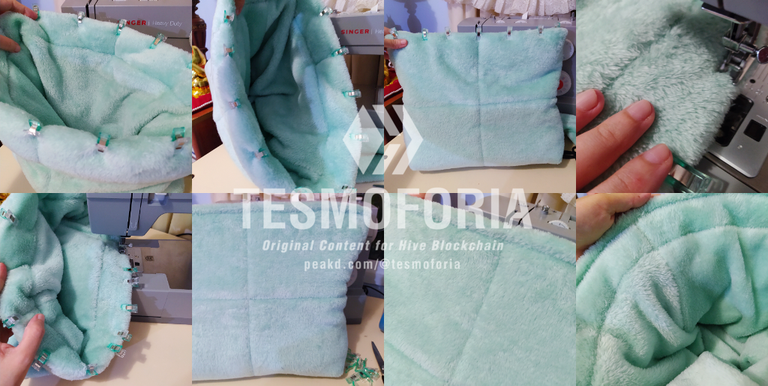
✦ Attach the entire edge of the bag with more sewing clamps and bring to the sewing machine leaving a 1.5 to 2 cm seam allowance ✦

【 PASO 3 】 A continuación cose ambas caras del bolso, y en caso tengas problemas para que la tela "ruede" en la máquina de coser, utiliza un poco de cinta adhesiva y luego retírala cuando la costura este hecha.
【 STEP 3 】 Next, sew both sides of the bag, and if you have trouble getting the fabric to "roll" in the sewing machine, use some tape and then remove it when the seam is finished.
Aplana las esquinas inferiores de lo que será el piso del bolso, y dibuja triángulos de 10 cm a partir de la costura central (fíjate en las imágenes guía), es decir 5 cm a la izquierda, y 5 cm a la derecha.
Flatten the bottom corners of what will be the bottom of the bag and draw triangles of 10 cm from the center seam (see guide pictures), i.e. 5 cm to the left and 5 cm to the right.
Elabora un forro de la misma tela de peluche (o una tela de forro normal tipo, tafeta) que mida 35 cm x 35 cm, alinéalo con el cuerpo del bolso y cóselo dejando una abertura de entre 5 y 10 cm. Hecha la costura, voltea la pieza completa por esa abertura con cuidado, y asegura todo el borde del bolso con una costura en linea recta.
Make a lining of the same plush fabric (or a normal lining fabric such as taffeta) measuring 35 cm x 35 cm, align it with the body of the bag and sew it leaving an opening of 5 to 10 cm. Once sewn, carefully turn the whole piece over through that opening, and secure the entire edge of the bag with a straight line seam.

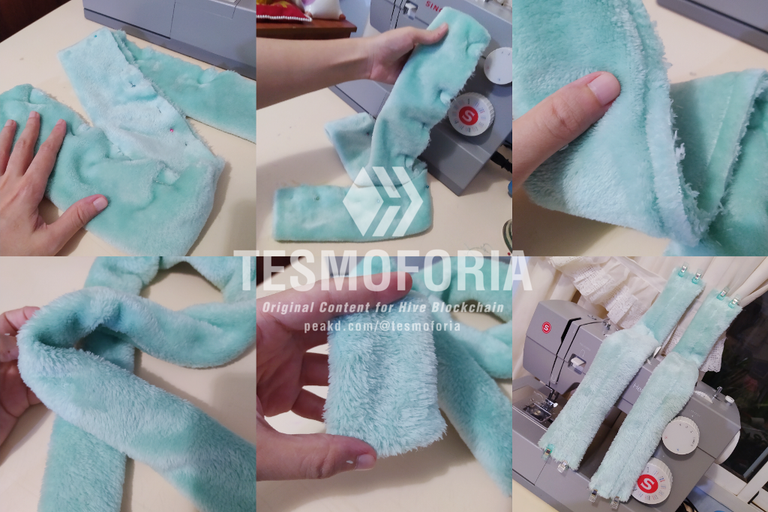
✦ I forgot to take pictures of the denim fabric strips, but inside the plush fabric clutches should go a denim fabric band! ✦
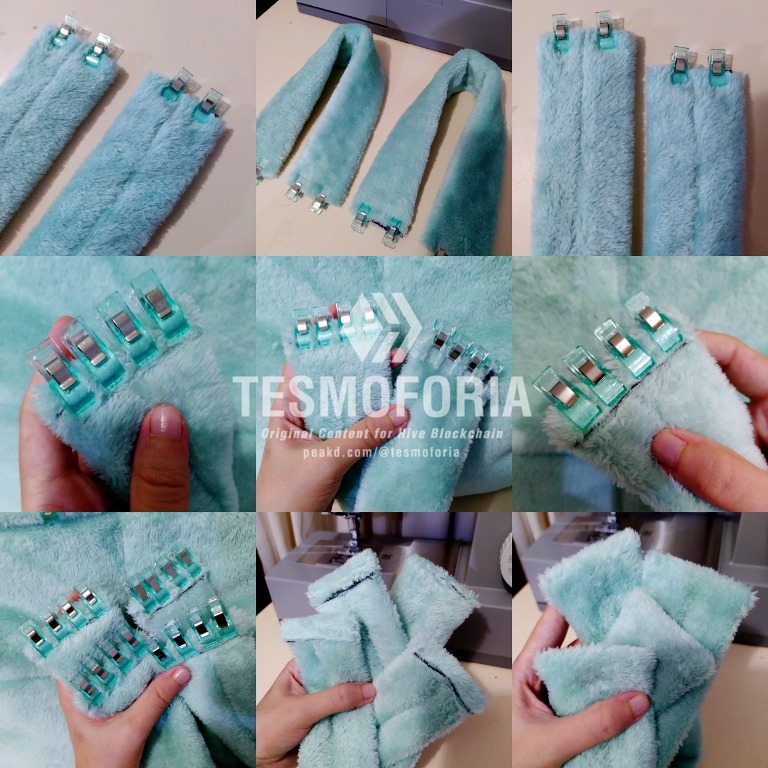
✦ Although in these photos you can see how the excess of fabric that gives body and resistance to the handles of the bag is showing a little ✦
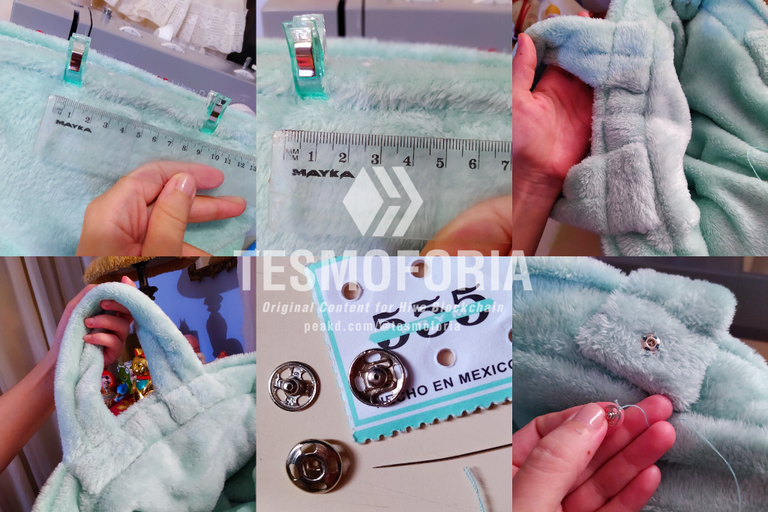
✦ At a distance of 5 cm from the central seam marked by the cross you made at the beginning, sew the handles of the wallet (look carefully at the photos and the position of the ruler) ✦

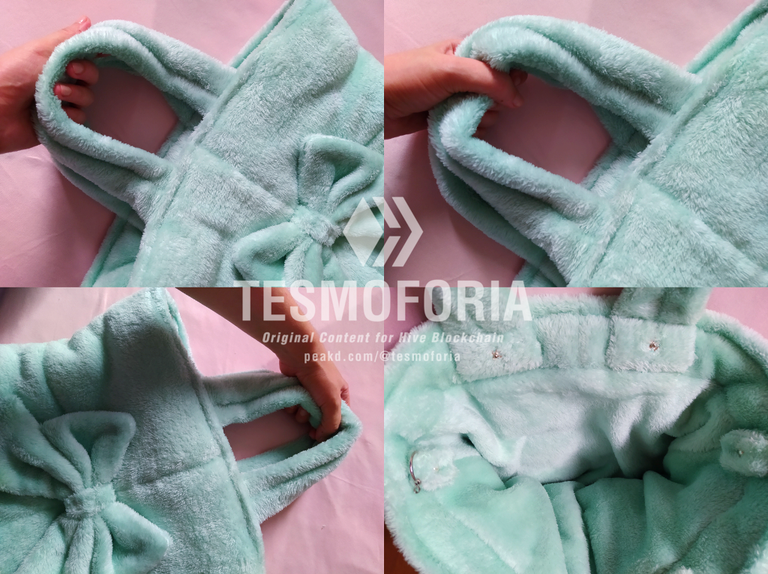
【 PASO 4 】 ¡Vamos a elaborar las agarraderas!, toma los rectángulos largos que restan de la tela, dóblalos por la mitad y cose a 0.5 cm del borde de cada uno, voltea e introduce una tira de tela denim, y cose por la mitad.
【 STEP 4 】 Let's make the handles! Take the remaining long rectangles of fabric, fold them in half and sew 0.5 cm from the edge of each one, turn and insert a strip of denim fabric, and sew in half.
Agrega pegamento silicón frío en las esquinas de las agarraderas, dobla hacia dentro y sostén con ayuda de las pinzas de costura mínimo por 40 min.
Add cold silicone glue to the corners of the handles, fold inward and hold with the help of the sewing clamps for a minimum of 40 minutes.
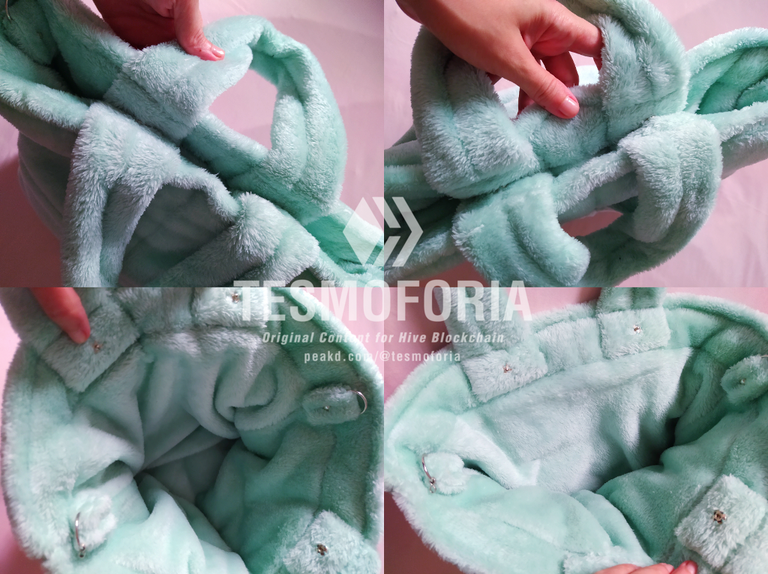
Centra las azas en la parte interna del cuerpo del bolso y cose con la máquina de coser, luego, instala en el centro interior de la base de cada aza un par de broches (puede ser cualquier broche de seguridad que a ti te guste, a mi me gustan estos).
Center the loops on the inside of the bag body and sew with the sewing machine, then, install on the inside center of the base of each loop a pair of snaps (it can be any safety clasp you like, I like these).

✦ Yes, it is as fluffy in person as it looks in photos! But if you don't like this bow you can add another type of decoration, or no decoration at all, and that's fine ✦
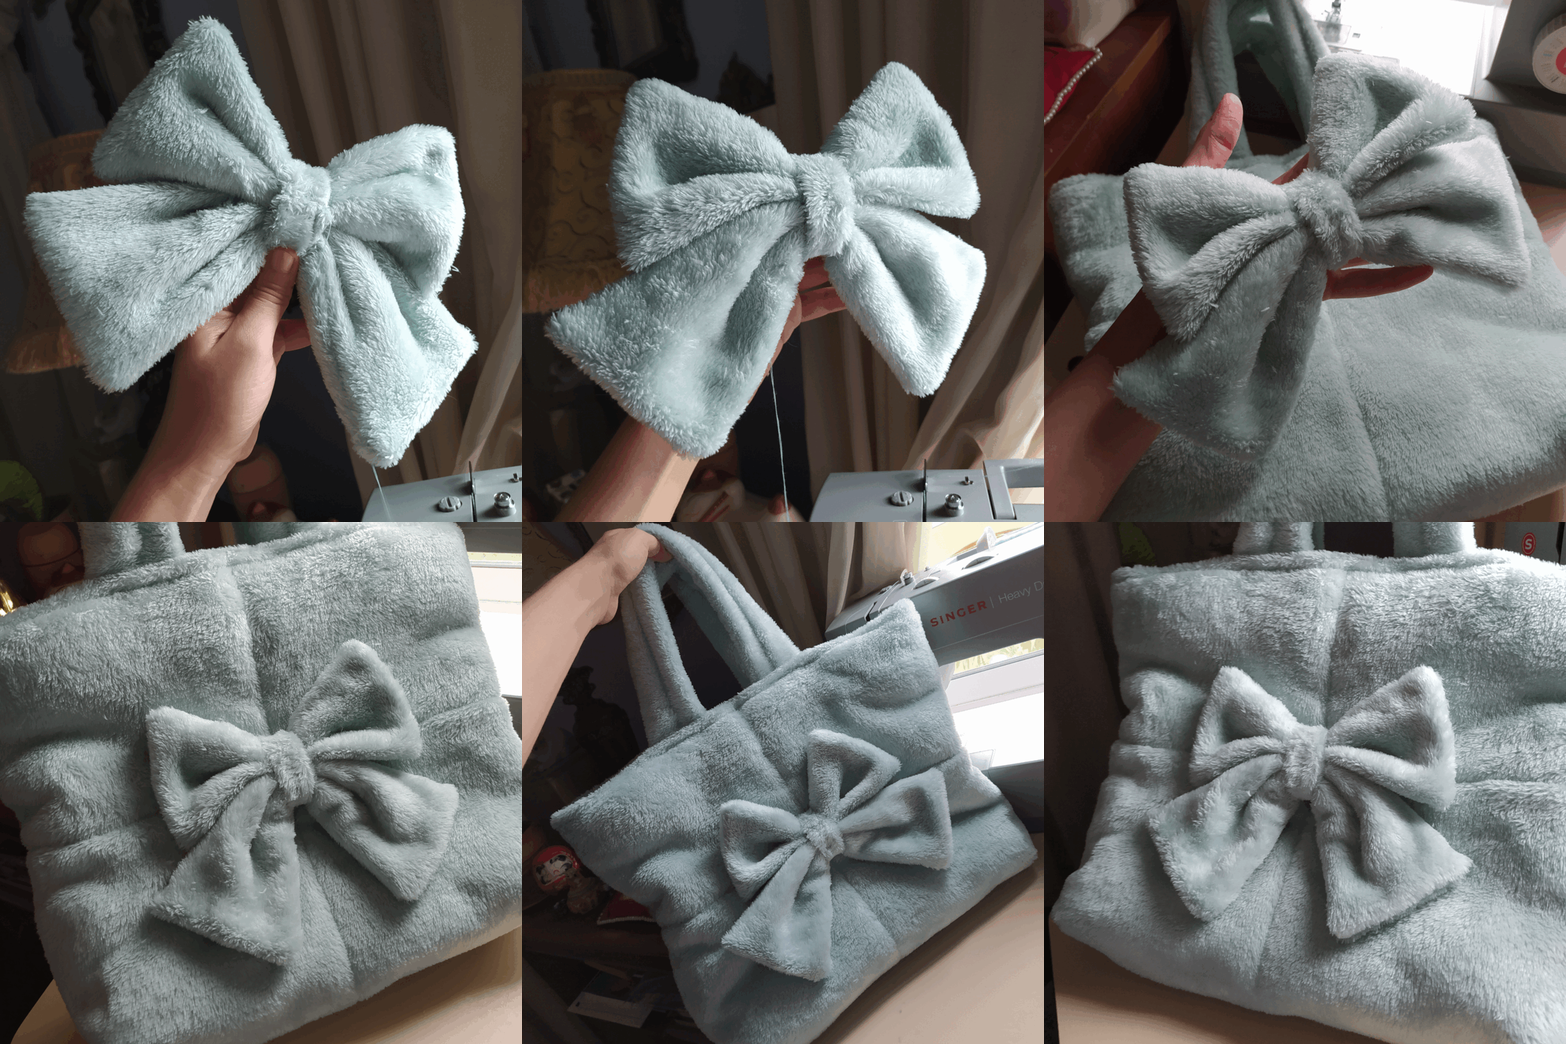

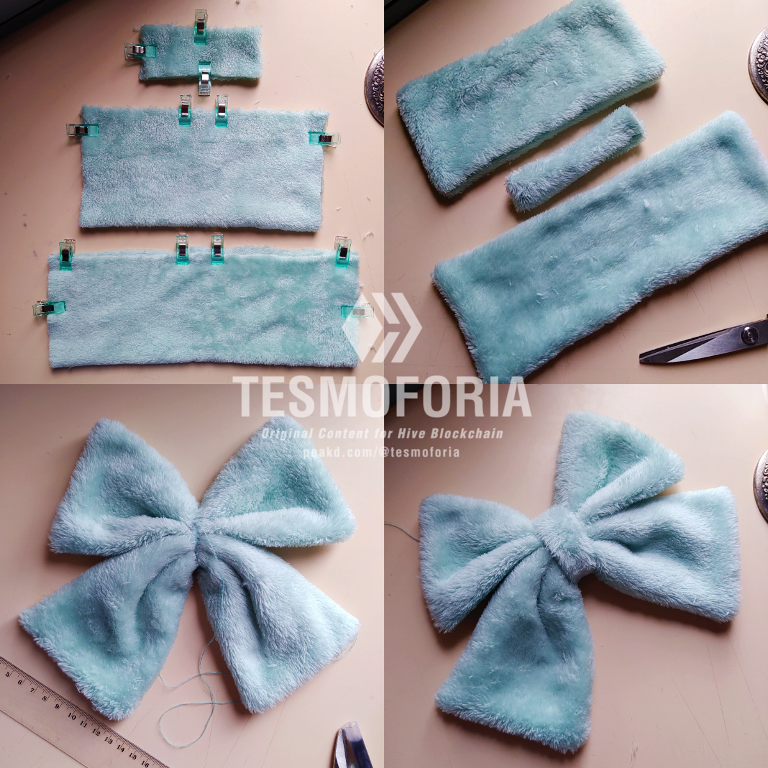
【 PASO 5 】 Finalmente, para crear el lazo del centro del bolso, toma las piezas de 20 cm x 20 cm, 27 cm x 20 cm, y 21 cm x 4 cm: Dóblalas por la mitad, sostén con las pinzas de costura y lleva a la máquina de coser dejando una pequeña abertura en el centro para voltearlas. Cose una pieza sobre otra y cierra con la pequeña banda de tela. Cose a mano de forma tradicional el lazo en el centro del bolso.
【 STEP 5 】 Finally, to create the bow in the center of the bag, take the 20 cm x 20 cm, 27 cm x 20 cm, and 21 cm x 4 cm pieces: Fold them in half, hold them with the sewing clamps and take them to the sewing machine leaving a small opening in the center to turn them over. Sew one piece on top of the other and close with the small fabric band. Hand sew the bow in the center of the bag in the traditional way.
« "ℙ𝕦𝕗𝕗𝕖𝕣 𝕋𝕠𝕥𝕖 𝔹𝕒𝕘" »

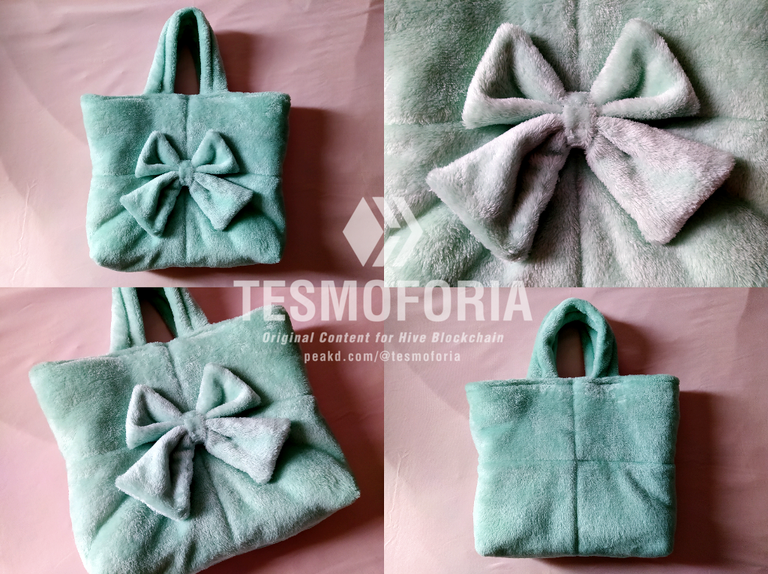

✦ "¿Por qué realizar este proyecto?" ✦
Bolsos lindos existen muchos, pero este diseño por el tipo de material seleccionado lo hace una fuente felicidad instantánea gracias a la experiencia sensorial que ofrece con su textura suave y acolchada.
『 Recomendaciones Finales 』~
Fíjate en la dirección de la fibra de peluche antes de cortar y coser las piezas, la dirección ideal es que todo apunte hacia abajo en dirección natural, acorde a la gravedad.
Para un efecto mas "acolchado", prueba utilizar una guata de 4 cm de grosor en adelante. Pero una guata de 2 cm también te dará un agradable resultado.
⏳ Tiempo: ⭐⭐⭐⭐/ 5.
🚀 Dificultad: ⭐⭐⭐/ 5.
🪙 Costo aproximado: ⭐⭐⭐/ 5.
✦ "Why do this project?" ✦
There are many cute bags, but this design by the type of material selected makes it a source of instant happiness thanks to the sensory experience it offers with its soft, quilted texture.
『 Final Tips 』~
Note the direction of the plush fiber before cutting and sewing the pieces together, the ideal direction is all pointing down in a natural direction, according to gravity.
For a more "padded" effect, try using a 4 cm or thicker padding, but a 2 cm padding will also give you a nice result.
⏳ Time: ⭐⭐⭐⭐/ 5.
🚀 Difficulty: ⭐⭐⭐/ 5.
🪙 Approximate cost: ⭐⭐⭐/ 5.

 |  |  |  |  |  |  |  |  |
|---|
✨ 🍓 All texts and images by @Tesmoforia 🍓 ✨
📸 Tools: Smartphone 📲 Snow 🎬 Remini 🌓 FotoJet 📐
🚨 ¡Please do not take, edit or republish my material without my permission! 🚨
💌 ¿Do you wish to contact me? Discord #tesmoforia 💌
🌙 Banner, signature and separators by Keili Lares
Posted Using InLeo Alpha


